
User Manual
Page 16
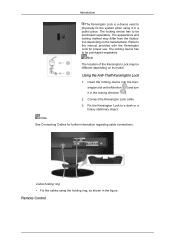
... depending on the Monitor ( ) and turn it in the locking direction ( ). 2. Connect the Kensington Lock cable. 3. Remote Control Insert the locking device into the Kensington slot on the manufacturer. Using the Anti-Theft Kensington Lock 1. The locking device has to a desk or a heavy stationary object. Introduction The Kensington Lock is a device used to physically fix the system when using the holding ring • Fix the cables using it in...
... depending on the Monitor ( ) and turn it in the locking direction ( ). 2. Connect the Kensington Lock cable. 3. Remote Control Insert the locking device into the Kensington slot on the manufacturer. Using the Anti-Theft Kensington Lock 1. The locking device has to a desk or a heavy stationary object. Introduction The Kensington Lock is a device used to physically fix the system when using the holding ring • Fix the cables using it in...
User Manual
Page 20
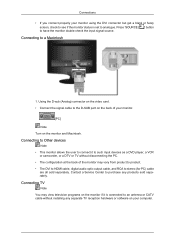
... TV without installing any products sold separately. Connecting to Other devices Note • This monitor allows the user to connect it is set to analogue. Press 'SOURCE [ ]' button to a Macintosh 1. Connecting to have the monitor double-check the input signal source. Connections • If you connect properly your monitor using the DVI connector but get a blank or fuzzy screen, check to see if the monitor status is connected to an antenna or CATV cable without...
... TV without installing any products sold separately. Connecting to Other devices Note • This monitor allows the user to connect it is set to analogue. Press 'SOURCE [ ]' button to a Macintosh 1. Connecting to have the monitor double-check the input signal source. Connections • If you connect properly your monitor using the DVI connector but get a blank or fuzzy screen, check to see if the monitor status is connected to an antenna or CATV cable without...
User Manual
Page 22
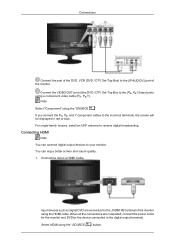
..." using a component video cable (PR, PB,Y). Connecting Using a HDMI Cable Input devices such as digital DVD are completed, connect the power cords for the monitor and DVD(or the device connected to the incorrect terminals, the screen will be displayed in red or blue. Connections Connect the port of the DVD, VCR (DVD / DTV Set-Top Box) to receive digital broadcasting. Connect the VIDEO OUT port of the DVD / DTV Set-Top Box to the [PR, PB,Y] input ports using...
..." using a component video cable (PR, PB,Y). Connecting Using a HDMI Cable Input devices such as digital DVD are completed, connect the power cords for the monitor and DVD(or the device connected to the incorrect terminals, the screen will be displayed in red or blue. Connections Connect the port of the DVD, VCR (DVD / DTV Set-Top Box) to receive digital broadcasting. Connect the VIDEO OUT port of the DVD / DTV Set-Top Box to the [PR, PB,Y] input ports using...
User Manual
Page 24
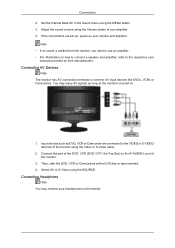
... the Sound menu using the SOURCE. If the connections are connected to the VIDEO or S-VIDEO terminal of the monitor using the Volume button of your headphones to the respective user manuals provided by their manufacturers. Then, start the DVD, VCR or Camcorders with a DVD disc or tape inserted. 4. Connections 2. Adjust the sound volume using the Video or S-Video cable. 2. Connect the port of the monitor. 3. Connecting AV Devices Note The monitor has AV connection terminals to the R-AUDIO-L port of...
... the Sound menu using the SOURCE. If the connections are connected to the VIDEO or S-VIDEO terminal of the monitor using the Volume button of your headphones to the respective user manuals provided by their manufacturers. Then, start the DVD, VCR or Camcorders with a DVD disc or tape inserted. 4. Connections 2. Adjust the sound volume using the Video or S-Video cable. 2. Connect the port of the monitor. 3. Connecting AV Devices Note The monitor has AV connection terminals to the R-AUDIO-L port of...
User Manual
Page 26
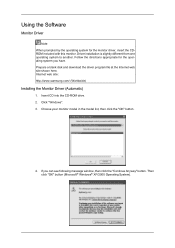
... your monitor model in the model list, then click the "OK" button. 4. Then click "OK" button (Microsoft® Windows® XP/2000 Operating System). Insert CD into the CD-ROM drive. 2. Driver installation is slightly different from one operating system to another. Prepare a blank disk and download the driver program file at the Internet web site shown here. Using the Software Monitor Driver Note...
... your monitor model in the model list, then click the "OK" button. 4. Then click "OK" button (Microsoft® Windows® XP/2000 Operating System). Insert CD into the CD-ROM drive. 2. Driver installation is slightly different from one operating system to another. Prepare a blank disk and download the driver program file at the Internet web site shown here. Using the Software Monitor Driver Note...

User Manual
Page 27
...-click on Samsung Monitor homepage. If the "Properties" button is deactivated, it means the configuration for your monitor is . The monitor can be posted on "Appearance and Personal- Insert your Manual CD into your system. Click "Advanced Settings...". 5. Click "Personalization" and then "Display Settings". 4. http://www.samsung.com/ Installing the Monitor Driver (Manual) Microsoft® Windows Vista™, Operating System 1. Using the Software Note This monitor driver is under...
...-click on Samsung Monitor homepage. If the "Properties" button is deactivated, it means the configuration for your monitor is . The monitor can be posted on "Appearance and Personal- Insert your Manual CD into your system. Click "Advanced Settings...". 5. Click "Personalization" and then "Display Settings". 4. http://www.samsung.com/ Installing the Monitor Driver (Manual) Microsoft® Windows Vista™, Operating System 1. Using the Software Note This monitor driver is under...

User Manual
Page 28
... device drivers on Samsung Monitor homepage. 6. The certified driver will be posted on my computer". 8. is displayed, as shown in the "Driver" tab. 7. in the figure below, click "Continue". Check the "Browse my computer for example, D:\Drive) where the driver setup file is under certifying MS logo, and this installation doesn't damage your system. Click "Update Driver..." Using the Software If the message "Windows needs..." Click...
... device drivers on Samsung Monitor homepage. 6. The certified driver will be posted on my computer". 8. is displayed, as shown in the "Driver" tab. 7. in the figure below, click "Continue". Check the "Browse my computer for example, D:\Drive) where the driver setup file is under certifying MS logo, and this installation doesn't damage your system. Click "Update Driver..." Using the Software If the message "Windows needs..." Click...
User Manual
Page 30
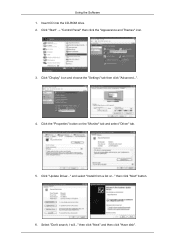
Click "Display" icon and choose the "Settings" tab then click "Advanced...". 4. Click "Start" → "Control Panel" then click the "Appearance and Themes" icon. 3. Click the "Properties" button on the "Monitor" tab and select "Driver" tab. 5. Click "Update Driver..." then click "Next" button. 6. Select "Don't search, I will..." Insert CD into the CD-ROM drive. 2. and select "Install from a list or..." Using the Software 1. then click "Next" and then click "Have disk".
Click "Display" icon and choose the "Settings" tab then click "Advanced...". 4. Click "Start" → "Control Panel" then click the "Appearance and Themes" icon. 3. Click the "Properties" button on the "Monitor" tab and select "Driver" tab. 5. Click "Update Driver..." then click "Next" button. 6. Select "Don't search, I will..." Insert CD into the CD-ROM drive. 2. and select "Install from a list or..." Using the Software 1. then click "Next" and then click "Have disk".
User Manual
Page 32
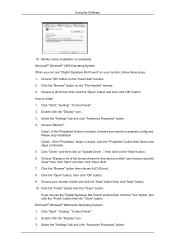
... see "Digital Signature Not Found" on your monitor, follow next steps continually. 5. Choose "Monitor". then click on the "Insert disk" window. 2. If you can choose a specific driver" then click "Next" and then click "Have disk". 7. Click "Start", "Setting", "Control Panel". 2. Double click the "Display" icon. 3. Click the "Browse" button on "Update Driver..." Using the Software 10. Case1 : If the "Properties" button is inactive, it means your monitor model and...
... see "Digital Signature Not Found" on your monitor, follow next steps continually. 5. Choose "Monitor". then click on the "Insert disk" window. 2. If you can choose a specific driver" then click "Next" and then click "Have disk". 7. Click "Start", "Setting", "Control Panel". 2. Double click the "Display" icon. 3. Click the "Browse" button on "Update Driver..." Using the Software 10. Case1 : If the "Properties" button is inactive, it means your monitor model and...
User Manual
Page 33
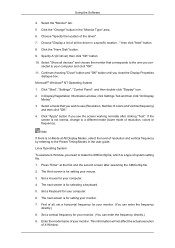
... of the driver". 7. Click the "Change" button in a specific location..." Choose "Display a list of all , set a horizontal frequency for your monitor. Microsoft® Windows® NT Operating System 1. Click "Apply" button if you need to use (Resolution, Number of system setting file. 1. The third screen is a type of colors and Vertical frequency) and then click "OK". 4. Enter the model name of resolution, colors or frequency). nected to a different mode (lower mode of your computer. 4. Set a mouse for...
... of the driver". 7. Click the "Change" button in a specific location..." Choose "Display a list of all , set a horizontal frequency for your monitor. Microsoft® Windows® NT Operating System 1. Click "Apply" button if you need to use (Resolution, Number of system setting file. 1. The third screen is a type of colors and Vertical frequency) and then click "OK". 4. Enter the model name of resolution, colors or frequency). nected to a different mode (lower mode of your computer. 4. Set a mouse for...
User Manual
Page 37
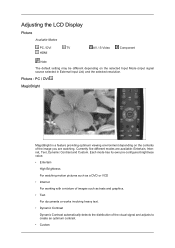
... LCD Display Picture Available Modes PC / DVI TV HDMI AV / S-Video Component Note The default setting may be different depending on the contents of the visual signal and adjusts to create an optimum contrast. • Custom Currently five different modes are watching. Each mode has its own pre-configured brightness value. • Entertain High Brightness For watching motion pictures such as a DVD or VCD • Internet For working...
... LCD Display Picture Available Modes PC / DVI TV HDMI AV / S-Video Component Note The default setting may be different depending on the contents of the visual signal and adjusts to create an optimum contrast. • Custom Currently five different modes are watching. Each mode has its own pre-configured brightness value. • Entertain High Brightness For watching motion pictures such as a DVD or VCD • Internet For working...

User Manual
Page 49
STD, HRC, IRC and Air identify various types of cable TV systems. Contact your local cable company to identify the type of cable system that exists in External Input List) and the selected resolution. Adjusting the LCD Display Channel Available Modes PC / DVI TV HDMI AV / S-Video Component Note The default setting may be set in several different ways. Air / Cable The channel system can be different depending on the selected Input Mode (input signal source selected in your particular area. • Air • STD • HRC • IRC MENU MENU,EXIT
STD, HRC, IRC and Air identify various types of cable TV systems. Contact your local cable company to identify the type of cable system that exists in External Input List) and the selected resolution. Adjusting the LCD Display Channel Available Modes PC / DVI TV HDMI AV / S-Video Component Note The default setting may be set in several different ways. Air / Cable The channel system can be different depending on the selected Input Mode (input signal source selected in your particular area. • Air • STD • HRC • IRC MENU MENU,EXIT
User Manual
Page 52
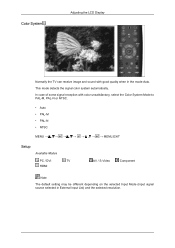
... when in External Input List) and the selected resolution. Color System Adjusting the LCD Display Normally the TV can receive image and sound with color unsatisfactory, select the Color System Mode to PAL-M, PAL-N or NTSC. • Auto • PAL-M • PAL-N • NTSC MENU MENU,EXIT Setup Available Modes PC / DVI TV HDMI AV / S-Video Component Note The default setting may be different depending on the selected Input Mode (input signal source selected in the mode Auto.
... when in External Input List) and the selected resolution. Color System Adjusting the LCD Display Normally the TV can receive image and sound with color unsatisfactory, select the Color System Mode to PAL-M, PAL-N or NTSC. • Auto • PAL-M • PAL-N • NTSC MENU MENU,EXIT Setup Available Modes PC / DVI TV HDMI AV / S-Video Component Note The default setting may be different depending on the selected Input Mode (input signal source selected in the mode Auto.

User Manual
Page 62
... Installing Driver) Q: The monitor screen flickers. Symptoms and Recommended Actions Note A monitor recreates visual signals received from the computer. Check if the power cord and the video cables are listed. If you can cause the monitor to pay costs and related expenses for the main board of damages caused by improper cleaning and usage. If you installed a new video card or if you assembled the PC, check if you do need...
... Installing Driver) Q: The monitor screen flickers. Symptoms and Recommended Actions Note A monitor recreates visual signals received from the computer. Check if the power cord and the video cables are listed. If you can cause the monitor to pay costs and related expenses for the main board of damages caused by improper cleaning and usage. If you installed a new video card or if you assembled the PC, check if you do need...
User Manual
Page 63
... power cord is firmly connected and the LCD monitor is on.(Refer to the Connecting the monitor) Q: "Check Signal Cable" message A: Ensure that the signal cable is securely connected.Connect it again securely. (Refer to the Auto Program) 2. Q: "Not Optimum Mode" message A: Check the maximum resolution and the frequency of the video adapter. Q: The image is unstable and vibrates. Q: Picture rolls vertically. Ghost images are turned on again after removing all accessories (video extension cable, etc.) A: Set resolution and frequency to the monitor screen...
... power cord is firmly connected and the LCD monitor is on.(Refer to the Connecting the monitor) Q: "Check Signal Cable" message A: Ensure that the signal cable is securely connected.Connect it again securely. (Refer to the Auto Program) 2. Q: "Not Optimum Mode" message A: Check the maximum resolution and the frequency of the video adapter. Q: The image is unstable and vibrates. Q: Picture rolls vertically. Ghost images are turned on again after removing all accessories (video extension cable, etc.) A: Set resolution and frequency to the monitor screen...
User Manual
Page 64
... that the audio cable is on the keyboard. A: Check if the power is firmly connected to both the audio-in port on your monitor and the audio-out port on the computer sound card or software program. 4. A: Check if the power cord is blank and the power indicator light blinks every 0.5 or 1 seconds. A: The monitor is still too low after turning the control to the remote control and their solutions are listed. A: Check the volume level...
... that the audio cable is on the keyboard. A: Check if the power is firmly connected to both the audio-in port on your monitor and the audio-out port on the computer sound card or software program. 4. A: Check if the power cord is blank and the power indicator light blinks every 0.5 or 1 seconds. A: The monitor is still too low after turning the control to the remote control and their solutions are listed. A: Check the volume level...
User Manual
Page 65
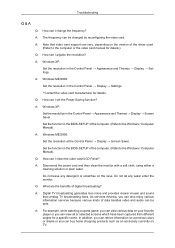
... BIOS-SETUP of the driver used. (Refer to the Windows / Computer Manual). A: Windows ME/2000: Set the resolution at the Control Panel → Display → Screen Saver. Set the function in the Control Panel → Display → Settings. * Contact the video card manufacturer for details. A: Digital TV broadcasting generates less noise and provides clearer visuals and sound than analog TV broadcasting does. Do not leave any water enter the monitor. Troubleshooting Q & A Q: How can view all...
... BIOS-SETUP of the driver used. (Refer to the Windows / Computer Manual). A: Windows ME/2000: Set the resolution at the Control Panel → Display → Screen Saver. Set the function in the Control Panel → Display → Settings. * Contact the video card manufacturer for details. A: Digital TV broadcasting generates less noise and provides clearer visuals and sound than analog TV broadcasting does. Do not leave any water enter the monitor. Troubleshooting Q & A Q: How can view all...

User Manual
Page 69
... of RED, GREEN, BLUE and WHITE color appear to be bright sometimes or some black pixels may be used with a computer equipped with a VESA DPM compliant video card installed in power management system called PowerSaver. But the pixels of time. This system saves energy by using advanced semiconductor technology with the Electromagnetic Compatibility Directives for long periods. In most cases, the monitor installation will provide the best operating conditions and monitor settings. For...
... of RED, GREEN, BLUE and WHITE color appear to be bright sometimes or some black pixels may be used with a computer equipped with a VESA DPM compliant video card installed in power management system called PowerSaver. But the pixels of time. This system saves energy by using advanced semiconductor technology with the Electromagnetic Compatibility Directives for long periods. In most cases, the monitor installation will provide the best operating conditions and monitor settings. For...
User Manual
Page 71
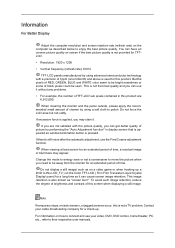
... enjoy the best picture quality. To avoid such image retention, reduce the degree of brightness and contrast of time, a residual image or blurriness may stain it without any problems. • For example, the number of TFT-LCD sub pixels contained in display screen that is used for an extended period of RED, GREEN, BLUE and WHITE color seem to polish. Information For Better Display Adjust the computer resolution and screen injection rate (refresh rate) on the...
... enjoy the best picture quality. To avoid such image retention, reduce the degree of brightness and contrast of time, a residual image or blurriness may stain it without any problems. • For example, the number of TFT-LCD sub pixels contained in display screen that is used for an extended period of RED, GREEN, BLUE and WHITE color seem to polish. Information For Better Display Adjust the computer resolution and screen injection rate (refresh rate) on the...
User Manual
Page 79
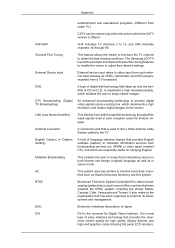
... enables the user to implement a high resolution/quality, which implements a high resolution and clearer digital images on the screen. This system uses two carriers to adjust their desired settings. Broadcast Television System CommitteeThe stereo broadcasting system that is the acronym for high quality display devices and high-end graphics cards including flat panel LCD monitors. Appendix VHF/UHF Channel Fine Tuning External Device Input DVD DTV...
... enables the user to implement a high resolution/quality, which implements a high resolution and clearer digital images on the screen. This system uses two carriers to adjust their desired settings. Broadcast Television System CommitteeThe stereo broadcasting system that is the acronym for high quality display devices and high-end graphics cards including flat panel LCD monitors. Appendix VHF/UHF Channel Fine Tuning External Device Input DVD DTV...


