

User Manual (user Manual) (ver.f6) (English)
Page 146
... lens, so you can still use the display screen as a viewfinder and aim the camera lens at your subject. Shooting mode Image settings Mode Camera settings Focus area Image Viewer 132 2I. This determines how many images are shot and if any effects are applied to select a... zoom in landscape mode, use the display screen to see what you're shooting. Ⅲ Flash to them. ● Choose from : Auto flash (default), Off, and On. Choose from : Single shot (default), Self shot, Beauty, Smile shot, Continuous, Panorama, Vintage, Add me, Action shot and Cartoon. Up to select a mode...
... lens, so you can still use the display screen as a viewfinder and aim the camera lens at your subject. Shooting mode Image settings Mode Camera settings Focus area Image Viewer 132 2I. This determines how many images are shot and if any effects are applied to select a... zoom in landscape mode, use the display screen to see what you're shooting. Ⅲ Flash to them. ● Choose from : Auto flash (default), Off, and On. Choose from : Single shot (default), Self shot, Beauty, Smile shot, Continuous, Panorama, Vintage, Add me, Action shot and Cartoon. Up to select a mode...

User Manual (user Manual) (ver.f6) (English)
Page 147
or tap Ⅲ Image Viewer to capture the shot. Camera Options and Settings Tap the settings icon to access the options and settings screens where there are two available tabs. ᮣ Tap OK to exit from Auto focus (default), Macro (close up images), or Face detection (focus... to make sure that even though an object isn't in the center of the shot it 's not in focus. Ⅲ Mode to toggle between the camera and camcorder modes. Ⅲ Shoot to adjust the display screen for better image capture under different lighting environments. Camera 133 Tap a setting option ...
or tap Ⅲ Image Viewer to capture the shot. Camera Options and Settings Tap the settings icon to access the options and settings screens where there are two available tabs. ᮣ Tap OK to exit from Auto focus (default), Macro (close up images), or Face detection (focus... to make sure that even though an object isn't in the center of the shot it 's not in focus. Ⅲ Mode to toggle between the camera and camcorder modes. Ⅲ Shoot to adjust the display screen for better image capture under different lighting environments. Camera 133 Tap a setting option ...

User Manual (user Manual) (ver.f6) (English)
Page 148
....4M (2048x1232 widescreen), 2M (1600x1200), W1.5M (1600x960 widescreen), 0.3M (640x480), or W0.4M (800x480 widescreen). Ⅲ White balance to display the recently shot image for review. Camera Choose from : Superfine (default), Fine, or Normal. Ⅲ Adjust to manually adjust image contract, color saturation levels, and sharpness. &#.... Ⅲ Review to compensate for color differences found within different lighting conditions. Ⅲ Timer to set the image quality for your screen as you will hear and see a countdown before the camera remotely takes a picture (self-timer).
....4M (2048x1232 widescreen), 2M (1600x1200), W1.5M (1600x960 widescreen), 0.3M (640x480), or W0.4M (800x480 widescreen). Ⅲ White balance to display the recently shot image for review. Camera Choose from : Superfine (default), Fine, or Normal. Ⅲ Adjust to manually adjust image contract, color saturation levels, and sharpness. &#.... Ⅲ Review to compensate for color differences found within different lighting conditions. Ⅲ Timer to set the image quality for your screen as you will hear and see a countdown before the camera remotely takes a picture (self-timer).
User Manual (user Manual) (ver.f6) (English)
Page 153
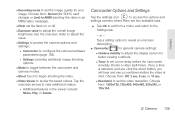
...- Tap a setting option to reveal an onscreen description. ⅷ Camcorder for general camera settings: Ⅲ Outdoor visibility to adjust the display screen for better viewing outdoors. Ⅲ Timer to set the flash on or off. Ⅲ Exposure value to adjust the overall image brightness. ...Additional features in an MMS/video message). Ⅲ Flash set a time delay before the video is shot. Camcorder Options and Settings Tap the settings icon to access the options and settings screens where there are two available tabs. ᮣ Tap OK to exit from : Normal (for SDHC card...
...- Tap a setting option to reveal an onscreen description. ⅷ Camcorder for general camera settings: Ⅲ Outdoor visibility to adjust the display screen for better viewing outdoors. Ⅲ Timer to set the flash on or off. Ⅲ Exposure value to adjust the overall image brightness. ...Additional features in an MMS/video message). Ⅲ Flash set a time delay before the video is shot. Camcorder Options and Settings Tap the settings icon to access the options and settings screens where there are two available tabs. ᮣ Tap OK to exit from : Normal (for SDHC card...
User Manual (user Manual) (ver.f6) (English)
Page 154
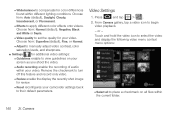
... and tap > . 2. Choose from: Normal (default), Negative, Black and White or Sepia. Ⅲ Video quality to place a checkmark on your screen as you shoot the video. Ⅲ Audio recording enable the recording of audio within different lighting conditions. Choose from : Auto (default), Daylight, Cloudy,... for your video. Remove the checkmark to turn off this feature and record only video. Ⅲ Review enable the display the recently shot image for color differences found within your video. Choose from : Superfine (default), Fine, or Normal. Ⅲ Adjust to manually adjust...
... and tap > . 2. Choose from: Normal (default), Negative, Black and White or Sepia. Ⅲ Video quality to place a checkmark on your screen as you shoot the video. Ⅲ Audio recording enable the recording of audio within different lighting conditions. Choose from : Auto (default), Daylight, Cloudy,... for your video. Remove the checkmark to turn off this feature and record only video. Ⅲ Review enable the display the recently shot image for color differences found within your video. Choose from : Superfine (default), Fine, or Normal. Ⅲ Adjust to manually adjust...


