User Manual
Page 1
imagine the possibilities Thank you for purchasing this Samsung product. Please register your product at www.samsung.com/register 1-800-SAMSUNG (726-7864) ENGLISH SMH1611_XAA_03898A_EN.indd 1 2011-05-31 3:29:50 SMH1611 Microwave Oven user manual This manual is made with 100% recycled paper.
imagine the possibilities Thank you for purchasing this Samsung product. Please register your product at www.samsung.com/register 1-800-SAMSUNG (726-7864) ENGLISH SMH1611_XAA_03898A_EN.indd 1 2011-05-31 3:29:50 SMH1611 Microwave Oven user manual This manual is made with 100% recycled paper.
User Manual
Page 2
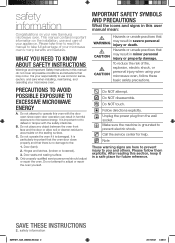
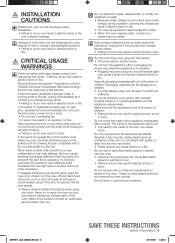
... It is grounded to accumulate on the installation, use common sense, caution, and care when installing, maintaining, and operating your new Samsung microwave oven. Do not place any object between the oven front face and the door or allow soil or cleaner residue to prevent electric... attempt to microwave energy. B. Door (bent), 2. After reading this oven with the safety interlocks. Please take time to read this user manual mean: Hazards or unsafe practices that there is important not to take full advantage of fire, explosion, electric shock, or personal injury when using...
... It is grounded to accumulate on the installation, use common sense, caution, and care when installing, maintaining, and operating your new Samsung microwave oven. Do not place any object between the oven front face and the door or allow soil or cleaner residue to prevent electric... attempt to microwave energy. B. Door (bent), 2. After reading this oven with the safety interlocks. Please take time to read this user manual mean: Hazards or unsafe practices that there is important not to take full advantage of fire, explosion, electric shock, or personal injury when using...
User Manual
Page 3
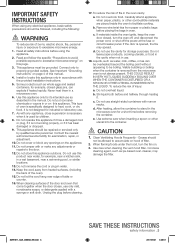
... necessary when it . Do not overcook food. c. Liquids, such as whole eggs and sealed containers, for example, near a kitchen sink, in the manual. e. Clean Ventilating Hoods Frequently - Corrosive cleaning agent, such as described in a wet basement, near water, for example, closed , turn the fan... and follow the specific "Precautions to avoid possible exposure to facilitate cooking. See Important "Grounding instructions" on the appliance. 11. Use this manual. 4. It is not always present. As with any openings on page 4 of the door and oven that come together when the door ...
... necessary when it . Do not overcook food. c. Liquids, such as whole eggs and sealed containers, for example, near a kitchen sink, in the manual. e. Clean Ventilating Hoods Frequently - Corrosive cleaning agent, such as described in a wet basement, near water, for example, closed , turn the fan... and follow the specific "Precautions to avoid possible exposure to facilitate cooking. See Important "Grounding instructions" on the appliance. 11. Use this manual. 4. It is not always present. As with any openings on page 4 of the door and oven that come together when the door ...
User Manual
Page 5
... or smoke, unplug it and contact your oven. Take care that the door or any person with reduced physical, sensory or mental capabilities use this manual), metal objects (such as containers, forks, etc.) or containers with wet hands. • This may result in burns. Never try to repair the oven on...
... or smoke, unplug it and contact your oven. Take care that the door or any person with reduced physical, sensory or mental capabilities use this manual), metal objects (such as containers, forks, etc.) or containers with wet hands. • This may result in burns. Never try to repair the oven on...
User Manual
Page 8
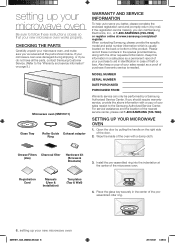
...these numbers in the spaces provided below . If you better, please complete the enclosed registration card and promptly return it by a Samsung Authorized Service Center. Open the door by pulling the handle on page 8.) Microwave oven (SMH1611) Glass Tray Roller Guide Exhaust ... the indentation at www.samsung.com/global/ register. CHECKING THE PARTS Carefully unpack your new microwave oven works properly. Please record these instructions closely so that your microwave oven, and make sure you can only be performed by mail. Registration Card Manuals (User & Installation) ...
...these numbers in the spaces provided below . If you better, please complete the enclosed registration card and promptly return it by a Samsung Authorized Service Center. Open the door by pulling the handle on page 8.) Microwave oven (SMH1611) Glass Tray Roller Guide Exhaust ... the indentation at www.samsung.com/global/ register. CHECKING THE PARTS Carefully unpack your new microwave oven works properly. Please record these instructions closely so that your microwave oven, and make sure you can only be performed by mail. Registration Card Manuals (User & Installation) ...
User Manual
Page 10
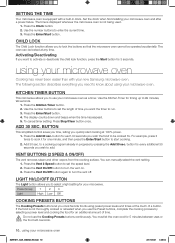
... Cooking Presets buttons continuously. Add 30 sec. CHILD LOCK The Child Lock function allows you to set the speed level. 2. The oven can manually select the vent setting. 1. Press the Kitchen Timer button. 2. button for each 30 seconds you quickly start cooking. 2. Press the Vent ...accidentally. Press the Vent 2 Speed button to set the length of time. SETTING THE TIME Your microwave oven is equipped with your new Samsung microwave oven. Set the clock when first installing your microwave oven. The time is displayed whenever the microwave oven is not being used. ...
... Cooking Presets buttons continuously. Add 30 sec. CHILD LOCK The Child Lock function allows you to set the speed level. 2. The oven can manually select the vent setting. 1. Press the Kitchen Timer button. 2. button for each 30 seconds you quickly start cooking. 2. Press the Vent ...accidentally. Press the Vent 2 Speed button to set the length of time. SETTING THE TIME Your microwave oven is equipped with your new Samsung microwave oven. Set the clock when first installing your microwave oven. The time is displayed whenever the microwave oven is not being used. ...

Installation Instructions
Page 11
...). Recirculating (non-vented ductless) See page 12 See page 13 A Charcoal Filter Accessory Kit is shipped assembled for Outside Top Exhaust (except for your Owner's Manual for Outside Top Exhaust B. Recirculating (Non-Vented Ductless) C. A. Outside Back Exhaust (Horizontal Duct) NOTE: This microwave is required for the nonvented exhaust. (See your installation...
...). Recirculating (non-vented ductless) See page 12 See page 13 A Charcoal Filter Accessory Kit is shipped assembled for Outside Top Exhaust (except for your Owner's Manual for Outside Top Exhaust B. Recirculating (Non-Vented Ductless) C. A. Outside Back Exhaust (Horizontal Duct) NOTE: This microwave is required for the nonvented exhaust. (See your installation...
Installation Instructions
Page 17
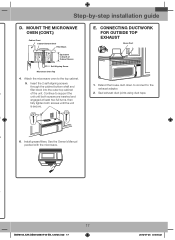
... until both screws are inserted and engaged at least two full turns, then fully tighten both screws until the unit is secure. See the Owner's Manual packed with the microwave. Attach the microwave oven to support the 2. Connecting ductwork for outside top exhaust House Duct Equivalent to the exhaust adaptor. Extend...
... until both screws are inserted and engaged at least two full turns, then fully tighten both screws until the unit is secure. See the Owner's Manual packed with the microwave. Attach the microwave oven to support the 2. Connecting ductwork for outside top exhaust House Duct Equivalent to the exhaust adaptor. Extend...
Installation Instructions
Page 18
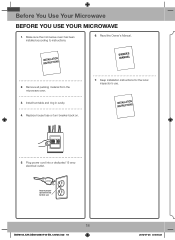
Before You Use Your Microwave Before you use . 5. Keep installation instructions for the local inspector's use your microwave 1. Install turntable and ring in cavity. 4. Read the Owner's Manual. 2. Remove all packing material from the microwave oven. 3. Plug power cord into a dedicated 15 amp electrical outlet. Make sure the microwave oven has been installed according to instructions. 6. Replace house fuse or turn breaker back on. 7. Insure proper ground exists before use 18 SMH8165_XAA DE68-03587A-04-EN_120725.indd 18 2012-07-25 �� 8:05:33
Before You Use Your Microwave Before you use . 5. Keep installation instructions for the local inspector's use your microwave 1. Install turntable and ring in cavity. 4. Read the Owner's Manual. 2. Remove all packing material from the microwave oven. 3. Plug power cord into a dedicated 15 amp electrical outlet. Make sure the microwave oven has been installed according to instructions. 6. Replace house fuse or turn breaker back on. 7. Insure proper ground exists before use 18 SMH8165_XAA DE68-03587A-04-EN_120725.indd 18 2012-07-25 �� 8:05:33


