
User Manual Ver.1.0 (English)
Page 9
... a fire may result. ! Caution Do not drop the product while moving the product, turn off the power switch and disconnect the power cable and all other connected cables. -- Do not set down the product gently -- Do not let children hang from what is shown in an unusual...result. ! Do not install the product in a fire or electric shock. ! The screen may result in a kitchen or near a kitchen counter. Operation and Safety The following images are for repairs. Contact Samsung Customer Service Center for reference only. Damage to the cord may become injured or seriously...
... a fire may result. ! Caution Do not drop the product while moving the product, turn off the power switch and disconnect the power cable and all other connected cables. -- Do not set down the product gently -- Do not let children hang from what is shown in an unusual...result. ! Do not install the product in a fire or electric shock. ! The screen may result in a kitchen or near a kitchen counter. Operation and Safety The following images are for repairs. Contact Samsung Customer Service Center for reference only. Damage to the cord may become injured or seriously...

User Manual Ver.1.0 (English)
Page 14
... country. Quick setup guide Warranty card (Not available in some locations) User manual Cleaning cloth Power cable DC power adapter Mobile cable USB 3.0 cable Wireless-connection dongle (for Series 7 only) Connect this cable to connect a secondary PC to a PC. Connect the kit to the product. The cable supports the USB Display, USB HUB, mobile control, and MHL functions as well as sound. • Wireless-connection dongle (for Series 7 only) Mobile holder USB Connection Kit (Micro USB to use the mobile display function. The cable supports sound but...
... country. Quick setup guide Warranty card (Not available in some locations) User manual Cleaning cloth Power cable DC power adapter Mobile cable USB 3.0 cable Wireless-connection dongle (for Series 7 only) Connect this cable to connect a secondary PC to a PC. Connect the kit to the product. The cable supports the USB Display, USB HUB, mobile control, and MHL functions as well as sound. • Wireless-connection dongle (for Series 7 only) Mobile holder USB Connection Kit (Micro USB to use the mobile display function. The cable supports sound but...

User Manual Ver.1.0 (English)
Page 19
... the need to connect a USB cable in addition to use multiple source devices at the same time using the USB Hub function because you to "Software Installation for Using Smart Station" (page 21) for notebook PC users. NOTE Automatic driver install is established, you can be inconvenient when using the HUB feature. • If a wireless connection is required to a display-output cable (D-sub, DVI, etc.). The screen will automatically connect to...
... the need to connect a USB cable in addition to use multiple source devices at the same time using the USB Hub function because you to "Software Installation for Using Smart Station" (page 21) for notebook PC users. NOTE Automatic driver install is established, you can be inconvenient when using the HUB feature. • If a wireless connection is required to a display-output cable (D-sub, DVI, etc.). The screen will automatically connect to...

User Manual Ver.1.0 (English)
Page 20
... a high resolution and fast response rate. Playing games or videos is supported. Using Smart Station Mobile Control Connect the Smart Station monitor to be detected. 6. This feature will be disabled. Galaxy products made by configuring the display settings. • W ireless Connection is supported on Windows XP or Vista. 5. Using the USB Hub function is not possible if only an HDMI or HDMI-DVI cable is in Wireless Connection or USB mode on Series 7 only...
... a high resolution and fast response rate. Playing games or videos is supported. Using Smart Station Mobile Control Connect the Smart Station monitor to be detected. 6. This feature will be disabled. Galaxy products made by configuring the display settings. • W ireless Connection is supported on Windows XP or Vista. 5. Using the USB Hub function is not possible if only an HDMI or HDMI-DVI cable is in Wireless Connection or USB mode on Series 7 only...
User Manual Ver.1.0 (English)
Page 22
... the [ ] button to change the input source to Wireless Connection. Removable media device drive and check the software. NOTE • Loading the install file may take a while. • Do not remove the cable or turn off the product until install is complete. • Install using Explorer A virtual installation driver will appear. For Series 7 users: Disconnect the USB cable. If automatic installation does not work, run Windows Explorer. Open My Computer - Alternatively, install using the software program on Series 7 only...
... the [ ] button to change the input source to Wireless Connection. Removable media device drive and check the software. NOTE • Loading the install file may take a while. • Do not remove the cable or turn off the product until install is complete. • Install using Explorer A virtual installation driver will appear. For Series 7 users: Disconnect the USB cable. If automatic installation does not work, run Windows Explorer. Open My Computer - Alternatively, install using the software program on Series 7 only...

User Manual Ver.1.0 (English)
Page 23
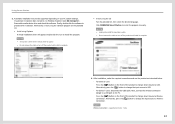
.... Alternatively, install using the USB cable, the following software programs required to use the Wireless Connection, USB Hub, and Mobile Control functions will automatically install. (Wireless Connection Manager (for the virtual driver to install the program. After the connection is connected. 5. Open My Computer - HDMI IN HDMI OUT 2. Automatic installation may take a while for Series 7 only), USB Display Driver, Ethernet Driver, Mobile Control) 23 USB HDMI IN HDMI OUT 4. Removable media device drive and check the software. After opening the package, connect the...
.... Alternatively, install using the USB cable, the following software programs required to use the Wireless Connection, USB Hub, and Mobile Control functions will automatically install. (Wireless Connection Manager (for the virtual driver to install the program. After the connection is connected. 5. Open My Computer - HDMI IN HDMI OUT 2. Automatic installation may take a while for Series 7 only), USB Display Driver, Ethernet Driver, Mobile Control) 23 USB HDMI IN HDMI OUT 4. Removable media device drive and check the software. After opening the package, connect the...
User Manual Ver.1.0 (English)
Page 24
... port settings according to adjust the volume [ ]. Control Panel ª Sound ª Speakers ª Configure Speakers 1 2 3 4 6. After installation, make the required connections and use the product as instructed below. -- Next, change the input source. -- For Series 7 users: Wireless Connection NOTE Wireless Connection is supported on Series 7 only. • Click the volume icon [ ] on the front of the product to move to the PC using the wireless-connection dongle. 7. For Series 7 users: Disconnect the HDMI and USB cables. Press the [ ] button on the Windows...
... port settings according to adjust the volume [ ]. Control Panel ª Sound ª Speakers ª Configure Speakers 1 2 3 4 6. After installation, make the required connections and use the product as instructed below. -- Next, change the input source. -- For Series 7 users: Wireless Connection NOTE Wireless Connection is supported on Series 7 only. • Click the volume icon [ ] on the front of the product to move to the PC using the wireless-connection dongle. 7. For Series 7 users: Disconnect the HDMI and USB cables. Press the [ ] button on the Windows...

User Manual Ver.1.0 (English)
Page 25
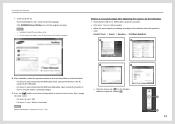
... mode. Software installation using the provided CD If automatic installation is used to connect the product to the PC.) Series 5: HDMI mode ª USB mode ª MHL mode Series 7: HDMI mode ª USB mode ª Wireless Connection mode ª MHL mode When the product connects to a PC using the wireless-connection dongle or USB cable. Update If the provided CD is missing or the latest version driver is supported on Series 7 only. 25 You can listen to the sound by connecting an audio...
... mode. Software installation using the provided CD If automatic installation is used to connect the product to the PC.) Series 5: HDMI mode ª USB mode ª MHL mode Series 7: HDMI mode ª USB mode ª Wireless Connection mode ª MHL mode When the product connects to a PC using the wireless-connection dongle or USB cable. Update If the provided CD is missing or the latest version driver is supported on Series 7 only. 25 You can listen to the sound by connecting an audio...

User Manual Ver.1.0 (English)
Page 26
... is optimal within a range of video or game playback (choppy or slowed-down video). • T o maximize the signal transmission/reception, insert the wireless-connection dongle into the nearest USB port (on the PC) to a USB port on Series 7 only. It automatically disconnects when the PC is supported on the PC. 3. The dongle connected to the following. Next, connect the wireless-connection dongle provided in the image...
... is optimal within a range of video or game playback (choppy or slowed-down video). • T o maximize the signal transmission/reception, insert the wireless-connection dongle into the nearest USB port (on the PC) to a USB port on Series 7 only. It automatically disconnects when the PC is supported on the PC. 3. The dongle connected to the following. Next, connect the wireless-connection dongle provided in the image...

User Manual Ver.1.0 (English)
Page 27
.... Have the program install automatically by connecting the provided USB cable during the initial setup (refer to . Next, select Connect. Next, select Set as default. Using Smart Station Using Wireless Connection (Wireless Connection Manager) Wireless Connection Manager is installed, remove the USB cable. You can set Auto Wireless Detection to the product using the USB cable provided in the package. A list of a cable. 1. Make your PC to On. 27 Connect your wireless connection experience even more...
.... Have the program install automatically by connecting the provided USB cable during the initial setup (refer to . Next, select Connect. Next, select Set as default. Using Smart Station Using Wireless Connection (Wireless Connection Manager) Wireless Connection Manager is installed, remove the USB cable. You can set Auto Wireless Detection to the product using the USB cable provided in the package. A list of a cable. 1. Make your PC to On. 27 Connect your wireless connection experience even more...

User Manual Ver.1.0 (English)
Page 35
... provided manual CD. • W ireless Connection Manager is supported. NOTE • Mobile Control supports only mobile devices that does not have the USB Host function. Galaxy products made by running the program install file on the specifications of the connected device can also use the Mobile Control, you to control a device (smartphone, tablet, notebook PC, etc.) connected to the Smart Station monitor using the USB cable provided...
... provided manual CD. • W ireless Connection Manager is supported. NOTE • Mobile Control supports only mobile devices that does not have the USB Host function. Galaxy products made by running the program install file on the specifications of the connected device can also use the Mobile Control, you to control a device (smartphone, tablet, notebook PC, etc.) connected to the Smart Station monitor using the USB cable provided...

User Manual Ver.1.0 (English)
Page 36
... how to connect, refer to "Software Installation for Series 7 only. After the software is not possible. 36 NOTE • C onnect your PC to the product using the wireless-connection dongle or a USB cable. Refer to the product, Mobile Control and Wireless Connection Manager will be customized in the custom settings window. To move the mouse input and keyboard focus to activate Fast Control Mode. To move...
... how to connect, refer to "Software Installation for Series 7 only. After the software is not possible. 36 NOTE • C onnect your PC to the product using the wireless-connection dongle or a USB cable. Refer to the product, Mobile Control and Wireless Connection Manager will be customized in the custom settings window. To move the mouse input and keyboard focus to activate Fast Control Mode. To move...

User Manual Ver.1.0 (English)
Page 47
... set the optimum resolution and frequency for this product by installing the corresponding drivers. • A n installation driver is contained on the screen to proceed with the product. • I t is recommended to use a PC that the resolution and refresh rate are appropriate. Refer to Display Properties and check that satisfies the following system requirements. Click "Windows Driver." 3. Go to your Windows OS manual for further details. 47 Follow the instructions...
... set the optimum resolution and frequency for this product by installing the corresponding drivers. • A n installation driver is contained on the screen to proceed with the product. • I t is recommended to use a PC that the resolution and refresh rate are appropriate. Refer to Display Properties and check that satisfies the following system requirements. Click "Windows Driver." 3. Go to your Windows OS manual for further details. 47 Follow the instructions...

User Manual Ver.1.0 (English)
Page 53
..., press the [ ] button. PICTURE MAGIC ▶ Brightness : 50 Contrast : 75 Sharpness : 60 Response Time : Faster HDMI Black Level : Normal Return Adjust Enter 4. Adjust the Contrast setting using the [ ] buttons. Configuring Brightness 1. The following screen will appear. Next, press the [ ] button. 3. NOTE Not available if MSAAMSGUINCGBright is in Dynamic Contrast mode. Move to Brightness using the [ ] buttons. 53 Move to make the picture appear brighter. Contrast Adjust the contrast between the objects and background. (Range: 0~100) A higher...
..., press the [ ] button. PICTURE MAGIC ▶ Brightness : 50 Contrast : 75 Sharpness : 60 Response Time : Faster HDMI Black Level : Normal Return Adjust Enter 4. Adjust the Contrast setting using the [ ] buttons. Configuring Brightness 1. The following screen will appear. Next, press the [ ] button. 3. NOTE Not available if MSAAMSGUINCGBright is in Dynamic Contrast mode. Move to Brightness using the [ ] buttons. 53 Move to make the picture appear brighter. Contrast Adjust the contrast between the objects and background. (Range: 0~100) A higher...

User Manual Ver.1.0 (English)
Page 62
..., press the [ ] button. 3. NOTE To open the OSD menu where you want and press [ ]. 6. NOTE To open the HUB menu screen, press the [ ] button on the stand. 4. Chapter. 9 Setup and Reset HUB Configure the settings to Wireless Connection mode. for Series 7 only If a PC connects to the product via the wireless-connection dongle, the product will automatically detect the wireless connection and change the input source to SETUP&RESET using the [ ] buttons. Press [ ] to move...
..., press the [ ] button. 3. NOTE To open the OSD menu where you want and press [ ]. 6. NOTE To open the HUB menu screen, press the [ ] button on the stand. 4. Chapter. 9 Setup and Reset HUB Configure the settings to Wireless Connection mode. for Series 7 only If a PC connects to the product via the wireless-connection dongle, the product will automatically detect the wireless connection and change the input source to SETUP&RESET using the [ ] buttons. Press [ ] to move...

User Manual Ver.1.0 (English)
Page 63
...; T he input source does not need to USB Super Charging using the [ The following screen will appear. Next, press the [ ] button. 3. Series 7 HUB Auto Wireless Detection USB Super Charging Select Source Wireless ID : Off : Off : HDMI USB Wireless Connection MHL Return Adjust Enter Return Adjust Enter • H DMI: Change the input source to HDMI mode. • U SB: Change the input source to USB mode. • W ireless Connection: Change the input source to Wireless Connection mode. • M HL: Change the input source to the blue USB 3.0 port. 5. NOTE...
...; T he input source does not need to USB Super Charging using the [ The following screen will appear. Next, press the [ ] button. 3. Series 7 HUB Auto Wireless Detection USB Super Charging Select Source Wireless ID : Off : Off : HDMI USB Wireless Connection MHL Return Adjust Enter Return Adjust Enter • H DMI: Change the input source to HDMI mode. • U SB: Change the input source to USB mode. • W ireless Connection: Change the input source to Wireless Connection mode. • M HL: Change the input source to the blue USB 3.0 port. 5. NOTE...

User Manual Ver.1.0 (English)
Page 70
...2. The current input source, frequency and PICTURE COLOR SIZE&POSITION SETUP&RESET INFORMATION Exit Move USB 67.5kHz 60Hz PP 1920 x 1080 Optimum Mode 1920 x 1080 60Hz Enter Configuring Brightness and Contrast in the initial screen (where no OSD menu is displayed. Adjust the Brightness or Contrast setting using the [ ] buttons in the Initial Screen Adjust the Brightness or Contrast setting using the [ ] buttons. 70 Press [ ] when the initial screen is displayed). 1. Move to alternate between the Brightness and Contrast settings. 3. Brightness Contrast Exit : : Adjust 100 75...
...2. The current input source, frequency and PICTURE COLOR SIZE&POSITION SETUP&RESET INFORMATION Exit Move USB 67.5kHz 60Hz PP 1920 x 1080 Optimum Mode 1920 x 1080 60Hz Enter Configuring Brightness and Contrast in the initial screen (where no OSD menu is displayed. Adjust the Brightness or Contrast setting using the [ ] buttons in the Initial Screen Adjust the Brightness or Contrast setting using the [ ] buttons. 70 Press [ ] when the initial screen is displayed). 1. Move to alternate between the Brightness and Contrast settings. 3. Brightness Contrast Exit : : Adjust 100 75...
User Manual Ver.1.0 (English)
Page 73
... on the screen and the power LED blinks every 0.5 to the product The screen is too dark. Adjust the COLOR settings. Check the connection of heat you feel can use the product in power-saving mode. The intensity of the stereo cable or adjust the volume. This message appears if the signal from the graphics card exceeds the maximum resolution or frequency for the product. White does not really look distorted. Troubleshooting Guide TROUBLESHOOTING SOLUTIONS...
... on the screen and the power LED blinks every 0.5 to the product The screen is too dark. Adjust the COLOR settings. Check the connection of heat you feel can use the product in power-saving mode. The intensity of the stereo cable or adjust the volume. This message appears if the signal from the graphics card exceeds the maximum resolution or frequency for the product. White does not really look distorted. Troubleshooting Guide TROUBLESHOOTING SOLUTIONS...

User Manual Ver.1.0 (English)
Page 74
... input source. 2. USB screen The USB screen is set to USB, press the [ ] button to check the input source. Symptom: Wireless Connection does not work properly, update the driver to use Mobile Control? If Wireless Connection does not work although the product is properly connected to check that the input source is not displayed. Press the [ ] button to the product and PC. The PC does not need to be turned on to the latest version from www.samsung.com. Troubleshooting Guide Troubleshooting Guide...
... input source. 2. USB screen The USB screen is set to USB, press the [ ] button to check the input source. Symptom: Wireless Connection does not work properly, update the driver to use Mobile Control? If Wireless Connection does not work although the product is properly connected to check that the input source is not displayed. Press the [ ] button to the product and PC. The PC does not need to be turned on to the latest version from www.samsung.com. Troubleshooting Guide Troubleshooting Guide...

User Manual Ver.1.0 (English)
Page 79
... connects to the right side of a horizontal cycle is called horizontal frequency. Vertical Frequency Repeating the same picture dozens of times per second allows you select the optimum resolution specified for the screen size of the panel. The repeat frequency is called "vertical frequency" or "refresh rate" and is measured in Hz. for Series 7 only Standard Host interface Frequency range Security Data transmission rate Sensitivity/Power output Power consumption Supported models Dimensions UWB (Ultra Wide...
... connects to the right side of a horizontal cycle is called horizontal frequency. Vertical Frequency Repeating the same picture dozens of times per second allows you select the optimum resolution specified for the screen size of the panel. The repeat frequency is called "vertical frequency" or "refresh rate" and is measured in Hz. for Series 7 only Standard Host interface Frequency range Security Data transmission rate Sensitivity/Power output Power consumption Supported models Dimensions UWB (Ultra Wide...


