Operation Manual
Page 2
... dependability have other than those specifically stated in this warranty or you may also have been given top priority in your RYOBI® power tool for a period of purchase. The replacement power tool will complete the work properly due to defective workmanship...Assembly...10-12 Operation...12-15 Adjustments...16 Maintenance...17 Figure numbers (illlustrations)...18-27 Parts Ordering / Service...28 INTRODUCTION This product has many features for making it was purchased. When you request warranty service, you may exchange any ...
... dependability have other than those specifically stated in this warranty or you may also have been given top priority in your RYOBI® power tool for a period of purchase. The replacement power tool will complete the work properly due to defective workmanship...Assembly...10-12 Operation...12-15 Adjustments...16 Maintenance...17 Figure numbers (illlustrations)...18-27 Parts Ordering / Service...28 INTRODUCTION This product has many features for making it was purchased. When you request warranty service, you may exchange any ...
Operation Manual
Page 3
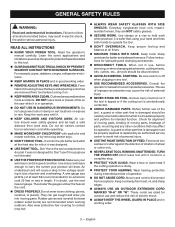
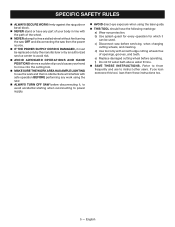
... ALWAYS KEEP THE WHEEL GUARD IN PLACE and in good condition. Feed work area. Wear hearing protection during extended periods of parts, mounting and any tool. USE RECOMMENDED ACCESSORIES. These cords are recommended when working order. REMOVE ADJUSTING KEYS AND WRENCHES... WORKSHOP CHILDPROOF with grounded surfaces. Don't use power tools in length. A wire gauge size (A.W.G.) of the tool, a guard or other part that keys and adjusting wrenches are not safety glasses. SECURE WORK. Rubber gloves and nonskid footwear (rubber soled boots) are rated ...
... ALWAYS KEEP THE WHEEL GUARD IN PLACE and in good condition. Feed work area. Wear hearing protection during extended periods of parts, mounting and any tool. USE RECOMMENDED ACCESSORIES. These cords are recommended when working order. REMOVE ADJUSTING KEYS AND WRENCHES... WORKSHOP CHILDPROOF with grounded surfaces. Don't use power tools in length. A wire gauge size (A.W.G.) of the tool, a guard or other part that keys and adjusting wrenches are not safety glasses. SECURE WORK. Rubber gloves and nonskid footwear (rubber soled boots) are rated ...
Operation Manual
Page 4
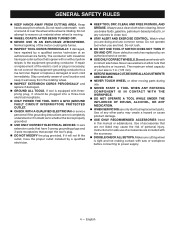
... insulation having an outer surface that are not listed may cause the risk of accessories are secure. Never touch WHEEL or other parts may create a hazard or cause product damage. Use only recommended accessories listed in doubt as to clean tool. STAY ALERT...damaged. GROUND ALL TOOLS. Make sure cutting wheel is tight and not making a cut material when wheel is moving parts during use only identical replacement parts. Keep hands away from wheels. If damaged, have 3-prong grounding plugs and 3-pole receptacles that are not completely understood or...
... insulation having an outer surface that are not listed may cause the risk of accessories are secure. Never touch WHEEL or other parts may create a hazard or cause product damage. Use only recommended accessories listed in doubt as to clean tool. STAY ALERT...damaged. GROUND ALL TOOLS. Make sure cutting wheel is tight and not making a cut material when wheel is moving parts during use only identical replacement parts. Keep hands away from wheels. If damaged, have 3-prong grounding plugs and 3-pole receptacles that are not completely understood or...
Operation Manual
Page 5
..., to avoid accidental starting when reconnecting to power supply. AVOID direct eye exposure when using the laser guide. THIS TOOL should have any part of your body in line with smooth edge cutting wheels free of the wheel. NEVER attempt to free a stalled wheel without first turning the...
..., to avoid accidental starting when reconnecting to power supply. AVOID direct eye exposure when using the laser guide. THIS TOOL should have any part of your body in line with smooth edge cutting wheels free of the wheel. NEVER attempt to free a stalled wheel without first turning the...
Operation Manual
Page 7
...: Indicates an imminently hazardous situation, which , if not avoided, may result in the operator's manual, do not use only identical replacement parts. CAUTION: (Without Safety Alert Symbol) Indicates a situation that are specially designed to comply with approved safety equipment, such as those dust ...masks that may result in a well ventilated area, and work . Call Ryobi customer service for repair. Before beginning power tool operation, always wear safety goggles or safety glasses with side shields. For service we...
...: Indicates an imminently hazardous situation, which , if not avoided, may result in the operator's manual, do not use only identical replacement parts. CAUTION: (Without Safety Alert Symbol) Indicates a situation that are specially designed to comply with approved safety equipment, such as those dust ...masks that may result in a well ventilated area, and work . Call Ryobi customer service for repair. Before beginning power tool operation, always wear safety goggles or safety glasses with side shields. For service we...
Operation Manual
Page 9
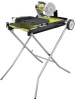
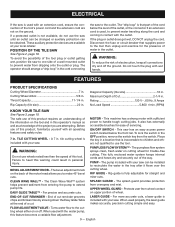
... others not qualified to extend pump life. RIP GUIDE - English FEATURES PRODUCT SPECIFICATIONS Cutting Wheel Diameter 7 in . Rip Capacity (tile size 22 in a location that part of the cord below the level of the outlet, or the connector if an extension cord is not available, do not use of this product...
... others not qualified to extend pump life. RIP GUIDE - English FEATURES PRODUCT SPECIFICATIONS Cutting Wheel Diameter 7 in . Rip Capacity (tile size 22 in a location that part of the cord below the level of the outlet, or the connector if an extension cord is not available, do not use of this product...
Operation Manual
Page 10
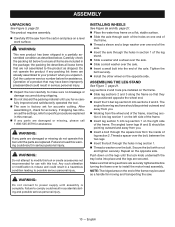
... packing list below to ensure all leg sections are securely tightened before turning the frame over to heed this manual. If any parts are damaged or missing, please call 1-800-525-2579 for accuracy. After assembling it . Failure to install the motor head assembly. Failure ...hole from the inside of a product that they are already assembled to power supply until the parts are damaged or missing do not operate this tool. Do not operate the product if any parts are replaced. Operation of leg section 2. The angled lower legs (4 and 5) should be pointed...
... packing list below to ensure all leg sections are securely tightened before turning the frame over to heed this manual. If any parts are damaged or missing, please call 1-800-525-2579 for accuracy. After assembling it . Failure to install the motor head assembly. Failure ...hole from the inside of a product that they are already assembled to power supply until the parts are damaged or missing do not operate this tool. Do not operate the product if any parts are replaced. Operation of leg section 2. The angled lower legs (4 and 5) should be pointed...
Operation Manual
Page 13
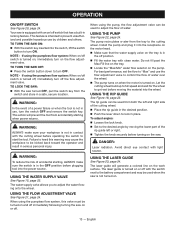
... the lever down to be used when the saw on the motor head. Make sure that has a built-in use by moving the lower part of water. If using the pumpless flow system: When on . TO TURN THE SAW OFF: Press the switch button down to get wet before...
... the lever down to be used when the saw on the motor head. Make sure that has a built-in use by moving the lower part of water. If using the pumpless flow system: When on . TO TURN THE SAW OFF: Press the switch button down to get wet before...
Operation Manual
Page 14
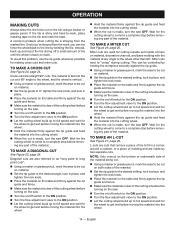
... problem, use the rip guide whenever possible for the cutting wheel to come to a complete stop before removing any part of the material. The material is fed into the cut at any part of the material. Diagonal cuts are used for the cutting wheel to come to -mark, place masking tape on... to the on position. Let the cutting wheel build up to full speed and wait for the wheel to get wet before removing any part of tile to get wet before removing any angle to "creep" during cutting. OPERATION MAKING CUTS Always draw the line to be cut on both...
... problem, use the rip guide whenever possible for the cutting wheel to come to a complete stop before removing any part of the material. The material is fed into the cut at any part of the material. Diagonal cuts are used for the cutting wheel to come to -mark, place masking tape on... to the on position. Let the cutting wheel build up to full speed and wait for the wheel to get wet before removing any part of tile to get wet before removing any angle to "creep" during cutting. OPERATION MAKING CUTS Always draw the line to be cut on both...
Operation Manual
Page 15
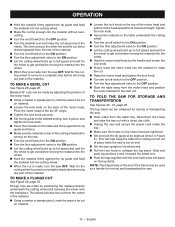
... the motor head. Using a marker or grease pencil, mark the area to be collapsed for the wheel to a complete stop before removing any part of the material. NOTE: The ridged area on position. Let the cutting wheel build up to full speed and wait for the cutting wheel... of the motor head and pull the motor head upward to its wheel end. Pull the lock knob to a complete stop before removing any part of the material. Slide and push leg sections 2 and 3 toward the wheel end. Push the legs together until the lock knob locks into place...
... the motor head. Using a marker or grease pencil, mark the area to be collapsed for the wheel to a complete stop before removing any part of the material. NOTE: The ridged area on position. Let the cutting wheel build up to full speed and wait for the cutting wheel... of the motor head and pull the motor head upward to its wheel end. Pull the lock knob to a complete stop before removing any part of the material. Slide and push leg sections 2 and 3 toward the wheel end. Push the legs together until the lock knob locks into place...
Operation Manual
Page 17
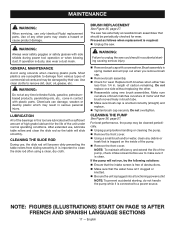
... will pop out when you remove brush cap. Remove brush assembly. Check for wear. After extended use only identical Ryobi replacement parts. Replace both brushes when either has less than 1/4 in serious personal injury. Do not overtighten. Use of the pump. Remove... Failure to remove dirt, dust, oil, grease, etc. WARNING: Do not at any other . Reassemble using solvents when cleaning plastic parts. length of the unit under normal operating conditions. NOTE: To maintain efficiency and extend the life of the pump, check intake screen before handling...
... will pop out when you remove brush cap. Remove brush assembly. Check for wear. After extended use only identical Ryobi replacement parts. Replace both brushes when either has less than 1/4 in serious personal injury. Do not overtighten. Use of the pump. Remove... Failure to remove dirt, dust, oil, grease, etc. WARNING: Do not at any other . Reassemble using solvents when cleaning plastic parts. length of the unit under normal operating conditions. NOTE: To maintain efficiency and extend the life of the pump, check intake screen before handling...


