Operation Manual
Page 2
.... warranty RYOBI® POWER TOOL - With the exception of sale). ryobitools.com. TABLE OF CONTENTS Introduction...2 Warranty...2 General Safety Rules...3 - 4 Specific Safety Rules...4 Symbols...5 Electrical...6 - 7 Features...7 Assembly...8 - 9 Operation...9 - 11 Maintenance...12 Figure numbers (illustrations)...13 - 17 Parts Ordering / Service...Back page INTRODUCTION This product has many features for making it was purchased. The replacement power tool will repair...
.... warranty RYOBI® POWER TOOL - With the exception of sale). ryobitools.com. TABLE OF CONTENTS Introduction...2 Warranty...2 General Safety Rules...3 - 4 Specific Safety Rules...4 Symbols...5 Electrical...6 - 7 Features...7 Assembly...8 - 9 Operation...9 - 11 Maintenance...12 Figure numbers (illustrations)...13 - 17 Parts Ordering / Service...Back page INTRODUCTION This product has many features for making it was purchased. The replacement power tool will repair...

Operation Manual
Page 3
...; GUARD AGAINST ELECTRICAL SHOCK by removing starter keys. DON'T FORCE TOOL. GENERAL SAFETY RULES WARNING: Read and understand all times. MAINTAIN TOOLS WITH CARE. For example, pipes, radiators, ranges, refrigerator enclosures. KEEP GUARDS IN PLACE and in use the next heavier gauge. Failure to rain. Make sure your hand and frees both hands to disconnect from tool before servicing, or when changing attachments, wheels, bits...
...; GUARD AGAINST ELECTRICAL SHOCK by removing starter keys. DON'T FORCE TOOL. GENERAL SAFETY RULES WARNING: Read and understand all times. MAINTAIN TOOLS WITH CARE. For example, pipes, radiators, ranges, refrigerator enclosures. KEEP GUARDS IN PLACE and in use the next heavier gauge. Failure to rain. Make sure your hand and frees both hands to disconnect from tool before servicing, or when changing attachments, wheels, bits...
Operation Manual
Page 4
... smooth edge cutting wheels free of drugs, alcohol, or any solvents to a live terminal. Do not rush. DO NOT USE TOOL IF SWITCH DOES NOT TURN IT ON AND OFF. If it will interfere with saw before operating. If you are secure. Never touch WHEEL or other users. Do not attempt to see the work area has ample lighting to remove cut , be replaced only...
... smooth edge cutting wheels free of drugs, alcohol, or any solvents to a live terminal. Do not rush. DO NOT USE TOOL IF SWITCH DOES NOT TURN IT ON AND OFF. If it will interfere with saw before operating. If you are secure. Never touch WHEEL or other users. Do not attempt to see the work area has ample lighting to remove cut , be replaced only...
Operation Manual
Page 5
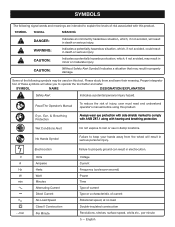
...) Power Time Type of current Type or a characteristic of injury, user must read and understand operator's manual before using this product. Proper interpretation of these symbols will allow you to rain or use in minor or moderate injury. English Read The Operator's Manual To reduce the risk of current Rotational speed, at no .../min Electrocution Volts Amperes Hertz Watt Minutes Alternating Current Direct...
...) Power Time Type of current Type or a characteristic of injury, user must read and understand operator's manual before using this product. Proper interpretation of these symbols will allow you to rain or use in minor or moderate injury. English Read The Operator's Manual To reduce the risk of current Rotational speed, at no .../min Electrocution Volts Amperes Hertz Watt Minutes Alternating Current Direct...
Operation Manual
Page 6
... in serious personal injury. Electrical Connection This tool is for a greater distance. If the saw . This speed is required, do not yank on a nominal 120 volt circuit and has a grounding plug similar to determine the minimum wire size required in serious injury. When repair or replacement of power and causing the motor to do so can support one power tool may be able to...
... in serious personal injury. Electrical Connection This tool is for a greater distance. If the saw . This speed is required, do not yank on a nominal 120 volt circuit and has a grounding plug similar to determine the minimum wire size required in serious injury. When repair or replacement of power and causing the motor to do so can support one power tool may be able to...
Operation Manual
Page 7
... cuts and miter cuts. To lock the switch in the OFF position, remove the switch key from overspray and mist. 7 - RIP GUIDE - Rip guide is fully adjustable for making cross cuts and using the bevel table. English If a protected outlet is used with sufficient power to handle tough cutting jobs. WARNING: To reduce the risk of an extension cord and the power tools' power cord. Rip Capacity (tile size 16 in personal injury. Rating 120 V~, 60 Hz, 4.8 Amps No Load Speed...
... cuts and miter cuts. To lock the switch in the OFF position, remove the switch key from overspray and mist. 7 - RIP GUIDE - Rip guide is fully adjustable for making cross cuts and using the bevel table. English If a protected outlet is used with sufficient power to handle tough cutting jobs. WARNING: To reduce the risk of an extension cord and the power tools' power cord. Rip Capacity (tile size 16 in personal injury. Rating 120 V~, 60 Hz, 4.8 Amps No Load Speed...
Operation Manual
Page 8
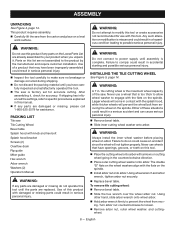
... the settings, refer to your product when you have been improperly assembled could result in the counterclockwise direction. Place outer cutting wheel washer onto arbor. Use of these situations could result in this tool. Place the cutting wheel onto arbor with knob and hex bolt Splash hood bracket Screws (2) Overflow drain Rip guide Miter guide Hex wrench Arbor wrench Washers (2) Operator's Manual Warning: If any parts on the Loose Parts List are already assembled to specific procedures...
... the settings, refer to your product when you have been improperly assembled could result in the counterclockwise direction. Place outer cutting wheel washer onto arbor. Use of these situations could result in this tool. Place the cutting wheel onto arbor with knob and hex bolt Splash hood bracket Screws (2) Overflow drain Rip guide Miter guide Hex wrench Arbor wrench Washers (2) Operator's Manual Warning: If any parts on the Loose Parts List are already assembled to specific procedures...
Operation Manual
Page 9
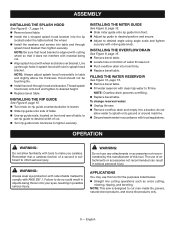
... bracket then tighten securely. Installing the Overflow drain See Figure 9, page 15. Remove bevel table. Locate hole on front and rear of table, to set rip guide to desired width of cut . Align splash hood with wheel and slide over bracket. OPERATION WARNING: Do not allow water to desired angle using angle scale and tighten securely with slot in splash hood with miter guide knob. NOTE: Be...
... bracket then tighten securely. Installing the Overflow drain See Figure 9, page 15. Remove bevel table. Locate hole on front and rear of table, to set rip guide to desired width of cut . Align splash hood with wheel and slide over bracket. OPERATION WARNING: Do not allow water to desired angle using angle scale and tighten securely with slot in splash hood with miter guide knob. NOTE: Be...
Operation Manual
Page 10
... right side of the cutting wheel. Turn knob on rip guide counterclockwise to loosen. Adjust the rip guide in the OFF position before removing any part of table, to set rip guide to a complete stop before plugging tool into the cutting wheel. When the cut on the tile using angle scale and tighten securely with an on/off SWITCH See Figure 11, page 15. To adjust angles: Slide miter guide onto rip guide from the mark, you...
... right side of the cutting wheel. Turn knob on rip guide counterclockwise to loosen. Adjust the rip guide in the OFF position before removing any part of table, to set rip guide to a complete stop before plugging tool into the cutting wheel. When the cut on the tile using angle scale and tighten securely with an on/off SWITCH See Figure 11, page 15. To adjust angles: Slide miter guide onto rip guide from the mark, you...
Operation Manual
Page 11
... cut piece should separate from front. Set the rip guide to desired width, and tighten the knob to secure in legs to rest plate into 22.5° angle. Use second set of notches to angle bevel table into high- Wait for the cutting wheel to come to a complete stop before removing any part of the material. NOTE: Make sure bevel table is locked firmly in a corner, around a cabinet, or a piece of molding...
... cut piece should separate from front. Set the rip guide to desired width, and tighten the knob to secure in legs to rest plate into 22.5° angle. Use second set of notches to angle bevel table into high- Wait for the cutting wheel to come to a complete stop before removing any part of the material. NOTE: Make sure bevel table is locked firmly in a corner, around a cabinet, or a piece of molding...
Operation Manual
Page 12
...) start on page 13 after French and Spanish language sections. 12 - MAINTENANCE WARNING: When servicing, use cutting wheels rated less than the no load speed of the bearings in personal injury. LUBRICATION All of this warning could result in objects being thrown into your eyes, resulting in . GENERAL MAINTENANCE Avoid using solvents when cleaning plastic parts. tile cutting wheel For maximum performance and safety...
...) start on page 13 after French and Spanish language sections. 12 - MAINTENANCE WARNING: When servicing, use cutting wheels rated less than the no load speed of the bearings in personal injury. LUBRICATION All of this warning could result in objects being thrown into your eyes, resulting in . GENERAL MAINTENANCE Avoid using solvents when cleaning plastic parts. tile cutting wheel For maximum performance and safety...


