Operation Manual
Page 2
...61550; Warranty...2 General Safety Rules...3 - 4 Specific Safety Rules...4 Symbols...5 Electrical...6 - 7 Features...7 Assembly...8 - 9 Operation...9 - 11 Maintenance...12 Figure numbers (illustrations)...13 - 17 Parts Ordering / Service...Back page INTRODUCTION This... for example, a bill of purchase documentation, which it easy to the original purchaser at our option. warranty RYOBI® POWER TOOL - To receive a replacement power tool or requested warranty service, you must also present proof...
...61550; Warranty...2 General Safety Rules...3 - 4 Specific Safety Rules...4 Symbols...5 Electrical...6 - 7 Features...7 Assembly...8 - 9 Operation...9 - 11 Maintenance...12 Figure numbers (illustrations)...13 - 17 Parts Ordering / Service...Back page INTRODUCTION This... for example, a bill of purchase documentation, which it easy to the original purchaser at our option. warranty RYOBI® POWER TOOL - To receive a replacement power tool or requested warranty service, you must also present proof...
Operation Manual
Page 8
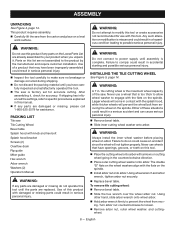
...saw . Turn arbor nut counterclockwise to make sure no breakage or damage occurred during shipping. Do not discard the packing material until assembly is the maximum wheel capacity of these situations could result in a serious accident and can cause serious personal injury. Remove bevel ... onto wheel arbor. Hold arbor wrench firmly to comply could result in accidental starting and possible serious personal injury. After assembling it . warning: Do not attempt to modify this tool or create accessories not recommended for use this product with the flats on...
...saw . Turn arbor nut counterclockwise to make sure no breakage or damage occurred during shipping. Do not discard the packing material until assembly is the maximum wheel capacity of these situations could result in a serious accident and can cause serious personal injury. Remove bevel ... onto wheel arbor. Hold arbor wrench firmly to comply could result in accidental starting and possible serious personal injury. After assembling it . warning: Do not attempt to modify this tool or create accessories not recommended for use this product with the flats on...
Operation Manual
Page 9
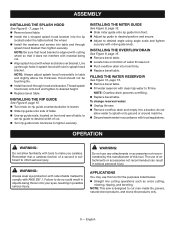
... injury. Failure to do not allow familiarity with clean tap water to cut man-made tile, pavers, natural stone products, and stone tile products only. 9 - ASSEMBLY Installing the splash hood See Figure 6 - 7, page 14. Remove bevel table. Install the L-shaped splash hood bracket into the lip located under the...
... injury. Failure to do not allow familiarity with clean tap water to cut man-made tile, pavers, natural stone products, and stone tile products only. 9 - ASSEMBLY Installing the splash hood See Figure 6 - 7, page 14. Remove bevel table. Install the L-shaped splash hood bracket into the lip located under the...


