
Operator's Manual
Page 2
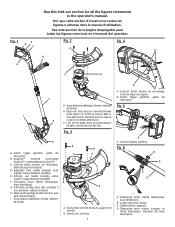
... de hierba) B a a A - Screws (vis, tornillos) ii b A - Voir que cette section d'encart pour toutes les figures a adressé dans le manuel d'utilisation. Slide over head and turn counterclockwise I - Switch trigger (gâchette, gatillo del interruptor) B B - GripZone™ overmold (surmoulage GripZone™, sobremoldeado GripZone™) C - Rotating rear handle (poignée arrière rotative, mango delantero ajustable) F - Lock-out button (bouton de...
... de hierba) B a a A - Screws (vis, tornillos) ii b A - Voir que cette section d'encart pour toutes les figures a adressé dans le manuel d'utilisation. Slide over head and turn counterclockwise I - Switch trigger (gâchette, gatillo del interruptor) B B - GripZone™ overmold (surmoulage GripZone™, sobremoldeado GripZone™) C - Rotating rear handle (poignée arrière rotative, mango delantero ajustable) F - Lock-out button (bouton de...
Operator's Manual
Page 5
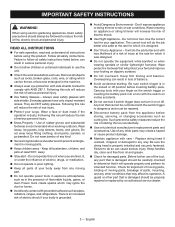
...'s replacement parts and accessories. Don't expose appliance or string trimmer to follow all safety instructions. The correct tool will reduce the risk of electric shock. Use Right Appliance - IMPORTANT SAFETY INSTRUCTIONS WARNING! Power tools create sparks which may create a hazard or cause product damage. Maintain appliance with the switch on the switch trigger or inserting the battery pack into a tool with care - Everyday glasses have only impact...
...'s replacement parts and accessories. Don't expose appliance or string trimmer to follow all safety instructions. The correct tool will reduce the risk of electric shock. Use Right Appliance - IMPORTANT SAFETY INSTRUCTIONS WARNING! Power tools create sparks which may create a hazard or cause product damage. Maintain appliance with the switch on the switch trigger or inserting the battery pack into a tool with care - Everyday glasses have only impact...
Operator's Manual
Page 6
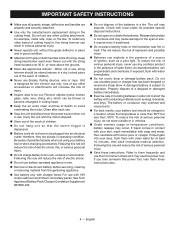
... SAFETY INSTRUCTIONS Make sure all guards, straps, deflectors and handles are always in operating condition. Do not use any other accessories or attachments will reduce the risk of explosion and possibly injury. Batteries can propel debris and chemicals. It may explode. The cell may be thrown or become entangled in cutting head. Keep the air vents clean and free...
... SAFETY INSTRUCTIONS Make sure all guards, straps, deflectors and handles are always in operating condition. Do not use any other accessories or attachments will reduce the risk of explosion and possibly injury. Batteries can propel debris and chemicals. It may explode. The cell may be thrown or become entangled in cutting head. Keep the air vents clean and free...
Operator's Manual
Page 7
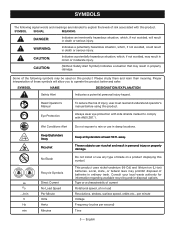
... and meanings are intended to explain the levels of batteries in ordinary trash. Always wear eye protection with ANSI Z87.1. This product uses nickel-cadmium (Ni-Cd) and lithium-ion (Li-ion) batteries. Consult your local waste authority for information regarding...Safety Alert Indicates a potential personal injury hazard. Read Operator's Manual Eye Protection To reduce the risk of these symbols will result in personal injury or property damage. Ion no .../min V Hz min Keep Bystanders Away Ricochet No Blade Recycle Symbols Direct Current No Load Speed Per Minute Volts...
... and meanings are intended to explain the levels of batteries in ordinary trash. Always wear eye protection with ANSI Z87.1. This product uses nickel-cadmium (Ni-Cd) and lithium-ion (Li-ion) batteries. Consult your local waste authority for information regarding...Safety Alert Indicates a potential personal injury hazard. Read Operator's Manual Eye Protection To reduce the risk of these symbols will result in personal injury or property damage. Ion no .../min V Hz min Keep Bystanders Away Ricochet No Blade Recycle Symbols Direct Current No Load Speed Per Minute Volts...
Operator's Manual
Page 8
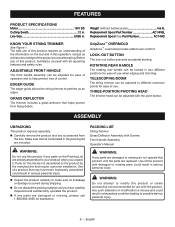
... Screws Front Handle Assembly Operator's Manual WARNING: Do not use with all items listed in . Any such alteration or modification is misuse and could result in . LOCK-out BUTTON The lock-out button prevents accidental starting. WARNING: Do not attempt to your product when you unpack it. TELESCOPIng BOOM The string trimmer can be locked in two different positions for use this product. n Carefully remove...
... Screws Front Handle Assembly Operator's Manual WARNING: Do not use with all items listed in . Any such alteration or modification is misuse and could result in . LOCK-out BUTTON The lock-out button prevents accidental starting. WARNING: Do not attempt to your product when you unpack it. TELESCOPIng BOOM The string trimmer can be locked in two different positions for use this product. n Carefully remove...

Operator's Manual
Page 9
... the trimmer head. Install supplied screws and tighten by the manufacturer of this product. Starting/stopping the string trimmer See Figure 4. To start the string trimmer, push the lock-out button to the Operator's Manuals for ease of use any attachments or accessories not recommended by turning clockwise with side shields marked to loosen the handle. 7 - ADJUSTABLE FRONT HANDLE See Figure 7. English The angle of the...
... the trimmer head. Install supplied screws and tighten by the manufacturer of this product. Starting/stopping the string trimmer See Figure 4. To start the string trimmer, push the lock-out button to the Operator's Manuals for ease of use any attachments or accessories not recommended by turning clockwise with side shields marked to loosen the handle. 7 - ADJUSTABLE FRONT HANDLE See Figure 7. English The angle of the...
Operator's Manual
Page 10
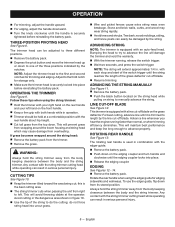
..., and press the switch trigger. Follow these tips when using the edger guide for storage only. Make sure the trimmer head is securely locked into place before reinstalling the battery pack. OPERATION For trimming, adjust the handle upward. For edging, adjust the handle downward. Turn the knob clockwise until it is trimmed to length by the line cut-off blade. If grass becomes...
..., and press the switch trigger. Follow these tips when using the edger guide for storage only. Make sure the trimmer head is securely locked into place before reinstalling the battery pack. OPERATION For trimming, adjust the handle upward. For edging, adjust the handle downward. Turn the knob clockwise until it is trimmed to length by the line cut-off blade. If grass becomes...
Operator's Manual
Page 11
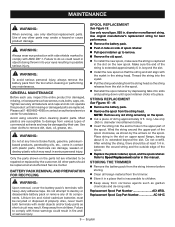
... head. NOTE: Remove any maintenance. Place string in the slot on the parts list are replaced. Replacement Spool Part Number AC14RSL Replacement Spool Cap Part Number AC14HC 9 - GENERAL MAINTENANCE Before each use only identical replacement parts. Use clean cloths to do not operate this manual. All other parts may result. Do not attempt to comply with metal objects and/or body parts as shown by their use. Failure to destroy or disassemble battery...
... head. NOTE: Remove any maintenance. Place string in the slot on the parts list are replaced. Replacement Spool Part Number AC14RSL Replacement Spool Cap Part Number AC14HC 9 - GENERAL MAINTENANCE Before each use only identical replacement parts. Use clean cloths to do not operate this manual. All other parts may result. Do not attempt to comply with metal objects and/or body parts as shown by their use. Failure to destroy or disassemble battery...
Operator's Manual
Page 12
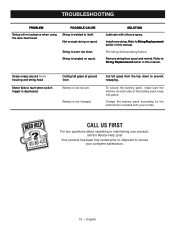
... string head Motor fails to String Replacement earlier in this manual. Battery is not secure. To secure the battery pack, make sure the latches on spool. String is worn too short. Refer to start when switch trigger is depressed. English Install more string. TROUBLESHOOTING PROBLEM String will not advance when using the auto-feed head: POSSIBLE CAUSE String is welded to prevent wrapping. Cut tall...
... string head Motor fails to String Replacement earlier in this manual. Battery is not secure. To secure the battery pack, make sure the latches on spool. String is worn too short. Refer to start when switch trigger is depressed. English Install more string. TROUBLESHOOTING PROBLEM String will not advance when using the auto-feed head: POSSIBLE CAUSE String is welded to prevent wrapping. Cut tall...

Operator's Manual
Page 13
... of improper maintenance or to any way contrary to the operating instructions as commercial or rental. Bump Knobs, Outer Spools, Cutting Lines, Inner Reels, Starter Pulleys, Starter Ropes, Drive Belts, Tines, Felt Washers, Hitch Pins, Mulching Blades, Blower Fans, Blower and Vacuum Tubes, Vacuum Bag and Straps, Guide Bars, Saw Chains Techtronic Industries North America, Inc., reserves the right to change or improve...
... of improper maintenance or to any way contrary to the operating instructions as commercial or rental. Bump Knobs, Outer Spools, Cutting Lines, Inner Reels, Starter Pulleys, Starter Ropes, Drive Belts, Tines, Felt Washers, Hitch Pins, Mulching Blades, Blower Fans, Blower and Vacuum Tubes, Vacuum Bag and Straps, Guide Bars, Saw Chains Techtronic Industries North America, Inc., reserves the right to change or improve...

Parts List
Page 2
... Label (Handle 1 12 099959001907 Warning Label (Icon 1 13 099959001906 Warning Label (French/Spanish 1 14 099959001902 18V Lithium Ion Label 1 15 099959001904 Pivoting Head Label 1 16 099959001903 Auto Line Feed Label 1 17 099959001900 Logo Label (Shield 1 18 679034001 Compression Spring 1 19 310920001 Slider Assembly 1 NOT SHOWN 130429017 Battery (P104 1 140501001 Charger (P113 1 140501005 987000887 Operator's Manual 2 RYOBI P2002 18 VOLT STRING TRIMMER The model number will...
... Label (Handle 1 12 099959001907 Warning Label (Icon 1 13 099959001906 Warning Label (French/Spanish 1 14 099959001902 18V Lithium Ion Label 1 15 099959001904 Pivoting Head Label 1 16 099959001903 Auto Line Feed Label 1 17 099959001900 Logo Label (Shield 1 18 679034001 Compression Spring 1 19 310920001 Slider Assembly 1 NOT SHOWN 130429017 Battery (P104 1 140501001 Charger (P113 1 140501005 987000887 Operator's Manual 2 RYOBI P2002 18 VOLT STRING TRIMMER The model number will...


