
Trilingual (BGH6110)
Page 3
...servicing, or when changing attachments, blades, bits, cutters, etc., all instructions listed below, may affect its intended function. Learn the grinder's applications and limitations as well as the specific potential hazards related to operate tool. Form the habit of improper accessories may risk injury... edges. USE OUTDOOR EXTENSION CORDS. Keep tools sharp and clean for recommended accessories. Follow instructions for which it on the bench grinder while it for a purpose not intended. USE THE PROPER EXTENSION CORD. Never yank cord to contain long hair. ...
...servicing, or when changing attachments, blades, bits, cutters, etc., all instructions listed below, may affect its intended function. Learn the grinder's applications and limitations as well as the specific potential hazards related to operate tool. Form the habit of improper accessories may risk injury... edges. USE OUTDOOR EXTENSION CORDS. Keep tools sharp and clean for recommended accessories. Follow instructions for which it on the bench grinder while it for a purpose not intended. USE THE PROPER EXTENSION CORD. Never yank cord to contain long hair. ...

Trilingual (BGH6110)
Page 4
...in contact with incorrect size holes. GENERAL SAFETY RULES INSPECT TOOL CORDS PERIODICALLY. SPECIFIC SAFETY RULES FIRMLY BOLT THE GRINDER TO A WORK BENCH OR LEG STAND at an authorized service facility. Excessive tightening can break the wheel. Use light pressure when ... USE ONLY RECOMMENDED ACCESSORIES listed in . NEVER TOUCH WHEEL or other moving parts during operation. ALWAYS USE THE GRINDER'S WHEEL GUARDS AND SAFETY SHIELDS. INSPECT GRINDING WHEEL for visible defects. Use of any part of personal injury. DO NOT use ...
...in contact with incorrect size holes. GENERAL SAFETY RULES INSPECT TOOL CORDS PERIODICALLY. SPECIFIC SAFETY RULES FIRMLY BOLT THE GRINDER TO A WORK BENCH OR LEG STAND at an authorized service facility. Excessive tightening can break the wheel. Use light pressure when ... USE ONLY RECOMMENDED ACCESSORIES listed in . NEVER TOUCH WHEEL or other moving parts during operation. ALWAYS USE THE GRINDER'S WHEEL GUARDS AND SAFETY SHIELDS. INSPECT GRINDING WHEEL for visible defects. Use of any part of personal injury. DO NOT use ...
Trilingual (BGH6110)
Page 9
...attempting. WORK REST Provides a stable work area. GRINDING WHEELS Equipped with course and fine grinding wheels to ensure your safety. ON/OFF SWITCH The bench grinder features a front access on the tool and in . No Load Speed 3,600 r/min. (RPM) Input 120 V~, 2.1 A, 60 Hz KNOW YOUR BENCH... GRINDER See Figure 2, page 13. English The safe use of the information on /off switch for convenience and safety. FEATURES PRODUCT SPECIFICATIONS Wheel Diameter 6 in . ...
...attempting. WORK REST Provides a stable work area. GRINDING WHEELS Equipped with course and fine grinding wheels to ensure your safety. ON/OFF SWITCH The bench grinder features a front access on the tool and in . No Load Speed 3,600 r/min. (RPM) Input 120 V~, 2.1 A, 60 Hz KNOW YOUR BENCH... GRINDER See Figure 2, page 13. English The safe use of the information on /off switch for convenience and safety. FEATURES PRODUCT SPECIFICATIONS Wheel Diameter 6 in . ...
Trilingual (BGH6110)
Page 10
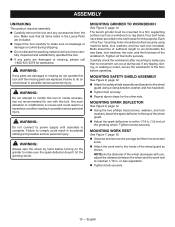
.... Tighten all items listed in . (1.6 mm) of the grinding wheel. WARNING: If any tipping, sliding, or walking is complete. MOUNTING GRINDER TO WORKBENCH See Figure 5, page 14. Each of the wheel guard as a workbench or leg stand. Carefully check the workbench after mounting to... during shipping. Do not discard the packing material until assembly is noted, secure the workbench to the floor before turning on the grinder to a firm supporting surface such as shown. Tighten screws securely. or less separation. Tighten knob securely. 10 - ASSEMBLY UNPACKING ...
.... Tighten all items listed in . (1.6 mm) of the grinding wheel. WARNING: If any tipping, sliding, or walking is complete. MOUNTING GRINDER TO WORKBENCH See Figure 5, page 14. Each of the wheel guard as a workbench or leg stand. Carefully check the workbench after mounting to... during shipping. Do not discard the packing material until assembly is noted, secure the workbench to the floor before turning on the grinder to a firm supporting surface such as shown. Tighten screws securely. or less separation. Tighten knob securely. 10 - ASSEMBLY UNPACKING ...
Trilingual (BGH6110)
Page 11
.... After sharpening, be kept sharp. OPERATION WARNING: Do not allow familiarity with tools to make a few "dry runs" first with the grinder off. Failure to crack. The use wheels rated less than the speed of this tool. NOTE: Excessive pressure may cause the wheel to ...do so could result in constant motion, moving it at most hardware stores). The Bench Grinder features a front access On/Off switch for the purposes listed below: Sharpening drill bits Sharpening lawn mower blades ...
.... After sharpening, be kept sharp. OPERATION WARNING: Do not allow familiarity with tools to make a few "dry runs" first with the grinder off. Failure to crack. The use wheels rated less than the speed of this tool. NOTE: Excessive pressure may cause the wheel to ...do so could result in constant motion, moving it at most hardware stores). The Bench Grinder features a front access On/Off switch for the purposes listed below: Sharpening drill bits Sharpening lawn mower blades ...
Trilingual (BGH6110)
Page 12
...weaken or destroy plastic which is necessary to remove dirt, dust, oil, grease, etc. n Remove the wheel cover by their use only identical Ryobi replacement parts. WIRE WHEEL REPLACEMENT (NOT INCLUDED) See Figure 13, page 16. NOTE: FIGURES (ILLUSTRATIONS) START ON PAGE 13 AFTER FRENCH AND...safe rated speed at any other parts may create a hazard or cause product damage. WHEEL REPLACEMENT See Figure 12, page 16. n Unplug the grinder. n Remove the outer flange and grinding wheel. If you must replace a grinding wheel, be damaged by loosening the screws. LUBRICATION All of the...
...weaken or destroy plastic which is necessary to remove dirt, dust, oil, grease, etc. n Remove the wheel cover by their use only identical Ryobi replacement parts. WIRE WHEEL REPLACEMENT (NOT INCLUDED) See Figure 13, page 16. NOTE: FIGURES (ILLUSTRATIONS) START ON PAGE 13 AFTER FRENCH AND...safe rated speed at any other parts may create a hazard or cause product damage. WHEEL REPLACEMENT See Figure 12, page 16. n Unplug the grinder. n Remove the outer flange and grinding wheel. If you must replace a grinding wheel, be damaged by loosening the screws. LUBRICATION All of the...
Repair Sheet
Page 3
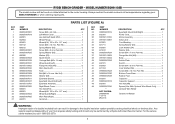
RYOBI BENCH GRINDER - PART NUMBER 28 089055007012 29 602301 30 ...Spacer (Use With Optional Wire Wheel Only 1 Optional Wire Wheel Operator's Manual WARNING: Improper repair of your BENCH GRINDER or when ordering repair parts. Any repairs requiring disassembly of a double insulated tool can result in all correspondence regarding... system possibly causing electrical shock or electrocution. MODEL NUMBER BGH6110SB The model number will be performed by a Ryobi Authorized Service Center. Always mention the model number in damage to the motor housing. For the service center...
RYOBI BENCH GRINDER - PART NUMBER 28 089055007012 29 602301 30 ...Spacer (Use With Optional Wire Wheel Only 1 Optional Wire Wheel Operator's Manual WARNING: Improper repair of your BENCH GRINDER or when ordering repair parts. Any repairs requiring disassembly of a double insulated tool can result in all correspondence regarding... system possibly causing electrical shock or electrocution. MODEL NUMBER BGH6110SB The model number will be performed by a Ryobi Authorized Service Center. Always mention the model number in damage to the motor housing. For the service center...


