User Manual (English)
Page 5
... User's Guide (1) • AC Power Adapter (1) • Stand (1) RF-HD35 3 If it is connected to a USB 1.1 port, your drive must be connected to use. • Bundled with built-in Hi-Speed USB 2.0 interface • Windows 2000, Windows XP, Windows Vista™, or Mac OS 8.6 or greater • Intel Pentium II...greater • Minimum 128 MB RAM Package contents Examine the contents of the box for Windows OS only). System requirements • PC or Mac with One-Touch Backup software (for your RF-HD35 USB 2.0 Hard Drive Enclosure Kit. Features • One-touch button to easily backup/...
... User's Guide (1) • AC Power Adapter (1) • Stand (1) RF-HD35 3 If it is connected to a USB 1.1 port, your drive must be connected to use. • Bundled with built-in Hi-Speed USB 2.0 interface • Windows 2000, Windows XP, Windows Vista™, or Mac OS 8.6 or greater • Intel Pentium II...greater • Minimum 128 MB RAM Package contents Examine the contents of the box for Windows OS only). System requirements • PC or Mac with One-Touch Backup software (for your RF-HD35 USB 2.0 Hard Drive Enclosure Kit. Features • One-touch button to easily backup/...
User Manual (English)
Page 8
... computer before inserting the Drivers and Utilities CD into your computer. Mac OS 10.x Select Disk Utilities from the top menu bar. Notes for Windows users: If you must partition and format the new hard drive. Connecting the enclosure To connect the enclosure to your computer: 1 Plug the...2.0 cable into the enclosure, then plug it into your requirements. 6 Use Disk Management in your system, you do not see an additional drive in Windows 2000 or Windows XP. If the drive is correctly detected, a new drive letter is assigned (for Mac users: Mac 8.6 - 9.2x Highlight the Drive Icon, ...
... computer before inserting the Drivers and Utilities CD into your computer. Mac OS 10.x Select Disk Utilities from the top menu bar. Notes for Windows users: If you must partition and format the new hard drive. Connecting the enclosure To connect the enclosure to your computer: 1 Plug the...2.0 cable into the enclosure, then plug it into your requirements. 6 Use Disk Management in your system, you do not see an additional drive in Windows 2000 or Windows XP. If the drive is correctly detected, a new drive letter is assigned (for Mac users: Mac 8.6 - 9.2x Highlight the Drive Icon, ...
User Manual (English)
Page 9
...RF-HD35 7 SP1). Installing the Mac OS 8.6, 9.x, or 10.x drivers Before installation, make sure that you update the USB extension to v1.4.1 (Mac OS 8.6). Installing the software Installing the USB drivers Installing the Windows 2000, Windows XP, and Windows Vista drivers Before installation, make sure that your CD or DVD drive. Installing the Rocketfish... One-Touch backup software To install the Rocketfish One-Touch backup ...
...RF-HD35 7 SP1). Installing the Mac OS 8.6, 9.x, or 10.x drivers Before installation, make sure that you update the USB extension to v1.4.1 (Mac OS 8.6). Installing the software Installing the USB drivers Installing the Windows 2000, Windows XP, and Windows Vista drivers Before installation, make sure that your CD or DVD drive. Installing the Rocketfish... One-Touch backup software To install the Rocketfish One-Touch backup ...
User Manual (English)
Page 12
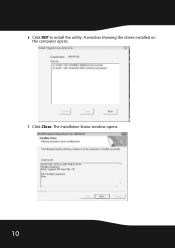
6 Click NEXT to install the utility. A window showing the drives installed on the computer opens. 7 Click Close. The Installation Status window opens. 10
6 Click NEXT to install the utility. A window showing the drives installed on the computer opens. 7 Click Close. The Installation Status window opens. 10
User Manual (English)
Page 13
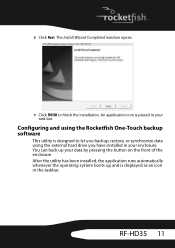
.... 8 Click Next. Configuring and using the external hard drive you backup, restore, or synchronize data using the Rocketfish One-Touch backup software This utility is placed in the taskbar. RF-HD35 11 The Install Wizard Completed window opens. 9 Click FINISH to let you have installed in your enclosure. After the utility has been installed...
.... 8 Click Next. Configuring and using the external hard drive you backup, restore, or synchronize data using the Rocketfish One-Touch backup software This utility is placed in the taskbar. RF-HD35 11 The Install Wizard Completed window opens. 9 Click FINISH to let you have installed in your enclosure. After the utility has been installed...
User Manual (English)
Page 14
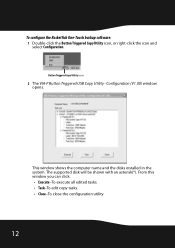
This window shows the computer name and the disks installed in the system. The supported disk will be shown with an asterisk(*). Button Triggered Copy Utility icon 2 The VIA-P Button Triggered USB Copy Utility - From this window you can click: • Execute-To execute all edited tasks. • Task-To edit copy tasks. • Close-To close the configuration utility. 12 Configuration (V1.00) window opens. To configure the Rocketfish One-Touch backup software: 1 Double-click the Button Triggered Copy Utility icon, or right-click the icon and select Configuration.
This window shows the computer name and the disks installed in the system. The supported disk will be shown with an asterisk(*). Button Triggered Copy Utility icon 2 The VIA-P Button Triggered USB Copy Utility - From this window you can click: • Execute-To execute all edited tasks. • Task-To edit copy tasks. • Close-To close the configuration utility. 12 Configuration (V1.00) window opens. To configure the Rocketfish One-Touch backup software: 1 Double-click the Button Triggered Copy Utility icon, or right-click the icon and select Configuration.

User Manual (English)
Page 15
...-click on a task item, or right-click and select an item to modify that item. • Active List-To open a window to arrange the active task list. The Arrange copy tasks window opens. A default file is generated by the application and is comprised of a source directory, a destination directory, and attributes. For ...-To save the current edited task list to the task list. • Delete-To delete the selected task. • Modify-To modify the selected task. RF-HD35 13 Task item Each copy task is named "Disk," with a unique signature, such as "5555AAAA" and a "CT" extension.
...-click on a task item, or right-click and select an item to modify that item. • Active List-To open a window to arrange the active task list. The Arrange copy tasks window opens. A default file is generated by the application and is comprised of a source directory, a destination directory, and attributes. For ...-To save the current edited task list to the task list. • Delete-To delete the selected task. • Modify-To modify the selected task. RF-HD35 13 Task item Each copy task is named "Disk," with a unique signature, such as "5555AAAA" and a "CT" extension.

User Manual (English)
Page 16
...-If this item is checked, all source files will be copied to the destination directory. 4 Highlight a task item, then click Modify. The Edit Copy Task window opens. 5 Type in the source directory will be copied to their destinations when the source file is more current than the destination file. 14 When...
...-If this item is checked, all source files will be copied to the destination directory. 4 Highlight a task item, then click Modify. The Edit Copy Task window opens. 5 Type in the source directory will be copied to their destinations when the source file is more current than the destination file. 14 When...
User Manual (English)
Page 17
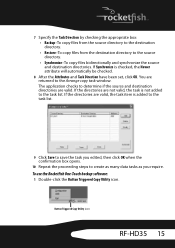
... to save the task you edited, then click OK when the confirmation box opens. 10 Repeat the proceeding steps to the Arrange copy task window. If the directories are returned to create as many data tasks as you require. If Synchronize is not added to the source directory. &#...and Task Direction have been set, click OK. If the directories are valid. To use the Rocketfish One-Touch backup software: 1 Double-click the Button Triggered Copy Utility icon. Button Triggered Copy Utility icon RF-HD35 15 7 Specify the Task Direction by checking the appropriate box: • Backup-To copy ...
... to save the task you edited, then click OK when the confirmation box opens. 10 Repeat the proceeding steps to the Arrange copy task window. If the directories are returned to create as many data tasks as you require. If Synchronize is not added to the source directory. &#...and Task Direction have been set, click OK. If the directories are valid. To use the Rocketfish One-Touch backup software: 1 Double-click the Button Triggered Copy Utility icon. Button Triggered Copy Utility icon RF-HD35 15 7 Specify the Task Direction by checking the appropriate box: • Backup-To copy ...

User Manual (English)
Page 18
The Active task list window opens. 3 The windows shows an Active Tasks list and an Inactive Tasks list. The Arrange Copy Tasks window opens. Active List button 2 Click the Active List button. Move the tasks from one list to the other by highlighting the task and pressing the left or right arrow buttons to move it. 4 Click Close when you have configured the list as you require. 16
The Active task list window opens. 3 The windows shows an Active Tasks list and an Inactive Tasks list. The Arrange Copy Tasks window opens. Active List button 2 Click the Active List button. Move the tasks from one list to the other by highlighting the task and pressing the left or right arrow buttons to move it. 4 Click Close when you have configured the list as you require. 16
User Manual (English)
Page 19
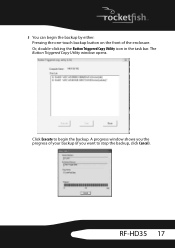
A progress window shows you the progress of the enclosure. Click Execute to begin the backup by either: Pressing the one-touch backup button on the front of your backup (if you want to stop the backup, click Cancel). The Button Triggered Copy Utility window opens. RF-HD35 17 Or, double-clicking the Button Triggered Copy Utility icon in the task bar. 5 You can begin the backup.
A progress window shows you the progress of the enclosure. Click Execute to begin the backup by either: Pressing the one-touch backup button on the front of your backup (if you want to stop the backup, click Cancel). The Button Triggered Copy Utility window opens. RF-HD35 17 Or, double-clicking the Button Triggered Copy Utility icon in the task bar. 5 You can begin the backup.
User Manual (English)
Page 20
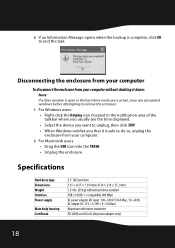
...× 35.2 mm) 1.21 lbs. (550 g) without shutting it down: Note: If a drive window is open or the hard drive enclosure is active, close any associated windows before attempting to remove the enclosure. 1 For Windows users: • Right-click the Hotplug icon (located in the notification area of the taskbar where... you usually see the time displayed. • Select the device you want to unplug, then click STOP. • When Windows notifies you that it is complete, click OK to do so, unplug the enclosure from your computer. 2 For Macintosh users: • Drag the ...
...× 35.2 mm) 1.21 lbs. (550 g) without shutting it down: Note: If a drive window is open or the hard drive enclosure is active, close any associated windows before attempting to remove the enclosure. 1 For Windows users: • Right-click the Hotplug icon (located in the notification area of the taskbar where... you usually see the time displayed. • Select the device you want to unplug, then click STOP. • When Windows notifies you that it is complete, click OK to do so, unplug the enclosure from your computer. 2 For Macintosh users: • Drag the ...

