
Operating Instructions
Page 1
For safe and correct use this manual before you use , be sure to Components Setting up the Scanner Installing Software Setting Originals Using the TWAIN Driver Appendix Read this manual carefully before using the machine. Image Scanner Operating Instructions Guide to read the Safety Information in this machine and keep it handy for future reference.
For safe and correct use this manual before you use , be sure to Components Setting up the Scanner Installing Software Setting Originals Using the TWAIN Driver Appendix Read this manual carefully before using the machine. Image Scanner Operating Instructions Guide to read the Safety Information in this machine and keep it handy for future reference.

Operating Instructions
Page 3
... Turning the Power On when Connected with SCSI Interface 33 Turning the Power On when Connected with USB/IEEE1394 Interface 33 Turning the Power Off 33 Using the Hard Reset Switch 34 3. Installing Software Installing TWAIN Driver 35 System Requirements 35 Installing TWAIN Driver 36 Installing DeskTopBinder Lite 38 System Requirements 38 Installing DeskTopBinder Lite 39 Installing ISIS Driver 40 System Requirements 40 Installing ISIS Driver 41 i Setting up the Scanner Confirmations Before the Setup 11 Location, Space and Environment 11 Disengaging the lock...
... Turning the Power On when Connected with SCSI Interface 33 Turning the Power On when Connected with USB/IEEE1394 Interface 33 Turning the Power Off 33 Using the Hard Reset Switch 34 3. Installing Software Installing TWAIN Driver 35 System Requirements 35 Installing TWAIN Driver 36 Installing DeskTopBinder Lite 38 System Requirements 38 Installing DeskTopBinder Lite 39 Installing ISIS Driver 40 System Requirements 40 Installing ISIS Driver 41 i Setting up the Scanner Confirmations Before the Setup 11 Location, Space and Environment 11 Disengaging the lock...

Operating Instructions
Page 4
... Specifications...86 ii INDEX...88 Using the TWAIN Driver Procedure Breakdown 57 Scanning Originals 58 What You Can Do with the TWAIN Driver 60 Functions of the Scanner 81 How Data Size Changes Depending on the Exposure Glass 48 Placing the Originals in Installation and Other Problems 70 Cleaning ...71 Cleaning the Original Table Cove 72 Cleaning Under the Pressure Panel 73 Cleaning Under the Background Panel 74 Cleaning Inside the ADF Cover...
... Specifications...86 ii INDEX...88 Using the TWAIN Driver Procedure Breakdown 57 Scanning Originals 58 What You Can Do with the TWAIN Driver 60 Functions of the Scanner 81 How Data Size Changes Depending on the Exposure Glass 48 Placing the Originals in Installation and Other Problems 70 Cleaning ...71 Cleaning the Original Table Cove 72 Cleaning Under the Pressure Panel 73 Cleaning Under the Background Panel 74 Cleaning Inside the ADF Cover...
Operating Instructions
Page 10
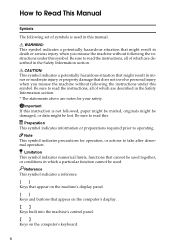
... machine without following the instructions under this symbol. R CAUTION: This symbol indicates a potentially hazardous situation that appear on the computer's display. {} Keys built into the machine's control panel. {} Keys on the machine's display panel. [] Keys and buttons that might be used in the Safety Information section. * The statements above are notes for operation, or actions to take...
... machine without following the instructions under this symbol. R CAUTION: This symbol indicates a potentially hazardous situation that appear on the computer's display. {} Keys built into the machine's control panel. {} Keys on the machine's display panel. [] Keys and buttons that might be used in the Safety Information section. * The statements above are notes for operation, or actions to take...

Operating Instructions
Page 25
... connect the scanner with SCSI-1/2 compliant devices as follows: • This scanner is male 50pin halfpitch pin type. You can daisy chain with the SCSI interface. The SCSI connecter of the scanner ON before the installation, click the [Cancel] button to discontinue the wizard. Set the DIP switches properly when you cannot use SCAM corresponding to SCSI board and driver for SCAM (SCSI Configured Automatically). If you can connect the scanner...
... connect the scanner with SCSI-1/2 compliant devices as follows: • This scanner is male 50pin halfpitch pin type. You can daisy chain with the SCSI interface. The SCSI connecter of the scanner ON before the installation, click the [Cancel] button to discontinue the wizard. Set the DIP switches properly when you cannot use SCAM corresponding to SCSI board and driver for SCAM (SCSI Configured Automatically). If you can connect the scanner...

Operating Instructions
Page 39
... machine is used for the TWAIN compliant applications. System Requirements Install TWAIN Driver to be used as a TWAIN scanner and an ISIS scanner. 3. A TWAIN driver and its applications are to be installed for the TWAIN scanner, and an ISIS driver and its applications are to the computer that meets the system requirements below. (A "recommended" environment is necessary to install the TWAIN driver to be installed for scanning documents by 16,770K Full color Mode.) •...
... machine is used for the TWAIN compliant applications. System Requirements Install TWAIN Driver to be used as a TWAIN scanner and an ISIS scanner. 3. A TWAIN driver and its applications are to be installed for the TWAIN scanner, and an ISIS driver and its applications are to the computer that meets the system requirements below. (A "recommended" environment is necessary to install the TWAIN driver to be installed for scanning documents by 16,770K Full color Mode.) •...

Operating Instructions
Page 41
... installation, follow the instruction accordingly. ❒ Even when "No approval of the logo test" appears on the display in "Readme.txt". "Scanner Driver(s), Utilities and Operating Instructions" CD-ROM is not required. Be sure to read them before use. -Changing the connecting interface When you change the connecting interface from the interface first installed, change the cable to set the Windows system CD-ROM appears on the display, you connect...
... installation, follow the instruction accordingly. ❒ Even when "No approval of the logo test" appears on the display in "Readme.txt". "Scanner Driver(s), Utilities and Operating Instructions" CD-ROM is not required. Be sure to read them before use. -Changing the connecting interface When you change the connecting interface from the interface first installed, change the cable to set the Windows system CD-ROM appears on the display, you connect...

Operating Instructions
Page 43
... the instructions on to Windows 2000/XP, or Windows Server 2003. C Click [DeskTopBinder Lite]. Installing DeskTopBinder Lite Installing DeskTopBinder Lite Preparation Log on the screen. The Installer of DeskTopBinder Lite. 39 Reference For information about the subsequent installation procedure, see the Setup Guide which can be displayed from the Setup screen of the DeskTopBinder Lite starts. A Start Windows, and then insert the supplied CD-ROM labeled "Scanner Driver(s), Utilities and Operating Instructions...
... the instructions on to Windows 2000/XP, or Windows Server 2003. C Click [DeskTopBinder Lite]. Installing DeskTopBinder Lite Installing DeskTopBinder Lite Preparation Log on the screen. The Installer of DeskTopBinder Lite. 39 Reference For information about the subsequent installation procedure, see the Setup Guide which can be displayed from the Setup screen of the DeskTopBinder Lite starts. A Start Windows, and then insert the supplied CD-ROM labeled "Scanner Driver(s), Utilities and Operating Instructions...

Operating Instructions
Page 44
Preparation Start installation, retaining the power of the scanner OFF. System Requirements 3 Install ISIS Driver to be used as the ISIS scanner; Installing Software Installing ISIS Driver When this machine is necessary to install the ISIS driver to the computer that meets the system requirements below. • Hardware PC/AT compatible • Display Resolution 1024 × 768 pixels, 256 colors or higher (16,770K colors or higher recommended) • Operating Systems Windows 98/98...
Preparation Start installation, retaining the power of the scanner OFF. System Requirements 3 Install ISIS Driver to be used as the ISIS scanner; Installing Software Installing ISIS Driver When this machine is necessary to install the ISIS driver to the computer that meets the system requirements below. • Hardware PC/AT compatible • Display Resolution 1024 × 768 pixels, 256 colors or higher (16,770K colors or higher recommended) • Operating Systems Windows 98/98...
Operating Instructions
Page 47
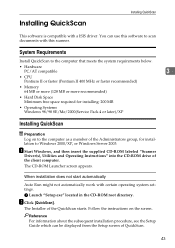
A Start Windows, and then insert the supplied CD-ROM labeled "Scanner Driver(s), Utilities and Operating Instructions" into the CD-ROM drive of the Administrators group, for installing: 200 MB • Operating Systems Windows 98/98 SE/Me/2000(Service Pack 4 or later)/XP Installing QuickScan Preparation Log on the screen. Follow the instructions on to scan documents with a ISIS driver. B Click [QuickScan]. The CD-ROM Launcher screen appears. Installing QuickScan Installing QuickScan This software is compatible with this...
A Start Windows, and then insert the supplied CD-ROM labeled "Scanner Driver(s), Utilities and Operating Instructions" into the CD-ROM drive of the Administrators group, for installing: 200 MB • Operating Systems Windows 98/98 SE/Me/2000(Service Pack 4 or later)/XP Installing QuickScan Preparation Log on the screen. Follow the instructions on to scan documents with a ISIS driver. B Click [QuickScan]. The CD-ROM Launcher screen appears. Installing QuickScan Installing QuickScan This software is compatible with this...

Operating Instructions
Page 56
... simplex printed, set the Background Panel to White. Changing the Color of the Background Panel for the Exposure Glass" 52 ADC035S Reference ⇒ p.54 "Changing the Color of the Background Panel for the ADF Preparation Skip this procedure if you use the simplex scanner. Setting Originals Changing the Color of the Background Panel Change the color of the Background Panel to enable auto original size detection or scan in [Back.Panel] tab on the TWAIN driver...
... simplex printed, set the Background Panel to White. Changing the Color of the Background Panel for the Exposure Glass" 52 ADC035S Reference ⇒ p.54 "Changing the Color of the Background Panel for the ADF Preparation Skip this procedure if you use the simplex scanner. Setting Originals Changing the Color of the Background Panel Change the color of the Background Panel to enable auto original size detection or scan in [Back.Panel] tab on the TWAIN driver...

Operating Instructions
Page 61
... TWAIN driver. ⇒ "Scanning Originals"I Save the scanned image. Menu and procedure may be different depending on the application you use . ⇒ "Scanning Originals"A Select and start the TWAIN driver. Menu may be different depending on the application you use . ⇒ "Scanning Originals"K 57 5. Procedure Breakdown The following overview diagram shows the flow of the TWAIN driver are introduced. Using the TWAIN Driver This chapter describes the operations for scanning documents from a computer using...
... TWAIN driver. ⇒ "Scanning Originals"I Save the scanned image. Menu and procedure may be different depending on the application you use . ⇒ "Scanning Originals"A Select and start the TWAIN driver. Menu may be different depending on the application you use . ⇒ "Scanning Originals"K 57 5. Procedure Breakdown The following overview diagram shows the flow of the TWAIN driver are introduced. Using the TWAIN Driver This chapter describes the operations for scanning documents from a computer using...

Operating Instructions
Page 62
... the TWAIN driver help files for scanned image(s)] area. A On the [Start] menu, point to [Program], point to scan originals using the TWAIN scanner function. Scanned data will be closed. played in the [File format for the details of making the scan settings and the preview function. 58 The [Scanner Settings] dialog box closes. Note ❒ Check the settings in the [Source] list. The TWAIN driver for details. After a short while, the dialog box of the scanner you installed with...
... the TWAIN driver help files for scanned image(s)] area. A On the [Start] menu, point to [Program], point to scan originals using the TWAIN scanner function. Scanned data will be closed. played in the [File format for the details of making the scan settings and the preview function. 58 The [Scanner Settings] dialog box closes. Note ❒ Check the settings in the [Source] list. The TWAIN driver for details. After a short while, the dialog box of the scanner you installed with...

Operating Instructions
Page 64
... the scanner to start scan- You can call out and save the original Scan (Standard/Photo Modes. /OCR/Filing), User saved 100 scan 5 Orientation: modes Standard 0 deg. Endorser User set the originals one by one page image. 256 Colors (in the left to the scanned images. When you are scanning the originals which are scanning the /Left 90 deg. If you enable ICM, the TWAIN Driver will match the color data according to the color pro- file. Using the TWAIN Driver What...
... the scanner to start scan- You can call out and save the original Scan (Standard/Photo Modes. /OCR/Filing), User saved 100 scan 5 Orientation: modes Standard 0 deg. Endorser User set the originals one by one page image. 256 Colors (in the left to the scanned images. When you are scanning the originals which are scanning the /Left 90 deg. If you enable ICM, the TWAIN Driver will match the color data according to the color pro- file. Using the TWAIN Driver What...

Operating Instructions
Page 71
... original size by use the USB/IEEE1394 con- Check if the ner. • Check the power source of the scanner till it is white, the scan- • Change the [Original Size:] to the correct setting. original size. • When the original is im- Please use the USB or IEEE1394 connection. number and call the service repre- started before turning er from • Note the error message and error occurred in the scanner. 67...
... original size by use the USB/IEEE1394 con- Check if the ner. • Check the power source of the scanner till it is white, the scan- • Change the [Original Size:] to the correct setting. original size. • When the original is im- Please use the USB or IEEE1394 connection. number and call the service repre- started before turning er from • Note the error message and error occurred in the scanner. 67...

Operating Instructions
Page 72
.... then restart 6 scanning. inal is set to original. Panel on the exposure glass. Clear Misfeed(s) in • If the same error occurs again, the operating system. Black even the panel is set to white on the TWAIN driver is Jammed or Double Fed in [Initial Settings] on the TWAIN driver to detect the • The settings for the ADF. nal size. To use the auto detect function. tive. virtual memory on Close all...
.... then restart 6 scanning. inal is set to original. Panel on the exposure glass. Clear Misfeed(s) in • If the same error occurs again, the operating system. Black even the panel is set to white on the TWAIN driver is Jammed or Double Fed in [Initial Settings] on the TWAIN driver to detect the • The settings for the ADF. nal size. To use the auto detect function. tive. virtual memory on Close all...

Operating Instructions
Page 73
... side (regular paper mode). registered. Double Feed has • Double Feed (More • To continue scanning, replace the occurred. continue scanning? set the scan area smaller and scan again. mum file size for the scan- When you do not use . sage will be the lowest resolution available for the [Endorser] tab. Cannot add any more scanning mode. • Maximum number of • You can add a maximum of 100 the scanning modes is scanning...
... side (regular paper mode). registered. Double Feed has • Double Feed (More • To continue scanning, replace the occurred. continue scanning? set the scan area smaller and scan again. mum file size for the scan- When you do not use . sage will be the lowest resolution available for the [Endorser] tab. Cannot add any more scanning mode. • Maximum number of • You can add a maximum of 100 the scanning modes is scanning...

Operating Instructions
Page 74
... TWAIN Driver from "Scanner Driver(s), Utilities and Operating Instructions" CD-ROM. See p.10 "DIP Switches" for details. • Set the DIP Switch No 2 to the correct USB driver. 6 70 stalled. The computer with USB driver when the connection. "Intel PCI to USB Enhanced Host Controller" will be updated to the ON position. USB or IEEE1394. See p.35 "Installing Software" for details. • Open the Device Manager. Then, press the Hard Reset Switch. Appendix When in Installation and Other Problems...
... TWAIN Driver from "Scanner Driver(s), Utilities and Operating Instructions" CD-ROM. See p.10 "DIP Switches" for details. • Set the DIP Switch No 2 to the correct USB driver. 6 70 stalled. The computer with USB driver when the connection. "Intel PCI to USB Enhanced Host Controller" will be updated to the ON position. USB or IEEE1394. See p.35 "Installing Software" for details. • Open the Device Manager. Then, press the Hard Reset Switch. Appendix When in Installation and Other Problems...
Operating Instructions
Page 89
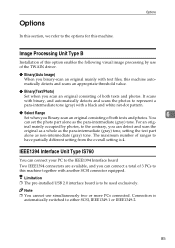
... (gray) tone, setting the text part alone as the para-intermediate (gray) tone. Connection is to be used exclusively. Limitation ❒ The pre-installed USB 2.0 interface board is automatically switched to the contrary, you Binary-scan an original consisting of both texts and photos. Options Image Processing Unit Type B Installation of this option enables the following visual image processing by photos, to either SCSI, IEEE1349-1 or...
... (gray) tone, setting the text part alone as the para-intermediate (gray) tone. Connection is to be used exclusively. Limitation ❒ The pre-installed USB 2.0 interface board is automatically switched to the contrary, you Binary-scan an original consisting of both texts and photos. Options Image Processing Unit Type B Installation of this option enables the following visual image processing by photos, to either SCSI, IEEE1349-1 or...

Operating Instructions
Page 92
... Original Sizes, 46 Automatic Document Feeder, 7 B Background Panel for Exposure Glass, 8, 73 Background Panel for the ADF Changing the Color, 52 Background Panel for the Exposure Glass Changing the Color, 54 C Cleaning ADF Exposure Glass 1, 73 ADF Exposure Glass 2, 74 Background Panel for Exposure Glass, 73 Exposure Glass, 73 Feed Roller, 72 Filter, 77 {Clear Modes} key, 7 Connecting Computer, 21 IEEE1394, 29 IEEE1394 Board, 18 Image-Processing Unit, 16 Options, 16 Power Code, 31 SCSI, 21 USB, 28 D Data Size, 82 DeskTopBinder Lite Installation, 38 DIP Switches...
... Original Sizes, 46 Automatic Document Feeder, 7 B Background Panel for Exposure Glass, 8, 73 Background Panel for the ADF Changing the Color, 52 Background Panel for the Exposure Glass Changing the Color, 54 C Cleaning ADF Exposure Glass 1, 73 ADF Exposure Glass 2, 74 Background Panel for Exposure Glass, 73 Exposure Glass, 73 Feed Roller, 72 Filter, 77 {Clear Modes} key, 7 Connecting Computer, 21 IEEE1394, 29 IEEE1394 Board, 18 Image-Processing Unit, 16 Options, 16 Power Code, 31 SCSI, 21 USB, 28 D Data Size, 82 DeskTopBinder Lite Installation, 38 DIP Switches...


