
Hardware Guide
Page 4
Cleaning the Printer Cautions to Take When Cleaning...113 Cleaning the Toner Density Sensor...114 Cleaning the Friction Pad and the Paper Feed Roller 116 Cleaning the Registration Roller and the Paper Tray 119 8. Paper and Other ... Specifying an IP Address for IPv6 (No DHCP 52 Receiving an IP Address for Type 2 112 7. Replacing Consumables Replacing the Print Cartridges...99 Replacing the Waste Toner Bottle...105 Replacing the Intermediate Transfer Unit (for Type 2 111 Replacing the Fusing Unit and Transfer Roller (for IPv6 Automatically (DHCP 54 Setting the Ethernet Speed...
Cleaning the Printer Cautions to Take When Cleaning...113 Cleaning the Toner Density Sensor...114 Cleaning the Friction Pad and the Paper Feed Roller 116 Cleaning the Registration Roller and the Paper Tray 119 8. Paper and Other ... Specifying an IP Address for IPv6 (No DHCP 52 Receiving an IP Address for Type 2 112 7. Replacing Consumables Replacing the Print Cartridges...99 Replacing the Waste Toner Bottle...105 Replacing the Intermediate Transfer Unit (for Type 2 111 Replacing the Fusing Unit and Transfer Roller (for IPv6 Automatically (DHCP 54 Setting the Ethernet Speed...

Hardware Guide
Page 5
... Again after it has been Inactive for a Long Period 152 Moving and Transporting the Printer...154 Moving the Printer...155 Consumables...156 Print Cartridge...156 Waste Toner Bottle...157 Specifications...158 Main Unit...158 Options...161 Trademarks...162 INDEX...165 3
... Again after it has been Inactive for a Long Period 152 Moving and Transporting the Printer...154 Moving the Printer...155 Consumables...156 Print Cartridge...156 Waste Toner Bottle...157 Specifications...158 Main Unit...158 Options...161 Trademarks...162 INDEX...165 3

Hardware Guide
Page 17
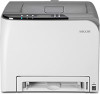
Exterior: Front View 1 CER020 1. Tray 1 Up to 250 sheets of the printer's components. Front Cover Open this cover to replace the waste toner bottle or remove jammed paper. Power Switch Use this cover, pull the lever on and off. 5. Top Cover Open Lever 15 Top Cover Open this cover ...
Exterior: Front View 1 CER020 1. Tray 1 Up to 250 sheets of the printer's components. Front Cover Open this cover to replace the waste toner bottle or remove jammed paper. Power Switch Use this cover, pull the lever on and off. 5. Top Cover Open Lever 15 Top Cover Open this cover ...

Hardware Guide
Page 20
... Loads from the printer rear, in the order of cyan (C), magenta (M), yellow (Y), and black (K). Waste Toner Bottle Collects toner that is wasted during printing. 1. Guide to check for or remove jammed paper. You might have to handle this unit... Transfer unit Removes to the paper. "Replace Transfer Roller" 18 Fusing Unit Fuses toner to change a waste toner bottle. If the following message appears on the control panel, replace the waste toner bottle: "Replace Waste Toner Bottle" 4. If the following message appears on the control panel, contact your service representative ...
... Loads from the printer rear, in the order of cyan (C), magenta (M), yellow (Y), and black (K). Waste Toner Bottle Collects toner that is wasted during printing. 1. Guide to check for or remove jammed paper. You might have to handle this unit... Transfer unit Removes to the paper. "Replace Transfer Roller" 18 Fusing Unit Fuses toner to change a waste toner bottle. If the following message appears on the control panel, replace the waste toner bottle: "Replace Waste Toner Bottle" 4. If the following message appears on the control panel, contact your service representative ...

Hardware Guide
Page 107
... display, replace the waste toner bottle: "Replace Waste Toner Bottle" • Waste toner bottles cannot be reused. • Purchasing and storing extra waste toner bottles are brought into 6 contact with this machine becomes very hot. If the transfer unit is installed. Do not touch the parts labeled " " (indicating a hot surface). • Store toner (new or used toner. Replacing the Waste Toner Bottle Replacing the Waste Toner Bottle • Do not...
... display, replace the waste toner bottle: "Replace Waste Toner Bottle" • Waste toner bottles cannot be reused. • Purchasing and storing extra waste toner bottles are brought into 6 contact with this machine becomes very hot. If the transfer unit is installed. Do not touch the parts labeled " " (indicating a hot surface). • Store toner (new or used toner. Replacing the Waste Toner Bottle Replacing the Waste Toner Bottle • Do not...

Hardware Guide
Page 108
... forward. 6 CER014 3. Slide both green ends of the transfer unit, and then lift it up. 106 CER015 Replacing Consumables • Comply with the waste toner bottle Recycling Program, whereby used waste toner bottles are collected for processing. Hold the tabs on both levers on the front cover, and then carefully lower the front cover. For details...
... forward. 6 CER014 3. Slide both green ends of the transfer unit, and then lift it up. 106 CER015 Replacing Consumables • Comply with the waste toner bottle Recycling Program, whereby used waste toner bottles are collected for processing. Hold the tabs on both levers on the front cover, and then carefully lower the front cover. For details...

Hardware Guide
Page 109
Hold the center of the waste toner bottle, and then carefully pull it out. 107 CER036 5. Pull the waste toner bottle halfway out, grab the bottle, and then pull it straight out. 6 CER075 CER037 To prevent the waste toner bottle touching the intermediate transfer unit, do not lift the bottle while pulling it out horizontally. Replacing the Waste Toner Bottle 4.
Hold the center of the waste toner bottle, and then carefully pull it out. 107 CER036 5. Pull the waste toner bottle halfway out, grab the bottle, and then pull it straight out. 6 CER075 CER037 To prevent the waste toner bottle touching the intermediate transfer unit, do not lift the bottle while pulling it out horizontally. Replacing the Waste Toner Bottle 4.

Hardware Guide
Page 110
Leave the bottle cap open. 108 Hold the center of the new waste toner bottle, and then carefully insert it halfway into the printer body. 6. Close the bottle cap. 6 CER039 CER089 7. Replacing Consumables CER038 6.
Leave the bottle cap open. 108 Hold the center of the new waste toner bottle, and then carefully insert it halfway into the printer body. 6. Close the bottle cap. 6 CER039 CER089 7. Replacing Consumables CER038 6.

Hardware Guide
Page 111
Push the middle part all the way in the waste toner bottle until it . 6 CER041 8. CER016 109 Push in . Replacing the Waste Toner Bottle CER040 To prevent the waste toner bottle touching the intermediate transfer unit, do not lift the bottle while inserting it clicks into place.
Push the middle part all the way in the waste toner bottle until it . 6 CER041 8. CER016 109 Push in . Replacing the Waste Toner Bottle CER040 To prevent the waste toner bottle touching the intermediate transfer unit, do not lift the bottle while inserting it clicks into place.

Hardware Guide
Page 127
...roller. Remove paper from the bypass tray. Prepare a new print cartridge. Contact your sales or service belt. representative. Replace the waste toner bottle with the print job, because tray 1 or tray 2 was specified as the input tray but paper was set in the duplex ... representative. Error & Status Messages on the Control Panel Message Explanation Recommended Action Misfd: Dupl Unit Internal Misfeed There is time to replace the waste toner bottle. There is a paper jam in the fusing unit. See p.143 "Removing Misfed Paper". Misfeed: PprTray There is a paper jam in Tray...
...roller. Remove paper from the bypass tray. Prepare a new print cartridge. Contact your sales or service belt. representative. Replace the waste toner bottle with the print job, because tray 1 or tray 2 was specified as the input tray but paper was set in the duplex ... representative. Error & Status Messages on the Control Panel Message Explanation Recommended Action Misfd: Dupl Unit Internal Misfeed There is time to replace the waste toner bottle. There is a paper jam in the fusing unit. See p.143 "Removing Misfed Paper". Misfeed: PprTray There is a paper jam in Tray...

Hardware Guide
Page 128
...print cartridge is not installed correctly. Clean the toner density sensor. Reset Tray 1 The indicated paper input tray 1 Install the indicated paper input is a problem with the printer's controller. Set the waste toner bottle correctly. If the error occurs again, contact your... sales or service representative. See p.114 "Cleaning the Toner Density Sensor". 126 Set the indicated print cartridge correctly. Turn off the...
...print cartridge is not installed correctly. Clean the toner density sensor. Reset Tray 1 The indicated paper input tray 1 Install the indicated paper input is a problem with the printer's controller. Set the waste toner bottle correctly. If the error occurs again, contact your... sales or service representative. See p.114 "Cleaning the Toner Density Sensor". 126 Set the indicated print cartridge correctly. Turn off the...

Hardware Guide
Page 156
... cord can cause the optional paper tray unit to disconnect all cables from the printer, and then move the machine. Use of the toners, nor the waste toner bottle to prevent toner spill inside the machine. 10 Repack the printer in fire or electric shock. • When disconnecting the power cord from the wall outlet...
... cord can cause the optional paper tray unit to disconnect all cables from the printer, and then move the machine. Use of the toners, nor the waste toner bottle to prevent toner spill inside the machine. 10 Repack the printer in fire or electric shock. • When disconnecting the power cord from the wall outlet...

Hardware Guide
Page 159
... use this printer, use . • Print cartridges (consumables) are not changed when necessary, printing will become impossible. We recommend keeping a stock of bottles or purchasing them soon. 10 157 Waste Toner Bottle Name Waste Toner Bottle SP C220 Average printable number of pages *1 25,000 pages *1 A4/letter 5% test chart, 3 pages / job, printing in 50% monochrome/color. &#...cartridges may need to be printed at a time, paper type and paper size used, and environmental conditions such as temperature and humidity. • If the waste toner bottles are not covered by warranty.
... use this printer, use . • Print cartridges (consumables) are not changed when necessary, printing will become impossible. We recommend keeping a stock of bottles or purchasing them soon. 10 157 Waste Toner Bottle Name Waste Toner Bottle SP C220 Average printable number of pages *1 25,000 pages *1 A4/letter 5% test chart, 3 pages / job, printing in 50% monochrome/color. &#...cartridges may need to be printed at a time, paper type and paper size used, and environmental conditions such as temperature and humidity. • If the waste toner bottles are not covered by warranty.

Hardware Guide
Page 168
...misfed paper 143 Replacing the Fusing Unit and Transfer Rollor. .112 Replacing the intermediate transfer unit............111 Replacing the print cartridge 99 Replacing the waste toner bottle 105 S Scroll Keys 20 Selecting the display language 36 Setting a paper size (tray 1 80 Setting a paper size (tray 2 80... messages 123 Stop/Start key 20 Storing paper 61 Symbols 4 T Test printing 36 Thick paper 1 62 Thick paper 2 62 Thin paper 62 Toner density sensor 114 Trademarks 162 Transfer Rollor 112 Tray 1 93 Troubleshooting 123, 127, 128, 132 Turning the power on 33 Type 1 model 5...
...misfed paper 143 Replacing the Fusing Unit and Transfer Rollor. .112 Replacing the intermediate transfer unit............111 Replacing the print cartridge 99 Replacing the waste toner bottle 105 S Scroll Keys 20 Selecting the display language 36 Setting a paper size (tray 1 80 Setting a paper size (tray 2 80... messages 123 Stop/Start key 20 Storing paper 61 Symbols 4 T Test printing 36 Thick paper 1 62 Thick paper 2 62 Thin paper 62 Toner density sensor 114 Trademarks 162 Transfer Rollor 112 Tray 1 93 Troubleshooting 123, 127, 128, 132 Turning the power on 33 Type 1 model 5...

Hardware Guide
Page 169
Unsupported paper 68 USB connection 129 Using the printer again after it has been inactive for a long period 152 V Viewing the HTML manuals 12 W WARNING labels 7 Waste toner bottle 105, 157 When printer does not print 128 Where to put the printer 23 167
Unsupported paper 68 USB connection 129 Using the printer again after it has been inactive for a long period 152 V Viewing the HTML manuals 12 W WARNING labels 7 Waste toner bottle 105, 157 When printer does not print 128 Where to put the printer 23 167


