Operating Instructions
Page 1
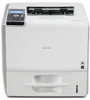
Operating Instructions Hardware Guide 1 Guide to the Printer 2 Setting Up the Printer 3 Installing Options 4 Connecting the Printer 5 Configuration 6 Loading Paper 7 Maintaining the Printer 8 Adjusting the Printer 9 Troubleshooting 10 Removing Misfed Paper 11 Appendix Read this manual carefully before you use , be sure to read "Safety Information" before using the machine. For safe and correct use this machine and keep it handy for future reference.
Operating Instructions Hardware Guide 1 Guide to the Printer 2 Setting Up the Printer 3 Installing Options 4 Connecting the Printer 5 Configuration 6 Loading Paper 7 Maintaining the Printer 8 Adjusting the Printer 9 Troubleshooting 10 Removing Misfed Paper 11 Appendix Read this manual carefully before you use , be sure to read "Safety Information" before using the machine. For safe and correct use this machine and keep it handy for future reference.
Operating Instructions
Page 4
... Paper Feed Unit...48 Installing the Memory Expansion Units...52 Installing the Hard Disk...52 Installing the SDRAM Module...55 Installing the Interface Units...59 Installing the Gigabit Ethernet Board...59 Installing the Wireless LAN Interface Board 61 Installing the IEEE 1284 Interface Board 63 Installing the SD Memory Card Options...66 4. Connecting the Printer Ethernet Cable Connection...69 Reading the LED Lamps...71 USB Cable Connection...72 Parallel Cable Connection...74 5. Configuration Ethernet Configuration...75 Specifying an IP Address (No DHCP)...76 Receiving an IP Address...
... Paper Feed Unit...48 Installing the Memory Expansion Units...52 Installing the Hard Disk...52 Installing the SDRAM Module...55 Installing the Interface Units...59 Installing the Gigabit Ethernet Board...59 Installing the Wireless LAN Interface Board 61 Installing the IEEE 1284 Interface Board 63 Installing the SD Memory Card Options...66 4. Connecting the Printer Ethernet Cable Connection...69 Reading the LED Lamps...71 USB Cable Connection...72 Parallel Cable Connection...74 5. Configuration Ethernet Configuration...75 Specifying an IP Address (No DHCP)...76 Receiving an IP Address...
Operating Instructions
Page 13
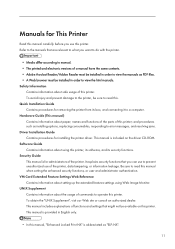
... html manuals. VM Card Extended Feature Settings Web Reference Contains information about paper; This manual includes explanations of functions and settings that you can use to prevent unauthorized use this manual, "Enhanced Locked Print NX" is abbreviated as installing options, replacing consumables, responding to what you use of commands to a computer. Refer to the manuals that are relevant to error messages, and resolving jams. Driver Installation Guide Contains procedures for removing the printer from...
... html manuals. VM Card Extended Feature Settings Web Reference Contains information about paper; This manual includes explanations of functions and settings that you can use to prevent unauthorized use this manual, "Enhanced Locked Print NX" is abbreviated as installing options, replacing consumables, responding to what you use of commands to a computer. Refer to the manuals that are relevant to error messages, and resolving jams. Driver Installation Guide Contains procedures for removing the printer from...
Operating Instructions
Page 26
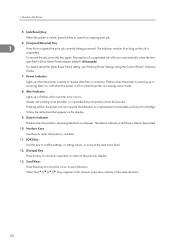
... print job currently being processed. The indicator remains lit as long as print cartridge. For details about the [Auto Reset Timer] setting, see "Making Printer Settings Using the Control Panel", Software Guide. 7. It is unlit when the power is off or while the printer is in indicator is lit if there is warming up or flashes when a printer error occurs. Data In Indicator Flashes when the printer is suspended. The data in energy saver mode. 8. Number...
... print job currently being processed. The indicator remains lit as long as print cartridge. For details about the [Auto Reset Timer] setting, see "Making Printer Settings Using the Control Panel", Software Guide. 7. It is unlit when the power is off or while the printer is in indicator is lit if there is warming up or flashes when a printer error occurs. Data In Indicator Flashes when the printer is suspended. The data in energy saver mode. 8. Number...
Operating Instructions
Page 33
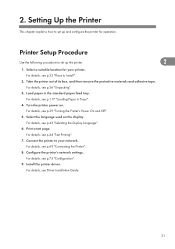
...117 "Loading Paper in the standard paper feed tray. For details, see p.75 "Configuration". 9. Take the printer out of its box, and then remove the protective materials and adhesive tape. Load paper in Trays". 4. Configure the printer's network settings. For details, see p.43 "Selecting the Display Language". 6. Install the printer driver. Turn the printer power on the display. Printer Setup Procedure Use the following procedure to your printer. Connect the printer to set up the printer. 2 1. 2. Print a test page. Select a suitable location for operation...
...117 "Loading Paper in the standard paper feed tray. For details, see p.75 "Configuration". 9. Take the printer out of its box, and then remove the protective materials and adhesive tape. Load paper in Trays". 4. Configure the printer's network settings. For details, see p.43 "Selecting the Display Language". 6. Install the printer driver. Turn the printer power on the display. Printer Setup Procedure Use the following procedure to your printer. Connect the printer to set up the printer. 2 1. 2. Print a test page. Select a suitable location for operation...
Operating Instructions
Page 47
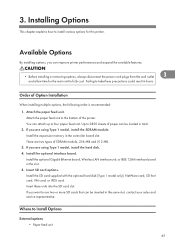
... of the printer. If you want to four paper feed unit. If you are using Type 1 model, install the hard disk. 4. Where to the bottom of Option Installation When installing multiple options, the following order is recommended: 1. If you can attach up to use two or more SD cards that can be inserted in the slot. 5. Install the optional Gigabit Ethernet board, Wireless LAN interface unit, or IEEE 1284 interface board in the...
... of the printer. If you want to four paper feed unit. If you are using Type 1 model, install the hard disk. 4. Where to the bottom of Option Installation When installing multiple options, the following order is recommended: 1. If you can attach up to use two or more SD cards that can be inserted in the slot. 5. Install the optional Gigabit Ethernet board, Wireless LAN interface unit, or IEEE 1284 interface board in the...

Operating Instructions
Page 53
... the printer. 3 CEC039 6. After installing the option, print the configuration page to be reconfigured. Attaching the Paper Feed Unit 5. If you can check whether the paper feed unit is not centered correctly, adjust the printing position for the Printer", Driver Installation Guide. 51 For details, see p.117 "Loading Paper in Trays". • After a new paper feed unit has been installed, the driver settings might need to confirm the installation. • When moving the printer, remove the paper feed unit. • After finishing the installation, you cannot install...
... the printer. 3 CEC039 6. After installing the option, print the configuration page to be reconfigured. Attaching the Paper Feed Unit 5. If you can check whether the paper feed unit is not centered correctly, adjust the printing position for the Printer", Driver Installation Guide. 51 For details, see p.117 "Loading Paper in Trays". • After a new paper feed unit has been installed, the driver settings might need to confirm the installation. • When moving the printer, remove the paper feed unit. • After finishing the installation, you cannot install...
Operating Instructions
Page 89
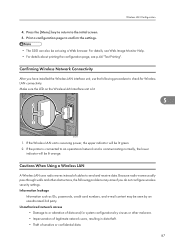
... and receive data. Unauthorized network access • Damage to or alteration of cables to check for Wireless LAN connectivity. Confirming Wireless Network Connectivity After you do not configure wireless security settings. Wireless LAN Configuration 4. If the Wireless LAN unit is lit. 5 1 2 CEC077 1. Information leakage Information such as IDs, passwords, credit card numbers, and e-mail content may arise if you have installed the Wireless LAN interface unit, use the following problems may be set using a Web browser. Press the [Menu] key...
... and receive data. Unauthorized network access • Damage to or alteration of cables to check for Wireless LAN connectivity. Confirming Wireless Network Connectivity After you do not configure wireless security settings. Wireless LAN Configuration 4. If the Wireless LAN unit is lit. 5 1 2 CEC077 1. Information leakage Information such as IDs, passwords, credit card numbers, and e-mail content may arise if you have installed the Wireless LAN interface unit, use the following problems may be set using a Web browser. Press the [Menu] key...
Operating Instructions
Page 99
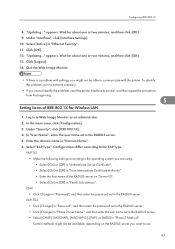
...". 11. To identify the problem, print a network summary. • If you want to Web Image Monitor as an administrator. 2. Log in "Domain Name". 6. Enter the domain name in to use. 97 Certain methods might not be available, depending on the RADIUS server you cannot identify the problem, reset the printer interface to the EAP Type. Configuring IEEE 802.1X 8. In the menu area, click...
...". 11. To identify the problem, print a network summary. • If you want to Web Image Monitor as an administrator. 2. Log in "Domain Name". 6. Enter the domain name in to use. 97 Certain methods might not be available, depending on the RADIUS server you cannot identify the problem, reset the printer interface to the EAP Type. Configuring IEEE 802.1X 8. In the menu area, click...
Operating Instructions
Page 109
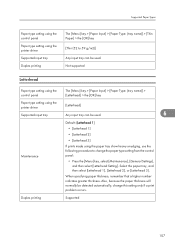
... driver Supported input tray Duplex printing The [Menu] key > [Paper Input] > [Paper Type: (tray name)] > [Thin Paper] > the [OK] key [Thin (52 to change this setting only if a print problem occurs. Not supported Letterhead Paper type setting using the control panel The [Menu] key > [Paper Input] > [Paper Type: (tray name)] > [Letterhead] > the [OK] key Paper type setting using the printer driver [Letterhead] Supported input tray Any input tray can be detected automatically, change the paper type setting from the control panel: • Press the [Menu] key, select [Maintenance...
... driver Supported input tray Duplex printing The [Menu] key > [Paper Input] > [Paper Type: (tray name)] > [Thin Paper] > the [OK] key [Thin (52 to change this setting only if a print problem occurs. Not supported Letterhead Paper type setting using the control panel The [Menu] key > [Paper Input] > [Paper Type: (tray name)] > [Letterhead] > the [OK] key Paper type setting using the printer driver [Letterhead] Supported input tray Any input tray can be detected automatically, change the paper type setting from the control panel: • Press the [Menu] key, select [Maintenance...
Operating Instructions
Page 110
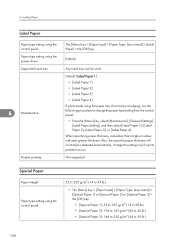
... used. 6. Loading Paper Label Paper Paper type setting using the control panel Paper type setting using the paper tray show heavy smudging, use the following procedure to 59 lb.) 108 Default: [Label Paper 1] • [Label Paper 1] • [Label Paper 2] • [Label Paper 3] • [Label Paper 4] If prints made using the printer driver Supported input tray 6 Maintenance Duplex printing The [Menu] key > [Paper Input] > [Paper Type: (tray name)] > [Label Paper] > the [OK] key [Labels] Any input tray can be detected automatically, change the paper type setting from the control...
... used. 6. Loading Paper Label Paper Paper type setting using the control panel Paper type setting using the paper tray show heavy smudging, use the following procedure to 59 lb.) 108 Default: [Label Paper 1] • [Label Paper 1] • [Label Paper 2] • [Label Paper 3] • [Label Paper 4] If prints made using the printer driver Supported input tray 6 Maintenance Duplex printing The [Menu] key > [Paper Input] > [Paper Type: (tray name)] > [Label Paper] > the [OK] key [Labels] Any input tray can be detected automatically, change the paper type setting from the control...
Operating Instructions
Page 113
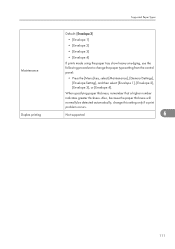
... that a higher number indicates greater thickness. Maintenance Duplex printing Supported Paper Types Default: [Envelope 3] • [Envelope 1] • [Envelope 2] • [Envelope 3] • [Envelope 4] If prints made using the paper tray show heavy smudging, use the following procedure to change this setting only if a print problem occurs. Also, because the paper thickness will normally be detected automatically, change the paper type setting from the control panel: • Press the [Menu] key, select [Maintenance], [General Settings], [Envelope Setting], and then select...
... that a higher number indicates greater thickness. Maintenance Duplex printing Supported Paper Types Default: [Envelope 3] • [Envelope 1] • [Envelope 2] • [Envelope 3] • [Envelope 4] If prints made using the paper tray show heavy smudging, use the following procedure to change this setting only if a print problem occurs. Also, because the paper thickness will normally be detected automatically, change the paper type setting from the control panel: • Press the [Menu] key, select [Maintenance], [General Settings], [Envelope Setting], and then select...
Operating Instructions
Page 152
.... Early replacement of pages printed at a time, paper type and size, and environmental conditions such as temperature and humidity. We recommend keeping a stock of toner) CEE107 • This message appears when the waste toner bottle is full. Maintaining the Printer • When removing jammed paper or replacing toner, avoid getting toner (new or used) on image volume and density, number of the print cartridge might need to drop it . However, if there is required.(Waste Toner Bottle...
.... Early replacement of pages printed at a time, paper type and size, and environmental conditions such as temperature and humidity. We recommend keeping a stock of toner) CEE107 • This message appears when the waste toner bottle is full. Maintaining the Printer • When removing jammed paper or replacing toner, avoid getting toner (new or used) on image volume and density, number of the print cartridge might need to drop it . However, if there is required.(Waste Toner Bottle...
Operating Instructions
Page 175
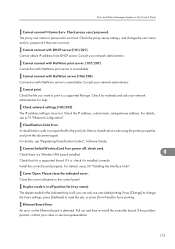
...-install the controller board. Cannot connect with NetWare print server. (107/207) Connection with DHCP server.(101/201) Cannot obtain IP address from DHCP server. Connect failed:WirelessCard Turn power off position for (tray name) The duplex mode for the indicated tray is incorrect. Cannot connect with NetWare print server is a supported file type. Check the file you can only use one-sided printing. For details, see "Registering Classification Codes", Software Guide. Press [Change] to change the user name and/or password if they are incorrect. Check network settings...
...-install the controller board. Cannot connect with NetWare print server. (107/207) Connection with DHCP server.(101/201) Cannot obtain IP address from DHCP server. Connect failed:WirelessCard Turn power off position for (tray name) The duplex mode for the indicated tray is incorrect. Cannot connect with NetWare print server is a supported file type. Check the file you can only use one-sided printing. For details, see "Registering Classification Codes", Software Guide. Press [Change] to change the user name and/or password if they are incorrect. Check network settings...
Operating Instructions
Page 178
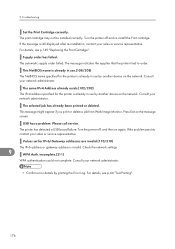
... service representative. Values set for the printer is already in use by another device on the network. The selected job has already been printed or deleted. Check the network settings. 9 WPA Auth. Press Exit on again. The printer has detected a USB board failure. Turn the printer off , and then on the message screen. The message indicates the supplies that the printer tried to order. 9. The print cartridge may not be installed correctly. Troubleshooting Set...
... service representative. Values set for the printer is already in use by another device on the network. The selected job has already been printed or deleted. Check the network settings. 9 WPA Auth. Press Exit on again. The printer has detected a USB board failure. Turn the printer off , and then on the message screen. The message indicates the supplies that the printer tried to order. 9. The print cartridge may not be installed correctly. Troubleshooting Set...
Operating Instructions
Page 185
.... • When removing a jammed sheet, the inside the tray. The registration roller is deteriorated or damaged. Clean the registration roller. Image quality varies when printing on thick paper or on B5 paper, the back of the next printed sheet may not be correct. Switch to Thick Paper mode. Make sure there are obvious. Clean the registration roller or the paper tray. 9 For details, see p.154 "Replacing the Maintenance Kit". Other Printing Problems The backs of printed sheets are obvious...
.... • When removing a jammed sheet, the inside the tray. The registration roller is deteriorated or damaged. Clean the registration roller. Image quality varies when printing on thick paper or on B5 paper, the back of the next printed sheet may not be correct. Switch to Thick Paper mode. Make sure there are obvious. Clean the registration roller or the paper tray. 9 For details, see p.154 "Replacing the Maintenance Kit". Other Printing Problems The backs of printed sheets are obvious...
Operating Instructions
Page 187
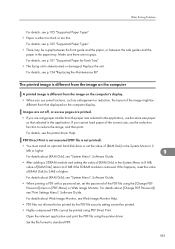
...the [Change PDF Password] menu in the application. For details about Web Image Monitor, see "System Menu", Software Guide. • When printing a PDF with a password set, set the value of the image might be different from the image on the computer display. Other Printing Problems For details, see "Print Settings Menu", Software Guide. Open the relevant application and print the PDF file using PDF Direct Print. For details, see p.105 "Supported Paper Types". • There may be printed using the printer driver. For details, see p.154 "Replacing the Maintenance Kit...
...the [Change PDF Password] menu in the application. For details about Web Image Monitor, see "System Menu", Software Guide. • When printing a PDF with a password set, set the value of the image might be different from the image on the computer display. Other Printing Problems For details, see "Print Settings Menu", Software Guide. Open the relevant application and print the PDF file using PDF Direct Print. For details, see p.105 "Supported Paper Types". • There may be printed using the printer driver. For details, see p.154 "Replacing the Maintenance Kit...
Operating Instructions
Page 188
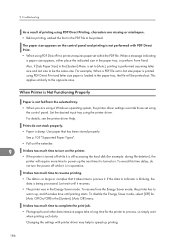
... performed with printer driver may help to power-up , and this time delay, do not stack properly. • Paper is loaded in operation. It takes too much time to turn the power off while it is still accessing the hard disk (for example: during file deletion), the printer will be printed out. Changing the settings with PDF Direct Print. • When using PDF Direct Print and letter size paper is damp. See p.105 "Supported Paper Types". • Pull...
... performed with printer driver may help to power-up , and this time delay, do not stack properly. • Paper is loaded in operation. It takes too much time to turn the power off while it is still accessing the hard disk (for example: during file deletion), the printer will be printed out. Changing the settings with PDF Direct Print. • When using PDF Direct Print and letter size paper is damp. See p.105 "Supported Paper Types". • Pull...
Operating Instructions
Page 225
... Image density 163 Installing options 45 Installing the memory expansion units 52 Interface units 59 Interior 21 J Job reset key 24 L Label paper 108 LED lamps 71 Letterhead 107 List of options 13 Loading envelopes 133 Loading paper 117 M Machine types 7 Maintenance kit 154, 212 Manuals 11, 14 Menu key 23 Middle thick 106 Model-specific information 7 Moving and transporting 209 Moving the printer a short distance 209 N NetWare 80 Network 75, 84 Network setting 80 No DHCP 76 Non-recommended paper types...
... Image density 163 Installing options 45 Installing the memory expansion units 52 Interface units 59 Interior 21 J Job reset key 24 L Label paper 108 LED lamps 71 Letterhead 107 List of options 13 Loading envelopes 133 Loading paper 117 M Machine types 7 Maintenance kit 154, 212 Manuals 11, 14 Menu key 23 Middle thick 106 Model-specific information 7 Moving and transporting 209 Moving the printer a short distance 209 N NetWare 80 Network 75, 84 Network setting 80 No DHCP 76 Non-recommended paper types...

Operating Instructions
Page 226
... certificate 94 Special paper 108 Specifications 213 SSID 86 Standard paper feed tray 101, 117 Status message 171 Storing paper 113 Supplies 25 Supported paper 101, 105 Suspend/resume key 24 Switch functions key 23 Symbols 6 T Test printing 44 Thick paper 106 Thin paper 106 Toner 149 Trademarks 220 Troubleshooting 171 U USB cable connection 72 User paper type 147, 148 W WARNING label 9 WEP key 89 Wireless LAN 84, 87, 89, 97 Wireless LAN configuration 84 Wireless LAN connectivity 87 Wireless LAN interface unit 61 WPA...
... certificate 94 Special paper 108 Specifications 213 SSID 86 Standard paper feed tray 101, 117 Status message 171 Storing paper 113 Supplies 25 Supported paper 101, 105 Suspend/resume key 24 Switch functions key 23 Symbols 6 T Test printing 44 Thick paper 106 Thin paper 106 Toner 149 Trademarks 220 Troubleshooting 171 U USB cable connection 72 User paper type 147, 148 W WARNING label 9 WEP key 89 Wireless LAN 84, 87, 89, 97 Wireless LAN configuration 84 Wireless LAN connectivity 87 Wireless LAN interface unit 61 WPA...


