User Guide
Page 18
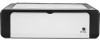
... type and paper size, and then click [OK]. 6. Changing the custom paper size 1. Click [Smart Organizing Monitor for SP 100 Series]. 3. Click [Close]. Click [Smart Organizing Monitor for SP 100 Series]. 3. Click [Smart Organizing Monitor for SP 100 Series Status]. 4. In the [Vertical: (148 to 216 mm)] box, enter the width. 7. On the [Start] ... Click [OK]. 9. Click [Close]. 16 Open the front cover and tray extension. On the [Start] menu, click [All Programs]. 2. Click [Smart Organizing Monitor for SP 100 Series Status]. 4. On the [Status] tab, click [Change...]. 5.
... type and paper size, and then click [OK]. 6. Changing the custom paper size 1. Click [Smart Organizing Monitor for SP 100 Series]. 3. Click [Close]. Click [Smart Organizing Monitor for SP 100 Series]. 3. Click [Smart Organizing Monitor for SP 100 Series Status]. 4. In the [Vertical: (148 to 216 mm)] box, enter the width. 7. On the [Start] ... Click [OK]. 9. Click [Close]. 16 Open the front cover and tray extension. On the [Start] menu, click [All Programs]. 2. Click [Smart Organizing Monitor for SP 100 Series Status]. 4. On the [Status] tab, click [Change...]. 5.
User Guide
Page 24
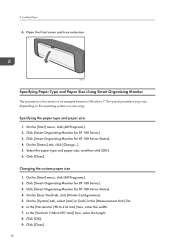
Configuring the Machine Using Smart Organizing Monitor 3. Click [Smart Organizing Monitor for SP 100 Series]. 3. On the [User Tool] tab, select [Configuration Page] in the [List / Test:] list. 5. Message area Displays the status of this machine with a message. For details about error messages, see p.37 "Error and Status Messages Appear on the Smart Organizing Monitor". On the [Start] menu, click [All Programs]. 2. Click [Print]. 22 Printing the Configuration Page 1. 4. Click [Smart Organizing Monitor for SP 100 Series Status]. 4.
Configuring the Machine Using Smart Organizing Monitor 3. Click [Smart Organizing Monitor for SP 100 Series]. 3. On the [User Tool] tab, select [Configuration Page] in the [List / Test:] list. 5. Message area Displays the status of this machine with a message. For details about error messages, see p.37 "Error and Status Messages Appear on the Smart Organizing Monitor". On the [Start] menu, click [All Programs]. 2. Click [Print]. 22 Printing the Configuration Page 1. 4. Click [Smart Organizing Monitor for SP 100 Series Status]. 4.
User Guide
Page 25
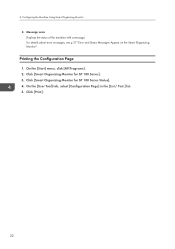
...; Specify the period of the machine settings that will elapse before switching to it fails to receive a print job. 23 Click [Smart Organizing Monitor for SP 100 Series]. 3. Click [Smart Organizing Monitor for SP 100 Series Status]. 4. Change the settings if necessary. 6.
...; Specify the period of the machine settings that will elapse before switching to it fails to receive a print job. 23 Click [Smart Organizing Monitor for SP 100 Series]. 3. Click [Smart Organizing Monitor for SP 100 Series Status]. 4. Change the settings if necessary. 6.
User Guide
Page 26
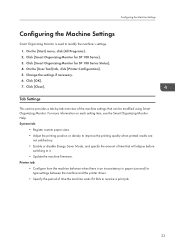
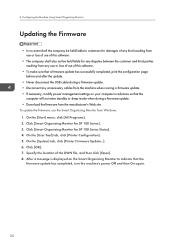
... Organizing Monitor from Windows. 1. On the [Start] menu, click [All Programs]. 2. Click [OK]. 7. Click [Smart Organizing Monitor for SP 100 Series]. 3. 4. After a message is displayed on the Smart Organizing Monitor to customers for damages of any kind resulting from use or loss ... from the manufacturer's Web site. To update the firmware, use of the DWN file, and then click [Open]. 8. Click [Smart Organizing Monitor for SP 100 Series Status]. 4. On the [System] tab, click [Printer Firmware Update...]. 6. On the [User Tool] tab, click [Printer Configuration]. 5. Specify...
... Organizing Monitor from Windows. 1. On the [Start] menu, click [All Programs]. 2. Click [OK]. 7. Click [Smart Organizing Monitor for SP 100 Series]. 3. 4. After a message is displayed on the Smart Organizing Monitor to customers for damages of any kind resulting from use or loss ... from the manufacturer's Web site. To update the firmware, use of the DWN file, and then click [Open]. 8. Click [Smart Organizing Monitor for SP 100 Series Status]. 4. On the [System] tab, click [Printer Firmware Update...]. 6. On the [User Tool] tab, click [Printer Configuration]. 5. Specify...


