User Manual
Page 3
... liable for errors contained herein or for incidental or consequential damages in the United States and/or other AC adapters may cause mechanical or paper-feeding problems. y Retain the box and packing materials for which copying is subject to , the implied warranties of Microsoft Corporation in connection with the machine. y This machine is a registered trademark of this document(s) is prohibited...
... liable for errors contained herein or for incidental or consequential damages in the United States and/or other AC adapters may cause mechanical or paper-feeding problems. y Retain the box and packing materials for which copying is subject to , the implied warranties of Microsoft Corporation in connection with the machine. y This machine is a registered trademark of this document(s) is prohibited...

User Manual
Page 4
... not installed and used in a particular installation. FCC Radio Frequency Interference Statement This product has been tested and found to comply with the instructions, may cause harmful interference to radio communications. If this device must ...installation. This equipment generates, uses, and can be determined by one or more of EN 60950. iv The FCC Class B limits are designed to correct the interference by turning the equipment off and on, the user is connected. ƒ Consult your point of purchase or service representative for a class B digital device, pursuant to Part...
... not installed and used in a particular installation. FCC Radio Frequency Interference Statement This product has been tested and found to comply with the instructions, may cause harmful interference to radio communications. If this device must ...installation. This equipment generates, uses, and can be determined by one or more of EN 60950. iv The FCC Class B limits are designed to correct the interference by turning the equipment off and on, the user is connected. ƒ Consult your point of purchase or service representative for a class B digital device, pursuant to Part...
User Manual
Page 5
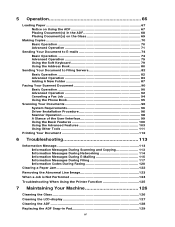
... Scan to Folder 11 2 Installing Your Machine 12 Minimum Configuration Requirements 12 Unlocking the Scan Unit 13 Installing the Input Paper Tray 14 Installing the Paper Stopper 15 Connecting the Cables 16 Connecting the ADF Cable 16 Connecting the Ethernet Cable 16 Connecting the Printer Cable 16 Connecting the Telephone Line 17 Connecting the Power and Turning on the Machine 17 3 Installing the Printer Driver 18 Before Installing the Printer Driver 18 Selecting the Panel Display Language 18 Printing the Test Page 19 Installing the Printer Driver Using Network 20 4 Configuring...
... Scan to Folder 11 2 Installing Your Machine 12 Minimum Configuration Requirements 12 Unlocking the Scan Unit 13 Installing the Input Paper Tray 14 Installing the Paper Stopper 15 Connecting the Cables 16 Connecting the ADF Cable 16 Connecting the Ethernet Cable 16 Connecting the Printer Cable 16 Connecting the Telephone Line 17 Connecting the Power and Turning on the Machine 17 3 Installing the Printer Driver 18 Before Installing the Printer Driver 18 Selecting the Panel Display Language 18 Printing the Test Page 19 Installing the Printer Driver Using Network 20 4 Configuring...
User Manual
Page 6
... Book 95 Scanning Your Documents 96 System Requirements 96 Driver Installation Procedure 96 Scanner Operation 98 A Glance of the User Interface 99 Using the Basic Features 100 Using the Advanced Features 103 Using Other Tools 111 Printing Your Document 112 6 Troubleshooting 113 Information Message 113 Information Messages During Scanning and Copying 113 Information Messages During Networking 114 Information Messages During E-Mailing 115 Information Messages During Filing 117 Information Codes During Faxing 120 Clearing a Paper Jam 122 Removing the Abnormal Line Image...
... Book 95 Scanning Your Documents 96 System Requirements 96 Driver Installation Procedure 96 Scanner Operation 98 A Glance of the User Interface 99 Using the Basic Features 100 Using the Advanced Features 103 Using Other Tools 111 Printing Your Document 112 6 Troubleshooting 113 Information Message 113 Information Messages During Scanning and Copying 113 Information Messages During Networking 114 Information Messages During E-Mailing 115 Information Messages During Filing 117 Information Codes During Faxing 120 Clearing a Paper Jam 122 Removing the Abnormal Line Image...
User Manual
Page 25
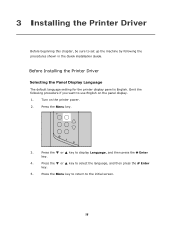
Press the Menu key. 3. Turn on the panel display. 1. Omit the following the procedures shown in the Quick Installation Guide. Press the ▼ or ▲ key to use English on the printer power. 2. Press the Menu key to return to display Language, and then press the # Enter key. 4. Press the ▼ or ▲ key to the initial screen. 18 3 Installing the Printer Driver Before beginning...
Press the Menu key. 3. Turn on the panel display. 1. Omit the following the procedures shown in the Quick Installation Guide. Press the ▼ or ▲ key to use English on the printer power. 2. Press the Menu key to return to display Language, and then press the # Enter key. 4. Press the ▼ or ▲ key to the initial screen. 18 3 Installing the Printer Driver Before beginning...
User Manual
Page 30
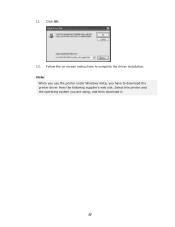
Select this printer and the operating system you have to complete the driver installation. Click OK. 12. 11. Follow the on-screen instructions to download the printer driver from the following supplier's web site. Note: When you use the printer under Windows Vista, you are using, and then download it. 23
Select this printer and the operating system you have to complete the driver installation. Click OK. 12. 11. Follow the on-screen instructions to download the printer driver from the following supplier's web site. Note: When you use the printer under Windows Vista, you are using, and then download it. 23
User Manual
Page 31
... scanned document to update the product and manage several MFPs on the network. Note: 9 If the system administrator has chosen DHCP, then the IP address of User Tools on the network. 4 Configuring the Machine The following settings or destinations must be defined by either launching the product's embedded web page (Web Image Monitor) or starting the Network Management Tool provided in the supplied Scanner Driver CD-ROM. To specify these settings...
... scanned document to update the product and manage several MFPs on the network. Note: 9 If the system administrator has chosen DHCP, then the IP address of User Tools on the network. 4 Configuring the Machine The following settings or destinations must be defined by either launching the product's embedded web page (Web Image Monitor) or starting the Network Management Tool provided in the supplied Scanner Driver CD-ROM. To specify these settings...
User Manual
Page 35
... default settings, simply press the Clear Modes button for common functions. You can create a password later and write it is performing one of the settings in the "User Tools" can also be set these settings, then the default settings will be automatically applied to create administrator's login password later. 9 If you may specify more administrator settings on the control panel. That is shipped with no specific password. Yet, an individual user...
... default settings, simply press the Clear Modes button for common functions. You can create a password later and write it is performing one of the settings in the "User Tools" can also be set these settings, then the default settings will be automatically applied to create administrator's login password later. 9 If you may specify more administrator settings on the control panel. That is shipped with no specific password. Yet, an individual user...
User Manual
Page 36
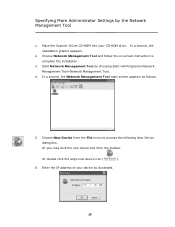
... CD-ROM drive. In a second, the Network Management Tool main screen appears as illustrated. 29 Or double click the large new device icon ( ). 6. Choose Network Management Tool and follow the on-screen instruction to prompt the following New Device dialog box. Or you may click the new device tool from the File menu to complete the installation. 3. Specifying More Administrator Settings by choosing Start>All Programs>Network Management Tool>Network Management Tool. 4. Place the Scanner Driver CD-ROM into your device as...
... CD-ROM drive. In a second, the Network Management Tool main screen appears as illustrated. 29 Or double click the large new device icon ( ). 6. Choose Network Management Tool and follow the on-screen instruction to prompt the following New Device dialog box. Or you may click the new device tool from the File menu to complete the installation. 3. Specifying More Administrator Settings by choosing Start>All Programs>Network Management Tool>Network Management Tool. 4. Place the Scanner Driver CD-ROM into your device as...

User Manual
Page 38
... the product's serial number. Displays the homepage's version. Displays the system's firmware version. Menu Map: Touch "Print" to print out all the menu items and their values. Item Model Manufacturer MAC Address Serial Number System Firmware Version Scanner Firmware Version Homepage Version Page Count Description Displays the product's model name. Displays the scan unit's MAC address. Displays the counters for B&W Net Scan+PC Scan, Color Net Scan+PC Scan, B&W copy, Fax Send, Fax Received, ADF, Total.
... the product's serial number. Displays the homepage's version. Displays the system's firmware version. Menu Map: Touch "Print" to print out all the menu items and their values. Item Model Manufacturer MAC Address Serial Number System Firmware Version Scanner Firmware Version Homepage Version Page Count Description Displays the product's model name. Displays the scan unit's MAC address. Displays the counters for B&W Net Scan+PC Scan, Color Net Scan+PC Scan, B&W copy, Fax Send, Fax Received, ADF, Total.

User Manual
Page 44
... scanned image darker and decreasing the value makes your default resolution for all outgoing mails Subject sending from the product. Up to select from the product. Default File Choose default maximum image size for documents to be reset to a single image file. 2. The higher the resolution, the greater details for ADF scan. The default settings mean the e-mail settings will be sent in seven steps using the product's Web Page. Image...
... scanned image darker and decreasing the value makes your default resolution for all outgoing mails Subject sending from the product. Up to select from the product. Default File Choose default maximum image size for documents to be reset to a single image file. 2. The higher the resolution, the greater details for ADF scan. The default settings mean the e-mail settings will be sent in seven steps using the product's Web Page. Image...

User Manual
Page 54
... other management settings such as energy saver (timer), display language, the default operation mode and so on again. Password Enter the password to enable or disable the energy saver. The factory default setting is idle. Choice: *Copy, E-Mail, Folder, Facsimile *Factory Default 47 E-mail Enter the e-mail address of the administrator of the product so Address that system can send the error or warning message...
... other management settings such as energy saver (timer), display language, the default operation mode and so on again. Password Enter the password to enable or disable the energy saver. The factory default setting is idle. Choice: *Copy, E-Mail, Folder, Facsimile *Factory Default 47 E-mail Enter the e-mail address of the administrator of the product so Address that system can send the error or warning message...
User Manual
Page 56
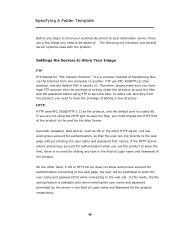
...Folder Template Before you begin to send your scanned document to your destination server, there are not using FTP to save the files, you must change the HTTP Port of the product to the web page, the user will introduce you need to Store Your Image FTP FTP Stands for the product respectively. 49 If you are a few things you need for setting... any text in the field of . In this mode, the file saving feature is no need to be prompted to enter the user name and password first while connecting to the web page without entering the user name and password first....
...Folder Template Before you begin to send your scanned document to your destination server, there are not using FTP to save the files, you must change the HTTP Port of the product to the web page, the user will introduce you need to Store Your Image FTP FTP Stands for the product respectively. 49 If you are a few things you need for setting... any text in the field of . In this mode, the file saving feature is no need to be prompted to enter the user name and password first while connecting to the web page without entering the user name and password first....

User Manual
Page 65
... the range of the printer. 58 Also you choose OFF from the ADF only. * Factory Default * The default paper size depends on the main tray of 1 to be sent in black and white via filing from Multi-Level (Gray), the file formats include PDF, JPEG, TIF, MTIF, and JPEG_EXIF. Increasing the value makes your scanned image darker and decreasing the value makes your document size. Choice: 1, 2, 3, *4, 5, 6, 7 Input the...
... the range of the printer. 58 Also you choose OFF from the ADF only. * Factory Default * The default paper size depends on the main tray of 1 to be sent in black and white via filing from Multi-Level (Gray), the file formats include PDF, JPEG, TIF, MTIF, and JPEG_EXIF. Increasing the value makes your scanned image darker and decreasing the value makes your document size. Choice: 1, 2, 3, *4, 5, 6, 7 Input the...

User Manual
Page 83
... 7 using the control Density panel. Choice: 1, 2, 3, *4, 5, 6, 7 Bind Multi-batch document scanning from the ADF or Multi-page scanning from the flatbed can specify the default value of image density in seven steps using Web Page. If you a default file name, image. Press the Scan Options tab to scan next batch or page of extension. Press the B&W Start button to send your document(s) in black and white, or the Color Start button to Bind or End. Paper Size Choose your filing file name...
... 7 using the control Density panel. Choice: 1, 2, 3, *4, 5, 6, 7 Bind Multi-batch document scanning from the ADF or Multi-page scanning from the flatbed can specify the default value of image density in seven steps using Web Page. If you a default file name, image. Press the Scan Options tab to scan next batch or page of extension. Press the B&W Start button to send your document(s) in black and white, or the Color Start button to Bind or End. Paper Size Choose your filing file name...

User Manual
Page 90
... the scanned image, the e-mail address to send the filing report, and check if you are not your document(s) in black and white, or the Color Start button to suit your requirement. Press the B&W Start button to create a subfolder on the glass. 2. Change the file format and the compression if they are a registered user with text FACE UP in the ADF or FACE DOWN on the screen...
... the scanned image, the e-mail address to send the filing report, and check if you are not your document(s) in black and white, or the Color Start button to suit your requirement. Press the B&W Start button to create a subfolder on the glass. 2. Change the file format and the compression if they are a registered user with text FACE UP in the ADF or FACE DOWN on the screen...

User Manual
Page 91
... set in the folder. Image If your own login name here. Choice: 75, 100,150, *200, 300, 400, 600 dpi. Note: The Legal option is too light or too dark, you are a registered user yet with a different login name displayed on the ADF or more disk space. Choice: 1, 2, 3, *4, 5, 6, 7 Bind Multi-batch document scanning from the ADF or Multi-page scanning from the flatbed can Density use...
... set in the folder. Image If your own login name here. Choice: 75, 100,150, *200, 300, 400, 600 dpi. Note: The Legal option is too light or too dark, you are a registered user yet with a different login name displayed on the ADF or more disk space. Choice: 1, 2, 3, *4, 5, 6, 7 Bind Multi-batch document scanning from the ADF or Multi-page scanning from the flatbed can Density use...
User Manual
Page 103
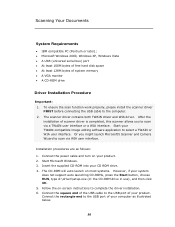
... installation of your product. Connect the power cable and turn on most systems. However, if your system does not support auto launching CD-ROMs, press the Start button, choose RUN, type d:\driver\setup.exe (d: the CD-ROM drive in use), and then click OK. 5. Start your TWAIN-compatible image editing software application to complete the driver installation. 6. The CD-ROM will auto launch on your product. 2. Insert the supplied CD-ROM into your CD ROM drive. 4. Connect...
... installation of your product. Connect the power cable and turn on most systems. However, if your system does not support auto launching CD-ROMs, press the Start button, choose RUN, type d:\driver\setup.exe (d: the CD-ROM drive in use), and then click OK. 5. Start your TWAIN-compatible image editing software application to complete the driver installation. 6. The CD-ROM will auto launch on your product. 2. Insert the supplied CD-ROM into your CD ROM drive. 4. Connect...

User Manual
Page 116
Saving a scan settings file Type a name for the settings you can use and click the Load button. Using a scan settings file You can save your scanning feature settings in the scanning features dialog box. Right-click the file name for your scan settings and configuration settings. Deleting a scan settings file Right-clicks a file name and press the Delete button the computer keyboard to delete the file. The settings in the file will automatically be saved and the file name will be specified in...
Saving a scan settings file Type a name for the settings you can use and click the Load button. Using a scan settings file You can save your scanning feature settings in the scanning features dialog box. Right-click the file name for your scan settings and configuration settings. Deleting a scan settings file Right-clicks a file name and press the Delete button the computer keyboard to delete the file. The settings in the file will automatically be saved and the file name will be specified in...

User Manual
Page 120
... Scanning and Copying Message Action Home sensor Restart your nearest dealer. error If the code still appears, contact your product. Open the ADF cover and remove the paper from the ADF then restart your nearest dealer. cable or status. 2. Detect printer Please turn the printer off your product. 2. Paper size not Please set the supported paper size to the tray of the supported printer. If the code still appears, contact your product. Lamp error Restart your nearest dealer. Check...
... Scanning and Copying Message Action Home sensor Restart your nearest dealer. error If the code still appears, contact your product. Open the ADF cover and remove the paper from the ADF then restart your nearest dealer. cable or status. 2. Detect printer Please turn the printer off your product. 2. Paper size not Please set the supported paper size to the tray of the supported printer. If the code still appears, contact your product. Lamp error Restart your nearest dealer. Check...


