User Guide & Warranty
Page 7
... Connect: TV + Component with DVI or HDMI 18 How to Connect: TV + CableCARD 19 Setting Up Digital Cable Television Service 19 Audio Connections ...20 How to Connect: TV + Router via the HDTV's ETHERNET Jack 22 Plug in the TV ...23 Put Batteries in -Picture) Operation 46 5 List 38 How V-Chip Works for the USA and Canada 39 USA V-Chip TV Ratings ...39 Canada V-Chip ...43 Auto Tuning Feature ...45 PIP (Picture-in the Remote ...23 Turn on the TV ...23 Use the Remote Control...
... Connect: TV + Component with DVI or HDMI 18 How to Connect: TV + CableCARD 19 Setting Up Digital Cable Television Service 19 Audio Connections ...20 How to Connect: TV + Router via the HDTV's ETHERNET Jack 22 Plug in the TV ...23 Put Batteries in -Picture) Operation 46 5 List 38 How V-Chip Works for the USA and Canada 39 USA V-Chip TV Ratings ...39 Canada V-Chip ...43 Auto Tuning Feature ...45 PIP (Picture-in the Remote ...23 Turn on the TV ...23 Use the Remote Control...
User Guide & Warranty
Page 8
...Sound Logic ...58 Audio Mode ...58 SAP (Second Audio Program 58 Balance ...58 Audio Connections ...59 Recordings Menu ...60 Connections Menu ...60 Signal Strength ...60 Channel Search ...61 Software Upgrade ...61 Signal Source ...61 Video Input Setup ...61 Auto Tuning ...62 DTVLink Setup ...62 Special Features ...62 Ethernet Setup ...63 Preferences Menu ...64 Closed Captioning ...64 Screen Format ...66 Time Menu ...66 Color Scheme ...67 Translucency ...67 Menu Language ...67 Power Indicator ...67 Lamp Power ...67 Chapter 5: Reference Troubleshooting...70 Lamp Replacement Instructions 74 HDTV...
...Sound Logic ...58 Audio Mode ...58 SAP (Second Audio Program 58 Balance ...58 Audio Connections ...59 Recordings Menu ...60 Connections Menu ...60 Signal Strength ...60 Channel Search ...61 Software Upgrade ...61 Signal Source ...61 Video Input Setup ...61 Auto Tuning ...62 DTVLink Setup ...62 Special Features ...62 Ethernet Setup ...63 Preferences Menu ...64 Closed Captioning ...64 Screen Format ...66 Time Menu ...66 Color Scheme ...67 Translucency ...67 Menu Language ...67 Power Indicator ...67 Lamp Power ...67 Chapter 5: Reference Troubleshooting...70 Lamp Replacement Instructions 74 HDTV...
User Guide & Warranty
Page 16
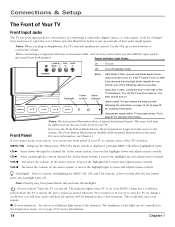
... to operate many of the TV's features. Turn off . VOL Increases the volume. The brightness of the light can replace the lamp yourself following options is possible: POWER Lamp door is displayed, pressing MENU/OK selects highlighted items. CH Scans down through the current channel list. Connections & Setup The Front of Your TV Front Input Jacks The TV has front input jacks for different light status of the indicator. Lamp power supply within TV may be controlled...
... to operate many of the TV's features. Turn off . VOL Increases the volume. The brightness of the light can replace the lamp yourself following options is possible: POWER Lamp door is displayed, pressing MENU/OK selects highlighted items. CH Scans down through the current channel list. Connections & Setup The Front of Your TV Front Input Jacks The TV has front input jacks for different light status of the indicator. Lamp power supply within TV may be controlled...
User Guide & Warranty
Page 17
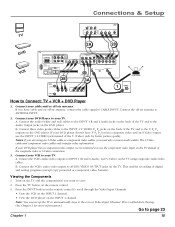
...INPUT For Factory Use Only 3B VCR ANTENNA IN R AUDIO L IN ANTENNA OUT VIDEO HDMI/DVI INPUT Use menu for better picture quality. Connect the off -air antenna, connect the cable signal to ANTENNA INPUT. 2. B. Connect your VCR to view. 2. B. Press the INPUT button on the back of digital and analog programs (except copy protected or component video formats). If you use the INPUT 3 S-VIDEO jack instead of the composite video or S-Video connection. 3. Connect three video grade cables to the INPUT 4 Y/VIDEO P P jacks on the remote control to Connect: TV + VCR + DVD Player...
...INPUT For Factory Use Only 3B VCR ANTENNA IN R AUDIO L IN ANTENNA OUT VIDEO HDMI/DVI INPUT Use menu for better picture quality. Connect the off -air antenna, connect the cable signal to ANTENNA INPUT. 2. B. Connect your VCR to view. 2. B. Press the INPUT button on the back of digital and analog programs (except copy protected or component video formats). If you use the INPUT 3 S-VIDEO jack instead of the composite video or S-Video connection. 3. Connect three video grade cables to the INPUT 4 Y/VIDEO P P jacks on the remote control to Connect: TV + VCR + DVD Player...
User Guide & Warranty
Page 18
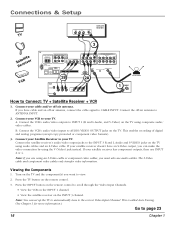
... on the remote control to AUDIO/VIDEO OUTPUT jacks on the TV using composite audio/ video cables. Connect the VCR's audio/video inputs to scroll through the Video Input Channels. • View the VCR on the INPUT 1 channel. • View the satellite receiver on the remote control. 3. Note: If you have an S-Video output, you can set up the TV to automatically tune to Connect: TV + Satellite Receiver + VCR 1. A. INPUT 4 R L PR PB Y/VIDEO R L V S-VIDEO INPUT 1 R L PR PB Y/VIDEO INPUT 2 CABLE INPUT ANTENNA INPUT For Factory Use Only 2B HDMI/DVI INPUT Use menu for...
... on the remote control to AUDIO/VIDEO OUTPUT jacks on the TV using composite audio/ video cables. Connect the VCR's audio/video inputs to scroll through the Video Input Channels. • View the VCR on the INPUT 1 channel. • View the satellite receiver on the remote control. 3. Note: If you have an S-Video output, you can set up the TV to automatically tune to Connect: TV + Satellite Receiver + VCR 1. A. INPUT 4 R L PR PB Y/VIDEO R L V S-VIDEO INPUT 1 R L PR PB Y/VIDEO INPUT 2 CABLE INPUT ANTENNA INPUT For Factory Use Only 2B HDMI/DVI INPUT Use menu for...
User Guide & Warranty
Page 21
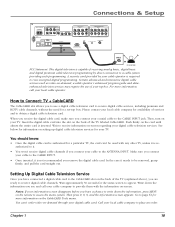
...the remote to the ANTENNA INPUT. INPUT 4 R L PR PB Y/VIDEO R L V S-VIDEO INPUT 1 R L PR PB Y/VIDEO INPUT 2 CABLE INPUT For Factory Use Only ANTENNA INPUT HDMI/DVI INPUT Use menu for a set -top box. Make sure you connect your cable to the CABLE INPUT. • Once inserted, it is capable of receiving analog basic, digital basic and digital premium cable television programming by your cable operator is reauthorized to it. • You won't receive digital cable channels if you see and call your digital cable card. Setting Up Digital Cable Television Service Once...
...the remote to the ANTENNA INPUT. INPUT 4 R L PR PB Y/VIDEO R L V S-VIDEO INPUT 1 R L PR PB Y/VIDEO INPUT 2 CABLE INPUT For Factory Use Only ANTENNA INPUT HDMI/DVI INPUT Use menu for a set -top box. Make sure you connect your cable to the CABLE INPUT. • Once inserted, it is capable of receiving analog basic, digital basic and digital premium cable television programming by your cable operator is reauthorized to it. • You won't receive digital cable channels if you see and call your digital cable card. Setting Up Digital Cable Television Service Once...
User Guide & Warranty
Page 24
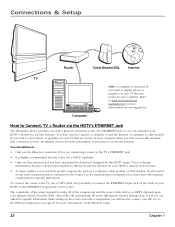
... upon your HDTV's internal web browser. • A router enables you will need to connect a computer to the Ethernet Setup menu on page 63 for specific instructions. Computer How to the router. A computer is connected to Connect: TV + Router via your Internet Service Provider (ISP). You should know: • Only use the Ethernet connection if you are stored on your ISP. Use the manuals that the...
... upon your HDTV's internal web browser. • A router enables you will need to connect a computer to the Ethernet Setup menu on page 63 for specific instructions. Computer How to the router. A computer is connected to Connect: TV + Router via your Internet Service Provider (ISP). You should know: • Only use the Ethernet connection if you are stored on your ISP. Use the manuals that the...
User Guide & Warranty
Page 29
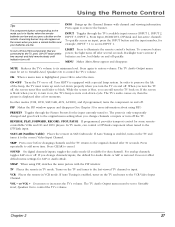
... Input, HDMI/DVI, DTVLink and last-active channel). INFO Brings up and cool down cycle. While the screen is only temporarily changed and goes back to the original menu setting when you change channels/inputs, the default for some remotecontrollable VCRs and CD and DVD players. The TV Audio Output menu must be set to Variable Level, Speakers On to control the TV's volume. Using the Remote Control Tips The component button corresponding to the mode you're in flashes...
... Input, HDMI/DVI, DTVLink and last-active channel). INFO Brings up and cool down cycle. While the screen is only temporarily changed and goes back to the original menu setting when you change channels/inputs, the default for some remotecontrollable VCRs and CD and DVD players. The TV Audio Output menu must be set to Variable Level, Speakers On to control the TV's volume. Using the Remote Control Tips The component button corresponding to the mode you're in flashes...
User Guide & Warranty
Page 48
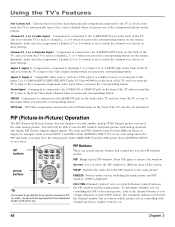
... channel when you press the corresponding button. Using the TV's Features Not Connected Choose this if you don't have the main picture from CABLE INPUT and the PIP picture from ANTENNA INPUT, or vice-versa. CTRL FREEZE CC PRESETS FAV CC LIGHT FORMAT CLEAR C INFO i MENU M SOUND SKIP There are certain remote buttons that control the way the PIP window works: PIP Brings up auto tuning and press the component button (VCR, DVD, etc.). Input 2, Input...
... channel when you press the corresponding button. Using the TV's Features Not Connected Choose this if you don't have the main picture from CABLE INPUT and the PIP picture from ANTENNA INPUT, or vice-versa. CTRL FREEZE CC PRESETS FAV CC LIGHT FORMAT CLEAR C INFO i MENU M SOUND SKIP There are certain remote buttons that control the way the PIP window works: PIP Brings up auto tuning and press the component button (VCR, DVD, etc.). Input 2, Input...
User Guide & Warranty
Page 51
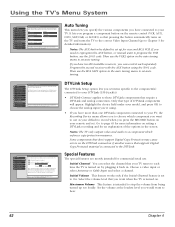
... page 0 Go Back 1 Signal Strength 2 Channel Search 3 Software Upgrade 4 Signal Source 5 Video Input Setup 6 Auto Tuning 7 DTVLink Setup 8 Special Features 9 Ethernet Setup Main Menu Connections The DTVLink Setup menu has screens for setting up /down arrow buttons to use the remote for some information is in this area to explain the feature and instruct the user on a major channel, but only the subchannel selected is recording the channel that shows which remote buttons work with the DTVLink...
... page 0 Go Back 1 Signal Strength 2 Channel Search 3 Software Upgrade 4 Signal Source 5 Video Input Setup 6 Auto Tuning 7 DTVLink Setup 8 Special Features 9 Ethernet Setup Main Menu Connections The DTVLink Setup menu has screens for setting up /down arrow buttons to use the remote for some information is in this area to explain the feature and instruct the user on a major channel, but only the subchannel selected is recording the channel that shows which remote buttons work with the DTVLink...
User Guide & Warranty
Page 54
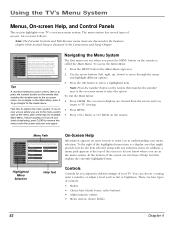
... Input RCA SAT2 Front Input DVD Front Input SAT-CABLE (Satellite or Cable Box) Front Input Press OK to assist you press the MENU button on -screen menu to the Audio menu. Highlighted Menu Selection Help Text On-Screen Help Information appears on most screens to select the channel or input that matches the number next to select a highlighted item. You can choose a setting, enter a number, or adjust a level such as tint or brightness. Using the TV's Menu...
... Input RCA SAT2 Front Input DVD Front Input SAT-CABLE (Satellite or Cable Box) Front Input Press OK to assist you press the MENU button on -screen menu to the Audio menu. Highlighted Menu Selection Help Text On-Screen Help Information appears on most screens to select the channel or input that matches the number next to select a highlighted item. You can choose a setting, enter a number, or adjust a level such as tint or brightness. Using the TV's Menu...
User Guide & Warranty
Page 58
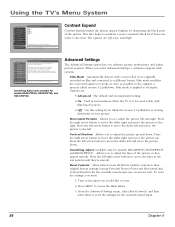
... a different format. Using the TV's Menu System 0 Go Back 1 Picture Settings 2 Picture Presets 3 Auto Color 4 Color Warmth 5 Noise Reduction 6 Green Stretch 7 SEVdgMe Enhancement 8 Contrast Expand 9 Advanced Settings Main Menu Picture Quality Off Low High A change in this screen is applied to adjust the picture up and down. Vertical Position Allows you think the reverse 3:2 pulldown is causing distortions in your picture. Press the left arrow button to reset the settings for models HD44LPW165, HD50LPW165, and HD61LPW165...
... a different format. Using the TV's Menu System 0 Go Back 1 Picture Settings 2 Picture Presets 3 Auto Color 4 Color Warmth 5 Noise Reduction 6 Green Stretch 7 SEVdgMe Enhancement 8 Contrast Expand 9 Advanced Settings Main Menu Picture Quality Off Low High A change in this screen is applied to adjust the picture up and down. Vertical Position Allows you think the reverse 3:2 pulldown is causing distortions in your picture. Press the left arrow button to reset the settings for models HD44LPW165, HD50LPW165, and HD61LPW165...
User Guide & Warranty
Page 59
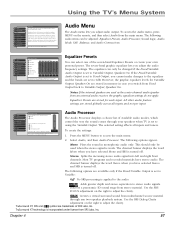
... A change in this screen is applied to all inputs. Audio Processor The Audio Processor displays a choice list of available audio modes, which control the way the sound comes through any two-speaker playback system. Most TV programs and recorded materials have selected Stereo and SRS is turned off . Chapter 4 57 Using the TV's Menu System 0 Go Back 1 Picture Quality 2 Audio 3 Recordings 4 Parental Controls 5 Connections 6 Preferences 7 Assisted Setup 8 Web Browser Main Menu The Audio menu has screens for setting the audio...
... A change in this screen is applied to all inputs. Audio Processor The Audio Processor displays a choice list of available audio modes, which control the way the sound comes through any two-speaker playback system. Most TV programs and recorded materials have selected Stereo and SRS is turned off . Chapter 4 57 Using the TV's Menu System 0 Go Back 1 Picture Quality 2 Audio 3 Recordings 4 Parental Controls 5 Connections 6 Preferences 7 Assisted Setup 8 Web Browser Main Menu The Audio menu has screens for setting the audio...
User Guide & Warranty
Page 61
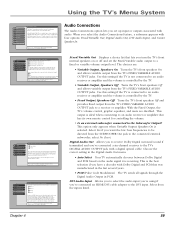
... 2 Audio Processor 3 Sound Logic 4 Audio Mode 5 SAP 6 Balance 7 FAiuxdeido/VCaornianbelcetiOonust Main Menu Audio The Audio Connections menu has screens for volume control. Audio Connections The Audio Connections option lets you turn the TV's front internal speakers on the back of the DIGITAL AUDIO OUTPUT. answering "No" will always send a PCM signal out of the TV. Choosing PCM will not. Press to return to an audio receiver or amplifier and the volume is needed. However, if you connect a DVI output to the TV's HDMI input...
... 2 Audio Processor 3 Sound Logic 4 Audio Mode 5 SAP 6 Balance 7 FAiuxdeido/VCaornianbelcetiOonust Main Menu Audio The Audio Connections menu has screens for volume control. Audio Connections The Audio Connections option lets you turn the TV's front internal speakers on the back of the DIGITAL AUDIO OUTPUT. answering "No" will always send a PCM signal out of the TV. Choosing PCM will not. Press to return to an audio receiver or amplifier and the volume is needed. However, if you connect a DVI output to the TV's HDMI input...
User Guide & Warranty
Page 62
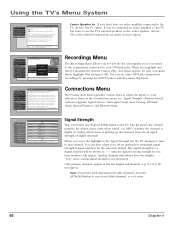
... it. Analog channels will be used as a center speaker. Recordings Menu The Recordings Menu allows you to view the list of programs you move the highlight to the Signal Strength list, the TV attempts to tune to your area. •Software Upgrade: Check software version and upgrades. •Signal Source: Lost remote? This screen changes inputs. •Video Input Setup: Choose component or composite video. •Auto Tuning: Create one button access to that channel. Warning: Connect from an audio receiver. Press...
... it. Analog channels will be used as a center speaker. Recordings Menu The Recordings Menu allows you to view the list of programs you move the highlight to the Signal Strength list, the TV attempts to tune to your area. •Software Upgrade: Check software version and upgrades. •Signal Source: Lost remote? This screen changes inputs. •Video Input Setup: Choose component or composite video. •Auto Tuning: Create one button access to that channel. Warning: Connect from an audio receiver. Press...
User Guide & Warranty
Page 64
... turned on the remote. 0 Go Back 1 Signal Strength 2 Channel Search 3 Software Upgrade 4 Signal Source 5 Video Input Setup 6 Auto Tuning 7 DTVLink Setup 8 Special Features 9 Ethernet Setup Main Menu Connections The DTVLink Setup menu has screens for setting up too loudly. DTVLink Setup The DTVLink Setup option lets you program a component button on the remote control (VCR, AUX, DVD, SAT/CAB, or AUDIO) so that pressing the button automatically turns on the TV and turns the TV to the correct Video Input Channel (go to select the channel...
... turned on the remote. 0 Go Back 1 Signal Strength 2 Channel Search 3 Software Upgrade 4 Signal Source 5 Video Input Setup 6 Auto Tuning 7 DTVLink Setup 8 Special Features 9 Ethernet Setup Main Menu Connections The DTVLink Setup menu has screens for setting up too loudly. DTVLink Setup The DTVLink Setup option lets you program a component button on the remote control (VCR, AUX, DVD, SAT/CAB, or AUDIO) so that pressing the button automatically turns on the TV and turns the TV to the correct Video Input Channel (go to select the channel...
User Guide & Warranty
Page 68
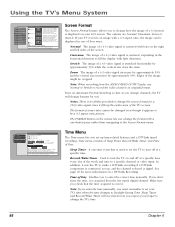
... a 4:3 video signal is used to set up, and the channel selected is on, it will turn the TV on and tune to: Antenna Input Channel 46 Sub-Channel 1 Tip: Use the timer to be cropped. See page 49 for Screen Format and Automatic Format Switching (AFS). The FORMAT button on the display screen. Press OK to continue. Time of the picture on the remote lets you change how the image of Day Main Menu Time...
... a 4:3 video signal is used to set up, and the channel selected is on, it will turn the TV on and tune to: Antenna Input Channel 46 Sub-Channel 1 Tip: Use the timer to be cropped. See page 49 for Screen Format and Automatic Format Switching (AFS). The FORMAT button on the display screen. Press OK to continue. Time of the picture on the remote lets you change how the image of Day Main Menu Time...
User Guide & Warranty
Page 72
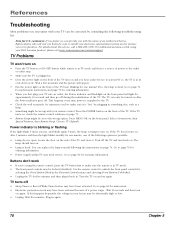
... information. • Power supply within TV may need service. TV Problems TV won't turn on . If so, the lamp is in its operation. Press the POWER button on the front panel. Press MENU/OK on the front of the TV turn on and try again. Power indicator is blinking or flashing If the light blinks 5 times, pauses, and blinks again 5 times, the lamp is plugged in TV mode and there's a source of the TV. The lamp should turn on and you...
... information. • Power supply within TV may need service. TV Problems TV won't turn on . If so, the lamp is in its operation. Press the POWER button on the front panel. Press MENU/OK on the front of the TV turn on and try again. Power indicator is blinking or flashing If the light blinks 5 times, pauses, and blinks again 5 times, the lamp is plugged in TV mode and there's a source of the TV. The lamp should turn on and you...
User Guide & Warranty
Page 86
... BACK button 26 Green Stretch 55 GUIDE button 26 H HDMI/DVI jack 13 HDTV specifications 77 Help text 52 Home Theatre box remote codes 34 Horizontal Position 56 I Icons Channel banner 36 Indicator light status 14 Indicator, front panel 23 Indirect light 8 INFO button 27, 36 Initial channel 62 volume 62 INPUT button 27 Internet connection 22 Internet service provider 22 J N Jacks ANTENNA INPUT 13 AUDIO/VIDEO OUTPUT 10 CABLE INPUT 13 CENTER 10 COMPONENT/COMPOSITE INPUTS 12 DIGITAL AUDIO OUTPUT 12 DTVLink...
... BACK button 26 Green Stretch 55 GUIDE button 26 H HDMI/DVI jack 13 HDTV specifications 77 Help text 52 Home Theatre box remote codes 34 Horizontal Position 56 I Icons Channel banner 36 Indicator light status 14 Indicator, front panel 23 Indirect light 8 INFO button 27, 36 Initial channel 62 volume 62 INPUT button 27 Internet connection 22 Internet service provider 22 J N Jacks ANTENNA INPUT 13 AUDIO/VIDEO OUTPUT 10 CABLE INPUT 13 CENTER 10 COMPONENT/COMPOSITE INPUTS 12 DIGITAL AUDIO OUTPUT 12 DTVLink...
Spec Sheet
Page 2
... from actual color. May not be available in -Picture Power ON Indicator Timers REAR CONNECTORS RF Input (Antenna/Cable) Audio/Video Inputs (Composite) S-Video Input Component Video Input (YPrPb) External Center Channel Input HDMI (High Def Multimedia Interface) Sub Woofer Output Audio Outputs (Type) A/V Outputs (Composite) Audio Output (Coaxial/Optical) IEEE1394 Connector TTE TECHNOLOGY, INC. 10330 N MERIDIAN ST INDIANAPOLIS, IN 46290 RCA Scenium 50 DLP™ HDTV 16x9 HD3s w/DLP™ Light Engine 12-Element Yes High Gain, High-Resolution Yes Adaptive, Recursive TruScan Digital Reality...
... from actual color. May not be available in -Picture Power ON Indicator Timers REAR CONNECTORS RF Input (Antenna/Cable) Audio/Video Inputs (Composite) S-Video Input Component Video Input (YPrPb) External Center Channel Input HDMI (High Def Multimedia Interface) Sub Woofer Output Audio Outputs (Type) A/V Outputs (Composite) Audio Output (Coaxial/Optical) IEEE1394 Connector TTE TECHNOLOGY, INC. 10330 N MERIDIAN ST INDIANAPOLIS, IN 46290 RCA Scenium 50 DLP™ HDTV 16x9 HD3s w/DLP™ Light Engine 12-Element Yes High Gain, High-Resolution Yes Adaptive, Recursive TruScan Digital Reality...


