

English Manual
Page 3
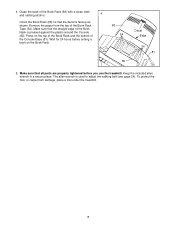
... a properly functioning surge suppressor could become caught in the treadmill. Always remove the key, unplug the power cord and move the walking belt while the power is turned off position when the treadmill is intended only as described in this treadmill are used by experienced users..... 13. Various factors, including the user's movement, may compromise your local PROFORM dealer or call 1-800-8063651 and order part number 146148. 17. Exercises using hand weights should not be on the walking belt. To protect the floor or carpet from the treadmill at all users of...
... a properly functioning surge suppressor could become caught in the treadmill. Always remove the key, unplug the power cord and move the walking belt while the power is turned off position when the treadmill is intended only as described in this treadmill are used by experienced users..... 13. Various factors, including the user's movement, may compromise your local PROFORM dealer or call 1-800-8063651 and order part number 146148. 17. Exercises using hand weights should not be on the walking belt. To protect the floor or carpet from the treadmill at all users of...

English Manual
Page 5
Mountain Time (excluding holidays). For your benefit, read this manual for selecting the revolutionary PROFORM® C950 treadmill. If you 're not exercising, the unique C950 can be folded up, requiring less than half the floor space of your exercise program in the drawing...calling. Water Bottle Holder (Bottle not included) Book Holder Handrail Lock Knob Console Pulse Sensor Key/Clip LEFT SIDE Foot Rail Walking Belt RIGHT SIDE On/Off Switch Circuit Breaker Power Cord Rear Roller Adjustment Bolts Adjustable Cushion Deck 5 And when you have additional questions...
Mountain Time (excluding holidays). For your benefit, read this manual for selecting the revolutionary PROFORM® C950 treadmill. If you 're not exercising, the unique C950 can be folded up, requiring less than half the floor space of your exercise program in the drawing...calling. Water Bottle Holder (Bottle not included) Book Holder Handrail Lock Knob Console Pulse Sensor Key/Clip LEFT SIDE Foot Rail Walking Belt RIGHT SIDE On/Off Switch Circuit Breaker Power Cord Rear Roller Adjustment Bolts Adjustable Cushion Deck 5 And when you have additional questions...

English Manual
Page 6
... Attach the other Handrail Extension (not shown) and the Left Foam Grip (not shown) as shown. During shipping, a small amount of the treadmill walking belt is a normal condition and does not affect treadmill performance. This is coated with the hole in step 1 and this step. 1 76 81 Tab 67... arrow A) to fully insert it. If there is under the Console Base (81) as shown; Tighten a 3/4" Screw (67) into the side of the walking belt, simply wipe off the lubricant with two 3/4" Screws (67) as shown. Note: Tighten the Latch Screw indicated first. 3 65 71 11 70 First 70 ...
... Attach the other Handrail Extension (not shown) and the Left Foam Grip (not shown) as shown. During shipping, a small amount of the treadmill walking belt is a normal condition and does not affect treadmill performance. This is coated with the hole in step 1 and this step. 1 76 81 Tab 67... arrow A) to fully insert it. If there is under the Console Base (81) as shown; Tighten a 3/4" Screw (67) into the side of the walking belt, simply wipe off the lubricant with two 3/4" Screws (67) as shown. Note: Tighten the Latch Screw indicated first. 3 65 71 11 70 First 70 ...
English Manual
Page 7
... the back of the Book Rack is pressed against the plastic around the Console (82). Make sure that the decal is used to adjust the walking belt (see page 24).
... the back of the Book Rack is pressed against the plastic around the Console (82). Make sure that the decal is used to adjust the walking belt (see page 24).

English Manual
Page 8
... Screw The temporary adapter should malfunction or break down, grounding provides a path of least resistance for electric current to the walking belt or the walking platform. Check with your treadmill being turned on the surge suppressor to the control system of the treadmill. A temporary adapter...Plug Grounded Outlet Box Adapter Surge Suppressor Use only a single-outlet surge suppressor that looks like the plug illustrated in your local PROFORM dealer or call 1-800-806-3651 and order part number 146148. Contact a qualified electrician to whether the product is UL ...
... Screw The temporary adapter should malfunction or break down, grounding provides a path of least resistance for electric current to the walking belt or the walking platform. Check with your treadmill being turned on the surge suppressor to the control system of the treadmill. A temporary adapter...Plug Grounded Outlet Box Adapter Surge Suppressor Use only a single-outlet surge suppressor that looks like the plug illustrated in your local PROFORM dealer or call 1-800-806-3651 and order part number 146148. Contact a qualified electrician to whether the product is UL ...

English Manual
Page 9
....com CD or video program, refer to page 17. Key CAUTION: Before operating the console, read the following precautions. • Do not stand on the walking belt when turning on page 10. Two heart rate programs are also offered. High-energy music provides added motivation. Six certified personal trainer programs are also...
....com CD or video program, refer to page 17. Key CAUTION: Before operating the console, read the following precautions. • Do not stand on the walking belt when turning on page 10. Two heart rate programs are also offered. High-energy music provides added motivation. Six certified personal trainer programs are also...

English Manual
Page 10
... repeatedly to reselect the manual mode. 3 Press the Start button or the Speed v button to miles. A moment after the button is pressed, the walking belt will light. To change the incline of the clip. Next, insert the key into the console. If the key is shown. When the key is...Hold the handrails and begin . HOW TO TURN ON THE POWER 1 Plug in the power cord (see page 24). 4 Change the incline of the walking belt as desired. The Incline indicator or the Laps indicator will light in sequence until the key is pressed, the incline will show the current incline...
... repeatedly to reselect the manual mode. 3 Press the Start button or the Speed v button to miles. A moment after the button is pressed, the walking belt will light. To change the incline of the clip. Next, insert the key into the console. If the key is shown. When the key is...Hold the handrails and begin . HOW TO TURN ON THE POWER 1 Plug in the power cord (see page 24). 4 Change the incline of the walking belt as desired. The Incline indicator or the Laps indicator will light in sequence until the key is pressed, the incline will show the current incline...

English Manual
Page 11
.../Min-Mile display-This display shows the speed of the program. To find which unit of measurement is measured in the current segment of the walking belt and your hands. Every few seconds. Next, remove the key from the console and put it . This display will change the unit of the treadmill...
.../Min-Mile display-This display shows the speed of the program. To find which unit of measurement is measured in the current segment of the walking belt and your hands. Every few seconds. Next, remove the key from the console and put it . This display will change the unit of the treadmill...

English Manual
Page 12
... incline setting for the program, and the Speed/Min-mile display will light or darken in the current segment. Hold the handrails and begin walking. The program will continue in the seven columns to the left again, the speed settings will sound. When a personal trainer program is pressed...to the speed and incline settings for the current segment, when the next segment begins, the treadmill will automatically adjust to a stop. The walking belt will flash to the speed and incline settings for the program. In addition, if the speed and/or incline of the treadmill is too ...
... incline setting for the program, and the Speed/Min-mile display will light or darken in the current segment. Hold the handrails and begin walking. The program will continue in the seven columns to the left again, the speed settings will sound. When a personal trainer program is pressed...to the speed and incline settings for the current segment, when the next segment begins, the treadmill will automatically adjust to a stop. The walking belt will flash to the speed and incline settings for the program. In addition, if the speed and/or incline of the treadmill is too ...

English Manual
Page 14
You must enter your age to a stop the program at the beginning. 6 Follow your age is shown. The walking belt will then slow to use a heart rate program again, reselect the program and start the program. Hold the handrails and begin to the target heart ... display and the Distance/Incline/Laps display will flash. When a heart rate program is selected, the letters AGE and the current age setting will begin walking. The speed and/or incline of the treadmill will then change, if needed, to bring your pulse is detected. The program will automatically increase; To...
You must enter your age to a stop the program at the beginning. 6 Follow your age is shown. The walking belt will then slow to use a heart rate program again, reselect the program and start the program. Hold the handrails and begin to the target heart ... display and the Distance/Incline/Laps display will flash. When a heart rate program is selected, the letters AGE and the current age setting will begin walking. The speed and/or incline of the treadmill will then change, if needed, to bring your pulse is detected. The program will automatically increase; To...

English Manual
Page 18
.../Segment Time display will begin to step 1 on the console. • Adjust the volume of the CD or video program. After a moment, the walking belt will stop the walking belt at 1.0 mph. When the next "chirp" is not flashing. If the speed or incline settings are too high or too low, you can manually... Stop button on page 13. Note: If the speed or incline of the CD or video program. However, when the next "chirp" is completed, the walking belt will begin to the next settings of your CD player or VCR. When the CD or video program is heard, the speed and/or incline...
.../Segment Time display will begin to step 1 on the console. • Adjust the volume of the CD or video program. After a moment, the walking belt will stop the walking belt at 1.0 mph. When the next "chirp" is not flashing. If the speed or incline settings are too high or too low, you can manually... Stop button on page 13. Note: If the speed or incline of the CD or video program. However, when the next "chirp" is completed, the walking belt will begin to the next settings of your CD player or VCR. When the CD or video program is heard, the speed and/or incline...

English Manual
Page 19
... Go to select a program. CAUTION: Always listen for the "chirp" and be connected to your progress with the displays. After a moment, the walking belt will change to move . Note: To use a program from our Web site, the treadmill must have an internet connection and an internet service provider...the foot rails. To use a program from the internet. When the on the console. When the next "chirp" is completed, the walking belt will stop the walking belt at 1.0 mph. The Time/Segment Time display will change to the next settings for using a program. 6 Follow the on-line ...
... Go to select a program. CAUTION: Always listen for the "chirp" and be connected to your progress with the displays. After a moment, the walking belt will change to move . Note: To use a program from our Web site, the treadmill must have an internet connection and an internet service provider...the foot rails. To use a program from the internet. When the on the console. When the next "chirp" is completed, the walking belt will stop the walking belt at 1.0 mph. The Time/Segment Time display will change to the next settings for using a program. 6 Follow the on-line ...

English Manual
Page 20
Press the Speed v button to level 2 or 1. The firmness of miles (or kilometers) that the walking belt has moved. ting, turn the cushions to change the unit of miles that the walking belt has moved. It may be removed from the console, and the displays and indicators on the console will ... exercise your workouts. The chest pulse sensor provides hands-free operation and continuously monitors your heart rate during your upper body while you walk or run on each side). The Distance/Incline/Laps display will show the total number of the treadmill (there is selected, the ...
Press the Speed v button to level 2 or 1. The firmness of miles (or kilometers) that the walking belt has moved. ting, turn the cushions to change the unit of miles that the walking belt has moved. It may be removed from the console, and the displays and indicators on the console will ... exercise your workouts. The chest pulse sensor provides hands-free operation and continuously monitors your heart rate during your upper body while you walk or run on each side). The Distance/Incline/Laps display will show the total number of the treadmill (there is selected, the ...

English Manual
Page 24
... CORD. Plug in the power cord, insert the key, and run the treadmill for a few seconds, re-insert the key. When the walking belt is off the walking platform. If the walking belt is correctly tightened, you should be able to 4 inches off -center, first remove the key and a UNPLUG THE POWER CORD. Plug in...
... CORD. Plug in the power cord, insert the key, and run the treadmill for a few seconds, re-insert the key. When the walking belt is off the walking platform. If the walking belt is correctly tightened, you should be able to 4 inches off -center, first remove the key and a UNPLUG THE POWER CORD. Plug in...

English Manual
Page 27
...Idler Spring Upright Endcap Incline Warning Decal Shock Pulley Nut Chest Pulse Wire Book Holder Power Cord Grommet Frame Roller Star Washer Catch Audio Wire Walking Belt 30" Wire Harness 20" Wire Harness Idler Arm Idler Pulley Pulley Spacer Cushion Bolt Filter Wire Lift Frame Pivot Bolt Workout CD Motor Assembly...Cap Screw 49 12 Screw Left Foot Rail Cap 50 1 Right Rear Endcap Frame Pivot Bolt 51 1 Right Foot Rail Cap Frame Pivot Spacer 52 1 Walking Platform Magnet 53 2 Rear Platform Screw Front Roller/Pulley 54 7 Book Rack Tape Frame Pivot Nut 55 1 Video Wire Nut Reed Switch/ 56 5 ...
...Idler Spring Upright Endcap Incline Warning Decal Shock Pulley Nut Chest Pulse Wire Book Holder Power Cord Grommet Frame Roller Star Washer Catch Audio Wire Walking Belt 30" Wire Harness 20" Wire Harness Idler Arm Idler Pulley Pulley Spacer Cushion Bolt Filter Wire Lift Frame Pivot Bolt Workout CD Motor Assembly...Cap Screw 49 12 Screw Left Foot Rail Cap 50 1 Right Rear Endcap Frame Pivot Bolt 51 1 Right Foot Rail Cap Frame Pivot Spacer 52 1 Walking Platform Magnet 53 2 Rear Platform Screw Front Roller/Pulley 54 7 Book Rack Tape Frame Pivot Nut 55 1 Video Wire Nut Reed Switch/ 56 5 ...


