

English Manual
Page 1
... reference. USER’'S MANUAL IMPORTANT: Please register this product (see the limited warranty on the back cover of this manual) before using this equipment. www.proform.com Model No. Write the serial number in this manual for reference. please contact Customer Care. CALL TOLL-FREE: 1-888-533-1333 Mon.–-Fri.... 6 a.m.–-6 p.m. PFTL79611.0 Serial No. Serial Number Decal QUESTIONS? Save this manual before contacting Customer Care. If you have questions, or if parts are damaged or missing, DO NOT CONTACT THE STORE; MT Sat. 8 a.m.–-4 p.m.
... reference. USER’'S MANUAL IMPORTANT: Please register this product (see the limited warranty on the back cover of this manual) before using this equipment. www.proform.com Model No. Write the serial number in this manual for reference. please contact Customer Care. CALL TOLL-FREE: 1-888-533-1333 Mon.–-Fri.... 6 a.m.–-6 p.m. PFTL79611.0 Serial No. Serial Number Decal QUESTIONS? Save this manual before contacting Customer Care. If you have questions, or if parts are damaged or missing, DO NOT CONTACT THE STORE; MT Sat. 8 a.m.–-4 p.m.
English Manual
Page 2
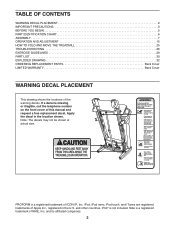
... IMPORTANT PRECAUTIONS 3 BEFORE YOU BEGIN 5 PART IDENTIFICATION CHART 6 ASSEMBLY 7 OPERATION AND ADJUSTMENT 15 HOW TO FOLD AND MOVE THE TREADMILL 25 TROUBLESHOOTING 26 EXERCISE GUIDELINES 29 PART LIST 30 EXPLODED DRAWING 32 ORDERING REPLACEMENT PARTS Back Cover LIMITED WARRANTY Back Cover WARNING ...DECAL PLACEMENT This drawing shows the locations of ICON IP, Inc. and its afliated companies. 2 PROFORM ...
... IMPORTANT PRECAUTIONS 3 BEFORE YOU BEGIN 5 PART IDENTIFICATION CHART 6 ASSEMBLY 7 OPERATION AND ADJUSTMENT 15 HOW TO FOLD AND MOVE THE TREADMILL 25 TROUBLESHOOTING 26 EXERCISE GUIDELINES 29 PART LIST 30 EXPLODED DRAWING 32 ORDERING REPLACEMENT PARTS Back Cover LIMITED WARRANTY Back Cover WARNING ...DECAL PLACEMENT This drawing shows the locations of ICON IP, Inc. and its afliated companies. 2 PROFORM ...

English Manual
Page 4
... the location of the power switch), and unplug the power cord when the treadmill is running. Inspect and properly tighten all parts of heart rate readings. Always unplug the power cord immediately after use only. The treadmill is not a medical device. Do not use . 21. When folding or... moving the treadmill, make sure that the storage latch is intended only as an ...
... the location of the power switch), and unplug the power cord when the treadmill is running. Inspect and properly tighten all parts of heart rate readings. Always unplug the power cord immediately after use only. The treadmill is not a medical device. Do not use . 21. When folding or... moving the treadmill, make sure that the storage latch is intended only as an ...

English Manual
Page 5
...us . And when you for selecting the revolutionary PROFORM® POWER 795 treadmill. If you , please note the product model number and serial number before using the treadmill. BEFORE YOU BEGIN Thank you ’'re not exercising, the unique treadmill can be folded up, requiring less than half ...the oor space of other treadmills. The POWER 795 treadmill offers an impressive selection of this manual. Before reading further, please review the drawing below and familiarize yourself with the labeled parts. The model number and the location of the serial number...
...us . And when you for selecting the revolutionary PROFORM® POWER 795 treadmill. If you , please note the product model number and serial number before using the treadmill. BEFORE YOU BEGIN Thank you ’'re not exercising, the unique treadmill can be folded up, requiring less than half ...the oor space of other treadmills. The POWER 795 treadmill offers an impressive selection of this manual. Before reading further, please review the drawing below and familiarize yourself with the labeled parts. The model number and the location of the serial number...

English Manual
Page 6
... CHART Use the drawings below each drawing is the key number of the part, from the PART LIST near the end of this manual. Extra parts may be included. 1/4" Star 1/4" Flat 5/16" Flat 5/16" Star Washer (35)–-2 Washer (36)–-2 Washer (113... 5/16" x 1" Screw (5)–-4 5/16" x 1 1/4" Bolt (4)–-6 3/8" x 1 1/4" Screw (8)–-4 3/8" x 1 3/4" Bolt (6)–-1 3/8" x 2" Bolt (3)–-1 3/8" x 2 3/4" Screw (7)–-4 6 Note: If a part is not in parentheses below to see if it is the quantity used for assembly. The number in the hardware kit, check to identify small...
... CHART Use the drawings below each drawing is the key number of the part, from the PART LIST near the end of this manual. Extra parts may be included. 1/4" Star 1/4" Flat 5/16" Flat 5/16" Star Washer (35)–-2 Washer (36)–-2 Washer (113... 5/16" x 1" Screw (5)–-4 5/16" x 1 1/4" Bolt (4)–-6 3/8" x 1 1/4" Screw (8)–-4 3/8" x 1 3/4" Bolt (6)–-1 3/8" x 2" Bolt (3)–-1 3/8" x 2 3/4" Screw (7)–-4 6 Note: If a part is not in parentheses below to see if it is the quantity used for assembly. The number in the hardware kit, check to identify small...

English Manual
Page 7
...If there is unplugged. ASSEMBLY •• To hire an authorized service technician to assemble the treadmill, call 1-800-445-2480. •• Assembly requires two persons. •• Place all parts in the same way. 94 2 56 96 Cardboard 2. Attach the Right Wheel Cap (not shown...) to the Base (94) with a soft cloth and a mild, non-abrasive cleaner. •• To identify small parts, see page 6. •• Assembly requires the following tools: the included hex keys one adjustable wrench one Phillips screwdriver scissors needlenose pliers To ...
...If there is unplugged. ASSEMBLY •• To hire an authorized service technician to assemble the treadmill, call 1-800-445-2480. •• Assembly requires two persons. •• Place all parts in the same way. 94 2 56 96 Cardboard 2. Attach the Right Wheel Cap (not shown...) to the Base (94) with a soft cloth and a mild, non-abrasive cleaner. •• To identify small parts, see page 6. •• Assembly requires the following tools: the included hex keys one adjustable wrench one Phillips screwdriver scissors needlenose pliers To ...

English Manual
Page 14
... the upper end of the hex keys is completed. one of the Storage Latch (53) to the position shown. Make sure that you use the treadmill. If there are oriented as 18 shown with a 3/8" x 2" Bolt (3) and a 3/8" Nut (12). Have a second person hold the Frame until this step, ...17 make sure that all parts are properly tightened before you have read and followed all instructions in a secure place; 17. IMPORTANT: Before you begin this step is used to the...
... the upper end of the hex keys is completed. one of the Storage Latch (53) to the position shown. Make sure that you use the treadmill. If there are oriented as 18 shown with a 3/8" x 2" Bolt (3) and a 3/8" Nut (12). Have a second person hold the Frame until this step, ...17 make sure that all parts are properly tightened before you have read and followed all instructions in a secure place; 17. IMPORTANT: Before you begin this step is used to the...

English Manual
Page 29
... heart rate monitor is to prevent post-exercise problems. EXERCISE FREQUENCY To maintain or improve your muscles and helps to make exercise a regular and enjoyable part of stretching and light exercise. The heart rate monitor is especially important for fat burning and aerobic exercise. To find the proper intensity level, find...
... heart rate monitor is to prevent post-exercise problems. EXERCISE FREQUENCY To maintain or improve your muscles and helps to make exercise a regular and enjoyable part of stretching and light exercise. The heart rate monitor is especially important for fat burning and aerobic exercise. To find the proper intensity level, find...

English Manual
Page 30
PART LIST Key No. Qty. 51 1 52 1 53 1 54 1 55 1 56 1 57 2 58 1 59 4 60 1 61 1 62 1 63 1 64 1 65 1 66 1 67 2 68 1 69 1 70 1 71 2 ...
PART LIST Key No. Qty. 51 1 52 1 53 1 54 1 55 1 56 1 57 2 58 1 59 4 60 1 61 1 62 1 63 1 64 1 65 1 66 1 67 2 68 1 69 1 70 1 71 2 ...

English Manual
Page 31
Description Right Tray Console Base Base Ground Wire Hood Clip #10 x 3/4" Flat Head Screw 5/16" Flat Washer User’'s Manual Note: Specications are not illustrated. 31 Qty. 101 1 102 1 103 1 104 1 105 2 106 2 107 1 Description Module Housing Console Back Console Console Frame Ground Wire Console Clamp Left Tray Key No. For information about ordering replacement parts, see the back cover of this manual. *These parts are subject to change without notice. Qty. 108 1 109 1 110 1 111 3 112 2 113 4 * –- Key No.
Description Right Tray Console Base Base Ground Wire Hood Clip #10 x 3/4" Flat Head Screw 5/16" Flat Washer User’'s Manual Note: Specications are not illustrated. 31 Qty. 101 1 102 1 103 1 104 1 105 2 106 2 107 1 Description Module Housing Console Back Console Console Frame Ground Wire Console Clamp Left Tray Key No. For information about ordering replacement parts, see the back cover of this manual. *These parts are subject to change without notice. Qty. 108 1 109 1 110 1 111 3 112 2 113 4 * –- Key No.

English Manual
Page 36
...ICON’'s option, the product through one (1) year from the service center will be the customer’'s responsibility. ORDERING REPLACEMENT PARTS To order replacement parts, please see the PART LIST and the EXPLODED DRAWING near the end of any kind. The frame and drive motor are limited in -home service, ... •• the name of the product (see the front cover of this manual) •• the key number and description of the replacement part(s) (see the front cover of this warranty is used for two (2) years from defects in USA © 2013 ICON IP, Inc. or other ...
...ICON’'s option, the product through one (1) year from the service center will be the customer’'s responsibility. ORDERING REPLACEMENT PARTS To order replacement parts, please see the PART LIST and the EXPLODED DRAWING near the end of any kind. The frame and drive motor are limited in -home service, ... •• the name of the product (see the front cover of this manual) •• the key number and description of the replacement part(s) (see the front cover of this warranty is used for two (2) years from defects in USA © 2013 ICON IP, Inc. or other ...


