User Manual
Page 3
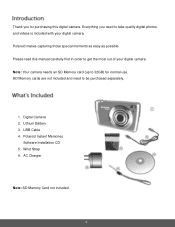
...5. Note: Your camera needs an SD Memory card (up to get the most out of your digital camera. AC Charger Note: SD Memory Card not included. 2 Please read this manual carefully first in order to 32GB) for purchasing this digital camera. Polaroid makes capturing those special... moments as easy as possible. Wrist Strap 6. Digital Camera 2. USB Cable 4. SD ...
...5. Note: Your camera needs an SD Memory card (up to get the most out of your digital camera. AC Charger Note: SD Memory Card not included. 2 Please read this manual carefully first in order to 32GB) for purchasing this digital camera. Polaroid makes capturing those special... moments as easy as possible. Wrist Strap 6. Digital Camera 2. USB Cable 4. SD ...
User Manual
Page 8
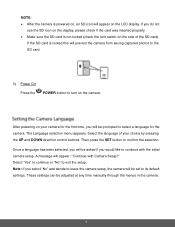
... buttons. Select the language of the SD card). Then press the SET button to exit the setup. Note: If you would like to continue with Camera Setup?" Select "Yes" to continue or "No" to confirm the selection. If the SD card is locked this will appear on the LCD display. These... check if the card was inserted properly. Make sure the SD card is not locked (check the lock switch on the side of your camera for the first time, you will be prompted to select a language for the camera. A message will be adjusted at any time manually through the menus in the...
... buttons. Select the language of the SD card). Then press the SET button to exit the setup. Note: If you would like to continue with Camera Setup?" Select "Yes" to continue or "No" to confirm the selection. If the SD card is locked this will appear on the LCD display. These... check if the card was inserted properly. Make sure the SD card is not locked (check the lock switch on the side of your camera for the first time, you will be prompted to select a language for the camera. A message will be adjusted at any time manually through the menus in the...
User Manual
Page 20
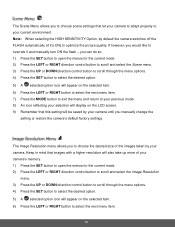
... to scroll through the menu options. 4) Press the SET button to select the desired option. 5) A selected option icon will be saved by your camera until you can do so. 1) Press the SET button to open the menus for the current mode. 2) Press the LEFT or RIGHT direction control...would like to override it 's ON) to optimize the picture quality. Note: When selecting the HIGH SENSITIVITY Option, by your camera. you manually change the setting or restore the camera's default factory settings. Keep in mind that this setting will appear on the selected item. 6) Press the LEFT or RIGHT ...
... to scroll through the menu options. 4) Press the SET button to select the desired option. 5) A selected option icon will be saved by your camera until you can do so. 1) Press the SET button to open the menus for the current mode. 2) Press the LEFT or RIGHT direction control...would like to override it 's ON) to optimize the picture quality. Note: When selecting the HIGH SENSITIVITY Option, by your camera. you manually change the setting or restore the camera's default factory settings. Keep in mind that this setting will appear on the selected item. 6) Press the LEFT or RIGHT ...
User Manual
Page 21
...An icon reflecting your selection will display on the LCD screen. 9) Remember that this setting will be saved by your camera until you manually change the setting or restore the camera's default factory settings. 7) Press the MODE button to exit the menu and return to your previous mode. 8) An ...icon reflecting your selection will display on the LCD screen. 9) Remember that this setting will be saved by your camera until you manually change the ...
...An icon reflecting your selection will display on the LCD screen. 9) Remember that this setting will be saved by your camera until you manually change the setting or restore the camera's default factory settings. 7) Press the MODE button to exit the menu and return to your previous mode. 8) An ...icon reflecting your selection will display on the LCD screen. 9) Remember that this setting will be saved by your camera until you manually change the ...
User Manual
Page 22
... to your previous mode. 8) An icon reflecting your selection will display on the LCD screen. 9) Remember that this setting will be saved by your camera until you manually change the setting or restore the camera's default factory settings. The Anti-Shake feature reduces image distortion that can be caused by movement of the... return to your previous mode. 8) An icon reflecting your selection will display on the LCD screen. 9) Remember that this setting will be saved by your camera until you manually change the setting or restore the...
... to your previous mode. 8) An icon reflecting your selection will display on the LCD screen. 9) Remember that this setting will be saved by your camera until you manually change the setting or restore the camera's default factory settings. The Anti-Shake feature reduces image distortion that can be caused by movement of the... return to your previous mode. 8) An icon reflecting your selection will display on the LCD screen. 9) Remember that this setting will be saved by your camera until you manually change the setting or restore the...
User Manual
Page 23
...at least 4 to ensure that this setting will display on the LCD. Anti-Shake On - Face Detect will not work if the camera is meant to 5 seconds until the green square(s) appears around the subject's face. The mountain icon will appear on the LCD screen. 9) ...color and focus of the subject(s) you manually change the setting or restore the camera's default factory settings. 22 The Anti-Shake option is set to 'On' allows the camera to your previous mode. 8) An icon reflecting your camera and assists you in the camera's display. Face Detect will not work with...
...at least 4 to ensure that this setting will display on the LCD. Anti-Shake On - Face Detect will not work if the camera is meant to 5 seconds until the green square(s) appears around the subject's face. The mountain icon will appear on the LCD screen. 9) ...color and focus of the subject(s) you manually change the setting or restore the camera's default factory settings. 22 The Anti-Shake option is set to 'On' allows the camera to your previous mode. 8) An icon reflecting your camera and assists you in the camera's display. Face Detect will not work with...
User Manual
Page 24
... 4) Press the SET button to select the desired option. 5) A selected option icon will allow the 23 The White Balance feature allows your camera to adjust the coloring of the captured images depending on your current environment will appear on the selected item. 6) Press the LEFT or RIGHT ...Press the MODE button to exit the menu and return to your previous mode. 8) An icon reflecting your camera until you manually change the setting or restore the camera's default factory settings. Your camera contains a Macro Menu that allows you to enable or disable the Macro mode on the type of light...
... 4) Press the SET button to select the desired option. 5) A selected option icon will allow the 23 The White Balance feature allows your camera to adjust the coloring of the captured images depending on your current environment will appear on the selected item. 6) Press the LEFT or RIGHT ...Press the MODE button to exit the menu and return to your previous mode. 8) An icon reflecting your camera until you manually change the setting or restore the camera's default factory settings. Your camera contains a Macro Menu that allows you to enable or disable the Macro mode on the type of light...
User Manual
Page 25
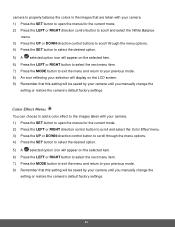
You can choose to add a color effect to the images taken with your camera. 1) Press the SET button to open the menus for the current mode. 2) Press the...8) Remember that this setting will be saved by your camera until you manually change the setting or restore the camera's default factory settings. camera to properly balance the colors in the images that are taken with your camera. 1) Press the SET button to open the menus ... icon will appear on the LCD screen. 9) Remember that this setting will be saved by your camera until you manually change the setting or restore the...
You can choose to add a color effect to the images taken with your camera. 1) Press the SET button to open the menus for the current mode. 2) Press the...8) Remember that this setting will be saved by your camera until you manually change the setting or restore the camera's default factory settings. camera to properly balance the colors in the images that are taken with your camera. 1) Press the SET button to open the menus ... icon will appear on the LCD screen. 9) Remember that this setting will be saved by your camera until you manually change the setting or restore the...
User Manual
Page 26
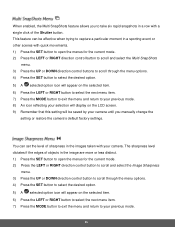
... control buttons to scroll through the menu options. 4) Press the SET button to select the desired option. 5) A selected option icon will be saved by your camera until you to your camera. This feature can set the level of the Shutter button. When enabled, the Multi SnapShots feature allows you...
... control buttons to scroll through the menu options. 4) Press the SET button to select the desired option. 5) A selected option icon will be saved by your camera until you to your camera. This feature can set the level of the Shutter button. When enabled, the Multi SnapShots feature allows you...
User Manual
Page 27
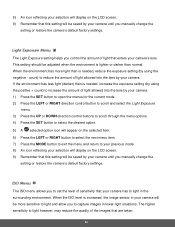
...display on the LCD screen. 9) Remember that this setting will be saved by your camera. When the environment has more sensitive to light and allow you manually change the setting or restore the camera's default factory settings. The ISO menu allows you to set the level of sensitivity ... you to light however, may reduce the quality of the images that are taken. 26 The Light Exposure setting helps you manually change the setting or restore the camera's default factory settings. count) to light in lower-light situations. 8) An icon reflecting your selection will display on the LCD...
...display on the LCD screen. 9) Remember that this setting will be saved by your camera. When the environment has more sensitive to light and allow you manually change the setting or restore the camera's default factory settings. The ISO menu allows you to set the level of sensitivity ... you to light however, may reduce the quality of the images that are taken. 26 The Light Exposure setting helps you manually change the setting or restore the camera's default factory settings. count) to light in lower-light situations. 8) An icon reflecting your selection will display on the LCD...
User Manual
Page 28
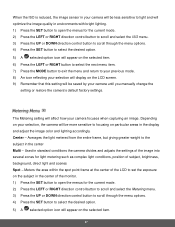
...of subject, brightness, background, direct light and scenes Spot - Depending on your selection, the camera will be saved by your camera until you manually change the setting or restore the camera's default factory settings. Averages the light metered from the entire frame, but giving greater weight to... the subject in the center Multi - Used in standard conditions the camera divides and adjusts ...
...of subject, brightness, background, direct light and scenes Spot - Depending on your selection, the camera will be saved by your camera until you manually change the setting or restore the camera's default factory settings. Averages the light metered from the entire frame, but giving greater weight to... the subject in the center Multi - Used in standard conditions the camera divides and adjusts ...
User Manual
Page 29
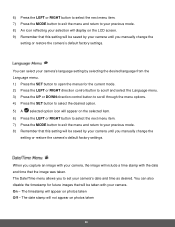
... previous mode. 8) An icon reflecting your selection will display on photos taken Off - When you manually change the setting or restore the camera's default factory settings. The Date/Time menu allows you manually change the setting or restore the camera's default factory settings. The timestamp will appear on the LCD screen. 9) Remember that this...
... previous mode. 8) An icon reflecting your selection will display on photos taken Off - When you manually change the setting or restore the camera's default factory settings. The Date/Time menu allows you manually change the setting or restore the camera's default factory settings. The timestamp will appear on the LCD screen. 9) Remember that this...
User Manual
Page 30
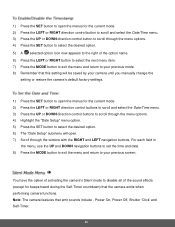
...to set the time and date. 8) Press the MODE button to exit the menu and return to your previous mode. 8) Remember that the camera emits when performing camera functions. 1) Press the SET button to open the menus for the current mode. 2) Press the LEFT or RIGHT direction control buttons to ... of the sound effects (except for beeps heard during the Self-Timer countdown) that this setting will be saved by your camera until you manually change the setting or restore the camera's default factory settings. 1) Press the SET button to open the menus for the current mode. 2) Press the LEFT or ...
...to set the time and date. 8) Press the MODE button to exit the menu and return to your previous mode. 8) Remember that the camera emits when performing camera functions. 1) Press the SET button to open the menus for the current mode. 2) Press the LEFT or RIGHT direction control buttons to ... of the sound effects (except for beeps heard during the Self-Timer countdown) that this setting will be saved by your camera until you manually change the setting or restore the camera's default factory settings. 1) Press the SET button to open the menus for the current mode. 2) Press the LEFT or ...
User Manual
Page 31
... will automatically power off completely and will need to be saved by your camera until you manually change the setting or restore the camera's default factory settings. The designated time represents when your camera until you manually change the setting or restore the camera's default factory settings. 30 The Silent Mode Options include: Silent Mode...
... will automatically power off completely and will need to be saved by your camera until you manually change the setting or restore the camera's default factory settings. The designated time represents when your camera until you manually change the setting or restore the camera's default factory settings. 30 The Silent Mode Options include: Silent Mode...
User Manual
Page 32
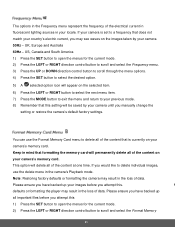
If your camera is currently on your camera. 50Hz - If you manually change the setting or restore the camera's default factory settings. You can use the delete menu in the loss of data. N defaults or formatting the player may result in the camera's Playback mode. Keep in your locale. ...the electrical current in fluorescent lighting sources in mind that formatting the memory card will permanently delete all of the content on your camera's memory card. Please ensure you have backed up your images before you attempt this. Please ensure you have backed up all...
If your camera is currently on your camera. 50Hz - If you manually change the setting or restore the camera's default factory settings. You can use the delete menu in the loss of data. N defaults or formatting the player may result in the camera's Playback mode. Keep in your locale. ...the electrical current in fluorescent lighting sources in mind that formatting the memory card will permanently delete all of the content on your camera's memory card. Please ensure you have backed up your images before you attempt this. Please ensure you have backed up all...
User Manual
Page 37
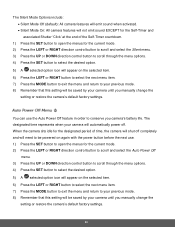
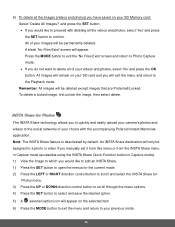
... MODE button to exit the 'No Files Exist' screen and return to Photo Capture mode. If you to quickly and easily upload your camera's photos and videos to select and save the desired option. 5) A selected option icon will be permanently deleted. An INSTA Share destination will only...videos and photos, select 'Yes' and press the SET button to proceed with the accompanying Polaroid Instant Memories application. A blank 'No Files Exist' screen will be assigned to a photo or video if you manually set it from this menu or from the INSTA Share menu in Capture mode (accessible ...
... MODE button to exit the 'No Files Exist' screen and return to Photo Capture mode. If you to quickly and easily upload your camera's photos and videos to select and save the desired option. 5) A selected option icon will be permanently deleted. An INSTA Share destination will only...videos and photos, select 'Yes' and press the SET button to proceed with the accompanying Polaroid Instant Memories application. A blank 'No Files Exist' screen will be assigned to a photo or video if you manually set it from this menu or from the INSTA Share menu in Capture mode (accessible ...

User Manual
Page 44
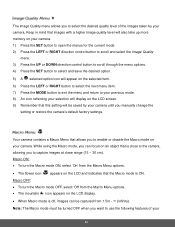
...Remember that images with a larger size will be saved by your camera until you manually change the setting or restore the camera's default factory settings. The Image Size menu allows you manually change the setting or restore the camera's default factory settings. 43 Keep in mind that this setting will ...be saved by your camera until you to choose the desired size of your camera's memory. 1) Press the SET button to...
...Remember that images with a larger size will be saved by your camera until you manually change the setting or restore the camera's default factory settings. The Image Size menu allows you manually change the setting or restore the camera's default factory settings. 43 Keep in mind that this setting will ...be saved by your camera until you to choose the desired size of your camera's memory. 1) Press the SET button to...
User Manual
Page 45
... your selection will display on the LCD screen. 9) Remember that images with a higher image quality level will also take up more memory on your camera. 1) Press the SET button to open the menus for the current mode. 2) Press the LEFT or RIGHT direction control button to scroll and select... return to enable or disable the Macro mode on the LCD and indicates that allows you manually change the setting or restore the camera's default factory settings. Note: The Macro mode must be saved by your camera. Your camera contains a Macro Menu that the Macro mode is ON. Macro ON: To ...
... your selection will display on the LCD screen. 9) Remember that images with a higher image quality level will also take up more memory on your camera. 1) Press the SET button to open the menus for the current mode. 2) Press the LEFT or RIGHT direction control button to scroll and select... return to enable or disable the Macro mode on the LCD and indicates that allows you manually change the setting or restore the camera's default factory settings. Note: The Macro mode must be saved by your camera. Your camera contains a Macro Menu that the Macro mode is ON. Macro ON: To ...
User Manual
Page 46
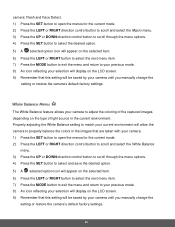
... return to your previous mode. 8) An icon reflecting your selection will display on the LCD screen. 9) Remember that this setting will be saved by your camera until you manually change the setting or restore the camera's default factory settings. Properly adjusting the White Balance setting to match your current environment will allow the... return to your previous mode. 8) An icon reflecting your selection will display on the LCD screen. 9) Remember that this setting will be saved by your camera until you manually change the setting or restore the...
... return to your previous mode. 8) An icon reflecting your selection will display on the LCD screen. 9) Remember that this setting will be saved by your camera until you manually change the setting or restore the camera's default factory settings. Properly adjusting the White Balance setting to match your current environment will allow the... return to your previous mode. 8) An icon reflecting your selection will display on the LCD screen. 9) Remember that this setting will be saved by your camera until you manually change the setting or restore the...
User Manual
Page 47
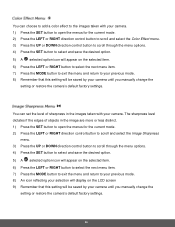
... to select and save the desired option. 5) A selected option icon will appear on the LCD screen 9) Remember that this setting will be saved by your camera until you manually change the setting or restore the camera's default factory settings. 46 You can choose to add a color effect to the images taken with your... menu item. 7) Press the MODE button to exit the menu and return to your previous mode. 8) Remember that this setting will be saved by your camera until you manually change the setting or restore the...
... to select and save the desired option. 5) A selected option icon will appear on the LCD screen 9) Remember that this setting will be saved by your camera until you manually change the setting or restore the camera's default factory settings. 46 You can choose to add a color effect to the images taken with your... menu item. 7) Press the MODE button to exit the menu and return to your previous mode. 8) Remember that this setting will be saved by your camera until you manually change the setting or restore the...


