
User Manual
Page 3
Table of Contents Safety Information 2 Identification of Controls 4 Remote Control 6 System Connections 8 System Setup 14 Source List 22 Recording 22 Copying from HDD to DVD 24 Playback 24 Editing 25 File Manager 28 USB and SD 29 YesDVD® 30 Troubleshooting 33 Technical Specifications 34 Glossary of Terms 35
Table of Contents Safety Information 2 Identification of Controls 4 Remote Control 6 System Connections 8 System Setup 14 Source List 22 Recording 22 Copying from HDD to DVD 24 Playback 24 Editing 25 File Manager 28 USB and SD 29 YesDVD® 30 Troubleshooting 33 Technical Specifications 34 Glossary of Terms 35

User Manual
Page 6
..., if the disc has the function, press to access DVD title menu 14. ZOOM button: press to enter setup menu 10. Remote Control 1. UP arrow 7. SETUP button: press to increase the on-screen image 37. button: press to select HDD record or playback 22. I/P button: press to cancel sound 13... button: press to set a timer recording 19. A-TV button: press to enter the edit mode 20. EDIT button: press to select analog television 40. AUDIO button: press to select DVD record or playback 21. DVD button: press to view current OSD language 17. HDD button: press to go fast backward 11...
..., if the disc has the function, press to access DVD title menu 14. ZOOM button: press to enter setup menu 10. Remote Control 1. UP arrow 7. SETUP button: press to increase the on-screen image 37. button: press to select HDD record or playback 22. I/P button: press to cancel sound 13... button: press to set a timer recording 19. A-TV button: press to enter the edit mode 20. EDIT button: press to select analog television 40. AUDIO button: press to select DVD record or playback 21. DVD button: press to view current OSD language 17. HDD button: press to go fast backward 11...
User Manual
Page 22
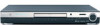
... source and ENTER to select the source. 1. The system state should indicate "stop recording, press STOP. RECORDING TO THE HDD USING THE REC BUTTON: 1. This will immediately start recording your current source input. This will toggle you want to access the USB or SD...stop ". Source List There are two ways to select. RECORD TO A DVD USING THE REC BUTTON: 1. Select the source for the recording. 2. Press REC. Recording Before recording, endure the timeshift buffer is off by pressing TIMESHIFT on the remote. Press REC. If yes, see the YesDVD section in...
... source and ENTER to select the source. 1. The system state should indicate "stop recording, press STOP. RECORDING TO THE HDD USING THE REC BUTTON: 1. This will immediately start recording your current source input. This will toggle you want to access the USB or SD...stop ". Source List There are two ways to select. RECORD TO A DVD USING THE REC BUTTON: 1. Select the source for the recording. 2. Press REC. Recording Before recording, endure the timeshift buffer is off by pressing TIMESHIFT on the remote. Press REC. If yes, see the YesDVD section in...
User Manual
Page 23
...arrow then up and down arrows to the HDD or DVD c. Use right arrow then up and down arrows to select to record to select the input source or DTV scanned channel. Use right arrow then up and down arrows to cancel the timed recording. End: press ENTER. DVT Channel: press...up and down arrows to change letters and name the recording (up and down arrows to resume watching your recording), press TIMESHIFT. 23 This will appear. To see the progress of the timer recording, press DISPLAY. 4. a. Press timer button on the remote control. 2. Press ENTER. When you are ready ...
...arrow then up and down arrows to the HDD or DVD c. Use right arrow then up and down arrows to select to record to select the input source or DTV scanned channel. Use right arrow then up and down arrows to cancel the timed recording. End: press ENTER. DVT Channel: press...up and down arrows to change letters and name the recording (up and down arrows to resume watching your recording), press TIMESHIFT. 23 This will appear. To see the progress of the timer recording, press DISPLAY. 4. a. Press timer button on the remote control. 2. Press ENTER. When you are ready ...
User Manual
Page 31
... be lost. Press the HDD button to archive hard disc drive recordings onto DVD+R/RW or DVD-R/RW discs. And, you through the chapters. split, segment, combine) to YesDVD recordings on the hard drive, the YesDVD features will notice that when you would like to include on the DVD disc, use the remote control's arrow buttons to...
... be lost. Press the HDD button to archive hard disc drive recordings onto DVD+R/RW or DVD-R/RW discs. And, you through the chapters. split, segment, combine) to YesDVD recordings on the hard drive, the YesDVD features will notice that when you would like to include on the DVD disc, use the remote control's arrow buttons to...


