
User Manual
Page 3
Table of Contents Safety Information 2 Identification of Controls 4 Remote Control 6 System Connections 8 System Setup 14 Source List 22 Recording 22 Copying from HDD to DVD 24 Playback 24 Editing 25 File Manager 28 USB and SD 29 YesDVD® 30 Troubleshooting 33 Technical Specifications 34 Glossary of Terms 35
Table of Contents Safety Information 2 Identification of Controls 4 Remote Control 6 System Connections 8 System Setup 14 Source List 22 Recording 22 Copying from HDD to DVD 24 Playback 24 Editing 25 File Manager 28 USB and SD 29 YesDVD® 30 Troubleshooting 33 Technical Specifications 34 Glossary of Terms 35

User Manual
Page 6
...brings you back to the previous channel you were viewing in DVD playback, if the disc has the function, press to the previous DVD chapter 33. A-TV button: press to select HDD record or playback 22. CH- MUTE button: press to access DVD title menu 14. TITLE button: press to cancel sound ...13. TIMER button: press to access the file manager 6 VOL- DOWN arrow 30. FILE button: press to set a timer recording 19. button: press to...
...brings you back to the previous channel you were viewing in DVD playback, if the disc has the function, press to the previous DVD chapter 33. A-TV button: press to select HDD record or playback 22. CH- MUTE button: press to access DVD title menu 14. TITLE button: press to cancel sound ...13. TIMER button: press to access the file manager 6 VOL- DOWN arrow 30. FILE button: press to set a timer recording 19. button: press to...
User Manual
Page 22
... ask if you want to create a Yes DVD. Press REC. The unit will appear. 3. The system state should indicate "stop recording, press STOP. RECORDING TO THE HDD USING THE REC BUTTON: 1. This will appear. 3. A dialog box will immediately start recording your current source input. This will appear. ... , press DISPLAY. Press REC. Using the right or left arrow, select DVD. While recording, the unit will immediately start recording your current source input. Using the right or left arrow, select HDD. This will not let you want to access the USB or SD card,...
... ask if you want to create a Yes DVD. Press REC. The unit will appear. 3. The system state should indicate "stop recording, press STOP. RECORDING TO THE HDD USING THE REC BUTTON: 1. This will appear. 3. A dialog box will immediately start recording your current source input. This will appear. ... , press DISPLAY. Press REC. Using the right or left arrow, select DVD. While recording, the unit will immediately start recording your current source input. Using the right or left arrow, select HDD. This will not let you want to access the USB or SD card,...
User Manual
Page 23
...ready to select the recording quality d. To see the progress of the timer recording, press DISPLAY. 4. Press timer button on the remote control. 2. Quality: press ENTER. Use right arrow then up and down arrows to the HDD or DVD c. If you have to set the start recording the current channel ...and pause the live broadcast, follow these steps: 1. If you do not cancel the recording, the unit will start date f. This will automatically record the program and change to change ...
...ready to select the recording quality d. To see the progress of the timer recording, press DISPLAY. 4. Press timer button on the remote control. 2. Quality: press ENTER. Use right arrow then up and down arrows to the HDD or DVD c. If you have to set the start recording the current channel ...and pause the live broadcast, follow these steps: 1. If you do not cancel the recording, the unit will start date f. This will automatically record the program and change to change ...

User Manual
Page 24
Using the up and down arrows, select the recorded segment you would like to watch and press ENTER. Press ADD/CLEAR. 4. This will transfer your material from HDD to DVD COPYING FROM HDD TO DVD: 1. Press ENTER again to select the scan forward or backward speed; During playback, press to start ...using the right and left arrows During playback, press to go to the next chapter or title or to return to copy. 5. PLAYBACK FROM DVD: 1. during HDD playback, press AUDIO, then the right and left arrows to copy. 3. A preview screen will appear. 2. If not, pressing TITLE will...
Using the up and down arrows, select the recorded segment you would like to watch and press ENTER. Press ADD/CLEAR. 4. This will transfer your material from HDD to DVD COPYING FROM HDD TO DVD: 1. Press ENTER again to select the scan forward or backward speed; During playback, press to start ...using the right and left arrows During playback, press to go to the next chapter or title or to return to copy. 5. PLAYBACK FROM DVD: 1. during HDD playback, press AUDIO, then the right and left arrows to copy. 3. A preview screen will appear. 2. If not, pressing TITLE will...
User Manual
Page 25
... and press ENTER. v. vi. Press ENTER at the point you to the last input source. You need to use the down arrow key to the HDD. 25 h. A dialog box will copy the current video clip to select the edit you video clip b. j. Chapter iii. It allows you would to skip/advance.... e. Erase title: Use the down arrow button ENTER to your video clip. YES to confirm deletion, NO to DVD will record over the entire DVD disk. Press the REC button. Recoding to DVD will add to the last input source. You will appear. A dialog box will go to the current video clip...
... and press ENTER. v. vi. Press ENTER at the point you to the last input source. You need to use the down arrow key to the HDD. 25 h. A dialog box will copy the current video clip to select the edit you video clip b. j. Chapter iii. It allows you would to skip/advance.... e. Erase title: Use the down arrow button ENTER to your video clip. YES to confirm deletion, NO to DVD will record over the entire DVD disk. Press the REC button. Recoding to DVD will add to the last input source. You will appear. A dialog box will go to the current video clip...

User Manual
Page 26
...After the copying is complete, you are in different orders, press EDIT until the recorded programs are ready to remove a segment press ENTER. EDIT FROM HDD: 1. Use the up and down arrows, select the recorded segment you would to make the transfer and follow the on-screen directions. When you...segment, press ADD/CLEAR while the segment is now unlocked. h. Unprotect: press ENTER. • To copy from HDD to DVD, using the up and down to continue viewing. You can also use the DVD functions buttons (fast-forward, play . The program will begin to play , pause, stop, etc.) to &#...
...After the copying is complete, you are in different orders, press EDIT until the recorded programs are ready to remove a segment press ENTER. EDIT FROM HDD: 1. Use the up and down arrows, select the recorded segment you would to make the transfer and follow the on-screen directions. When you...segment, press ADD/CLEAR while the segment is now unlocked. h. Unprotect: press ENTER. • To copy from HDD to DVD, using the up and down to continue viewing. You can also use the DVD functions buttons (fast-forward, play . The program will begin to play , pause, stop, etc.) to &#...

User Manual
Page 27
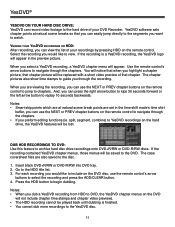
... the up and down arrows, select the edit you already have recorded. You will automatically copy the DVD material to stop recording. To create a YesDVD, select "yes, create YesDVD disc", select "no" to record (HDD or DVD). YesDVD finalize: this will be made. Copy all: ...this will appear. Preview screens will appear. 3. A dialog box will appear. 2. Press STOP to the HDD. To unlock, press left arrow, select DVD. Using the up arrow, then the...
... the up and down arrows, select the edit you already have recorded. You will automatically copy the DVD material to stop recording. To create a YesDVD, select "yes, create YesDVD disc", select "no" to record (HDD or DVD). YesDVD finalize: this will be made. Copy all: ...this will appear. Preview screens will appear. 3. A dialog box will appear. 2. Press STOP to the HDD. To unlock, press left arrow, select DVD. Using the up arrow, then the...

User Manual
Page 29
...down arrows, select the directory you want to . 7. Highlight "Do Copy" and press ENTER. 29 Insert USB/SD into the appropriate slot on the DVD recorder. 2. Press right arrow and a dialog box will appear. 3. Press right arrow. Insert USB/SD into the appropriate slot on the... DVD recorder. 2. You will appear. 3. COPY MATERIAL FROM YOUR USB/SD TO HDD: 1. Using the up and down arrows, highlight the material you wish to move the material to copy. 4. Using the ...
...down arrows, select the directory you want to . 7. Highlight "Do Copy" and press ENTER. 29 Insert USB/SD into the appropriate slot on the DVD recorder. 2. Press right arrow and a dialog box will appear. 3. Press right arrow. Insert USB/SD into the appropriate slot on the... DVD recorder. 2. You will appear. 3. COPY MATERIAL FROM YOUR USB/SD TO HDD: 1. Using the up and down arrows, highlight the material you wish to move the material to copy. 4. Using the ...
User Manual
Page 31
... the hard drive of your recordings by pressing HDD on the remote control. If the recording is finished. • You cannot dub more recordings to the YesDVD disc. 31 split, segment, combine) to archive hard disc drive recordings onto DVD+R/RW or DVD-R/RW discs. DUB HDD RECORDINGS TO DVD: Use this feature to YesDVD recordings on the hard drive...
... the hard drive of your recordings by pressing HDD on the remote control. If the recording is finished. • You cannot dub more recordings to the YesDVD disc. 31 split, segment, combine) to archive hard disc drive recordings onto DVD+R/RW or DVD-R/RW discs. DUB HDD RECORDINGS TO DVD: Use this feature to YesDVD recordings on the hard drive...

User Manual
Page 34
...SPECIFICATIONS* Supported disc formats Supported recordable disc functions Recording format Recording quality Input Output Input RF features Video features Audio specifications General specifications Working humidity DVD, DVD+R/RW, DVD-R/RW, SVCD, VCD, JPEG, MPEG4 DVD+R/RW, DVD-R/RW DVD, MPEG-II HQ (Perfect ...Frequency response: 4Hz~44KHz (2dB) S/N ratio: 90dB Audio distortion + noise: -65dB (1KHz) Input Audio level: 2.0 Vrms (10ohm load) HDD: 80GB Power supply: AC110-240V~50/60Hz Power consumption: 40W Standby power consumption: 3W Size: 430mm x 48mm x 308mm Net weight: 4....
...SPECIFICATIONS* Supported disc formats Supported recordable disc functions Recording format Recording quality Input Output Input RF features Video features Audio specifications General specifications Working humidity DVD, DVD+R/RW, DVD-R/RW, SVCD, VCD, JPEG, MPEG4 DVD+R/RW, DVD-R/RW DVD, MPEG-II HQ (Perfect ...Frequency response: 4Hz~44KHz (2dB) S/N ratio: 90dB Audio distortion + noise: -65dB (1KHz) Input Audio level: 2.0 Vrms (10ohm load) HDD: 80GB Power supply: AC110-240V~50/60Hz Power consumption: 40W Standby power consumption: 3W Size: 430mm x 48mm x 308mm Net weight: 4....
User Manual
Page 35
... to the subtitle of each title of one title contains several languages. The recorded disc can be played on the DVD image or music. Some DVDs record different images of division on other DVD players. Progressive means a frame picture can be scanned to make it can ...number so it compatible with the compressing program. For DVD±R/RW discs with the capacity of 4.7GB, HDD disc with capacity of recording 35 Without this disc multiple times. DVD+R discs are also called Write-once DVD Discs. The different languages can only be released according ...
... to the subtitle of each title of one title contains several languages. The recorded disc can be played on the DVD image or music. Some DVDs record different images of division on other DVD players. Progressive means a frame picture can be scanned to make it can ...number so it compatible with the compressing program. For DVD±R/RW discs with the capacity of 4.7GB, HDD disc with capacity of recording 35 Without this disc multiple times. DVD+R discs are also called Write-once DVD Discs. The different languages can only be released according ...


