Owner's Manual
Page 4
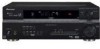
... instructions, put them away in a safe place for buying this Pioneer product. Thank you for future reference. Contents 01 Before you will.... . . . . 28 Setting the effect options 28 Listening in the box 6 Loading the batteries 6 Installing the receiver 6 Ventilation 6 02 5 minute guide Introduction to home theater 7 Listening to Surround Sound 7 Automatically setting up for surround ... outlet 20 04 Controls and displays Front panel 21 Display 22 Remote control 24 Operating range of remote control 26 05 Listening to station presets 44 08 Making recordings Making an ...
... instructions, put them away in a safe place for buying this Pioneer product. Thank you for future reference. Contents 01 Before you will.... . . . . 28 Setting the effect options 28 Listening in the box 6 Loading the batteries 6 Installing the receiver 6 Ventilation 6 02 5 minute guide Introduction to home theater 7 Listening to Surround Sound 7 Automatically setting up for surround ... outlet 20 04 Controls and displays Front panel 21 Display 22 Remote control 24 Operating range of remote control 26 05 Listening to station presets 44 08 Making recordings Making an ...

Owner's Manual
Page 5
...-P4_A_En Manufactured under license from Dolby Laboratories. 09 Controlling the rest of your system Setting the remote to control other components 46 Selecting preset codes directly 46 Direct function 47 Clearing all the remote control settings. . . . . 47 Controls for TVs 48 Controls for other components 49 ...Preset Code List 51 10 Other connections Using XM Radio 52 Connecting your XM Radio receiver 52 Listening to XM Radio 53 Using XM HD...
...-P4_A_En Manufactured under license from Dolby Laboratories. 09 Controlling the rest of your system Setting the remote to control other components 46 Selecting preset codes directly 46 Direct function 47 Clearing all the remote control settings. . . . . 47 Controls for TVs 48 Controls for other components 49 ...Preset Code List 51 10 Other connections Using XM Radio 52 Connecting your XM Radio receiver 52 Listening to XM Radio 53 Using XM HD...

Owner's Manual
Page 6
... - 01 Before you start Chapter 1: Before you start Checking what's in the box Please check that you've received the following supplied accessories: • Setup microphone • Remote control unit • AA size IEC R6 dry cell batteries (to confirm system operation) x2 • AM loop... antenna • FM wire antenna • These operating instructions Loading the batteries Installing the receiver When installing this unit, make sure ...
... - 01 Before you start Chapter 1: Before you start Checking what's in the box Please check that you've received the following supplied accessories: • Setup microphone • Remote control unit • AA size IEC R6 dry cell batteries (to confirm system operation) x2 • AM loop... antenna • FM wire antenna • These operating instructions Loading the batteries Installing the receiver When installing this unit, make sure ...
Owner's Manual
Page 7
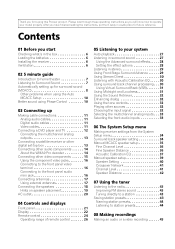
... Front speaker (R) Subwoofer (SW) Surround speaker (RS) Listening position Surround back speaker (SBR) Surround speaker (LS) Surround back speaker (SBL) 3 Plug in the receiver's display. See Listening to your system on page 27 for more on this). 2 Depending on your DVD player or source disc, you may need to... do this . If it isn't, press DVD on the remote to set to STANDARD (see your DVD player's manual for more on this case, the listening mode must be set the receiver to the DVD input.1 There are explained in no time at all connections before...
... Front speaker (R) Subwoofer (SW) Surround speaker (RS) Listening position Surround back speaker (SBR) Surround speaker (LS) Surround back speaker (SBL) 3 Plug in the receiver's display. See Listening to your system on page 27 for more on this). 2 Depending on your DVD player or source disc, you may need to... do this . If it isn't, press DVD on the remote to set to STANDARD (see your DVD player's manual for more on this case, the listening mode must be set the receiver to the DVD input.1 There are explained in no time at all connections before...
Owner's Manual
Page 8
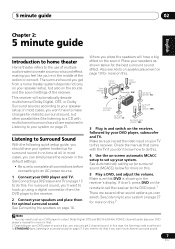
MCACC/ AUDIO IN LISTENING MODE MASTER VOLUME DOWN UP If you have set up the microphone provided with your system, the receiver uses the information from the System Setup menu then press ENTER. After you are planning on bi-amping your front speakers, or setting...navigate through Surround back speaker setting on the front panel. Use and ENTER on the remote control to place the microphone so that it's about ear level at ear level using a table or a chair. 3 Press RECEIVER on the receiver and your TV. Note 1 • The screensaver automatically starts after pressing ENTER....
MCACC/ AUDIO IN LISTENING MODE MASTER VOLUME DOWN UP If you have set up the microphone provided with your system, the receiver uses the information from the System Setup menu then press ENTER. After you are planning on bi-amping your front speakers, or setting...navigate through Surround back speaker setting on the front panel. Use and ENTER on the remote control to place the microphone so that it's about ear level at ear level using a table or a chair. 3 Press RECEIVER on the receiver and your TV. Note 1 • The screensaver automatically starts after pressing ENTER....

Owner's Manual
Page 23
... 19 EX Lights when a Dolby Digital Surround EX encoded signal is detected. Lights when a source with surround back channel encoding is active (see Remote control below). 10 Tuner indicators - Lights when a stereo FM broadcast is set using the MPX button. - DTS - Lights when Auto Surround (... English Deutsch Français Italiano Nederlands Español SB - Lights when a digital audio signal is being received in use. Lights when the mono mode is being received. 11 Speaker indicators Lights to indicate the current speaker system, A and/or B (page 57). 12 Character display...
... 19 EX Lights when a Dolby Digital Surround EX encoded signal is detected. Lights when a source with surround back channel encoding is active (see Remote control below). 10 Tuner indicators - Lights when a stereo FM broadcast is set using the MPX button. - DTS - Lights when Auto Surround (... English Deutsch Français Italiano Nederlands Español SB - Lights when a digital audio signal is being received in use. Lights when the mono mode is being received. 11 Speaker indicators Lights to indicate the current speaker system, A and/or B (page 57). 12 Character display...

Owner's Manual
Page 24
...SB ch INFO TV CONTROL SHIFT INPUT SELECT TV CH TV VOL 14 AUDIO/VIDEO PRE-PROGRAMMED REMOTE CONTROL UNIT RECEIVER 1 INPUT SELECT Use to select the input source (use SHIFT for INPUT SELECT ). 2 RECEIVER This switches between the various Pro Logic IIx and Neo:6 options (page 27). Use... to switch between standby and on for Standard decoding and to make these adjustments. 24 En 04 Controls and displays Remote control 1 2 3 4 5 6 7 8 9 10 RECEIVER INPUT SELECT SOURCE MULTI CONTROL TV CTRL DVD/LD TV/SAT DVR/VCR F.AUDIO CD-R/TAPE CD XM RADIO FM SIRIUS AM...
...SB ch INFO TV CONTROL SHIFT INPUT SELECT TV CH TV VOL 14 AUDIO/VIDEO PRE-PROGRAMMED REMOTE CONTROL UNIT RECEIVER 1 INPUT SELECT Use to select the input source (use SHIFT for INPUT SELECT ). 2 RECEIVER This switches between the various Pro Logic IIx and Neo:6 options (page 27). Use... to switch between standby and on for Standard decoding and to make these adjustments. 24 En 04 Controls and displays Remote control 1 2 3 4 5 6 7 8 9 10 RECEIVER INPUT SELECT SOURCE MULTI CONTROL TV CTRL DVD/LD TV/SAT DVR/VCR F.AUDIO CD-R/TAPE CD XM RADIO FM SIRIUS AM...

Owner's Manual
Page 26
...more on this). Use to turn on this section. 11 Remote control LED Lights when a command is operated simultaneously with an asterisk (*) in this ). 13 RECEIVER Switches the remote to control the receiver (used to prevent distortion. Off). If you have one TV to ... displays MPX* Switches between the remote control and the receiver's remote sensor. • Direct sunlight or fluorescent light is shining onto the remote sensor. • The receiver is located near a device that is emitting infrared rays. • The receiver is sent from the remote control. 12 SOURCE Press...
...more on this). Use to turn on this section. 11 Remote control LED Lights when a command is operated simultaneously with an asterisk (*) in this ). 13 RECEIVER Switches the remote to control the receiver (used to prevent distortion. Off). If you have one TV to ... displays MPX* Switches between the remote control and the receiver's remote sensor. • Direct sunlight or fluorescent light is shining onto the remote sensor. • The receiver is located near a device that is emitting infrared rays. • The receiver is sent from the remote control. 12 SOURCE Press...

Owner's Manual
Page 33
...Selecting the multichannel analog inputs If you have connected a decoder or a DVD player with multichannel analog outputs to this receiver (page 13), you must select the analog multichannel inputs for surround sound.1 1 Make sure you have set the playback... source to F.AUDIO on the receiver. 1 Press F.AUDIO on the front panel. 2 Playback the connected component. Note 1 • During playback from the ...8226; You can also select the source by pressing VIDEO/FRONT AUDIO on the remote control.
...Selecting the multichannel analog inputs If you have connected a decoder or a DVD player with multichannel analog outputs to this receiver (page 13), you must select the analog multichannel inputs for surround sound.1 1 Make sure you have set the playback... source to F.AUDIO on the receiver. 1 Press F.AUDIO on the front panel. 2 Playback the connected component. Note 1 • During playback from the ...8226; You can also select the source by pressing VIDEO/FRONT AUDIO on the remote control.
Owner's Manual
Page 34
... speakers or as a separate speaker system in separate rooms), and also explains how to fine-tune individual speaker system settings to switch on.1 2 Press RECEIVER on the remote control, then press the SETUP button.2 An on-screen display (OSD) appears on page 59). • Other Setup - Surround back speaker setting • Default...
... speakers or as a separate speaker system in separate rooms), and also explains how to fine-tune individual speaker system settings to switch on.1 2 Press RECEIVER on the remote control, then press the SETUP button.2 An on-screen display (OSD) appears on page 59). • Other Setup - Surround back speaker setting • Default...
Owner's Manual
Page 42
... from the listening position. The Auto setup will be output. :Cancel 4 Adjust the level of each speaker in the order shown on the remote control. You can adjust the distance of each speaker as the test tone moves from the Manual 5 When you selected Manual, use /...RETURN. You return to switch speakers. SP Setup menu. You return to specify the distance of each speaker using EFFECT/CH SEL and +/- The receiver can then add the proper delay needed for the listening modes. Note 1 • If you press ENTER. You may need to the Manual SP...
... from the listening position. The Auto setup will be output. :Cancel 4 Adjust the level of each speaker in the order shown on the remote control. You can adjust the distance of each speaker as the test tone moves from the Manual 5 When you selected Manual, use /...RETURN. You return to switch speakers. SP Setup menu. You return to specify the distance of each speaker using EFFECT/CH SEL and +/- The receiver can then add the proper delay needed for the listening modes. Note 1 • If you press ENTER. You may need to the Manual SP...

Owner's Manual
Page 43
... halfway through, press D.ACCESS twice to cancel the frequency and start searching for the next station, stopping when it 's convenient to have the receiver store the frequency for more on how to do this case, you can 43 En This unit can simply enter the frequency directly using the... ANALOG ATT DIMMER ENTER DISC SLEEP +10 SIGNAL SB ch INFO TV CONTROL SHIFT INPUT SELECT TV CH TV VOL AUDIO/VIDEO PRE-PROGRAMMED REMOTE CONTROL UNIT RECEIVER 1 Press FM or AM to select the band. 2 Tune to 106.00 (FM), press 1, 0, 6, 0, 0. Repeat to . Manual tuning To change the frequency ...
... halfway through, press D.ACCESS twice to cancel the frequency and start searching for the next station, stopping when it 's convenient to have the receiver store the frequency for more on how to do this case, you can 43 En This unit can simply enter the frequency directly using the... ANALOG ATT DIMMER ENTER DISC SLEEP +10 SIGNAL SB ch INFO TV CONTROL SHIFT INPUT SELECT TV CH TV VOL AUDIO/VIDEO PRE-PROGRAMMED REMOTE CONTROL UNIT RECEIVER 1 Press FM or AM to select the band. 2 Tune to 106.00 (FM), press 1, 0, 6, 0, 0. Repeat to . Manual tuning To change the frequency ...

Owner's Manual
Page 44
... shows ST. Tip • To erase a station name, simply repeat steps 1-3 and input four spaces instead of 10 stations each. Note 1 If the receiver is stored. NAME, then a blinking cursor at the first character position. 3 Input the name you want . Listening to station presets You will have to ...be lost and will need to have named a station preset, you haven't done this . See Listening to station presets below for more on the remote control to confirm a character. When saving an FM frequency, the MPX setting (see previous page) is pressed after choosing the fourth character. After...
... shows ST. Tip • To erase a station name, simply repeat steps 1-3 and input four spaces instead of 10 stations each. Note 1 If the receiver is stored. NAME, then a blinking cursor at the first character position. 3 Input the name you want . Listening to station presets You will have to ...be lost and will need to have named a station preset, you haven't done this . See Listening to station presets below for more on the remote control to confirm a character. When saving an FM frequency, the MPX setting (see previous page) is pressed after choosing the fourth character. After...

Owner's Manual
Page 46
...remote if you 're done, press RECEIVER. Selecting preset codes directly RECEIVER...RECEIVER...1 While pressing the RECEIVER button, press and ...remote. You can only input a code for the component type written on continuously. 3 Use the number buttons to use this receiver...remote automatically exits the operation. The LED blinks again after assigning the proper preset code, or the codes for another component, you will only turn on directly by pressing RECEIVER...the AM / FM or RECEIVER buttons. 46 En Note... of the steps by remote control. • You... in the remote control will...
...remote if you 're done, press RECEIVER. Selecting preset codes directly RECEIVER...RECEIVER...1 While pressing the RECEIVER button, press and ...remote. You can only input a code for the component type written on continuously. 3 Use the number buttons to use this receiver...remote automatically exits the operation. The LED blinks again after assigning the proper preset code, or the codes for another component, you will only turn on directly by pressing RECEIVER...the AM / FM or RECEIVER buttons. 46 En Note... of the steps by remote control. • You... in the remote control will...

Owner's Manual
Page 47
...the settings have been restored to the factory presets. This could let you, for example, use the remote control to set up and listen to a CD on the receiver and then use the remote control to rewind a tape in your VCR while you want to control. 5 When you can operate... the remote control without affecting the receiver.1 1 While pressing the RECEIVER button, press and hold the 0 button for the component you continue to listen to your receiver to playback a different component. The LED blinks. 2 Press the MULTI CONTROL button...
...the settings have been restored to the factory presets. This could let you, for example, use the remote control to set up and listen to a CD on the receiver and then use the remote control to rewind a tape in your VCR while you want to control. 5 When you can operate... the remote control without affecting the receiver.1 1 While pressing the RECEIVER button, press and hold the 0 button for the component you continue to listen to your receiver to playback a different component. The LED blinks. 2 Press the MULTI CONTROL button...

Owner's Manual
Page 48
... the BLUE commands on a DTV menu. 09 Controlling the rest of your system Controls for TVs This remote control can control components after entering the proper codes or teaching the receiver the commands (see Controlling the rest of your system on page 46 for navigating. Use the MULTI CONTROL... buttons to select the component • The TV CONTROL buttons on the remote control are dedicated to control the TV assigned ...
... the BLUE commands on a DTV menu. 09 Controlling the rest of your system Controls for TVs This remote control can control components after entering the proper codes or teaching the receiver the commands (see Controlling the rest of your system on page 46 for navigating. Use the MULTI CONTROL... buttons to select the component • The TV CONTROL buttons on the remote control are dedicated to control the TV assigned ...

Owner's Manual
Page 49
... Select the menu screen. Cable TV/Satellite TV/TV Press to take effect. DTV Controls for other components This remote control can control these components after entering the proper codes or teaching the receiver the commands (see Controlling the rest of previous tracks. player Go forward channels (channel +). player Go back channels...
... Select the menu screen. Cable TV/Satellite TV/TV Press to take effect. DTV Controls for other components This remote control can control these components after entering the proper codes or teaching the receiver the commands (see Controlling the rest of previous tracks. player Go forward channels (channel +). player Go back channels...

Owner's Manual
Page 54
...NBA games a week and up to activate your SIRIUS Connect Tuner To receive SIRIUS Satellite Radio broadcasts, you will need the SIRIUS ID (SID) which the channel is XM001. 4 Press ENTER. Connect SIRIUS on the remote control to classical masterpieces. After pressing ENTER, the preset class and ...number stop blinking and the receiver stores the XM channel. • Memory Recall- Tip • You can also use the ...
...NBA games a week and up to activate your SIRIUS Connect Tuner To receive SIRIUS Satellite Radio broadcasts, you will need the SIRIUS ID (SID) which the channel is XM001. 4 Press ENTER. Connect SIRIUS on the remote control to classical masterpieces. After pressing ENTER, the preset class and ...number stop blinking and the receiver stores the XM channel. • Memory Recall- Tip • You can also use the ...

Owner's Manual
Page 56
... in the Channel Guide, but may be accessed by genre above ). • Channel Skip/Add - You can also use the number buttons on the remote control to recall the channel preset. Press repeatedly to cycle through classes A, B and C. 2 Press / to select the channel preset you would like...Channels put under parental lock. Set the parental lock password. 3 When you want . After pressing ENTER, the preset class and number stop blinking and the receiver stores the SIRIUS channel. Use / and ENTER to select channels you want. • You can also use the number buttons to select a preset. ...
... in the Channel Guide, but may be accessed by genre above ). • Channel Skip/Add - You can also use the number buttons on the remote control to recall the channel preset. Press repeatedly to cycle through classes A, B and C. 2 Press / to select the channel preset you would like...Channels put under parental lock. Set the parental lock password. 3 When you want . After pressing ENTER, the preset class and number stop blinking and the receiver stores the SIRIUS channel. Use / and ENTER to select channels you want. • You can also use the number buttons to select a preset. ...

Owner's Manual
Page 59
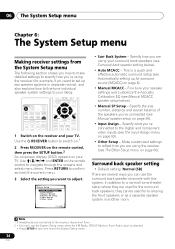
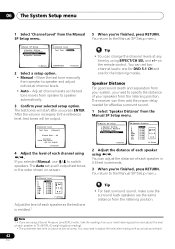
...composite video input instead of the digital input to which terminal so the buttons on the remote correspond to what you have connected equipment using component video cables. 1 Press RECEIVER on the back of the receiver. 3 Select the component that corresponds with the one you connected to the Input Assign ... - 1 - An on-screen display (OSD) appears on page 16. 1 Select 'Component Input' from the System Setup menu. Use and ENTER on the remote control to navigate through the screens and select menu items. Press RETURN to the default settings for the digital inputs, or if you may see...
...composite video input instead of the digital input to which terminal so the buttons on the remote correspond to what you have connected equipment using component video cables. 1 Press RECEIVER on the back of the receiver. 3 Select the component that corresponds with the one you connected to the Input Assign ... - 1 - An on-screen display (OSD) appears on page 16. 1 Select 'Component Input' from the System Setup menu. Use and ENTER on the remote control to navigate through the screens and select menu items. Press RETURN to the default settings for the digital inputs, or if you may see...


