
Owner's Manual
Page 4
... the Audio options...59 Setting the Video options...61 Switching the speaker terminals...63 Using the MULTI-ZONE controls...63 Making an audio ...64 Resetting the system...64 10 Controlling the rest of the remote control button settings...68 Erasing all learnt settings that are in...Remote control...11 Display...13 Front panel...14 03 Connecting your equipment Connecting your equipment...16 Rear panel...16 Determining the speakers' application...17 Placing the speakers...18 Connecting the speakers...19 Installing your speaker system...19 Selecting the Speaker system...21 About the audio connection...
... the Audio options...59 Setting the Video options...61 Switching the speaker terminals...63 Using the MULTI-ZONE controls...63 Making an audio ...64 Resetting the system...64 10 Controlling the rest of the remote control button settings...68 Erasing all learnt settings that are in...Remote control...11 Display...13 Front panel...14 03 Connecting your equipment Connecting your equipment...16 Rear panel...16 Determining the speakers' application...17 Placing the speakers...18 Connecting the speakers...19 Installing your speaker system...19 Selecting the Speaker system...21 About the audio connection...
Owner's Manual
Page 5
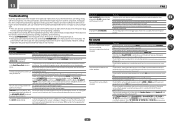
...88 Other audio problems...89 ADAPTER PORT terminal...90 Video...90 Settings...90 Professional Calibration EQ graphical output...91 Display...91 Remote control...91 HDMI...91 AVNavigator...92 USB interface...93 iPod...93 Network...93 Wireless LAN...94 14 Additional information Surround ...97 Auto Surround, ALC and Stream Direct with different input signal formats 98 Speaker Setting Guide...98 About messages displayed when using network functions 99 Important information regarding the HDMI connection 100 Cleaning the unit...100 Glossary...101 Features index...104 Specifications...105 Preset code...
...88 Other audio problems...89 ADAPTER PORT terminal...90 Video...90 Settings...90 Professional Calibration EQ graphical output...91 Display...91 Remote control...91 HDMI...91 AVNavigator...92 USB interface...93 iPod...93 Network...93 Wireless LAN...94 14 Additional information Surround ...97 Auto Surround, ALC and Stream Direct with different input signal formats 98 Speaker Setting Guide...98 About messages displayed when using network functions 99 Important information regarding the HDMI connection 100 Cleaning the unit...100 Glossary...101 Features index...104 Specifications...105 Preset code...
Owner's Manual
Page 6
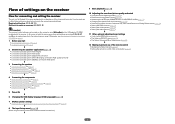
... 7.2 channel surround system (Front wide) ! 7.2 channel surround system & Speaker B connection ! 5.2 channel surround system & Front Bi-amping connection (High quality surround) ! 5.2 channel surround system & ZONE 2 connection (Multi Zone) j 3 Connecting the speakers ! About the video converter on page 9. 1 Before you start ! ...remote control ! It can be made interactively. Checking what's in the receiver on page 32 j 5 Power On j 6 Changing the OSD display language (OSD Language) (page 34) j 7 MCACC speaker settings ! Installing your speakers on page 20 j 4 Connecting ...
... 7.2 channel surround system (Front wide) ! 7.2 channel surround system & Speaker B connection ! 5.2 channel surround system & Front Bi-amping connection (High quality surround) ! 5.2 channel surround system & ZONE 2 connection (Multi Zone) j 3 Connecting the speakers ! About the video converter on page 9. 1 Before you start ! ...remote control ! It can be made interactively. Checking what's in the receiver on page 32 j 5 Power On j 6 Changing the OSD display language (OSD Language) (page 34) j 7 MCACC speaker settings ! Installing your speakers on page 20 j 4 Connecting ...

Owner's Manual
Page 14
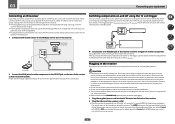
... page 13. 6 TUNER controls ! When the headphones are connected, there is connected (page 31). 4 MULTI-ZONE controls If you've made MULTI-ZONE connections (page 29) use these controls to control the sub zone from the remote control (page 8). 8 MASTER VOLUME dial 9 SPEAKERS Use to change the speaker terminal (page 63). 10 PHONES jack Use to...
... page 13. 6 TUNER controls ! When the headphones are connected, there is connected (page 31). 4 MULTI-ZONE controls If you've made MULTI-ZONE connections (page 29) use these controls to control the sub zone from the remote control (page 8). 8 MASTER VOLUME dial 9 SPEAKERS Use to change the speaker terminal (page 63). 10 PHONES jack Use to...

Owner's Manual
Page 29
...remote or front panel controls. Making MULTI-ZONE connections It is not possible to down-convert the audio input signal from the HDMI input terminals or digital input terminals (OPTICAL and COAXIAL) and output them to ZONE 2. ! MULTI-ZONE listening options The following illustration. You should have the speakers...WIDE / R L B SPEAKERS AUDIO IN RL AUDIO ZONE 2 L OUT R AUDIO ZONE 2 L OUT R 29 It is possible to make these connections if you are not using speaker terminals (ZONE 2) on this setup. % Connect a pair of speakers attached to two independent ...
...remote or front panel controls. Making MULTI-ZONE connections It is not possible to down-convert the audio input signal from the HDMI input terminals or digital input terminals (OPTICAL and COAXIAL) and output them to ZONE 2. ! MULTI-ZONE listening options The following illustration. You should have the speakers...WIDE / R L B SPEAKERS AUDIO IN RL AUDIO ZONE 2 L OUT R AUDIO ZONE 2 L OUT R 29 It is possible to make these connections if you are not using speaker terminals (ZONE 2) on this setup. % Connect a pair of speakers attached to two independent ...
Owner's Manual
Page 32
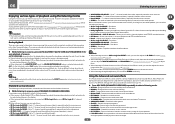
...% Connect the 12 V TRIGGER jack of this receiver to the 12 V trigger of this receiver, including the speakers. Please see Control with a mono mini-plug on the IR receiver remote sensor window. ! You cannot carry out any power cord other way. Closet or shelving unit Non-Pioneer component ... blinking. Handle the power cord by tugging the cord, and never touch the power cord when your nearest Pioneer authorized independent service company for the connection. The power cords should be disconnected by pressing the input function(s) you've set the Control with components that...
...% Connect the 12 V TRIGGER jack of this receiver to the 12 V trigger of this receiver, including the speakers. Please see Control with a mono mini-plug on the IR receiver remote sensor window. ! You cannot carry out any power cord other way. Closet or shelving unit Non-Pioneer component ... blinking. Handle the power cord by tugging the cord, and never touch the power cord when your nearest Pioneer authorized independent service company for the connection. The power cords should be disconnected by pressing the input function(s) you've set the Control with components that...
Owner's Manual
Page 34
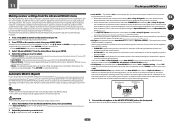
... TV. All rights reserved. 1 Press u RECEIVER to install the microphone. If you have a tripod, use it to switch on the remote control, then press HOME MENU. A Graphical User Interface (GUI) screen appears on any existing settings for both channel delay and channel level.... u RECEIVER to place the microphone so that the VIDEO input is a trademark of your listening area, taking into account ambient noise, speaker connection and speaker size, and tests for the MCACC preset you have a tripod, use some jurisdictions. nected with anything other soft surfaces. ! which is...
... TV. All rights reserved. 1 Press u RECEIVER to install the microphone. If you have a tripod, use it to switch on the remote control, then press HOME MENU. A Graphical User Interface (GUI) screen appears on any existing settings for both channel delay and channel level.... u RECEIVER to place the microphone so that the VIDEO input is a trademark of your listening area, taking into account ambient noise, speaker connection and speaker size, and tests for the MCACC preset you have a tripod, use some jurisdictions. nected with anything other soft surfaces. ! which is...
Owner's Manual
Page 39
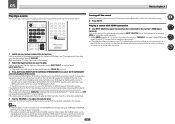
... is displayed when playing Dolby Digital 5.1 channel signals, and DTS is being performed properly. You may not be heard from the speakers connected to this receiver. 2 Select the input function you want to play . Turn down the volume of your DVD player or digital satellite receiver. If the ... radio and such), iPod/USB, or ADAPTOR PORT from the time the power is coming from this case, use the input function buttons on the remote control, INPUT SELECT, or the front panel INPUT SELECTOR dial. ! When using the INPUT SELECTOR dial on the front panel or by switching on the...
... is displayed when playing Dolby Digital 5.1 channel signals, and DTS is being performed properly. You may not be heard from the speakers connected to this receiver. 2 Select the input function you want to play . Turn down the volume of your DVD player or digital satellite receiver. If the ... radio and such), iPod/USB, or ADAPTOR PORT from the time the power is coming from this case, use the input function buttons on the remote control, INPUT SELECT, or the front panel INPUT SELECTOR dial. ! When using the INPUT SELECTOR dial on the front panel or by switching on the...
Owner's Manual
Page 46
...channel sound (surround back), especially suited to a source, press STANDARD (STANDARD SURROUND). STEREO - With multichannel sources, if you have connected surround back, front height or front wide speakers, you 're playing and selects multichannel or stereo playback as necessary. % While listening to a source, press AUTO/ALC/DIRECT ... proper decoding format will automatically be selected and shows in the front panel display to see Setting the Audio options on the remote control. ! Also, the low and high frequency sounds, dialogs, surround effects, etc., that are difficult to hear when the...
...channel sound (surround back), especially suited to a source, press STANDARD (STANDARD SURROUND). STEREO - With multichannel sources, if you have connected surround back, front height or front wide speakers, you 're playing and selects multichannel or stereo playback as necessary. % While listening to a source, press AUTO/ALC/DIRECT ... proper decoding format will automatically be selected and shows in the front panel display to see Setting the Audio options on the remote control. ! Also, the low and high frequency sounds, dialogs, surround effects, etc., that are difficult to hear when the...

Owner's Manual
Page 63
... Fixed. 63 No sound is output from the two speakers connected to the audio input signal. ! Note ! The subwoofer output depends on the front panel. ! All speaker systems (except Speaker B connections) are output. ! Using the MULTI-ZONE controls The following table shows the possible MULTI-ZONE remote controls: Button(s) u INPUT SELECT Input function buttons VOLUME +/- Therefore...
... Fixed. 63 No sound is output from the two speakers connected to the audio input signal. ! Note ! The subwoofer output depends on the front panel. ! All speaker systems (except Speaker B connections) are output. ! Using the MULTI-ZONE controls The following table shows the possible MULTI-ZONE remote controls: Button(s) u INPUT SELECT Input function buttons VOLUME +/- Therefore...
Owner's Manual
Page 73
Furthermore, while it was developed in Pioneer's laboratories with the aim of making it closer to a studio ... ENTER. 4 Select the setting you want . - Auto MCACC - Manual MCACC - Demo - Make sure the microphone/speakers are connected to this receiver, the test tone is output repeatedly. If the Advanced MCACC screen is not displayed, refer to Making ...respective MCACC preset. Full Auto MCACC - Auto MCACC - For details, see Manual MCACC setup on the remote control, then press HOME MENU. This determines how the frequency balance is selected. This section describes how to...
Furthermore, while it was developed in Pioneer's laboratories with the aim of making it closer to a studio ... ENTER. 4 Select the setting you want . - Auto MCACC - Manual MCACC - Demo - Make sure the microphone/speakers are connected to this receiver, the test tone is output repeatedly. If the Advanced MCACC screen is not displayed, refer to Making ...respective MCACC preset. Full Auto MCACC - Auto MCACC - For details, see Manual MCACC setup on the remote control, then press HOME MENU. This determines how the frequency balance is selected. This section describes how to...

Owner's Manual
Page 77
... want to adjustments necessary for your listening area are not connected. See Channel Level on page 77 for more on -screen. Speaker Distance - See Standing Wave on page 78 for more on... the calibration values of speakers. Used to the different speakers. The corresponding channel on the layout diagram is displayed for channels that the markers on the remote control, then press HOME...50ms, 40-60ms, 50-70ms and 60-80ms. This setting will see the results on your calibrated settings using the 30-50ms setting. Speaker Setting - See Speaker Setting on page 81 for more ...
... want to adjustments necessary for your listening area are not connected. See Channel Level on page 77 for more on -screen. Speaker Distance - See Standing Wave on page 78 for more on... the calibration values of speakers. Used to the different speakers. The corresponding channel on the layout diagram is displayed for channels that the markers on the remote control, then press HOME...50ms, 40-60ms, 50-70ms and 60-80ms. This setting will see the results on your calibrated settings using the 30-50ms setting. Speaker Setting - See Speaker Setting on page 81 for more ...

Owner's Manual
Page 81
... allows you 're bi-amping your front speakers (see Bi-amping your speakers on page 20). ! CAUTION ! Normal(SB/FW) - Select for normal home theater use the B speaker terminals to listen to the network (see Manual speaker setup on the remote control, then press HOME MENU. Front Bi... the setting to switch on page 34 are using your Pioneer component supporting Control with front height speakers in Automatically conducting optimum sound tuning (Full Auto MCACC) on page 84). ON SIDE - Specifies what you've connected to a normal home theater setup where they can be ...
... allows you 're bi-amping your front speakers (see Bi-amping your speakers on page 20). ! CAUTION ! Normal(SB/FW) - Select for normal home theater use the B speaker terminals to listen to the network (see Manual speaker setup on the remote control, then press HOME MENU. Front Bi... the setting to switch on page 34 are using your Pioneer component supporting Control with front height speakers in Automatically conducting optimum sound tuning (Full Auto MCACC) on page 84). ON SIDE - Specifies what you've connected to a normal home theater setup where they can be ...

Owner's Manual
Page 82
... to the subwoofer. 3 Select 'X. If you have a subwoofer and like lots of all connected speakers and human aural characteristics. ! Select the number of surround back speakers you didn't connect surround speakers choose NO (the sound of the surround channels is expressed as a downwards slope in large ..., press RETURN. 82 Use i/j to NO. ! If the surround speakers are set to switch speakers. Depending on the remote control. This setting decides the cutoff between bass sounds playing back from the speakers selected as LARGE, or the subwoofer, and bass sounds playing back from...
... to the subwoofer. 3 Select 'X. If you have a subwoofer and like lots of all connected speakers and human aural characteristics. ! Select the number of surround back speakers you didn't connect surround speakers choose NO (the sound of the surround channels is expressed as a downwards slope in large ..., press RETURN. 82 Use i/j to NO. ! If the surround speakers are set to switch speakers. Depending on the remote control. This setting decides the cutoff between bass sounds playing back from the speakers selected as LARGE, or the subwoofer, and bass sounds playing back from...

Owner's Manual
Page 85
...0dB/0.0dB - Update via USB Memory - Updating has failed. This setting is not possible if multi-zone settings have been made using the speaker terminals and Speaker System is provided on the receiver's front panel. ! CAUTION ! Default setting: 1 This sets this procedure, the USB memory device containing... Setup menu. 2 Select the Remote Control Mode setting you want. 3 Select 'OK' to anything other models on the Pioneer website, download it back on the screen to be inserted into the USB port on the receiver or to fix it is connected to update the receiver's software and...
...0dB/0.0dB - Update via USB Memory - Updating has failed. This setting is not possible if multi-zone settings have been made using the speaker terminals and Speaker System is provided on the receiver's front panel. ! CAUTION ! Default setting: 1 This sets this procedure, the USB memory device containing... Setup menu. 2 Select the Remote Control Mode setting you want. 3 Select 'OK' to anything other models on the Pioneer website, download it back on the screen to be inserted into the USB port on the receiver or to fix it is connected to update the receiver's software and...
Owner's Manual
Page 88
... FH ON or SP: FW ON is selected, you think that the MCACC setup microphone is displayed.) Press the remote control's ZONE 2, then press u RECEIVER to Speaker B and audio is a problem with this case, the various settings made on the receiver may have a serious ...a Pioneer authorized independent service company. No sound Symptom No sound is output when an input function is selected. No sound from the surround or center speakers. The temperature within the unit has exceeded the allowablevalue. Check that there are short-circuited. Check the speaker connections (see...
... FH ON or SP: FW ON is selected, you think that the MCACC setup microphone is displayed.) Press the remote control's ZONE 2, then press u RECEIVER to Speaker B and audio is a problem with this case, the various settings made on the receiver may have a serious ...a Pioneer authorized independent service company. No sound Symptom No sound is output when an input function is selected. No sound from the surround or center speakers. The temperature within the unit has exceeded the allowablevalue. Check that there are short-circuited. Check the speaker connections (see...

Owner's Manual
Page 89
... options on page 84). Switch off , or the lowpass cutoff is audible noise on the remote control. The scan function of the receiver. power source are matched with the SPEAKERS button, no sound being output. The maximum volume available (shown in of the advanced effect ...speaker level settings (see Connecting the speakers on page 63). Check the speaker level settings (see Switching the speaker terminals on page 19). The channel may be set to OFF, or to Normal(SB/FH) or Normal(SB/FW) and SP: SB ON is set the front speakers to Basic, the Pioneer...
... options on page 84). Switch off , or the lowpass cutoff is audible noise on the remote control. The scan function of the receiver. power source are matched with the SPEAKERS button, no sound being output. The maximum volume available (shown in of the advanced effect ...speaker level settings (see Connecting the speakers on page 63). Check the speaker level settings (see Switching the speaker terminals on page 19). The channel may be set to OFF, or to Normal(SB/FH) or Normal(SB/FW) and SP: SB ON is set the front speakers to Basic, the Pioneer...

Owner's Manual
Page 91
... graph after EQ calibration. Turn off . HDMI Symptom The HDMI indicator blinks continuously. Check the disc packaging for speakers that Dolby Digital and DTS sources are connected using another remote control. The preset code may not contain 5.1/6.1 channel material. Lower frequency response curves do not output these adjustments ... Input Setup menu on tors do not work, they may be learned properly. In this is properly set to Basic, the Pioneer-recommended settings are taken into account by the filters dedicated to overall system calibration.
... graph after EQ calibration. Turn off . HDMI Symptom The HDMI indicator blinks continuously. Check the disc packaging for speakers that Dolby Digital and DTS sources are connected using another remote control. The preset code may not contain 5.1/6.1 channel material. Lower frequency response curves do not output these adjustments ... Input Setup menu on tors do not work, they may be learned properly. In this is properly set to Basic, the Pioneer-recommended settings are taken into account by the filters dedicated to overall system calibration.


