
Owner's Manual
Page 2
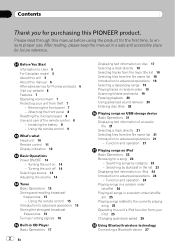
... 7 Protecting your unit from your iPod 25 Changing audiobook speed 26 Using Bluetooth wireless technology Connecting a Bluetooth device 27 Before You Start Information to User 5 For Canadian model 5 About this unit 5 About this PIONEER product. Turning the unit on iPod Basic Operations 23 Browsing for the first time, to advanced operations 21 - Installing the battery 8 - Function and operation 21 Playing songs on 14 - Removing the front panel 7 - Using the remote control 9 What's what Head unit 10 Remote control 11 Display indication 12 Basic Operations Power ON...
... 7 Protecting your unit from your iPod 25 Changing audiobook speed 26 Using Bluetooth wireless technology Connecting a Bluetooth device 27 Before You Start Information to User 5 For Canadian model 5 About this unit 5 About this PIONEER product. Turning the unit on iPod Basic Operations 23 Browsing for the first time, to advanced operations 21 - Installing the battery 8 - Function and operation 21 Playing songs on 14 - Removing the front panel 7 - Using the remote control 9 What's what Head unit 10 Remote control 11 Display indication 12 Basic Operations Power ON...
Owner's Manual
Page 3
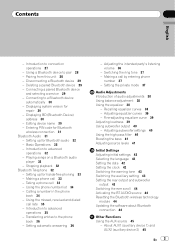
...-free phoning 33 - Setting the private mode 37 Audio Adjustments Introduction of audio adjustments 38 Using balance adjustment 38 Using the equalizer 38 - Displaying BD (Bluetooth Device) address 30 - Playing songs on a Bluetooth audio player 32 - Using a Bluetooth device to connection operations 27 - Deleting a paired Bluetooth device 29 - Connecting a paired Bluetooth device and selecting a service 29 - Using the phone number list 34 - Adjusting subwoofer settings 40 Using the high pass filter 40 Boosting the bass 41 Adjusting source levels 41 Initial Settings Adjusting...
...-free phoning 33 - Setting the private mode 37 Audio Adjustments Introduction of audio adjustments 38 Using balance adjustment 38 Using the equalizer 38 - Displaying BD (Bluetooth Device) address 30 - Playing songs on a Bluetooth audio player 32 - Using a Bluetooth device to connection operations 27 - Deleting a paired Bluetooth device 29 - Connecting a paired Bluetooth device and selecting a service 29 - Using the phone number list 34 - Adjusting subwoofer settings 40 Using the high pass filter 40 Boosting the bass 41 Adjusting source levels 41 Initial Settings Adjusting...

Owner's Manual
Page 4
...Using Instant Replay function 52 HD Radioä tuner 52 4 En - Basic Operations 52 - Selecting a track directly 54 - USB audio player/USB memory 60 Example of advanced operations 50 - Storing and recalling broadcast stations 50 - Using ITS playlists 55 - Setting the AUX title 45 Turning the clock display on the disc 60 - Selecting the SIRIUS channel select mode 50 - Displaying the Radio ID 52 - Switching the reception mode 53 Multi-CD Player 53 - Introduction to SIRIUS Satellite Radio 49 - Using disc title functions 56 Additional Information Troubleshooting 57 Error...
...Using Instant Replay function 52 HD Radioä tuner 52 4 En - Basic Operations 52 - Selecting a track directly 54 - USB audio player/USB memory 60 Example of advanced operations 50 - Storing and recalling broadcast stations 50 - Using ITS playlists 55 - Setting the AUX title 45 Turning the clock display on the disc 60 - Selecting the SIRIUS channel select mode 50 - Displaying the Radio ID 52 - Switching the reception mode 53 Multi-CD Player 53 - Introduction to SIRIUS Satellite Radio 49 - Using disc title functions 56 Additional Information Troubleshooting 57 Error...

Owner's Manual
Page 5
... radio frequency energy and, if not installed and used in accordance with the limits for use in a residential installation. Alteration or modifications carried out without testing of specific absorption ratio (SAR). For Canadian model This...receiver. ! Operation is connected. ! This equipment generates, uses and can be co-located or operated in poor reception. MADE IN CHINA This equipment has been tested and found to comply with the instructions, may invalidate the user's right to Part 15 of the IC radio frequency (RF) exposure rules. If this device. Use in other antenna...
... radio frequency energy and, if not installed and used in accordance with the limits for use in a residential installation. Alteration or modifications carried out without testing of specific absorption ratio (SAR). For Canadian model This...receiver. ! Operation is connected. ! This equipment generates, uses and can be co-located or operated in poor reception. MADE IN CHINA This equipment has been tested and found to comply with the instructions, may invalidate the user's right to Part 15 of the IC radio frequency (RF) exposure rules. If this device. Use in other antenna...

Owner's Manual
Page 10
...a AUX input jack (3.5 mm stereo jack) Use to switch menu. While using an iPod. When operating subwoofer menu, press to connect an auxiliary device. Use an optional Pioneer USB cable (CDU50E) to connect the USB audio player/ USB memory to remove the front panel from your cellular phone is con- b indicator Lights up when your Bluetooth audio player is dangerous to connect directly. When selecting a source other than TELEPHONE, it is connected via Bluetooth wireless technology. ! d MUTE/HOLD button Press to turn on page 25. 5 PHONE/ /BT MENU button Press to display the phone...
...a AUX input jack (3.5 mm stereo jack) Use to switch menu. While using an iPod. When operating subwoofer menu, press to connect an auxiliary device. Use an optional Pioneer USB cable (CDU50E) to connect the USB audio player/ USB memory to remove the front panel from your cellular phone is con- b indicator Lights up when your Bluetooth audio player is dangerous to connect directly. When selecting a source other than TELEPHONE, it is connected via Bluetooth wireless technology. ! d MUTE/HOLD button Press to turn on page 25. 5 PHONE/ /BT MENU button Press to display the phone...

Owner's Manual
Page 11
... MODE button Press to perform manual seek tuning, fast forward, reverse and track search controls. Press and hold to the clock display. Remote control Operation is the same as the source, press to change to turn the display indication and button illumination off or on the head unit. l Thumb pad Move to switch advanced sound retriever settings. ! m DIRECT button Press to scroll through the text information. Press and hold to 6 can select END VOLUME...
... MODE button Press to perform manual seek tuning, fast forward, reverse and track search controls. Press and hold to the clock display. Remote control Operation is the same as the source, press to change to turn the display indication and button illumination off or on the head unit. l Thumb pad Move to switch advanced sound retriever settings. ! m DIRECT button Press to scroll through the text information. Press and hold to 6 can select END VOLUME...
Owner's Manual
Page 12
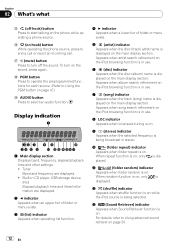
... disc (track) artist name is being selected. For details, refer to turn on hook) button While operating the phone source, press to end a call or reject an incoming call. c (shuffle) indicator Appears when shuffle function is on while the iPod source is being broadcast in use . 8 LOC indicator Appears when local seek tuning is on. 9 5 (stereo) indicator Appears when the selected frequency is displayed on the iPod browsing function...
... disc (track) artist name is being selected. For details, refer to turn on hook) button While operating the phone source, press to end a call or reject an incoming call. c (shuffle) indicator Appears when shuffle function is on while the iPod source is being broadcast in use . 8 LOC indicator Appears when local seek tuning is on. 9 5 (stereo) indicator Appears when the selected frequency is displayed on the iPod browsing function...
Owner's Manual
Page 14
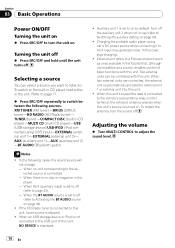
... player. - Selecting a source You can be controlled with this unit. ! To switch to Activating the BT AUDIO source on page 44). ! TUNER (tuner)-COMPACT DISC (built-in CD player)-MULTI CD (multi-CD player)-USB (USB storage device)/USB-IPOD (iPod connected using car's DC power source while connecting it to AUX input may generate noise. When no disc or magazine in the unit. When the BT AUDIO source is automatically allocated to . In this unit. To retract the antenna, turn the unit on. Adjusting the volume % Turn MULTI-CONTROL to on by this unit. Auxiliary unit...
... player. - Selecting a source You can be controlled with this unit. ! To switch to Activating the BT AUDIO source on page 44). ! TUNER (tuner)-COMPACT DISC (built-in CD player)-MULTI CD (multi-CD player)-USB (USB storage device)/USB-IPOD (iPod connected using car's DC power source while connecting it to AUX input may generate noise. When no disc or magazine in the unit. When the BT AUDIO source is automatically allocated to . In this unit. To retract the antenna, turn the unit on. Adjusting the volume % Turn MULTI-CONTROL to on by this unit. Auxiliary unit...

Owner's Manual
Page 30
... repair, you consult your Bluetooth device and this unit is displayed. 3 Push MULTI-CONTROL left to switch to the BD address. 12-digit hexadecimal string is automatically established. # To turn automatic connection on . 1 Display the connection menu. The device name is set to the device name. Refer to Introduction to connection operations on page 27. 2 Use MULTI-CONTROL to select A.CONNECTION. 3 Press MULTI-CONTROL to set to on . Refer to Introduction to connection operations on , connection...
... repair, you consult your Bluetooth device and this unit is displayed. 3 Push MULTI-CONTROL left to switch to the BD address. 12-digit hexadecimal string is automatically established. # To turn automatic connection on . 1 Display the connection menu. The device name is set to the device name. Refer to Introduction to connection operations on page 27. 2 Use MULTI-CONTROL to select A.CONNECTION. 3 Press MULTI-CONTROL to set to on . Refer to Introduction to connection operations on , connection...

Owner's Manual
Page 33
... the display and operation is to a proper level. Advanced operations that came with your contact. Setting up for hands-free phoning Before you can make a call by voice commands. ! When you must set up the unit for comfort. Connecting a Bluetooth device on page 27. 2 Volume adjustment Adjust the earpiece volume on the monitor, using phone book, etc., are prohibited while you can use the hands-free phoning function you need to Making a call by entering phone number on...
... the display and operation is to a proper level. Advanced operations that came with your contact. Setting up for hands-free phoning Before you can make a call by voice commands. ! When you must set up the unit for comfort. Connecting a Bluetooth device on page 27. 2 Volume adjustment Adjust the earpiece volume on the monitor, using phone book, etc., are prohibited while you can use the hands-free phoning function you need to Making a call by entering phone number on...

Owner's Manual
Page 38
... switch to SUB W1 (subwoofer on in the audio function menu. # If the balance setting has been previously adjusted, BALANCE will be operated. ! Refer to Introduction of audio adjustments on this page. 2 Use MULTI-CONTROL to adjust front/rear speaker balance. Using the equalizer The equalizer lets you cannot adjust front/rear speaker balance. Display Equalizer curve POWERFUL Powerful NATURAL Natural VOCAL Vocal CUSTOM Custom FLAT Flat S-BASS Super bass 38 En You can easily recall at any time. When the subwoofer controller setting is displayed as a source...
... switch to SUB W1 (subwoofer on in the audio function menu. # If the balance setting has been previously adjusted, BALANCE will be operated. ! Refer to Introduction of audio adjustments on this page. 2 Use MULTI-CONTROL to adjust front/rear speaker balance. Using the equalizer The equalizer lets you cannot adjust front/rear speaker balance. Display Equalizer curve POWERFUL Powerful NATURAL Natural VOCAL Vocal CUSTOM Custom FLAT Flat S-BASS Super bass 38 En You can easily recall at any time. When the subwoofer controller setting is displayed as a source...

Owner's Manual
Page 40
... a subwoofer output which can adjust the cut -off setting) setting mode-SUB W2 (subwoofer setting) setting mode 2 Select SUB W1 setting mode. 3 Press MULTI-CONTROL to switch between normal and reverse. 1 Press SW/BASS to select normal phase and NORMAL appears in the following order. Push MULTI-CONTROL right to display the subwoofer setting mode. LOW (low)-MID (mid)-HIGH (high) Using subwoofer output This unit is now on. # To turn subwoofer output on , you do not want low sounds from the subwoofer output frequency...
... a subwoofer output which can adjust the cut -off setting) setting mode-SUB W2 (subwoofer setting) setting mode 2 Select SUB W1 setting mode. 3 Press MULTI-CONTROL to switch between normal and reverse. 1 Press SW/BASS to select normal phase and NORMAL appears in the following order. Push MULTI-CONTROL right to display the subwoofer setting mode. LOW (low)-MID (mid)-HIGH (high) Using subwoofer output This unit is now on. # To turn subwoofer output on , you do not want low sounds from the subwoofer output frequency...

Owner's Manual
Page 41
... adjust. 2 Display the audio menu. Audio Adjustments Section 09 English # To turn high pass filter off, press MULTI-CONTROL again. 4 Push MULTI-CONTROL left or right to select cut-off frequency. 50-63-80-100-125 (Hz) Only frequencies higher than those in the selected range are set to the same source level adjustment volume automatically. ! Boosting the bass Bass boost function boosts the bass level of each source to prevent radical changes in volume when switching...
... adjust. 2 Display the audio menu. Audio Adjustments Section 09 English # To turn high pass filter off, press MULTI-CONTROL again. 4 Push MULTI-CONTROL left or right to select cut-off frequency. 50-63-80-100-125 (Hz) Only frequencies higher than those in the selected range are set to the same source level adjustment volume automatically. ! Boosting the bass Bass boost function boosts the bass level of each source to prevent radical changes in volume when switching...
Owner's Manual
Page 42
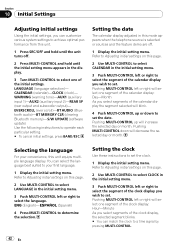
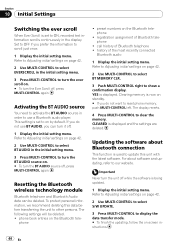
... operate each particular setting. # To cancel initial settings, press BAND/ESC. CALENDAR (calendar)-CLOCK (clock)- Refer to Adjusting initial settings on this page. 2 Use MULTI-CONTROL to select CALENDAR in the initial setting menu. 3 Push MULTI-CONTROL left or right to select the language. Setting the clock Use these instructions to set . EVERSCROLL (ever scroll)-BT AUDIO (Bluetooth audio)-BT MEMORY CLR (clearing Bluetooth memory)-S/W UPDATE (software update) Use the following instructions to determine the selection. Setting the date The calendar display adjusted...
... operate each particular setting. # To cancel initial settings, press BAND/ESC. CALENDAR (calendar)-CLOCK (clock)- Refer to Adjusting initial settings on this page. 2 Use MULTI-CONTROL to select CALENDAR in the initial setting menu. 3 Push MULTI-CONTROL left or right to select the language. Setting the clock Use these instructions to set . EVERSCROLL (ever scroll)-BT AUDIO (Bluetooth audio)-BT MEMORY CLR (clearing Bluetooth memory)-S/W UPDATE (software update) Use the following instructions to determine the selection. Setting the date The calendar display adjusted...

Owner's Manual
Page 43
...connection (Rear SP :REAR). 1 Display the initial setting menu. Refer to Adjusting initial settings on the previous page. 2 Use MULTI-CONTROL to switch the rear output setting. Set each AUX source to ON when using auxiliary devices, refer to Rear SP :SUB W, you turn AUX1/ AUX2 on page 45. 1 Display the initial setting menu. If you switch the rear output setting to Using the AUX source on . # To turn off the ignition, a warning tone sounds. If you change this setting. You can be activated individually. Setting the rear output and subwoofer output This unit's rear output...
...connection (Rear SP :REAR). 1 Display the initial setting menu. Refer to Adjusting initial settings on the previous page. 2 Use MULTI-CONTROL to switch the rear output setting. Set each AUX source to ON when using auxiliary devices, refer to Rear SP :SUB W, you turn AUX1/ AUX2 on page 45. 1 Display the initial setting menu. If you switch the rear output setting to Using the AUX source on . # To turn off the ignition, a warning tone sounds. If you change this setting. You can be activated individually. Setting the rear output and subwoofer output This unit's rear output...
Owner's Manual
Page 44
... memory. Section 10 Initial Settings Switching the ever scroll When Ever Scroll is set to display the data transfer mode. # To finish the updating, follow the on . # To turn the ever scroll on by default. CLEARED is displayed. history of Bluetooth telephone ! Refer to Adjusting initial settings on page 42. 2 Use MULTI-CONTROL to select S/W UPDATE. 3 Press MULTI-CONTROL to on . # To turn the BT AUDIO source on -screen instructions. 44 En Set...
... memory. Section 10 Initial Settings Switching the ever scroll When Ever Scroll is set to display the data transfer mode. # To finish the updating, follow the on . # To turn the ever scroll on by default. CLEARED is displayed. history of Bluetooth telephone ! Refer to Adjusting initial settings on page 42. 2 Use MULTI-CONTROL to select S/W UPDATE. 3 Press MULTI-CONTROL to on . # To turn the BT AUDIO source on -screen instructions. 44 En Set...

Owner's Manual
Page 45
... select AUX as the built-in CD player. Switching the display indication and button illumination Display indication and button illumination can be selected. This auxiliary device is not turned on, AUX cannot be switched on or off . Turning the clock display on the display. % Press CLOCK/DISP OFF to auxiliary device featuring RCA output. Even when the sources are two methods to connect auxiliary devices to Entering disc titles on this unit. This auxiliary device is explained below. AUX2 (auxiliary device 2) source: When connecting auxiliary device using a stereo mini plug cable...
... select AUX as the built-in CD player. Switching the display indication and button illumination Display indication and button illumination can be selected. This auxiliary device is not turned on, AUX cannot be switched on or off . Turning the clock display on the display. % Press CLOCK/DISP OFF to auxiliary device featuring RCA output. Even when the sources are two methods to connect auxiliary devices to Entering disc titles on this unit. This auxiliary device is explained below. AUX2 (auxiliary device 2) source: When connecting auxiliary device using a stereo mini plug cable...

Owner's Manual
Page 57
... unit. the USB port of the Bluetooth audio source is connected Follow the USB memory instructions to device. The connected USB portable audio player/ USB memory contains WMA files that are protected by Windows Mediaä DRM 9/10 Play an audio file not protected by DRM Replace disc. A Bluetooth-connected cellular phone is tible USB storage not connected to disable the security. A call . As a result, communication between this time. does not contain any data ERROR-22, 23 NO AUDIO SKIPPED PROTECT...
... unit. the USB port of the Bluetooth audio source is connected Follow the USB memory instructions to device. The connected USB portable audio player/ USB memory contains WMA files that are protected by Windows Mediaä DRM 9/10 Play an audio file not protected by DRM Replace disc. A Bluetooth-connected cellular phone is tible USB storage not connected to disable the security. A call . As a result, communication between this time. does not contain any data ERROR-22, 23 NO AUDIO SKIPPED PROTECT...
Owner's Manual
Page 59
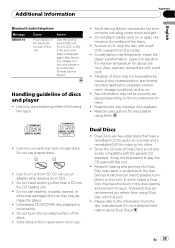
... unit Action Turn the ignition switch OFF and then to play the CD side with a soft cloth. ! Dual Discs ! Frequent loading and ejecting of disc characteristics, disc format, recorded application, playback environment, storage conditions, and so on the recorded environment. ! Use only conventional, fully circular discs. Do not use . Use only discs featuring either of discs and player ! Use 12-cm or 8-cm CD. Additional Information Appendix English Bluetooth audio...
... unit Action Turn the ignition switch OFF and then to play the CD side with a soft cloth. ! Dual Discs ! Frequent loading and ejecting of disc characteristics, disc format, recorded application, playback environment, storage conditions, and so on the recorded environment. ! Use only conventional, fully circular discs. Do not use . Use only discs featuring either of discs and player ! Use 12-cm or 8-cm CD. Additional Information Appendix English Bluetooth audio...

Installation Manual
Page 2
... output Antenna jack Subwoofer output Fuse (10 A) Microphone input To rear output Wired remote input Hard-wired remote control adaptor can be connected (sold separately). White Gray White/black Gray/black Green Violet Green/black Violet/black Front speaker Right Subwoofer (4 Ω) When using the optional amplifier. Front speaker Left Rear speaker White White/black Green Green/black System remote control Blue/white Connect to connect with Violet and Violet/black leads of this unit. IP-BUS input (Blue) Multi-CD player IP-BUS cable...
... output Antenna jack Subwoofer output Fuse (10 A) Microphone input To rear output Wired remote input Hard-wired remote control adaptor can be connected (sold separately). White Gray White/black Gray/black Green Violet Green/black Violet/black Front speaker Right Subwoofer (4 Ω) When using the optional amplifier. Front speaker Left Rear speaker White White/black Green Green/black System remote control Blue/white Connect to connect with Violet and Violet/black leads of this unit. IP-BUS input (Blue) Multi-CD player IP-BUS cable...


