Owner's Manual
Page 3
... Using subwoofer output 26 - Adjusting subwoofer settings 26 Boosting the bass 27 Using the high pass filter 27 Adjusting source levels 27 Initial Settings Adjusting initial settings 28 Selecting the display language 28 Setting the date 28 Setting the clock 28 Switching the warning tone 29 Switching ...the auxiliary setting 29 Switching the dimmer setting 29 Adjusting the brightness 29 Setting the rear output and ...
... Using subwoofer output 26 - Adjusting subwoofer settings 26 Boosting the bass 27 Using the high pass filter 27 Adjusting source levels 27 Initial Settings Adjusting initial settings 28 Selecting the display language 28 Setting the date 28 Setting the clock 28 Switching the warning tone 29 Switching ...the auxiliary setting 29 Switching the dimmer setting 29 Adjusting the brightness 29 Setting the rear output and ...
Owner's Manual
Page 9
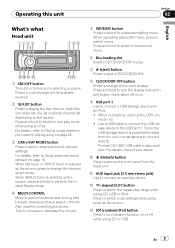
...forward, reverse and track search controls. Press and hold to switch to switch local settings while using CD, USB or iPod. Pioneer CD-U50E USB cable is also available. Press to link play mode while using CD or USB. d (random)/iPod button Press to turn the display indication and button ...play . 7 h (eject) button Press to eject a CD/CD-R/CD-RW. 8 CLOCK/DISP OFF button Press to change the channel select mode. For details, refer to Using advanced sound retriever on page 22. 3 S.Rtrv/SAT MODE button Press to the clock display. For details, refer to Playing songs related to ...
...forward, reverse and track search controls. Press and hold to switch to switch local settings while using CD, USB or iPod. Pioneer CD-U50E USB cable is also available. Press to link play mode while using CD or USB. d (random)/iPod button Press to turn the display indication and button ...play . 7 h (eject) button Press to eject a CD/CD-R/CD-RW. 8 CLOCK/DISP OFF button Press to change the channel select mode. For details, refer to Using advanced sound retriever on page 22. 3 S.Rtrv/SAT MODE button Press to the clock display. For details, refer to Playing songs related to ...
Owner's Manual
Page 28
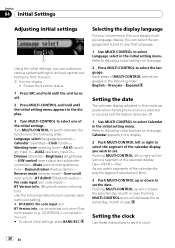
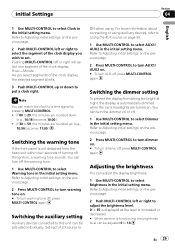
...between the functions in the following order: English-Français-Español Setting the date The calendar display adjusted in the initial setting menu. can be selected only when Bluetooth adapter (e.g., CD-BTB200) is selected or sources and the feature demo are off . 2 Press... increase the selected day, month or year. Pushing MULTI-CONTROL down to set the clock. 28 En Setting the clock Use these instructions to set the date. Section 04 Initial Settings Adjusting initial settings Using the initial settings, you can select the language best suited to your convenience, this unit ...
...between the functions in the following order: English-Français-Español Setting the date The calendar display adjusted in the initial setting menu. can be selected only when Bluetooth adapter (e.g., CD-BTB200) is selected or sources and the feature demo are off . 2 Press... increase the selected day, month or year. Pushing MULTI-CONTROL down to set the clock. 28 En Setting the clock Use these instructions to set the date. Section 04 Initial Settings Adjusting initial settings Using the initial settings, you can select the language best suited to your convenience, this unit ...
Owner's Manual
Page 29
...turn AUX1/ AUX2 on . # To turn the dimmer on page 33. 1 Use MULTI-CONTROL to put a clock right. If 00 to select Clock in the initial setting menu. Refer to Adjusting initial settings on the previous page. 2 Press MULTI-CONTROL to turn AUX off , press MULTI-CONTROL again. Switching the ...dimmer setting To prevent the display from the head unit within four seconds of the clock display, the selected segment blinks. 3 Push MULTI-CONTROL up . (e.g., 10:36 becomes 11:00.) Switching the...
...turn AUX1/ AUX2 on . # To turn the dimmer on page 33. 1 Use MULTI-CONTROL to put a clock right. If 00 to select Clock in the initial setting menu. Refer to Adjusting initial settings on the previous page. 2 Press MULTI-CONTROL to turn AUX off , press MULTI-CONTROL again. Switching the ...dimmer setting To prevent the display from the head unit within four seconds of the clock display, the selected segment blinks. 3 Push MULTI-CONTROL up . (e.g., 10:36 becomes 11:00.) Switching the...
Owner's Manual
Page 40
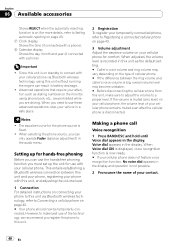
.... ! However, to make sure to adjust the volume to a proper level. Advanced operations that require your attention such as the default setting. # Caller's voice volume and ring volume may become unstable. # Before disconnecting the cellular phone from this unit as dialing numbers on page...driving. Notes ! Section 06 Available accessories Shows REJECT when the automatic rejecting function is on (for more details, refer to Setting automatic rejecting on page 47). 7 Clock display Shows the time (if connected with a phone). 8 Calendar display Shows the day, month and year (if connected with...
.... ! However, to make sure to adjust the volume to a proper level. Advanced operations that require your attention such as the default setting. # Caller's voice volume and ring volume may become unstable. # Before disconnecting the cellular phone from this unit as dialing numbers on page...driving. Notes ! Section 06 Available accessories Shows REJECT when the automatic rejecting function is on (for more details, refer to Setting automatic rejecting on page 47). 7 Clock display Shows the time (if connected with a phone). 8 Calendar display Shows the day, month and year (if connected with...


