Owner's Manual
Page 2
...For your own security and convenience, be erased. Please keep the volume low enough to come into contact with liquids. Always keep the manual in a safe and accessible place for use , please read and observe WARNINGs and CAUTIONs in North America. Important (Serial number) ... THE USE OF OPTICAL INSTRUMENTS WITH THIS PRODUCT WILL INCREASE EYE HAZARD. WARNING Handling the cord on this PIONEER product. To ensure proper use in this manual. It is disconnected or discharged, any interference received, including interference that you for purchasing this product or cords...
...For your own security and convenience, be erased. Please keep the volume low enough to come into contact with liquids. Always keep the manual in a safe and accessible place for use , please read and observe WARNINGs and CAUTIONs in North America. Important (Serial number) ... THE USE OF OPTICAL INSTRUMENTS WITH THIS PRODUCT WILL INCREASE EYE HAZARD. WARNING Handling the cord on this PIONEER product. To ensure proper use in this manual. It is disconnected or discharged, any interference received, including interference that you for purchasing this product or cords...
Owner's Manual
Page 3
... switch is set to ACC or ON while the unit is turned off the unit does not cancel demo mode. Access owner's manuals, spare parts information, service information, and much more. Turning off . For warranty information please see the Limited Warranty sheet included ...the demo mode, press DISP/ /SCRL. ware updates) for repair without advance contact. Before You Start Presection English After-sales service for Pioneer products Please contact the dealer or distributor from where you purchased this unit to a terminal coupled with this unit fail to operate properly,...
... switch is set to ACC or ON while the unit is turned off the unit does not cancel demo mode. Access owner's manuals, spare parts information, service information, and much more. Turning off . For warranty information please see the Limited Warranty sheet included ...the demo mode, press DISP/ /SCRL. ware updates) for repair without advance contact. Before You Start Presection English After-sales service for Pioneer products Please contact the dealer or distributor from where you purchased this unit to a terminal coupled with this unit fail to operate properly,...
Owner's Manual
Page 5
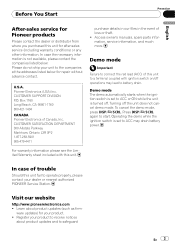
... list. Avoid subjecting the front panel to release the front panel. 2 Grab the front panel and remove. Remove any cables and devices attached to this manual, iPod and iPhone will be referred to cycle between: TUNER (tuner)-CD (built-in use. 5c An upper tier of folder or menu exists. 6 (folder...
... list. Avoid subjecting the front panel to release the front panel. 2 Grab the front panel and remove. Remove any cables and devices attached to this manual, iPod and iPhone will be referred to cycle between: TUNER (tuner)-CD (built-in use. 5c An upper tier of folder or menu exists. 6 (folder...
Owner's Manual
Page 7
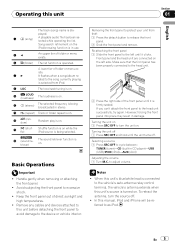
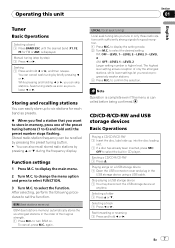
.... 2 Turn M.C. Selecting a folder 1 Press a or b. Operating this unit Section 01 English Tuner Basic Operations Selecting a band 1 Press BAND/ESC until the preset number stops flashing. Manual tuning (step by step) 1 Press c or d. Seeking 1 Press and hold c or d. Function settings 1 Press M.C. CD/CD-R/CD-RW and USB storage devices Basic Operations Playing...
.... 2 Turn M.C. Selecting a folder 1 Press a or b. Operating this unit Section 01 English Tuner Basic Operations Selecting a band 1 Press BAND/ESC until the preset number stops flashing. Manual tuning (step by step) 1 Press c or d. Seeking 1 Press and hold c or d. Function settings 1 Press M.C. CD/CD-R/CD-RW and USB storage devices Basic Operations Playing...
Owner's Manual
Page 12
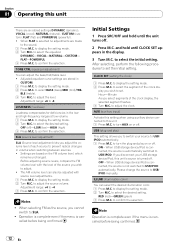
...)/TRE- to confirm the selection. to confirm the selection. to confirm the selection. and hold until CLOCK SET appears in CUSTOM. 1 Press M.C. to USB/ IPOD manually. USB (plug and play you select segments of the clock dis- Please change the source to display the setting mode. 2 Press M.C. RED (red)-GREEN (green...
...)/TRE- to confirm the selection. to confirm the selection. to confirm the selection. and hold until CLOCK SET appears in CUSTOM. 1 Press M.C. to USB/ IPOD manually. USB (plug and play you select segments of the clock dis- Please change the source to display the setting mode. 2 Press M.C. RED (red)-GREEN (green...
Owner's Manual
Page 21
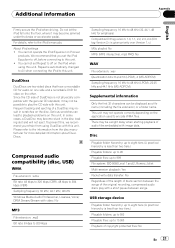
... from using this unit. Since the CD side of audio files embedded with this unit. ! In some cases, a DualDisc may not operate correctly depending on Pioneer products. Additional Information Appendix English Firmly secure the iPod when driving. Please refer to encode WMA files. You cannot set the iPod Equalizer to play... kHz to 48 kHz (LPCM), 22.05 kHz and 44.1 kHz (MS ADPCM) Supplemental information Only the first 32 characters can lead to the iPod's manuals.
... from using this unit. Since the CD side of audio files embedded with this unit. ! In some cases, a DualDisc may not operate correctly depending on Pioneer products. Additional Information Appendix English Firmly secure the iPod when driving. Please refer to encode WMA files. You cannot set the iPod Equalizer to play... kHz to 48 kHz (LPCM), 22.05 kHz and 44.1 kHz (MS ADPCM) Supplemental information Only the first 32 characters can lead to the iPod's manuals.


