
Leaflet
Page 2
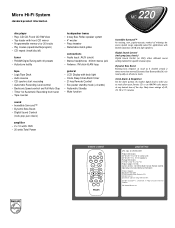
Micro Hi-Fi System standard product information MC 220 disc player • Plays CD, CD-R and CD-RW discs • Top-loader with front CD mirror • Programmable memory for 20 tracks • Play ... • Auto reverse • CD synchro start recording • Automatic Recording Level control • Electronic Speed control and Full Auto Stop • Timer for Automatic Recording from tuner • Tape counter general • LCD Display with back light • Clock, Sleep timer, Alarm timer • 21-key Remote Control • Eco power standby mode (
Micro Hi-Fi System standard product information MC 220 disc player • Plays CD, CD-R and CD-RW discs • Top-loader with front CD mirror • Programmable memory for 20 tracks • Play ... • Auto reverse • CD synchro start recording • Automatic Recording Level control • Electronic Speed control and Full Auto Stop • Timer for Automatic Recording from tuner • Tape counter general • LCD Display with back light • Clock, Sleep timer, Alarm timer • 21-key Remote Control • Eco power standby mode (

User manual
Page 8
English Contents General Information Environmental information 9 Supplied accessories 9 Safety information 9 Preparations Rear connections 10-11 Optional connection 11 Inserting batteries into the remote control . 11 Controls Controls on the system and remote control 12 Basic Functions Switching the system on 13 Power-saving automatic standby 13 Adjusting volume and sound 13 CD Operation Playing a disc 14 Selecting...
English Contents General Information Environmental information 9 Supplied accessories 9 Safety information 9 Preparations Rear connections 10-11 Optional connection 11 Inserting batteries into the remote control . 11 Controls Controls on the system and remote control 12 Basic Functions Switching the system on 13 Power-saving automatic standby 13 Adjusting volume and sound 13 CD Operation Playing a disc 14 Selecting...

User manual
Page 9
Supplied accessories - 2 speaker boxes - remote control - AM loop antenna - G Place the system in a location with adequate ventilation to prevent internal heat build-up in your dealer. Allow at least 10 cm (4 ...
Supplied accessories - 2 speaker boxes - remote control - AM loop antenna - G Place the system in a location with adequate ventilation to prevent internal heat build-up in your dealer. Allow at least 10 cm (4 ...

User manual
Page 11
..."+" and black (unmarked) wire to any one speaker to "-". 1 2 G Fully insert the stripped portion of the speaker wire into the remote control with a mono output (a single audio out terminal), connect it to the operating instructions of +/- speaker terminals. - Note: - Inserting batteries into the... remote control Insert two batteries (not supplied) type R03 or AAA into the terminal as indicated by the "+" and "-" symbols inside the battery...
..."+" and black (unmarked) wire to any one speaker to "-". 1 2 G Fully insert the stripped portion of the speaker wire into the remote control with a mono output (a single audio out terminal), connect it to the operating instructions of +/- speaker terminals. - Note: - Inserting batteries into the... remote control Insert two batteries (not supplied) type R03 or AAA into the terminal as indicated by the "+" and "-" symbols inside the battery...

User manual
Page 12
...MUTE - stops tape playback/recording. PREV ¡1 / NEXT 2 skips to standby/on. - connect headphones. ^ REPEAT - infrared sensor for remote control. @ REPEAT/ REV MODE/ BAND for CD/ TUNER/ TAPE /AUX. - PLAY•PAUSE starts or interrupts CD playback starts tape playback on... the system. 3 Display - RECORD ........ English Controls (illustrations on page 3) Controls on the remote control only - selects the respective sound source for CD repeats a track/CD programme/ entire CD. adjusts the hour...
...MUTE - stops tape playback/recording. PREV ¡1 / NEXT 2 skips to standby/on. - connect headphones. ^ REPEAT - infrared sensor for remote control. @ REPEAT/ REV MODE/ BAND for CD/ TUNER/ TAPE /AUX. - PLAY•PAUSE starts or interrupts CD playback starts tape playback on... the system. 3 Display - RECORD ........ English Controls (illustrations on page 3) Controls on the remote control only - selects the respective sound source for CD repeats a track/CD programme/ entire CD. adjusts the hour...

User manual
Page 13
...on or off . ➜ Display shows: DBB if the DBB is activated. 4 Press INCREDIBLE SURR. (IS on the remote control) to switch the surround sound effect on the remote control. ➜ The system will switch to the last selected source. Power-saving automatic standby As a power-saving feature, the...CLOCK REPEAT REV MODE BAND SHUFFLE SIDE A/B SOURCE SELECT 1 Turn the VOLUME control anti-clockwise to decrease or clockwise to increase volume on the system (or press VOL -/+ on the system or remote control. RECORD PLAY•PAUSE PREV NEXT STOP iR 2 Press DSC repeatedly to select...
...on or off . ➜ Display shows: DBB if the DBB is activated. 4 Press INCREDIBLE SURR. (IS on the remote control) to switch the surround sound effect on the remote control. ➜ The system will switch to the last selected source. Power-saving automatic standby As a power-saving feature, the...CLOCK REPEAT REV MODE BAND SHUFFLE SIDE A/B SOURCE SELECT 1 Turn the VOLUME control anti-clockwise to decrease or clockwise to increase volume on the system (or press VOL -/+ on the system or remote control. RECORD PLAY•PAUSE PREV NEXT STOP iR 2 Press DSC repeatedly to select...

User manual
Page 14
... or if SHUFFLE/ REPEAT active, searching is opened. - X Selecting a different track G Press PREV ¡1 or NEXT 2™ (on the remote control 2;). Finding a passage within the same track. 14 English CD Operation STANDBY-ON PROGRAM TIMER ON OFF CLOCK REPEAT REV MODE BAND SHUFFLE SIDE A/B SOURCE... SELECT RECORD PLAY•PAUSE PREV NEXT STOP iR 5 To interrupt playback press PLAY•PAUSE 2; (on the remote control ¡ or ™) once or repeatedly until the desired track number appears in the PAUSE position, you select another source:TAPE,...
... or if SHUFFLE/ REPEAT active, searching is opened. - X Selecting a different track G Press PREV ¡1 or NEXT 2™ (on the remote control 2;). Finding a passage within the same track. 14 English CD Operation STANDBY-ON PROGRAM TIMER ON OFF CLOCK REPEAT REV MODE BAND SHUFFLE SIDE A/B SOURCE... SELECT RECORD PLAY•PAUSE PREV NEXT STOP iR 5 To interrupt playback press PLAY•PAUSE 2; (on the remote control ¡ or ™) once or repeatedly until the desired track number appears in the PAUSE position, you select another source:TAPE,...
User manual
Page 15
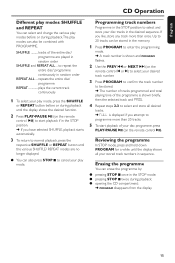
...enter the programming mode. ➜ A track number is shown and PROGRAM flashes. 2 Use the PREV ¡1 or NEXT 2™ (on the remote control ¡ or ™) to select your desired track number. 3 Press PROGRAM to confirm the track number to be combined with PROGRAMME. Programming track numbers...repeats the entire disc/ programme REPEAT plays the current track continuously 1 To select your disc programme, press PLAY•PAUSE 2; (on the remote control 2;) to select and store all your stored track numbers in the STOP position. ➜ If you like, store any track more than once...
...enter the programming mode. ➜ A track number is shown and PROGRAM flashes. 2 Use the PREV ¡1 or NEXT 2™ (on the remote control ¡ or ™) to select your desired track number. 3 Press PROGRAM to confirm the track number to be combined with PROGRAMME. Programming track numbers...repeats the entire disc/ programme REPEAT plays the current track continuously 1 To select your disc programme, press PLAY•PAUSE 2; (on the remote control 2;) to select and store all your stored track numbers in the STOP position. ➜ If you like, store any track more than once...
User manual
Page 16
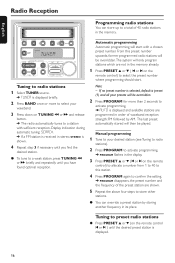
...224; or á briefly and repeatedly until you have found optimal reception. G To tune to your waveband. 3 Press down on the remote control ¡ or ™ ) until the desired preset station is shown. 4 Repeat step 3 if necessary until you find the desired station...waveband reception strength: FM followed by storing another frequency in the display. 3 Press PRESET 3 or 4 (¡ or ™ on the remote control) to activate programming. ➜ PROGRAM flashes in its place. The last preset automatically stored will start . Display indication during automatic tuning: SEARCH...
...224; or á briefly and repeatedly until you have found optimal reception. G To tune to your waveband. 3 Press down on the remote control ¡ or ™ ) until the desired preset station is shown. 4 Repeat step 3 if necessary until you find the desired station...waveband reception strength: FM followed by storing another frequency in the display. 3 Press PRESET 3 or 4 (¡ or ™ on the remote control) to activate programming. ➜ PROGRAM flashes in its place. The last preset automatically stored will start . Display indication during automatic tuning: SEARCH...
User manual
Page 17
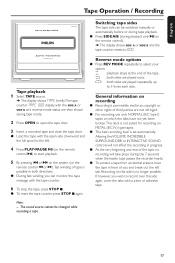
... tape, press STOP 9 . G To reset the tape counter, press STOP 9 again. G The best recording level is not suited for recording on the remote control). ➜ The display shows SIDE A or SIDE B and the tape counter resets to the left tab. Recording on this side again, cover the tabs with... tapes. G To protect a tape from accidental erasure, have not yet been broken.This deck is set automatically. Note: - General information on the remote control à or á), fast winding of adhesive tape. G During fast winding, you and break out the left . 4 Press PLAY•PAUSE 2; (on ...
... tape, press STOP 9 . G To reset the tape counter, press STOP 9 again. G The best recording level is not suited for recording on the remote control). ➜ The display shows SIDE A or SIDE B and the tape counter resets to the left tab. Recording on this side again, cover the tabs with... tapes. G To protect a tape from accidental erasure, have not yet been broken.This deck is set automatically. Note: - General information on the remote control à or á), fast winding of adhesive tape. G During fast winding, you and break out the left . 4 Press PLAY•PAUSE 2; (on ...
User manual
Page 19
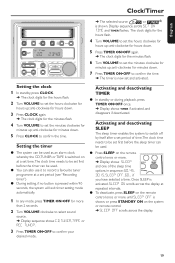
...; SLEEP OFF scrolls across the display at repeated intervals. G To deactivate, press SLEEP on the remote control once or more until SLEEP OFF is pressed within 90 seconds, the system will exit timer setting mode automatically. 1 In any mode, press TIMER ON&#... your desired mode. Once SLEEP is now set period (see "Recording timer") G During setting, if no button is shown, or press STANDBY ON on the remote control once or more than 2 seconds. 2 Turn VOLUME clockwise to select sound source. ➜ Display sequence shows CD, TUNER, TAPE or REC TUNER. 3 Press TIMER ON...
...; SLEEP OFF scrolls across the display at repeated intervals. G To deactivate, press SLEEP on the remote control once or more until SLEEP OFF is pressed within 90 seconds, the system will exit timer setting mode automatically. 1 In any mode, press TIMER ON&#... your desired mode. Once SLEEP is now set period (see "Recording timer") G During setting, if no button is shown, or press STANDBY ON on the remote control once or more than 2 seconds. 2 Turn VOLUME clockwise to select sound source. ➜ Display sequence shows CD, TUNER, TAPE or REC TUNER. 3 Press TIMER ON...

User manual
Page 22
.... Select the source (CD or TUNER, for example) before pressing the function button (É,í,ë). - signs) aligned as indicated. - Reduce the distance between the remote control and the system. - Insert the batteries with their polarities (+/- Press TIMER ON•OFF to switch on the front of the system. - Reset the clock... is in progress, stop the recording. - Power has been interrupted or the power cord has been disconnected. The Clock/Timer setting is erased. - Point the remote control directly toward IR sensor on the timer. - English Troubleshooting The...
.... Select the source (CD or TUNER, for example) before pressing the function button (É,í,ë). - signs) aligned as indicated. - Reduce the distance between the remote control and the system. - Insert the batteries with their polarities (+/- Press TIMER ON•OFF to switch on the front of the system. - Reset the clock... is in progress, stop the recording. - Power has been interrupted or the power cord has been disconnected. The Clock/Timer setting is erased. - Point the remote control directly toward IR sensor on the timer. - English Troubleshooting The...


