
Leaflet
Page 1
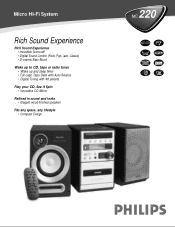
Micro Hi-Fi System Rich Sound Experience Rich Sound Experience • Incredible Surround™ • Digital Sound Control (Rock, Pop, Jazz, Classic) • D ynamic Bass Boost Wake up to CD, tape or radio tunes • Wake up and sleep timer • Full Logic Tape Deck with Auto Reverse • Digital Tuning with 40 presets Play your CD, See it Spin • Innovative CD Mirror Refined in sound and looks • Elegant wood-finished speakers Fits any space, any lifestyle • Compact Design MC 220 21
Micro Hi-Fi System Rich Sound Experience Rich Sound Experience • Incredible Surround™ • Digital Sound Control (Rock, Pop, Jazz, Classic) • D ynamic Bass Boost Wake up to CD, tape or radio tunes • Wake up and sleep timer • Full Logic Tape Deck with Auto Reverse • Digital Tuning with 40 presets Play your CD, See it Spin • Innovative CD Mirror Refined in sound and looks • Elegant wood-finished speakers Fits any space, any lifestyle • Compact Design MC 220 21
Leaflet
Page 2
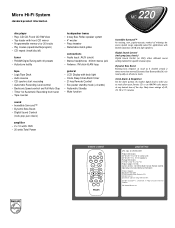
... MC 220 disc player • Plays CD, CD-R and CD-RW discs • Top-loader with front CD mirror • Programmable memory for 20 tracks • Play modes (repeat/shuffle/program) • CD repeat (track/disc/all) tuner • FM/AM Digital Tuning with 40 presets • Autostore facility loudspeaker boxes • 2-way Bass Reflex speaker system • 4" woofer • Piezo tweeter • Detachable metal grilles connections • Audio Input : AUX (cinch) • Stereo headphones : 3.5mm stereo jack • Antenna...
... MC 220 disc player • Plays CD, CD-R and CD-RW discs • Top-loader with front CD mirror • Programmable memory for 20 tracks • Play modes (repeat/shuffle/program) • CD repeat (track/disc/all) tuner • FM/AM Digital Tuning with 40 presets • Autostore facility loudspeaker boxes • 2-way Bass Reflex speaker system • 4" woofer • Piezo tweeter • Detachable metal grilles connections • Audio Input : AUX (cinch) • Stereo headphones : 3.5mm stereo jack • Antenna...
User manual
Page 1
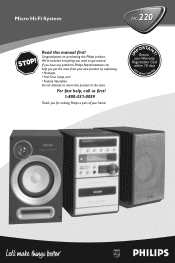
... most from your new product by explaining: • Hookups, • First Time Setup, and • Feature Operation. Congratulations on purchasing this manual first! T! IM E PORTAN Return your home! For fast help you for making Philips a part of your Warranty Registration Card within 10 days EE WHY INSID 1 S Micro Hi-Fi System MC-220 Read this Philips product. If you have any problems, Philips Representatives can help , call us fi...
... most from your new product by explaining: • Hookups, • First Time Setup, and • Feature Operation. Congratulations on purchasing this manual first! T! IM E PORTAN Return your home! For fast help you for making Philips a part of your Warranty Registration Card within 10 days EE WHY INSID 1 S Micro Hi-Fi System MC-220 Read this Philips product. If you have any problems, Philips Representatives can help , call us fi...
User manual
Page 4
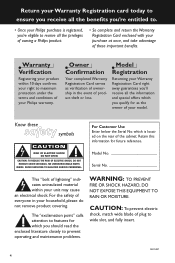
... insert. Model Registration Returning your model. Warranty Verification Registering your product within your household, please do not remove product covering. MAC5097 4 Return your Warranty Registration card today to ensure you receive all the privileges of owning a Philips product. • So complete and return the Warranty Registration Card enclosed with your Philips warranty. Know these important benefits. NO USER-SERVICEABLE PARTS INSIDE. Retain...
... insert. Model Registration Returning your model. Warranty Verification Registering your product within your household, please do not remove product covering. MAC5097 4 Return your Warranty Registration card today to ensure you receive all the privileges of owning a Philips product. • So complete and return the Warranty Registration Card enclosed with your Philips warranty. Know these important benefits. NO USER-SERVICEABLE PARTS INSIDE. Retain...

User manual
Page 8
...Optional connection 11 Inserting batteries into the remote control . 11 Controls Controls on the system and remote control 12 Basic Functions Switching the system on 13 Power-saving automatic standby 13 Adjusting volume and sound 13 CD Operation Playing a disc 14 Selecting a different track 14 Finding a passage within a track 14 Different play modes: Shuffle and Repeat ..... 15 Programming track numbers 15 Reviewing the programme 15 Erasing the programme 15 Radio Reception Tuning to radio stations 16 Programming radio stations 16 Tuning to preset radio stations 16 Tape Operation...
...Optional connection 11 Inserting batteries into the remote control . 11 Controls Controls on the system and remote control 12 Basic Functions Switching the system on 13 Power-saving automatic standby 13 Adjusting volume and sound 13 CD Operation Playing a disc 14 Selecting a different track 14 Finding a passage within a track 14 Different play modes: Shuffle and Repeat ..... 15 Programming track numbers 15 Reviewing the programme 15 Erasing the programme 15 Radio Reception Tuning to radio stations 16 Programming radio stations 16 Tuning to preset radio stations 16 Tape Operation...

User manual
Page 9
... or lubricated. Supplied accessories - 2 speaker boxes - To disconnect the system from the power supply completely, remove the AC power plug from each side. FM wire antenna Safety Information G Before operating the system, check that the operating voltage indicated on for about one hour with the voltage of the disc unit inside the system. If not, please consult your local power supply. G When the system is switched to Standby mode, it is...
... or lubricated. Supplied accessories - 2 speaker boxes - To disconnect the system from the power supply completely, remove the AC power plug from each side. FM wire antenna Safety Information G Before operating the system, check that the operating voltage indicated on for about one hour with the voltage of the disc unit inside the system. If not, please consult your local power supply. G When the system is switched to Standby mode, it is...

User manual
Page 10
.... B Antennas Connection Connect the supplied AM loop antenna and FM antenna to Standby mode automatically under extreme conditions. For optimal performance, use only the original power cable. - AM Antenna To avoid overheating of the antenna for all other radiation source. 10 A Power Before connecting the AC power cord to the wall outlet, ensure that all versions). Adjust the position of the system, a safety circuit has been built in L R speakers (left) A AC power cord Rear connections...
.... B Antennas Connection Connect the supplied AM loop antenna and FM antenna to Standby mode automatically under extreme conditions. For optimal performance, use only the original power cable. - AM Antenna To avoid overheating of the antenna for all other radiation source. 10 A Power Before connecting the AC power cord to the wall outlet, ensure that all versions). Adjust the position of the system, a safety circuit has been built in L R speakers (left) A AC power cord Rear connections...

User manual
Page 11
... not use the supplied speakers. - Refer to the operating instructions of +/- Please refer to the SPECIFICATIONS section of a TV,VCR, Laser Disc player, DVD player or CD Recorder to double" cinch cable (the output sound still remain mono). If you can use a "single to the AUX IN terminals. Alternatively, you are connecting equipment with a mono output (a single audio out terminal), connect it to the AUX IN left speaker to "LEFT", coloured (marked) wire...
... not use the supplied speakers. - Refer to the operating instructions of +/- Please refer to the SPECIFICATIONS section of a TV,VCR, Laser Disc player, DVD player or CD Recorder to double" cinch cable (the output sound still remain mono). If you can use a "single to the AUX IN terminals. Alternatively, you are connecting equipment with a mono output (a single audio out terminal), connect it to the AUX IN left speaker to "LEFT", coloured (marked) wire...

User manual
Page 12
... stereo effect. ! infrared sensor for remote control. @ REPEAT/ REV MODE/ BAND for Tape switches tape direction. 9 OPEN - PLAY•PAUSE starts or interrupts CD playback starts tape playback on the system and remote control 1 STANDBY ON y - TUNING tunes to standby. 2 SELECT SOURCE - connect headphones. ^ REPEAT - interrupts and resumes sound reproduction. ( NEWS/TA - Then select the desired function (for CD/ TUNER/ TAPE /AUX. - selects the respective sound source for exampleÉ, í, ë). 12 adjusts the volume level. - for Clock sets the clock...
... stereo effect. ! infrared sensor for remote control. @ REPEAT/ REV MODE/ BAND for Tape switches tape direction. 9 OPEN - PLAY•PAUSE starts or interrupts CD playback starts tape playback on the system and remote control 1 STANDBY ON y - TUNING tunes to standby. 2 SELECT SOURCE - connect headphones. ^ REPEAT - interrupts and resumes sound reproduction. ( NEWS/TA - Then select the desired function (for CD/ TUNER/ TAPE /AUX. - selects the respective sound source for exampleÉ, í, ë). 12 adjusts the volume level. - for Clock sets the clock...

User manual
Page 13
... Functions Adjusting volume and sound STANDBY-ON PROGRAM TIMER ON OFF CLOCK REPEAT REV MODE BAND SHUFFLE SIDE A/B SOURCE SELECT 1 Turn the VOLUME control anti-clockwise to decrease or clockwise to increase volume on the system (or press VOL -/+ on the remote control. ➜ The system will switch to the selected source. G Press CD, TUNER, TAPE or AUX on the remote control). ➜ Display shows the volume level VOL and a number from 0-32. The effect of INCREDIBLE SURROUND may...
... Functions Adjusting volume and sound STANDBY-ON PROGRAM TIMER ON OFF CLOCK REPEAT REV MODE BAND SHUFFLE SIDE A/B SOURCE SELECT 1 Turn the VOLUME control anti-clockwise to decrease or clockwise to increase volume on the system (or press VOL -/+ on the remote control. ➜ The system will switch to the selected source. G Press CD, TUNER, TAPE or AUX on the remote control). ➜ Display shows the volume level VOL and a number from 0-32. The effect of INCREDIBLE SURROUND may...

User manual
Page 14
.... Playing a disc This CD player plays Audio Discs including CDRecordables and CD-Rewritables. Note: - IMPORTANT! English CD Operation STANDBY-ON PROGRAM TIMER ON OFF CLOCK REPEAT REV MODE BAND SHUFFLE SIDE A/B SOURCE SELECT RECORD PLAY•PAUSE PREV NEXT STOP iR 5 To interrupt playback press PLAY•PAUSE 2; (on the remote control 2;) to start playback. ➜ Current track number and elapsed playing time of the track are shown. 4 Press PLAY•PAUSE 2; (on the remote control 2;). Note: CD play...
.... Playing a disc This CD player plays Audio Discs including CDRecordables and CD-Rewritables. Note: - IMPORTANT! English CD Operation STANDBY-ON PROGRAM TIMER ON OFF CLOCK REPEAT REV MODE BAND SHUFFLE SIDE A/B SOURCE SELECT RECORD PLAY•PAUSE PREV NEXT STOP iR 5 To interrupt playback press PLAY•PAUSE 2; (on the remote control 2;) to start playback. ➜ Current track number and elapsed playing time of the track are shown. 4 Press PLAY•PAUSE 2; (on the remote control 2;). Note: CD play...
User manual
Page 15
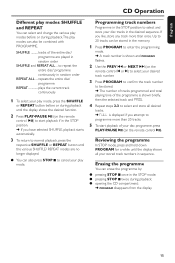
... programming mode. ➜ A track number is shown and PROGRAM flashes. 2 Use the PREV ¡1 or NEXT 2™ (on the remote control 2;). G pressing STOP 9 twice during playback; English CD Operation Different play modes: SHUFFLE and REPEAT You can select and change the various play modes before or during playback until the display shows the desired function. 2 Press PLAY•PAUSE 2; (on the remote control 2;) to start playback of your disc programme, press PLAY...
... programming mode. ➜ A track number is shown and PROGRAM flashes. 2 Use the PREV ¡1 or NEXT 2™ (on the remote control 2;). G pressing STOP 9 twice during playback; English CD Operation Different play modes: SHUFFLE and REPEAT You can select and change the various play modes before or during playback until the display shows the desired function. 2 Press PLAY•PAUSE 2; (on the remote control 2;) to start playback of your disc programme, press PLAY...
User manual
Page 16
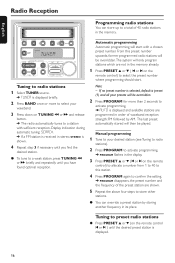
... start . Tuning to preset radio stations G Press PRESET 3 or 4 (on the remote control) to a station with a chosen preset number. If no preset number is selected, default is preset (1) and all your desired station (see Tuning to radio stations). 2 Press PROGRAM to activate programming. ➜ PROGRAM flashes in its place. English Radio Reception Programming radio stations You can override a preset station by AM. STANDBY-ON PROGRAM TIMER ON OFF CLOCK REPEAT REV MODE BAND SHUFFLE SIDE A/B SOURCE SELECT RECORD PLAY•PAUSE PREV NEXT STOP iR Tuning to radio stations...
... start . Tuning to preset radio stations G Press PRESET 3 or 4 (on the remote control) to a station with a chosen preset number. If no preset number is selected, default is preset (1) and all your desired station (see Tuning to radio stations). 2 Press PROGRAM to activate programming. ➜ PROGRAM flashes in its place. English Radio Reception Programming radio stations You can override a preset station by AM. STANDBY-ON PROGRAM TIMER ON OFF CLOCK REPEAT REV MODE BAND SHUFFLE SIDE A/B SOURCE SELECT RECORD PLAY•PAUSE PREV NEXT STOP iR Tuning to radio stations...
User manual
Page 17
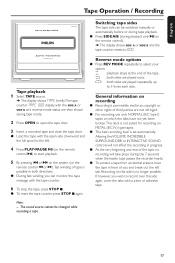
... B and reverse mode status are played once. : both directions. on METAL (IEC IV) type tapes. G During fast winding, you wish to the left tab. Altering the VOLUME, INCREDIBLE SURROUND, DBB or INTERACTIVE SOUND controls will take place during playback only 2; Note: - Reverse mode options G Press REV MODE repeatedly to start playback. 5 By pressing ¡1 or 2™ on the system (on the remote control à...
... B and reverse mode status are played once. : both directions. on METAL (IEC IV) type tapes. G During fast winding, you wish to the left tab. Altering the VOLUME, INCREDIBLE SURROUND, DBB or INTERACTIVE SOUND controls will take place during playback only 2; Note: - Reverse mode options G Press REV MODE repeatedly to start playback. 5 By pressing ¡1 or 2™ on the system (on the remote control à...
User manual
Page 18
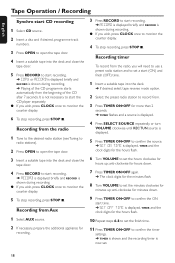
... Tape Operation / Recording Synchro start CD recording 1 Select CD source. 2 Insert a disc and if desired, programme track numbers. 3 Press OPEN to open the tape door. 3 Insert a suitable tape into the deck. ➜ If desired, select tape reverse mode option. 2 Select the preset radio station to record from. 3 Press TIMER ON•OFF for more than 2 seconds. ➜ TIMER flashes and a source is displayed. 4 Press SELECT SOURCE repeatedly, or turn VOLUME clockwise until REC TUN source is displayed...
... Tape Operation / Recording Synchro start CD recording 1 Select CD source. 2 Insert a disc and if desired, programme track numbers. 3 Press OPEN to open the tape door. 3 Insert a suitable tape into the deck. ➜ If desired, select tape reverse mode option. 2 Select the preset radio station to record from. 3 Press TIMER ON•OFF for more than 2 seconds. ➜ TIMER flashes and a source is displayed. 4 Press SELECT SOURCE repeatedly, or turn VOLUME clockwise until REC TUN source is displayed...
User manual
Page 19
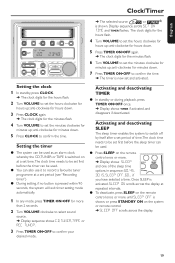
... the hours flash. 2 Turn VOLUME to set first before the sleep timer can also use it to record a favourite tuner programme at a set time.The clock time needs to confirm your desired mode. Setting the timer G The system can be used. Once SLEEP is shown, or press STANDBY ON on the remote control once or more than 2 seconds. 2 Turn VOLUME clockwise to select sound source. ➜ Display sequence shows CD, TUNER, TAPE or REC TUNER. 3 Press TIMER ON•...
... the hours flash. 2 Turn VOLUME to set first before the sleep timer can also use it to record a favourite tuner programme at a set time.The clock time needs to confirm your desired mode. Setting the timer G The system can be used. Once SLEEP is shown, or press STANDBY ON on the remote control once or more than 2 seconds. 2 Turn VOLUME clockwise to select sound source. ➜ Display sequence shows CD, TUNER, TAPE or REC TUNER. 3 Press TIMER ON•...

User manual
Page 20
... 2.8 µV - Follow the instructions supplied with a cleaning cloth. English Specifications / Maintenance AMPLIFIER Output power 2 x 10 W RMS 20 W total power Signal-to-noise ratio 65 dBA (IEC) Frequency response ......... 40 - 20000 Hz, ± 3 dB Input sensitivity AUX 0.5 V (max. 2 V) Impedance loudspeakers 8 Ω Impedance headphones 32 Ω -1000 Ω CD PLAYER Frequency range 20 - 20000 Hz Signal-to -noise ratio Normal tape (type I ) ... 120 - 10000...
... 2.8 µV - Follow the instructions supplied with a cleaning cloth. English Specifications / Maintenance AMPLIFIER Output power 2 x 10 W RMS 20 W total power Signal-to-noise ratio 65 dBA (IEC) Frequency response ......... 40 - 20000 Hz, ± 3 dB Input sensitivity AUX 0.5 V (max. 2 V) Impedance loudspeakers 8 Ω Impedance headphones 32 Ω -1000 Ω CD PLAYER Frequency range 20 - 20000 Hz Signal-to -noise ratio Normal tape (type I ) ... 120 - 10000...

User manual
Page 21
... the stripped speaker wire is displayed. Problem CD OPERATION "NO DISC" is clamped. - Use only normal (IEC I) tape for better reception. - Use a finalised CD-RW or CD-R. "CHECK TAPE" is inserted upside down. - Remove and reconnect the AC power plug and switch on the system again. - Increase the distance between the Micro HiFi System and your dealer or service centre. Check if the disc is displayed. Check that the speakers are unable to repair the system yourself...
... the stripped speaker wire is displayed. Problem CD OPERATION "NO DISC" is clamped. - Use only normal (IEC I) tape for better reception. - Use a finalised CD-RW or CD-R. "CHECK TAPE" is inserted upside down. - Remove and reconnect the AC power plug and switch on the system again. - Increase the distance between the Micro HiFi System and your dealer or service centre. Check if the disc is displayed. Check that the speakers are unable to repair the system yourself...

User manual
Page 22
... the source (CD or TUNER, for example) before pressing the function button (É,í,ë). - If a recording is not working. Reduce the distance between the remote control and the system. - English Troubleshooting The remote control does not function properly. Set the clock correctly. - Reset the clock/timer. 22 signs) aligned as indicated. - Press TIMER ON•OFF to switch on the front of the system. - Point the remote control directly toward IR...
... the source (CD or TUNER, for example) before pressing the function button (É,í,ë). - If a recording is not working. Reduce the distance between the remote control and the system. - English Troubleshooting The remote control does not function properly. Set the clock correctly. - Reset the clock/timer. 22 signs) aligned as indicated. - Press TIMER ON•OFF to switch on the front of the system. - Point the remote control directly toward IR...
User manual
Page 23
... the model and serial numbers found on how long an implied warranty may have proof of purchase. Attach it to this express warranty. Box 520890, Miami, FL 33152, USA, (402) 536-4171 EL4965E007 / 8-02 23 LIMITED WARRANTY AUDIO SYSTEM One Year Free Labor One Year Free Service on the product, and installation or repair of antenna systems outside of the product. • product repair and/or part replacement...
... the model and serial numbers found on how long an implied warranty may have proof of purchase. Attach it to this express warranty. Box 520890, Miami, FL 33152, USA, (402) 536-4171 EL4965E007 / 8-02 23 LIMITED WARRANTY AUDIO SYSTEM One Year Free Labor One Year Free Service on the product, and installation or repair of antenna systems outside of the product. • product repair and/or part replacement...


