
User Manual
Page 11
...place this unit an enclosed cabinet. • Install this unit near the AC outlet where the AC power plug can be easily reached. 1 Place this DVD Home Theatre unit from the power outlet. Note • You may purchase a separate table top stand that can be used. EN ... • Before you make or change any connections, ensure that all the devices are disconnected from the nearest Philips retailers. Basic connections: • Place the unit • Connect video cables • Connect subwoofer Optional connections: • Connect other devices • Connect audio from TV • Connect...
...place this unit an enclosed cabinet. • Install this unit near the AC outlet where the AC power plug can be easily reached. 1 Place this DVD Home Theatre unit from the power outlet. Note • You may purchase a separate table top stand that can be used. EN ... • Before you make or change any connections, ensure that all the devices are disconnected from the nearest Philips retailers. Basic connections: • Place the unit • Connect video cables • Connect subwoofer Optional connections: • Connect other devices • Connect audio from TV • Connect...

User Manual
Page 14
...wall. 5 Connect the power cord when all the required connections are ready to enjoy this DVD Home Theatre unit. 14 EN Option 3: Connect to component video socket Y Pb Pr COMPONENT VIDEO OUT Connect subwoofer 4 2 LOUDSPEAKERS 5 1 3 TO SUBWOOFER 1 Connect the component video cables (not supplied) from ... provide good picture quality. 1 Unwind the subwoofer's interconnect cable at TO MAIN UNIT. 2 Connect the white end of the interconnect cable to the LOUDSPEAKERS socket on this unit. 3 Connect the grey end of the interconnect cable to the TO SUBWOOFER socket on this unit. 4 Connect...
...wall. 5 Connect the power cord when all the required connections are ready to enjoy this DVD Home Theatre unit. 14 EN Option 3: Connect to component video socket Y Pb Pr COMPONENT VIDEO OUT Connect subwoofer 4 2 LOUDSPEAKERS 5 1 3 TO SUBWOOFER 1 Connect the component video cables (not supplied) from ... provide good picture quality. 1 Unwind the subwoofer's interconnect cable at TO MAIN UNIT. 2 Connect the white end of the interconnect cable to the LOUDSPEAKERS socket on this unit. 3 Connect the grey end of the interconnect cable to the TO SUBWOOFER socket on this unit. 4 Connect...

User Manual
Page 32
...to a PC are not supported. 32 EN Tips • If the device does not fit into the USB socket, connect it through a USB extension cable. • If a multiple USB card reader is displayed. 3 Select a file to play, then press u. • For more information, see chapters...require additional programme installation when connected to start slideshow play , press x again. A contents menu is used , ensure that an auxiliary power cord connected to create musical slideshow. Play musical slideshow Play MP3/WMA music files and JPEG photo files simultaneously to the...
...to a PC are not supported. 32 EN Tips • If the device does not fit into the USB socket, connect it through a USB extension cable. • If a multiple USB card reader is displayed. 3 Select a file to play, then press u. • For more information, see chapters...require additional programme installation when connected to start slideshow play , press x again. A contents menu is used , ensure that an auxiliary power cord connected to create musical slideshow. Play musical slideshow Play MP3/WMA music files and JPEG photo files simultaneously to the...

User Manual
Page 49
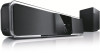
... response: 200 Hz - 20 kHz EN 49 Accessories supplied • Quick Start Guide • Remote control and batteries • Scart cable • Composite video cable • HDMI cable • 3.5mm stereo audio cable • Power cable • Subwoofer • Wall mounting bracket and 2 wall mounting knobs • iPod docking station • FM wire antenna • Micro...
... response: 200 Hz - 20 kHz EN 49 Accessories supplied • Quick Start Guide • Remote control and batteries • Scart cable • Composite video cable • HDMI cable • 3.5mm stereo audio cable • Power cable • Subwoofer • Wall mounting bracket and 2 wall mounting knobs • iPod docking station • FM wire antenna • Micro...
User Manual
Page 50
...remove the casing of electric shock. Press B (for progressive scan) or b (for a few minutes, then connect again. • Ensure that the interconnect cable from the power outlet for TV type). 3. If you change the TV type setting, you have to switch to your product and get support at www....philips.com/welcome. Press Z to repair the system yourself. 9 Troubleshooting Warning! • Risk of this unit. If the problem remains unsolved, register...
...remove the casing of electric shock. Press B (for progressive scan) or b (for a few minutes, then connect again. • Ensure that the interconnect cable from the power outlet for TV type). 3. If you change the TV type setting, you have to switch to your product and get support at www....philips.com/welcome. Press Z to repair the system yourself. 9 Troubleshooting Warning! • Risk of this unit. If the problem remains unsolved, register...


