

Owner's Manual
Page 2
... a 13-ampere plug is used, a 3-ampere fuse has to be fitted Contents on pages 165 to clean it, oil it or change mechanical and accessory parts. d) The drive belt must never be adjusted by the needle during sewing. "ome safety rules valid for United Kingdom only The wires in the mains...: Neutral Brown: Live As the colours of the wires in the mains lead of the terminals in your fingers by anyone but an authori zed Pfaff agent. The wire which is coloured brown must be connected to the termi nal which is marked with the letter N or coloured black. b) Make sure...
... a 13-ampere plug is used, a 3-ampere fuse has to be fitted Contents on pages 165 to clean it, oil it or change mechanical and accessory parts. d) The drive belt must never be adjusted by the needle during sewing. "ome safety rules valid for United Kingdom only The wires in the mains...: Neutral Brown: Live As the colours of the wires in the mains lead of the terminals in your fingers by anyone but an authori zed Pfaff agent. The wire which is coloured brown must be connected to the termi nal which is marked with the letter N or coloured black. b) Make sure...
Owner's Manual
Page 5
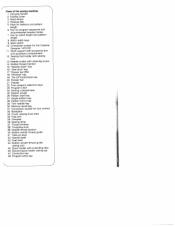
Parts of the sewing machine 1 Carrying handle 2 Folding cover 3 Hand wheel 4 Release disc 5 Keys for balance and pattern length 6 Key for program sequence and recommended sewing modes 7 Key for stitch length and pattern length 8 Stitch width keys 9 Main switch 10 Connection socket for the Creative Designer 1473 CD 11 Work support with accessory box...
Parts of the sewing machine 1 Carrying handle 2 Folding cover 3 Hand wheel 4 Release disc 5 Keys for balance and pattern length 6 Key for program sequence and recommended sewing modes 7 Key for stitch length and pattern length 8 Stitch width keys 9 Main switch 10 Connection socket for the Creative Designer 1473 CD 11 Work support with accessory box...

Owner's Manual
Page 46
Be sure to 20 hours of oil in the hook raceway, as instructed on page 163. Clean the feed dog and the parts in the sewing lamp. 42 Insert the edge guide into cutout D, push down the lamp housing and hold it there, Turn the light bulb towards B. ...
Be sure to 20 hours of oil in the hook raceway, as instructed on page 163. Clean the feed dog and the parts in the sewing lamp. 42 Insert the edge guide into cutout D, push down the lamp housing and hold it there, Turn the light bulb towards B. ...

Owner's Manual
Page 48
.... They can be employed for special sewing work Binder (remove sewing foot holder) 98 053 484-91 For binding edges with 1.4-1 8 mm needle gauge)I ------ Accessory Part No. __ Special accessories The special accessories listed below are intended for the intended purpose only.
.... They can be employed for special sewing work Binder (remove sewing foot holder) 98 053 484-91 For binding edges with 1.4-1 8 mm needle gauge)I ------ Accessory Part No. __ Special accessories The special accessories listed below are intended for the intended purpose only.
Owner's Manual
Page 53
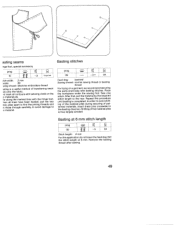
... dress pins crosswise to e material. Shifting of transferring seam es onto the fabric. hen all contours with tailoring chalk on a garment, we recommend securing the parts previously with the fringe foot. Place the workpiece under the sewing foot. After that, pull the material by the required stitch length to the rear...
... dress pins crosswise to e material. Shifting of transferring seam es onto the fabric. hen all contours with tailoring chalk on a garment, we recommend securing the parts previously with the fringe foot. Place the workpiece under the sewing foot. After that, pull the material by the required stitch length to the rear...
Owner's Manual
Page 71
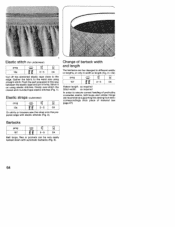
.... Elastic straps (outerwear) prog [ 13a -- (1 11 3-5 On skirts or trousers sew the strap onto the pre pared edge with automatic bartacks (Fig. 3). 64 Push the part prepared in width or length (Fig. 4 + 4b) prog 157 1 KK 3-5OA Pattern length: as required Stitch-width: as required In order to ensure correct feeding...
.... Elastic straps (outerwear) prog [ 13a -- (1 11 3-5 On skirts or trousers sew the strap onto the pre pared edge with automatic bartacks (Fig. 3). 64 Push the part prepared in width or length (Fig. 4 + 4b) prog 157 1 KK 3-5OA Pattern length: as required Stitch-width: as required In order to ensure correct feeding...
Owner's Manual
Page 74
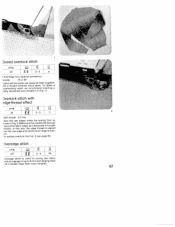
.... To obtain a ood-looking seam we recommend inserting a ghtly tensioned wool thread in Fig. 2. k Knit-edge foot (special accessory) Jeedle: 70 or 80 ashioned knit parts can easily be sewn together vith a closed overlock stitch seam. Diosed overlock stitch prog 23 --
.... To obtain a ood-looking seam we recommend inserting a ghtly tensioned wool thread in Fig. 2. k Knit-edge foot (special accessory) Jeedle: 70 or 80 ashioned knit parts can easily be sewn together vith a closed overlock stitch seam. Diosed overlock stitch prog 23 --

Owner's Manual
Page 81
...;seheeatneanhtmmontruicegadannoadgeewvddeteheo.adfrraeraHnenrssfdhpoea(aFilowrctodietognra.mfsib,rgt3oooiph)ptftm.tlclhteaWhhatcoeeentihnhlsngyfe.ergal,neebFstasruttiidihdhrrctsseeneot. ARa"stmhCtnatoeo"dtipasvac.ephenhoW rstdehltdsehdhisenoeinetnwsretdehenyrabedtorarlunotereh.in an embroidery hoop. 2 3 J I 4 For mending you can place the damaged part of its slot.
...;seheeatneanhtmmontruicegadannoadgeewvddeteheo.adfrraeraHnenrssfdhpoea(aFilowrctodietognra.mfsib,rgt3oooiph)ptftm.tlclhteaWhhatcoeeentihnhlsngyfe.ergal,neebFstasruttiidihdhrrctsseeneot. ARa"stmhCtnatoeo"dtipasvac.ephenhoW rstdehltdsehdhisenoeinetnwsretdehenyrabedtorarlunotereh.in an embroidery hoop. 2 3 J I 4 For mending you can place the damaged part of its slot.
Owner's Manual
Page 122
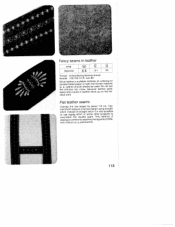
vylerie) the stitches should always be used for joining parts of double-folded paper or light non-woven material (e. g. Do not set too close, because leather splits easily and cracks in leather jg zrzz Optional L E ...
vylerie) the stitches should always be used for joining parts of double-folded paper or light non-woven material (e. g. Do not set too close, because leather splits easily and cracks in leather jg zrzz Optional L E ...
Owner's Manual
Page 156
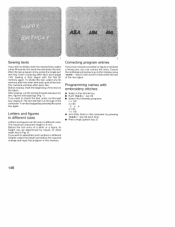
... width key 8 (Fig. 2). After sewing, cut the joining threads between let ters, figures and spacings (Fig. 1). The maximum character height is then begun with each part of the text again. Cancel the individual entries back up to divide a text into several lines, select a free M-memory for each line. If you wish...
... width key 8 (Fig. 2). After sewing, cut the joining threads between let ters, figures and spacings (Fig. 1). The maximum character height is then begun with each part of the text again. Cancel the individual entries back up to divide a text into several lines, select a free M-memory for each line. If you wish...


