

Owner's Manual
Page 3
Parts of your select sewing machine 1 Connection socket "foot control with main cord" 2 Main switch 3 Handwheel release disk 4 Handwheel 5 Bobbin winder 6 Lid with stitches 7 Extra spool ... screw 19 Presser foot lifter 20 Button for "reverse sewing" 21 Stitch length dial 22 Stitch selection 1540 23 Carrying handle 24 Stitch selection 1530 & 1520 25 Thread guide 26 Sewing lamp (max. 15 watt) 27 Stitch width dial 28 Needle position dial 29 Needle plate
Parts of your select sewing machine 1 Connection socket "foot control with main cord" 2 Main switch 3 Handwheel release disk 4 Handwheel 5 Bobbin winder 6 Lid with stitches 7 Extra spool ... screw 19 Presser foot lifter 20 Button for "reverse sewing" 21 Stitch length dial 22 Stitch selection 1540 23 Carrying handle 24 Stitch selection 1530 & 1520 25 Thread guide 26 Sewing lamp (max. 15 watt) 27 Stitch width dial 28 Needle position dial 29 Needle plate

Owner's Manual
Page 5
... bent or blunt needles. Use this manual. 7. Never operate this sewing machine is required around the sewing machine needle. 16. To disconnect, turn all moving parts. To unplug, grasp the plug, not the cord. 15. Do not use only SAVE THESE INSTRUCTIONS Please also observe the general safety notes on cord...
... bent or blunt needles. Use this manual. 7. Never operate this sewing machine is required around the sewing machine needle. 16. To disconnect, turn all moving parts. To unplug, grasp the plug, not the cord. 15. Do not use only SAVE THESE INSTRUCTIONS Please also observe the general safety notes on cord...
Owner's Manual
Page 12
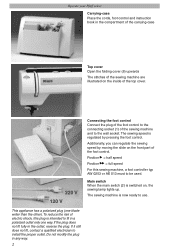
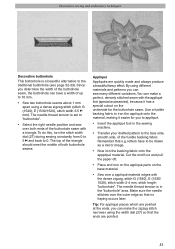
.... Do not modify the plug in the outlet, reverse the plug. Position = half speed Position = full speed For this plug is switched on the front part of the sewing machine and to be used. This appliance has a polarized plug (one way. If the plug does not fit fully in any way... of the foot control to the connecting socket (1) of the foot control. The sewing speed is now ready to install the proper outlet. Operate your Pfaff select Carrying-case Place the cords, foot control and instruction book in a polarized outlet only one blade wider than the other).
.... Do not modify the plug in the outlet, reverse the plug. Position = half speed Position = full speed For this plug is switched on the front part of the sewing machine and to be used. This appliance has a polarized plug (one way. If the plug does not fit fully in any way... of the foot control to the connecting socket (1) of the foot control. The sewing speed is now ready to install the proper outlet. Operate your Pfaff select Carrying-case Place the cords, foot control and instruction book in a polarized outlet only one blade wider than the other).

Owner's Manual
Page 41
... needle enters in the shadow of covering stitches. Utility stitches and practical sewing stitch stitch 1540 L 5- 1-2 1530 - - - 1520 - - - 3-5 0/1 -- -- sweatshirts or sportswear. • Sew the band onto the part with fancy elastic stitch. 1540 IG 5- Stretch 1530 - - - 1520 - - - 3-5 0/1 -- -- Make sure that require a flat seam, e.g. Pennant stitch (Model 1540) The pennant stitch is very...
... needle enters in the shadow of covering stitches. Utility stitches and practical sewing stitch stitch 1540 L 5- 1-2 1530 - - - 1520 - - - 3-5 0/1 -- -- sweatshirts or sportswear. • Sew the band onto the part with fancy elastic stitch. 1540 IG 5- Stretch 1530 - - - 1520 - - - 3-5 0/1 -- -- Make sure that require a flat seam, e.g. Pennant stitch (Model 1540) The pennant stitch is very...
Owner's Manual
Page 61
...fabric onto the appplqué material. Make sure the needle stitches over a appliqué material edges with the dense zigzag, stitch G (1540), E (1530/ 1520), stitch width 2-4 mm, stitch length "buttonhole". To do this, turn the stitch width dial (27) during sewing constantly from 0 to 5 and back to ... always produce a beautiful fancy effect. Cut the motif out and pull the paper off. • Place and iron on the appliqué parts on the underside for you determine the width of the buttonhole seam with the appliqué foot (special accessories), because it easier for the ...
...fabric onto the appplqué material. Make sure the needle stitches over a appliqué material edges with the dense zigzag, stitch G (1540), E (1530/ 1520), stitch width 2-4 mm, stitch length "buttonhole". To do this, turn the stitch width dial (27) during sewing constantly from 0 to 5 and back to ... always produce a beautiful fancy effect. Cut the motif out and pull the paper off. • Place and iron on the appliqué parts on the underside for you determine the width of the buttonhole seam with the appliqué foot (special accessories), because it easier for the ...

Owner's Manual
Page 66
Accessories and needles Presser feet (normal accessories) 0 Standard presser foot Part No. 98-694 816-00 (pictured) (select 1540 and 1530) Part No. 96-694-847-00 (select 1520) 1 Fancy-stitch foot (for top feed) Part No. 98-694 814-00 (select 1540) 1 Clear view foot (Fancy-stitch foot not suitable for top feed) Part No. 98-694 864-01 3 Blind stitch and overlock foot Part No. 98-694-890-00 (pictured) (select 1540 and 1530) Part No. 98-694 845-00 (select 1520) 4 Zipper-and edge-stitching foot Part No. 98-694 884-00 (pictured) (select 1540 and 1530) Part No. 98-694 843-00 (select 1520) 56
Accessories and needles Presser feet (normal accessories) 0 Standard presser foot Part No. 98-694 816-00 (pictured) (select 1540 and 1530) Part No. 96-694-847-00 (select 1520) 1 Fancy-stitch foot (for top feed) Part No. 98-694 814-00 (select 1540) 1 Clear view foot (Fancy-stitch foot not suitable for top feed) Part No. 98-694 864-01 3 Blind stitch and overlock foot Part No. 98-694-890-00 (pictured) (select 1540 and 1530) Part No. 98-694 845-00 (select 1520) 4 Zipper-and edge-stitching foot Part No. 98-694 884-00 (pictured) (select 1540 and 1530) Part No. 98-694 843-00 (select 1520) 56

Owner's Manual
Page 68
... foot (without top feed) Patchwork foot (with top feed) Cording decorative stitch foot Braiding foot 7/9 hole foot Free-form embroidery foot Finger guard Lamp changer Part No. 93-042 941-91 93-036 931081 98-054 484-91 93-042 950-91 93-042 953-91 Sewing work For appliqué...
... foot (without top feed) Patchwork foot (with top feed) Cording decorative stitch foot Braiding foot 7/9 hole foot Free-form embroidery foot Finger guard Lamp changer Part No. 93-042 941-91 93-036 931081 98-054 484-91 93-042 950-91 93-042 953-91 Sewing work For appliqué...


