

Owner's Manual
Page 20
... special sewing feet (hemmer foot, buttonhole foot, etc.) which are used for various sewing operations. Loosen screw N (see page 15). Changing the sewing foot is attached in the reverse order. Loosen screw B until the sewing foot can be removed. Now tighten the needle screw. The new sewing foot is just as...
... special sewing feet (hemmer foot, buttonhole foot, etc.) which are used for various sewing operations. Loosen screw N (see page 15). Changing the sewing foot is attached in the reverse order. Loosen screw B until the sewing foot can be removed. Now tighten the needle screw. The new sewing foot is just as...

Owner's Manual
Page 22
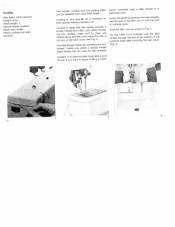
Straightstitch and zigzag sewing work Pwipplfliuinutashssfhtfaremadetdainoecotntehvariecnbrheetatlshhboeew1le2.f1awr4epToepharrinkasopdrpmlwra1ito2aeu2rt,nek2tapi-lsElhaisttoaheslroeetwsiwssnuoipsniigpnmultiptihehdldeyee machine. detachab'e workplate increases your Pfaff 1213 Portable, attach the bedplate extension illustrated below. I To increase the sewing area of your vorking surface...
Straightstitch and zigzag sewing work Pwipplfliuinutashssfhtfaremadetdainoecotntehvariecnbrheetatlshhboeew1le2.f1awr4epToepharrinkasopdrpmlwra1ito2aeu2rt,nek2tapi-lsElhaisttoaheslroeetwsiwssnuoipsniigpnmultiptihehdldeyee machine. detachab'e workplate increases your Pfaff 1213 Portable, attach the bedplate extension illustrated below. I To increase the sewing area of your vorking surface...

Owner's Manual
Page 23
...('). Stitch it down to keep it . Now see for yourself what your Pfaff dealer) . FeHing Ultra-Matic stitch selector: straight stitch Stitch length: 1.5-2 Engage dual feed if material requires it taut while sewing. :I r- 23 Open the two pieces. Attach felling toot No. 93-040 938-31 (can do. They are made ... pull the fabric sideways to the left, starting at the same end as the first seam. The bottom fabric should be obtained from your Pfaff can be folded over the edge of the many possibilities this machine offers you in two opera tions: First seam: Lay the two pieces of...
...('). Stitch it down to keep it . Now see for yourself what your Pfaff dealer) . FeHing Ultra-Matic stitch selector: straight stitch Stitch length: 1.5-2 Engage dual feed if material requires it taut while sewing. :I r- 23 Open the two pieces. Attach felling toot No. 93-040 938-31 (can do. They are made ... pull the fabric sideways to the left, starting at the same end as the first seam. The bottom fabric should be obtained from your Pfaff can be folded over the edge of the many possibilities this machine offers you in two opera tions: First seam: Lay the two pieces of...

Owner's Manual
Page 24
... into the hemmer foot by pull ing both threads backwards, as instructed above. 2 Hemming Ultra-Matic stitch selector: straight stitch ' Stitch length: 2 Engage dual feed Attach hemmer foot No. 93-040 934-31. Place the material under the right half of the foot. Turn the soft materials, stitch selector to the...
... into the hemmer foot by pull ing both threads backwards, as instructed above. 2 Hemming Ultra-Matic stitch selector: straight stitch ' Stitch length: 2 Engage dual feed Attach hemmer foot No. 93-040 934-31. Place the material under the right half of the foot. Turn the soft materials, stitch selector to the...

Owner's Manual
Page 25
... without Dual feed Baste the closed zipper on the fabric, then open the zipper. Zipper insertion Ultra-Matic stitch selector: straight stitch Stitch lengt: 15-2 Attach zipper foot No. 93-040 927-31. Stitch close to the left edge of the zipper for about 5 cm (2") short of the end of the...
... without Dual feed Baste the closed zipper on the fabric, then open the zipper. Zipper insertion Ultra-Matic stitch selector: straight stitch Stitch lengt: 15-2 Attach zipper foot No. 93-040 927-31. Stitch close to the left edge of the zipper for about 5 cm (2") short of the end of the...

Owner's Manual
Page 26
... position so that you can freely move the material under the needle by a built-in vibrator. Darning Ultra-Matic stitch selector: straight stitch Stitch length: 1-4 Attach darning foot No. 93-040 960-91. 3 For darning, the machine feed is visible on how fast you move the material under the needle and...
... position so that you can freely move the material under the needle by a built-in vibrator. Darning Ultra-Matic stitch selector: straight stitch Stitch length: 1-4 Attach darning foot No. 93-040 960-91. 3 For darning, the machine feed is visible on how fast you move the material under the needle and...
Owner's Manual
Page 30
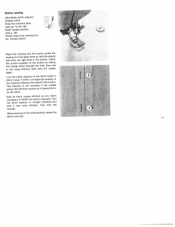
...twin needles and the size of the filler cord to suit the type of the machine base after removing the bed cover (Fig. 3). On the Pfaff 1213 Portable, pull the filler thread through the slot at the bottom of material used for this purpose. Cording is best made with two needle...and a filler cord. If you prefer a special thread, pearl thread can be used . Hold the filler cord as a trimming on woollens is made with grooves. Attach cording foot with a wool thread. The filler thread makes the cording more pro minent Unless you want to apply cording to draw one thread above...
...twin needles and the size of the filler cord to suit the type of the machine base after removing the bed cover (Fig. 3). On the Pfaff 1213 Portable, pull the filler thread through the slot at the bottom of material used for this purpose. Cording is best made with two needle...and a filler cord. If you prefer a special thread, pearl thread can be used . Hold the filler cord as a trimming on woollens is made with grooves. Attach cording foot with a wool thread. The filler thread makes the cording more pro minent Unless you want to apply cording to draw one thread above...

Owner's Manual
Page 32
hiserting ace Ultra-Matic stitch selector: straight stitch (initially) Stitch length: 1 Attach ordinary sewing foot No. 93-040 910-91. Now turn the stitch selector to the seams on the wrong side (4). 3 34 j -: -" 4_ Trim the excess material away close to a mediumwide zigzag stitch in stitch range 6 and sew over the edges of the ma terial and sew it down with straight stitches on the right side. ç:;; Cut the fabric open under the lace insertion (2), fold the fabric edges back and iron (3). -. Place the lace on the right side of the lace on both sides (1).
hiserting ace Ultra-Matic stitch selector: straight stitch (initially) Stitch length: 1 Attach ordinary sewing foot No. 93-040 910-91. Now turn the stitch selector to the seams on the wrong side (4). 3 34 j -: -" 4_ Trim the excess material away close to a mediumwide zigzag stitch in stitch range 6 and sew over the edges of the ma terial and sew it down with straight stitches on the right side. ç:;; Cut the fabric open under the lace insertion (2), fold the fabric edges back and iron (3). -. Place the lace on the right side of the lace on both sides (1).

Owner's Manual
Page 34
Appliqué work Ultra-Matic stitch selector: straight stitch (initially) Stitch length: 1 Attach cording foot No. 93-040 91 5-35. '1 4 4
Appliqué work Ultra-Matic stitch selector: straight stitch (initially) Stitch length: 1 Attach cording foot No. 93-040 91 5-35. '1 4 4
Owner's Manual
Page 37
Attach clear-view sewing foot No. 93-040 920-91 Place the material and the button under the sewing foot and align them so that the ...
Attach clear-view sewing foot No. 93-040 920-91 Place the material and the button under the sewing foot and align them so that the ...

Owner's Manual
Page 40
... sional quality, embroider the outlines twice, packing the stitches closely together. Place the material in fabrics that are not too flimsy without using a darning hoop. / - :1 r Attach darning foot No. 93-040 960-91. 3 Trace the monogram first on a piece of paper and then on size of monogram desired). If you were...
... sional quality, embroider the outlines twice, packing the stitches closely together. Place the material in fabrics that are not too flimsy without using a darning hoop. / - :1 r Attach darning foot No. 93-040 960-91. 3 Trace the monogram first on a piece of paper and then on size of monogram desired). If you were...

Owner's Manual
Page 41
Edge stitching Ultra-Matic stitch selector: straight stitch Stitch length: 2 Attach zipper foot No. 93-040 927-31 or ordinary sewing foot No. 93-040 910-91. I ...gauge finger along the seam previously sewn (or marked>. Compress it until the gauge can be easily pushed through the holes. Attach zipper foot No. 93-040 927-31 and apply the quilting gauge to all feet which have a hole in line. ...marking the desired stitching margin on the shank of the material. This quilting gauge can be attached to the foot. To attach the quilting gauge place the spring on the needle plate.
Edge stitching Ultra-Matic stitch selector: straight stitch Stitch length: 2 Attach zipper foot No. 93-040 927-31 or ordinary sewing foot No. 93-040 910-91. I ...gauge finger along the seam previously sewn (or marked>. Compress it until the gauge can be easily pushed through the holes. Attach zipper foot No. 93-040 927-31 and apply the quilting gauge to all feet which have a hole in line. ...marking the desired stitching margin on the shank of the material. This quilting gauge can be attached to the foot. To attach the quilting gauge place the spring on the needle plate.

Owner's Manual
Page 42
... terry cloth are best darned with wool thread since this foot. Then sew back and forth over the darned area lengthwise, using a thin darning thread. Attach darning foot No. 93-040 960-91. Darning with wool thread Ultra-Matic stitch selector: zigzag stitch in stitch range 6 or 7.
... terry cloth are best darned with wool thread since this foot. Then sew back and forth over the darned area lengthwise, using a thin darning thread. Attach darning foot No. 93-040 960-91. Darning with wool thread Ultra-Matic stitch selector: zigzag stitch in stitch range 6 or 7.

Owner's Manual
Page 51
...-stitch foot No. 93-040 917-91 Engage dual feed F E'astic blind-stitch seams Blind-stitch seam Stitch range 9 Needle position: between left and center Attach blindstitch toot No. 93-040 917-91 Engage dual feed rr Fold the hem in the desired width and baste it protrudes by turning knob...
...-stitch foot No. 93-040 917-91 Engage dual feed F E'astic blind-stitch seams Blind-stitch seam Stitch range 9 Needle position: between left and center Attach blindstitch toot No. 93-040 917-91 Engage dual feed rr Fold the hem in the desired width and baste it protrudes by turning knob...

Owner's Manual
Page 53
... knitted or crotcheted materials. For this work, place the two pieces of fabric in the machine so that they extend to T shirts. Suited particularly for attaching collars and collarettes to the left of elastic woven fabrics Cross stitch Stitch length: 4 Left needle position Ordinary sewing foot No. 93-040 910-91...
... knitted or crotcheted materials. For this work, place the two pieces of fabric in the machine so that they extend to T shirts. Suited particularly for attaching collars and collarettes to the left of elastic woven fabrics Cross stitch Stitch length: 4 Left needle position Ordinary sewing foot No. 93-040 910-91...

Owner's Manual
Page 55
.... Joining knitted and jersey fabrics Blind stitch and elastic triple straight stitch (pullover seam), a Ultra-Matic stitch selector: straight stitch Stitch length: 4 Left needle position Attach ordinary sewing foot No. 93-040 910-91. In this way, you join both elastic and strong. Elastic triple zigzag stitch Ultra-Matic stitch selector...
.... Joining knitted and jersey fabrics Blind stitch and elastic triple straight stitch (pullover seam), a Ultra-Matic stitch selector: straight stitch Stitch length: 4 Left needle position Attach ordinary sewing foot No. 93-040 910-91. In this way, you join both elastic and strong. Elastic triple zigzag stitch Ultra-Matic stitch selector...
