User Manual
Page 6
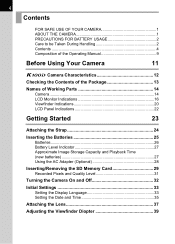
... to be Taken During Handling 2 Contents 4 Composition of the Operating Manual 9 Before Using Your Camera 11 q Camera Characteristics 12 Checking the Contents of the Package 13 Names of Working Parts 14 Camera 14 LCD Monitor Indications 16 Viewfinder Indications 20 LCD Panel Indications 22 Getting Started 23 Attaching the...27 Using the AC Adapter (Optional 28 Inserting/Removing the SD Memory Card 29 Recorded Pixels and Quality Level 31 Turning the Camera On and Off 32 Initial Settings 33 Setting the Display Language 33 Setting the Date and Time 35 Attaching the Lens 37 ...
... to be Taken During Handling 2 Contents 4 Composition of the Operating Manual 9 Before Using Your Camera 11 q Camera Characteristics 12 Checking the Contents of the Package 13 Names of Working Parts 14 Camera 14 LCD Monitor Indications 16 Viewfinder Indications 20 LCD Panel Indications 22 Getting Started 23 Attaching the...27 Using the AC Adapter (Optional 28 Inserting/Removing the SD Memory Card 29 Recorded Pixels and Quality Level 31 Turning the Camera On and Off 32 Initial Settings 33 Setting the Display Language 33 Setting the Date and Time 35 Attaching the Lens 37 ...
User Manual
Page 11
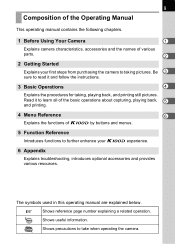
... names of q by buttons and menus. 5 Function Reference Introduces functions to further enhance your first steps from purchasing the camera to taking , playing back, and printing still pictures. Read it and follow the instructions. 3 Basic Operations 4 Explains the... to learn all of the basic operations about capturing, playing back, 5 and printing. 4 Menu Reference 6 Explains the functions of various parts. 2 2 Getting Started Explains your q experience. 6 Appendix Explains troubleshooting, introduces optional accessories and provides various resources. The symbols used in...
... names of q by buttons and menus. 5 Function Reference Introduces functions to further enhance your first steps from purchasing the camera to taking , playing back, and printing still pictures. Read it and follow the instructions. 3 Basic Operations 4 Explains the... to learn all of the basic operations about capturing, playing back, 5 and printing. 4 Menu Reference 6 Explains the functions of various parts. 2 2 Getting Started Explains your q experience. 6 Appendix Explains troubleshooting, introduces optional accessories and provides various resources. The symbols used in...
User Manual
Page 13
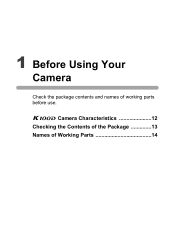
1 Before Using Your Camera Check the package contents and names of Working Parts 14 q Camera Characteristics 12 Checking the Contents of the Package 13 Names of working parts before use.
1 Before Using Your Camera Check the package contents and names of Working Parts 14 q Camera Characteristics 12 Checking the Contents of the Package 13 Names of working parts before use.
User Manual
Page 14
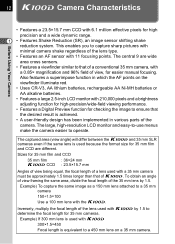
... divide the focal length of the camera. The central 9 are different. The captured area (view angle) will differ between the q and 35 mm SLR cameras even if the same lens is ...focusing. Also features a superimpose function in various parts of the 35 mm lens by 1.5 to capture sharp pictures with minimal camera shake regardless of the lens used with 210...,000 pixels and a brightness adjusting function for high-precision/wide-field viewing performance. • Features a Digital Preview function for high...
... divide the focal length of the camera. The central 9 are different. The captured area (view angle) will differ between the q and 35 mm SLR cameras even if the same lens is ...focusing. Also features a superimpose function in various parts of the 35 mm lens by 1.5 to capture sharp pictures with minimal camera shake regardless of the lens used with 210...,000 pixels and a brightness adjusting function for high-precision/wide-field viewing performance. • Features a Digital Preview function for high...
User Manual
Page 16
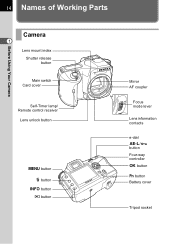
14 Names of Working Parts Before Using Your Camera Camera 1 Lens mount index Shutter release button Main switch Card cover Self-Timer lamp/ Remote control receiver Lens unlock button 3 button i button M button Q button Mirror AF coupler Focus mode lever Lens information contacts e-dial L/Z button Four-way controller 4 button { button Battery cover Tripod socket
14 Names of Working Parts Before Using Your Camera Camera 1 Lens mount index Shutter release button Main switch Card cover Self-Timer lamp/ Remote control receiver Lens unlock button 3 button i button M button Q button Mirror AF coupler Focus mode lever Lens information contacts e-dial L/Z button Four-way controller 4 button { button Battery cover Tripod socket

User Manual
Page 106
... adjusts the p.76 brightness. p.117 4 Auto Bracket AE Metering Sets Auto Bracket shooting. p.151 p.136 Swtch dst msr pt Selects the part of images. p.73 p.127 Flash Exp. Adjusts the flash exposure to display overexposed area warning. Plays back recorded images one after another. Mode...] menu. Item Plybk dsply mthd Instant Review Preview Display Digital Filter Slideshow Function Page Sets shooting information to show during Instant Review or Digital Preview. p.114 Recorded Pixels Sets the recording size of the screen to set focus to...
... adjusts the p.76 brightness. p.117 4 Auto Bracket AE Metering Sets Auto Bracket shooting. p.151 p.136 Swtch dst msr pt Selects the part of images. p.73 p.127 Flash Exp. Adjusts the flash exposure to display overexposed area warning. Plays back recorded images one after another. Mode...] menu. Item Plybk dsply mthd Instant Review Preview Display Digital Filter Slideshow Function Page Sets shooting information to show during Instant Review or Digital Preview. p.114 Recorded Pixels Sets the recording size of the screen to set focus to...

User Manual
Page 130
... focusing area to the center of the viewfinder to set focus to one of the eleven points in the viewfinder. (Superimpose AF Area) N Auto The camera selects the optimum AF point even if the subject is N (Auto). Set in [Swtch dst msr pt] in the [A Custom Setting] menu. (p....106) Mode Auto Bracket AE Metering Swtch dst msr pt AF Mode Flash Exp. 128 Selecting the Focusing Area (AF Point) Choose the part of the viewfinder. Mode] menu (p.104). 5 Rec. Comp. 0.0 Shake Reduction Cancel OK OK Function Reference AF point is not displayed in the viewfinder...
... focusing area to the center of the viewfinder to set focus to one of the eleven points in the viewfinder. (Superimpose AF Area) N Auto The camera selects the optimum AF point even if the subject is N (Auto). Set in [Swtch dst msr pt] in the [A Custom Setting] menu. (p....106) Mode Auto Bracket AE Metering Swtch dst msr pt AF Mode Flash Exp. 128 Selecting the Focusing Area (AF Point) Choose the part of the viewfinder. Mode] menu (p.104). 5 Rec. Comp. 0.0 Shake Reduction Cancel OK OK Function Reference AF point is not displayed in the viewfinder...

User Manual
Page 138
... the screen to use for measuring brightness and determining exposure. L Multi-segment Segments the screen in 16 parts, meters each portion metering and determines the appropriate exposure. 136 Selecting the Metering Method Choose the part of the screen and determines exposure. 5 Set in [AE Metering] in the [A Rec. L (Multi-segment metering), M (Center...
... the screen to use for measuring brightness and determining exposure. L Multi-segment Segments the screen in 16 parts, meters each portion metering and determines the appropriate exposure. 136 Selecting the Metering Method Choose the part of the screen and determines exposure. 5 Set in [AE Metering] in the [A Rec. L (Multi-segment metering), M (Center...

User Manual
Page 191
...and [Cln] appears on the LCD panel while cleaning the CCD. • This camera features a CCD shifting shake reduction system, and it may appear in the image for professional cleaning because the CCD is a precision part. • Do not use a spray type blower. • Do not clean ... some operating noise while cleaning the CCD. A warning beep will sound if the battery capacity becomes low during cleaning. Appendix Please contact PENTAX service center for white backgrounds and other shooting conditions if the CCD becomes dirty or dusty. The Sensor Cleaning screen appears. Please stop...
...and [Cln] appears on the LCD panel while cleaning the CCD. • This camera features a CCD shifting shake reduction system, and it may appear in the image for professional cleaning because the CCD is a precision part. • Do not use a spray type blower. • Do not clean ... some operating noise while cleaning the CCD. A warning beep will sound if the battery capacity becomes low during cleaning. Appendix Please contact PENTAX service center for white backgrounds and other shooting conditions if the CCD becomes dirty or dusty. The Sensor Cleaning screen appears. Please stop...

User Manual
Page 212
... POLICY All PENTAX cameras purchased through authorized bona fide photographic distribution channels are guaranteed against defects of material or workmanship for damages from delay or loss of use or from whom you purchased the equipment or to you upon completion of parts as hereinbefore ... liquid damage, mishandling, tampering, battery or chemical corrosion, operation contrary to be borne by 6 nonauthorized PENTAX service facilities. Service will be rendered, and defective parts will be liable for a period of twelve months from date of its representatives under all guarantees or ...
... POLICY All PENTAX cameras purchased through authorized bona fide photographic distribution channels are guaranteed against defects of material or workmanship for damages from delay or loss of use or from whom you purchased the equipment or to you upon completion of parts as hereinbefore ... liquid damage, mishandling, tampering, battery or chemical corrosion, operation contrary to be borne by 6 nonauthorized PENTAX service facilities. Service will be rendered, and defective parts will be liable for a period of twelve months from date of its representatives under all guarantees or ...

User Manual
Page 214
... has been tested and found to comply with the instructions, may cause undesired operation. These limits are designed to part 15 of the FCC Rules. If this equipment does cause harmful interference to radio or television reception, which the receiver... device must accept any interference received, including interference that interference will not occur in accordance with the limits for a Class B digital device, pursuant to provide reasonable protection against harmful interference in a residential installation. Causing Equipment Regulations. Changes or modifications not approved ...
... has been tested and found to comply with the instructions, may cause undesired operation. These limits are designed to part 15 of the FCC Rules. If this equipment does cause harmful interference to radio or television reception, which the receiver... device must accept any interference received, including interference that interference will not occur in accordance with the limits for a Class B digital device, pursuant to provide reasonable protection against harmful interference in a residential installation. Causing Equipment Regulations. Changes or modifications not approved ...
User Manual
Page 215
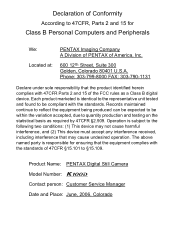
...is responsible for Class B Personal Computers and Peripherals We: Located at: PENTAX Imaging Company A Division of PENTAX of America, Inc. 600 12th Street, Suite 300 Golden, Colorado 80401 U.S.A. Product Name: PENTAX Digital Still Camera Model Number: q Contact person: Customer Service Manager Date and Place:... June, 2006, Colorado Phone: 303-799-8000 FAX: 303-790-1131 Declare under sole responsibility that the equipment complies with 47CFR Parts 2 and 15 of ...
...is responsible for Class B Personal Computers and Peripherals We: Located at: PENTAX Imaging Company A Division of PENTAX of America, Inc. 600 12th Street, Suite 300 Golden, Colorado 80401 U.S.A. Product Name: PENTAX Digital Still Camera Model Number: q Contact person: Customer Service Manager Date and Place:... June, 2006, Colorado Phone: 303-799-8000 FAX: 303-790-1131 Declare under sole responsibility that the equipment complies with 47CFR Parts 2 and 15 of ...