
Operation Manual
Page 1
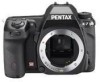
SLR Digital Camera Operating Manual For optimum camera performance, please read the Operating Manual before using the camera.
SLR Digital Camera Operating Manual For optimum camera performance, please read the Operating Manual before using the camera.
Operation Manual
Page 2
... The liquid crystal panel used in the monitor is manufactured using extremely high precision technology. However, this PENTAX Q Digital Camera. Regarding copyrights Images taken using the camera in helping you can use of the copyright as there are cases where limitations are not PRINT Image ... 2001 Seiko Epson Corporation. HDMI, the HDMI logo and High-Definition Multimedia Interface are not available on the recorded image. PENTAX Digital Camera Utility and SDM are different from the actual product. The DNG logo is a possibility that 0.01% or fewer of items...
... The liquid crystal panel used in the monitor is manufactured using extremely high precision technology. However, this PENTAX Q Digital Camera. Regarding copyrights Images taken using the camera in helping you can use of the copyright as there are cases where limitations are not PRINT Image ... 2001 Seiko Epson Corporation. HDMI, the HDMI logo and High-Definition Multimedia Interface are not available on the recorded image. PENTAX Digital Camera Utility and SDM are different from the actual product. The DNG logo is a possibility that 0.01% or fewer of items...

Operation Manual
Page 3
... areas are present inside the camera, with the risk of electric shock. • If the camera interior is a risk of low temperature burns when holding such portions for this product, we request your nearest PENTAX Service Center. 1 FOR USING YOUR CAMERA SAFELY We have paid close attention... to the safety of glass fragments. When using the camera and seek medical attention. ABOUT THE CAMERA Warning • Do not disassemble or modify the...
... areas are present inside the camera, with the risk of electric shock. • If the camera interior is a risk of low temperature burns when holding such portions for this product, we request your nearest PENTAX Service Center. 1 FOR USING YOUR CAMERA SAFELY We have paid close attention... to the safety of glass fragments. When using the camera and seek medical attention. ABOUT THE CAMERA Warning • Do not disassemble or modify the...

Operation Manual
Page 4
... charger. Flush your eyes, do not rub them. Be careful not to charge batteries other abnormality occurs, immediately discontinue using and consult a PENTAX Service Center. Attempting to violent impact. About the Battery Warning • Be sure to get medical attention immediately. Caution • Only use...or heating, or may damage the cord. Not inserting battery correctly may cause an electrical shock. • If any leakage from the camera, be sure to attach the provided protective cap to use the specified battery with wet hands. When storing a battery removed from the battery...
... charger. Flush your eyes, do not rub them. Be careful not to charge batteries other abnormality occurs, immediately discontinue using and consult a PENTAX Service Center. Attempting to violent impact. About the Battery Warning • Be sure to get medical attention immediately. Caution • Only use...or heating, or may damage the cord. Not inserting battery correctly may cause an electrical shock. • If any leakage from the camera, be sure to attach the provided protective cap to use the specified battery with wet hands. When storing a battery removed from the battery...

Operation Manual
Page 5
...high humidity. Precautions on the day of use it is not used for the battery charger D-BC90. DO NOT INCINERATE. - Do not leave the camera in a vehicle, as at a wedding or when traveling). This will over-discharge and shorten the battery's usage span. • Charging the ...may decrease the battery performance. About the Battery and Charger • Storing the battery fully charged may be guaranteed if recording, playback or transferring your camera or recording media (SD Memory Card), etc. DO NOT EXPOSE TO HIGH TEMP. (140°F / 60°C). 3 • Do not...
...high humidity. Precautions on the day of use it is not used for the battery charger D-BC90. DO NOT INCINERATE. - Do not leave the camera in a vehicle, as at a wedding or when traveling). This will over-discharge and shorten the battery's usage span. • Charging the ...may decrease the battery performance. About the Battery and Charger • Storing the battery fully charged may be guaranteed if recording, playback or transferring your camera or recording media (SD Memory Card), etc. DO NOT EXPOSE TO HIGH TEMP. (140°F / 60°C). 3 • Do not...

Operation Manual
Page 6
... and managed at low temperatures. 4 • Do not subject the camera to over tighten the tripod screw when using a tripod. Wipe dry any rain or water drops on the camera. • Please do not press forcefully on the PENTAX website. Refer to grow on the lens or viewfinder. Use a cushion... to protect the camera from the case and store in high temperatures and high humidity can be found...
... and managed at low temperatures. 4 • Do not subject the camera to over tighten the tripod screw when using a tripod. Wipe dry any rain or water drops on the camera. • Please do not press forcefully on the PENTAX website. Refer to grow on the lens or viewfinder. Use a cushion... to protect the camera from the case and store in high temperatures and high humidity can be found...

Operation Manual
Page 7
... 1 Care to be Taken During Handling 3 Contents 5 Composition of the Operating Manual 11 Before Using Your Camera 13 Q Characteristics 14 Checking the Contents of the Package 16 Names and Functions of Working Parts 17 Capture Mode 18 Playback Mode 20 Display Indicators ... 47 Inserting/Removing the SD Memory Card 49 Recorded Pixels and Quality Level 51 Attaching the Lens 53 Adjusting the Viewfinder Diopter 55 Turning the Camera On and Off 56 Initial Settings 57 Setting the Display Language 57 Setting the Date and Time 61
... 1 Care to be Taken During Handling 3 Contents 5 Composition of the Operating Manual 11 Before Using Your Camera 13 Q Characteristics 14 Checking the Contents of the Package 16 Names and Functions of Working Parts 17 Capture Mode 18 Playback Mode 20 Display Indicators ... 47 Inserting/Removing the SD Memory Card 49 Recorded Pixels and Quality Level 51 Attaching the Lens 53 Adjusting the Viewfinder Diopter 55 Turning the Camera On and Off 56 Initial Settings 57 Setting the Display Language 57 Setting the Date and Time 61

Operation Manual
Page 8
..., Exposure and Focus Before Shooting (Preview 129 Selecting the Preview Method 129 Displaying the Optical Preview 130 Displaying the Digital Preview 131 Preventing Camera Shake during Shutter Release 132 Using the Shake Reduction Function 132 Shooting with the Self-timer 136 Shooting with the Remote...Continuously 143 Continuous Shooting 143 Interval Shooting 144 Multi-exposure 146 6 Basic Operations 63 Basic Shooting Operation 64 Holding the Camera 64 Letting the Camera Choose the Optimal Settings 66 Using a Zoom Lens 71 Using the Built-in Flash 72 Setting the Flash Mode 72...
..., Exposure and Focus Before Shooting (Preview 129 Selecting the Preview Method 129 Displaying the Optical Preview 130 Displaying the Digital Preview 131 Preventing Camera Shake during Shutter Release 132 Using the Shake Reduction Function 132 Shooting with the Self-timer 136 Shooting with the Remote...Continuously 143 Continuous Shooting 143 Interval Shooting 144 Multi-exposure 146 6 Basic Operations 63 Basic Shooting Operation 64 Holding the Camera 64 Letting the Camera Choose the Optimal Settings 66 Using a Zoom Lens 71 Using the Built-in Flash 72 Setting the Flash Mode 72...

Operation Manual
Page 10
... IN Jack 233 Connecting the Camera to an HDMI Terminal 235 Processing Images 237 Changing the Image Size 238 Changing the Number of Recorded Pixels and Quality Level (Resize 238 Cutting Out Part of the Image (Cropping 239 Processing Images with Digital Filters 241 Applying the Digital Filter 243 Recreating Filter Effects 244...
... IN Jack 233 Connecting the Camera to an HDMI Terminal 235 Processing Images 237 Changing the Image Size 238 Changing the Number of Recorded Pixels and Quality Level (Resize 238 Cutting Out Part of the Image (Cropping 239 Processing Images with Digital Filters 241 Applying the Digital Filter 243 Recreating Filter Effects 244...

Operation Manual
Page 11
... Saved to Exif 277 Setting the Color Space 279 Correcting Defective Pixels in the CMOS Sensor (Pixel Mapping 280 Selecting Settings to Save in the Camera (Memory 281
... Saved to Exif 277 Setting the Color Space 279 Correcting Defective Pixels in the CMOS Sensor (Pixel Mapping 280 Selecting Settings to Save in the Camera (Memory 281

Operation Manual
Page 13
...This Operating Manual contains the following chapters. 1 Before Using Your Camera 1 Explains camera characteristics, accessories and the names and functions of various parts. 2 Getting Started 2 Explains your first steps from purchasing the camera to taking and playing back pictures. 4 4 Shooting Functions ... filters and processing pictures taken in RAW format. 9 9 Changing Additional Settings Explains the procedures for changing the camera settings, such as the monitor settings and the image file naming convention. 10 10 Appendix Explains troubleshooting, introduces optional accessories...
...This Operating Manual contains the following chapters. 1 Before Using Your Camera 1 Explains camera characteristics, accessories and the names and functions of various parts. 2 Getting Started 2 Explains your first steps from purchasing the camera to taking and playing back pictures. 4 4 Shooting Functions ... filters and processing pictures taken in RAW format. 9 9 Changing Additional Settings Explains the procedures for changing the camera settings, such as the monitor settings and the image file naming convention. 10 10 Appendix Explains troubleshooting, introduces optional accessories...

Operation Manual
Page 14
Shows useful information. Shows precautions to take when operating the camera. 12 The symbols used in this Operating Manual are explained below. 1 Shows reference page number explaining a related operation.
Shows useful information. Shows precautions to take when operating the camera. 12 The symbols used in this Operating Manual are explained below. 1 Shows reference page number explaining a related operation.

Operation Manual
Page 15
1 Before Using Your Camera Check the package contents and names and functions of Working Parts 17 Display Indicators 22 How to Change Function Settings 34 Using the Mode Dial 39 Q Characteristics 14 Checking the Contents of the Package 16 Names and Functions of working parts before use.
1 Before Using Your Camera Check the package contents and names and functions of Working Parts 17 Display Indicators 22 How to Change Function Settings 34 Using the Mode Dial 39 Q Characteristics 14 Checking the Contents of the Package 16 Names and Functions of working parts before use.

Operation Manual
Page 16
...Reduction (SR), an image sensor shifting shake reduction system. The camera can be recorded by taking advantage of a conventional 35 mm camera, with the intended exposure. The large text, high-contrast monitor and easy-to-use digital filters such as Star Burst or Soft while taking pictures or ...to capture sharp pictures with minimal camera shake regardless of expression. Also features Sensitivity Priority mode K that automatically adjusts ...
...Reduction (SR), an image sensor shifting shake reduction system. The camera can be recorded by taking advantage of a conventional 35 mm camera, with the intended exposure. The large text, high-contrast monitor and easy-to-use digital filters such as Star Burst or Soft while taking pictures or ...to capture sharp pictures with minimal camera shake regardless of expression. Also features Sensitivity Priority mode K that automatically adjusts ...

Operation Manual
Page 17
...35 mm lens by 1.5 to get the best camera performance for 35 mm cameras. This enables you to move the image sensor at high speeds, compensating camera shake. Before Using Your Camera The captured area (view angle) will differ between the Q and 35 mm SLR cameras even if the same lens is not a malfunction.... Example) If 300 mm lens is used with more power is equivalent to a 450 mm lens on the Q features a PENTAX original system which allow you to determine the focal length for...
...35 mm lens by 1.5 to get the best camera performance for 35 mm cameras. This enables you to move the image sensor at high speeds, compensating camera shake. Before Using Your Camera The captured area (view angle) will differ between the Q and 35 mm SLR cameras even if the same lens is not a malfunction.... Example) If 300 mm lens is used with more power is equivalent to a 450 mm lens on the Q features a PENTAX original system which allow you to determine the focal length for...

Operation Manual
Page 18
... The following accessories are included. 1 Hot shoe cover FK (Installed on camera) Eyecup FR (Installed on camera) ME viewfinder cap Before Using Your Camera Sync socket 2P cap (Installed on camera) Body mount cover (Installed on camera) Triangular ring and protective cover (Installed on camera) USB cable I-USB7 AV cable I-AVC7 Strap O-ST53 Rechargeable lithium-ion...
... The following accessories are included. 1 Hot shoe cover FK (Installed on camera) Eyecup FR (Installed on camera) ME viewfinder cap Before Using Your Camera Sync socket 2P cap (Installed on camera) Body mount cover (Installed on camera) Triangular ring and protective cover (Installed on camera) USB cable I-USB7 AV cable I-AVC7 Strap O-ST53 Rechargeable lithium-ion...

Operation Manual
Page 19
Names and Functions of Working 17 Parts Before Using Your Camera Built-in flash Strap lug AF assist light Card cover Self-timer lamp/ Remote control receiver Lens mount index Lens unlock button Speaker Microphone Viewfinder ... receiver Cable release terminal Card access lamp Tripod socket Battery grip contacts Battery cover unlock knob Battery cover * In the first illustration, the camera is shown with the Hot shoe cover FK removed. * In the second illustration, the camera is shown with the Hot shoe cover FK and the Eyecup FR removed.
Names and Functions of Working 17 Parts Before Using Your Camera Built-in flash Strap lug AF assist light Card cover Self-timer lamp/ Remote control receiver Lens mount index Lens unlock button Speaker Microphone Viewfinder ... receiver Cable release terminal Card access lamp Tripod socket Battery grip contacts Battery cover unlock knob Battery cover * In the first illustration, the camera is shown with the Hot shoe cover FK removed. * In the second illustration, the camera is shown with the Hot shoe cover FK and the Eyecup FR removed.

Operation Manual
Page 20
18 Capture Mode Before Using Your Camera Functions of buttons, dials and levers used during shooting are noted. 1 1 7 2 8 3 9 4 0 5 a 6 b e f g h c i j k l d m 1 m button Turn the rear e-dial while pressing this button to set the EV compensation ...
18 Capture Mode Before Using Your Camera Functions of buttons, dials and levers used during shooting are noted. 1 1 7 2 8 3 9 4 0 5 a 6 b e f g h c i j k l d m 1 m button Turn the rear e-dial while pressing this button to set the EV compensation ...

Operation Manual
Page 21
.... (p.189) b Focus mode lever Switches between autofocus modes (l/k) (p.118) and manual focus mode (p.126). c Q button Switches to change the AF point. (p.123) Before Using Your Camera When the AF point switching dial is set to j (Select), press the button to the Playback mode. (p.78) d M button Turns the status screen display on...
.... (p.189) b Focus mode lever Switches between autofocus modes (l/k) (p.118) and manual focus mode (p.126). c Q button Switches to change the AF point. (p.123) Before Using Your Camera When the AF point switching dial is set to j (Select), press the button to the Playback mode. (p.78) d M button Turns the status screen display on...

Operation Manual
Page 22
Before Using Your Camera Playback Mode Functions of buttons, dials and levers used during playback are noted. 1 2 3 4 8 5 9 6 0 a 7 b Next, press the four-way controller (5) to move the cursor or change ...
Before Using Your Camera Playback Mode Functions of buttons, dials and levers used during playback are noted. 1 2 3 4 8 5 9 6 0 a 7 b Next, press the four-way controller (5) to move the cursor or change ...


