
CQ5330U User Guide
Page 4
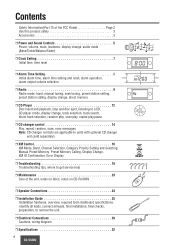
... ❒ Maintenance 23 Care of the FCC Rules Page 2 Use this product safely 3 Accessories 3 ❒ Power and Sound Controls 5 Power, volume, mute, loudness, display change, audio mode (Bass/Treble/Balance/Fader) ❒ Clock Setting 7 Initial time, time reset ❒ Alarm Time Setting 8 Initial alarm time, alarm time setting and reset, alarm...; CD changer control 14 Play, repeat, random, scan, error messages Note: CD changer controls are applicable to remove the unit ❒ Electrical Connections 29 Cautions, wiring diagram ❒ Specifications 32 4 CQ-5330U
... ❒ Maintenance 23 Care of the FCC Rules Page 2 Use this product safely 3 Accessories 3 ❒ Power and Sound Controls 5 Power, volume, mute, loudness, display change, audio mode (Bass/Treble/Balance/Fader) ❒ Clock Setting 7 Initial time, time reset ❒ Alarm Time Setting 8 Initial alarm time, alarm time setting and reset, alarm...; CD changer control 14 Play, repeat, random, scan, error messages Note: CD changer controls are applicable to remove the unit ❒ Electrical Connections 29 Cautions, wiring diagram ❒ Specifications 32 4 CQ-5330U

CQ5330U User Guide
Page 29
... power connector NO. If need, please consult your dealer. 86 42 Detail of its memory maybe erased when the battery terminals are disconnected. ❐ Wiring Diagram XM control connector CD changer / XM control connector CD Receiver CQ-5330U 10 12 14 16 9 11 13 15 753 1 Antenna (Rear Side)... ground battery system. • To prevent damage to the unit, be sure to follow the connection diagram below. • Do not insert the power connector into the unit until the wiring is designed to operate with the unit. Bundle all cables and keep cable terminals free from touching any...
... power connector NO. If need, please consult your dealer. 86 42 Detail of its memory maybe erased when the battery terminals are disconnected. ❐ Wiring Diagram XM control connector CD changer / XM control connector CD Receiver CQ-5330U 10 12 14 16 9 11 13 15 753 1 Antenna (Rear Side)... ground battery system. • To prevent damage to the unit, be sure to follow the connection diagram below. • Do not insert the power connector into the unit until the wiring is designed to operate with the unit. Bundle all cables and keep cable terminals free from touching any...


