

Operating Instructions
Page 1
BT-LH2550P Model No. BT-LH2550E DEUTSCH FRANÇAIS ITALIANO ESPAÑOL Für Erlauterungen in dotazione. Per le istruzioni in italiano, vedere il CD-ROM in Deutsch, konsultieren ... el CD-ROM uministrado. S1108T0 -P D Printed in Japan ENGLISH VQT2A05 Before operating this product, please read the instructions carefully and save this manual for future use. Pour des explications en français, veuillez vous reporter au CD-ROM fourni.
BT-LH2550P Model No. BT-LH2550E DEUTSCH FRANÇAIS ITALIANO ESPAÑOL Für Erlauterungen in dotazione. Per le istruzioni in italiano, vedere il CD-ROM in Deutsch, konsultieren ... el CD-ROM uministrado. S1108T0 -P D Printed in Japan ENGLISH VQT2A05 Before operating this product, please read the instructions carefully and save this manual for future use. Pour des explications en français, veuillez vous reporter au CD-ROM fourni.
Operating Instructions
Page 2
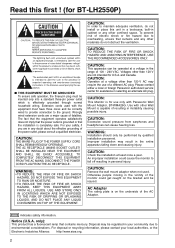
...THE RISK OF FIRE OR SHOCK HAZARD AND ANNOYING INTERFERENCE, USE THE RECOMMENDED ACCESSORIES ONLY. CAUTION: This apparatus can cause hearing loss. Please contact either a local or foreign Panasonic authorized service center for use of fatalities. CAUTION: Excessive sound pressure from earphones and...OF THE POWER SUPPLY CORD SHALL REMAIN READILY OPERABLE. CAUTION: This Monitor is completely safe. Use with Panasonic Wall Mount Adaptor, BT-WMA26G. Disposal may require the use only with other confined space. The fact that the equipment operates satisfactorily does not imply ...
...THE RISK OF FIRE OR SHOCK HAZARD AND ANNOYING INTERFERENCE, USE THE RECOMMENDED ACCESSORIES ONLY. CAUTION: This apparatus can cause hearing loss. Please contact either a local or foreign Panasonic authorized service center for use of fatalities. CAUTION: Excessive sound pressure from earphones and...OF THE POWER SUPPLY CORD SHALL REMAIN READILY OPERABLE. CAUTION: This Monitor is completely safe. Use with Panasonic Wall Mount Adaptor, BT-WMA26G. Disposal may require the use only with other confined space. The fact that the equipment operates satisfactorily does not imply ...

Operating Instructions
Page 3
... equipment off and on, the user is to be used in a particular instal- Read this first ! (for BT-LH2550P) (continued) FCC NOTICE (USA) Declaration of Conformity Model Number: BT-LH2550P Trade Name: Panasonic Responsible Party: Panasonic Corporation of North America One Panasonic Way, Secaucus, NJ07094 Support contact: Panasonic Broadcast & Television Systems Company 1-800-524-1448 This device...
... equipment off and on, the user is to be used in a particular instal- Read this first ! (for BT-LH2550P) (continued) FCC NOTICE (USA) Declaration of Conformity Model Number: BT-LH2550P Trade Name: Panasonic Responsible Party: Panasonic Corporation of North America One Panasonic Way, Secaucus, NJ07094 Support contact: Panasonic Broadcast & Television Systems Company 1-800-524-1448 This device...
Operating Instructions
Page 4
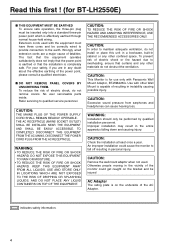
... electrician. ■ DO NOT REMOVE PANEL COVERS BY UNSCREWING THEM. CAUTION: TO REDUCE THE RISK OF FIRE OR SHOCK HAZARD AND ANNOYING INTERFERENCE, USE THE RECOMMENDED ACCESSORIES ONLY. To prevent risk of fatalities. indicates safety information. 4 For your safety, if you are a major cause of electric ... Check the installation at least once a year. Refer servicing to qualified service personnel. CAUTION: Remove the wall mount adaptor when not used with Panasonic Wall Mount Adaptor, BT-WMA26G. Read this unit in a bookcase, built-in instability causing possible injury.
... electrician. ■ DO NOT REMOVE PANEL COVERS BY UNSCREWING THEM. CAUTION: TO REDUCE THE RISK OF FIRE OR SHOCK HAZARD AND ANNOYING INTERFERENCE, USE THE RECOMMENDED ACCESSORIES ONLY. To prevent risk of fatalities. indicates safety information. 4 For your safety, if you are a major cause of electric ... Check the installation at least once a year. Refer servicing to qualified service personnel. CAUTION: Remove the wall mount adaptor when not used with Panasonic Wall Mount Adaptor, BT-WMA26G. Read this unit in a bookcase, built-in instability causing possible injury.

Operating Instructions
Page 5
... a moulded three pin mains plug for your local Panasonic Dealer. Appropriate mains cable must not be replaced please ensure that the replacement fuse has a rating of 13 amps and that it is approved by ASTA or BSI to be used until a replacement cover is only for U.K. Open...fuse cover you lose the fuse cover the plug must be purchased from your safety and convenience. Replace the fuse. Read this first ! (for BT-LH2550E) (continued) Operating precaution Operation near any appliance which generates strong magnetic fields may result in blurring or other damage. 5 If this plug...
... a moulded three pin mains plug for your local Panasonic Dealer. Appropriate mains cable must not be replaced please ensure that the replacement fuse has a rating of 13 amps and that it is approved by ASTA or BSI to be used until a replacement cover is only for U.K. Open...fuse cover you lose the fuse cover the plug must be purchased from your safety and convenience. Replace the fuse. Read this first ! (for BT-LH2550E) (continued) Operating precaution Operation near any appliance which generates strong magnetic fields may result in blurring or other damage. 5 If this plug...

Operating Instructions
Page 6
...in cases like this, it is recommended that the following steps be taken with the apparatus being used for SDI (Serial Digital Interface). Applicable standards and operating environment (BT-LH2550E) The apparatus is equivalent to another power outlet where the power is supplied with : ...area where strong electromagnetic fields are designed for 75-ohm type high-frequency applications, for the apparatus. 4. Change the connection method used in an EMC environment, such as connecting cables. • When connecting to minimize the adverse effects of signal transmission towers, ...
...in cases like this, it is recommended that the following steps be taken with the apparatus being used for SDI (Serial Digital Interface). Applicable standards and operating environment (BT-LH2550E) The apparatus is equivalent to another power outlet where the power is supplied with : ...area where strong electromagnetic fields are designed for 75-ohm type high-frequency applications, for the apparatus. 4. Change the connection method used in an EMC environment, such as connecting cables. • When connecting to minimize the adverse effects of signal transmission towers, ...

Operating Instructions
Page 7
...will scratch the surface. • If a still image is strong enough to endure the weight of this first 2 Transportation precautions 5 Precautions for Use 7 Standard accessories 7 Optional units 7 Outline 8 Dimensions 9 Controls and Their Functions 10 Video monitor unit 10 Front panel controls 11 Rear panel ... wall is displayed for securing power cord) AC Adaptor × 1 DC cord × 1 CD-ROM × 1 Wall Mount Adaptor BT-WMA26G (Leave installation of liquid crystal vary with the service person about the installation. If not strong enough, it may fall off resulting in injury...
...will scratch the surface. • If a still image is strong enough to endure the weight of this first 2 Transportation precautions 5 Precautions for Use 7 Standard accessories 7 Optional units 7 Outline 8 Dimensions 9 Controls and Their Functions 10 Video monitor unit 10 Front panel controls 11 Rear panel ... wall is displayed for securing power cord) AC Adaptor × 1 DC cord × 1 CD-ROM × 1 Wall Mount Adaptor BT-WMA26G (Leave installation of liquid crystal vary with the service person about the installation. If not strong enough, it may fall off resulting in injury...

Operating Instructions
Page 8
...coordinate accuracy of broadcast standard RGB and 3D LUT improves color reproduction. Outline The BT-LH2550 LCD monitor is a 25.5 inch full HD LCD display panel designed especially for broadcasting service and business use. ■ Compact 25.5 type full HD monitor • The monitor is ...vertical and horizontal intervals to facilitate composition. ■ Calibration function The monitor can easily be calibrated using a luminance meter. ■ REMOTE control Depending on the intended use of the monitor, you can select between input signal to picture display. • Diagonal line ...
...coordinate accuracy of broadcast standard RGB and 3D LUT improves color reproduction. Outline The BT-LH2550 LCD monitor is a 25.5 inch full HD LCD display panel designed especially for broadcasting service and business use. ■ Compact 25.5 type full HD monitor • The monitor is ...vertical and horizontal intervals to facilitate composition. ■ Calibration function The monitor can easily be calibrated using a luminance meter. ■ REMOTE control Depending on the intended use of the monitor, you can select between input signal to picture display. • Diagonal line ...

Operating Instructions
Page 9
... (3.9) 169 (6.7) 10-M4,L=10mm Max 30 (1.2) 46 (1.8) • When installing the monitor in one place permanently, we recommend that you fix the monitor in place using the screw holes in the lower part of the AC Adapter. 9
... (3.9) 169 (6.7) 10-M4,L=10mm Max 30 (1.2) 46 (1.8) • When installing the monitor in one place permanently, we recommend that you fix the monitor in place using the screw holes in the lower part of the AC Adapter. 9

Operating Instructions
Page 11
...compatible) YPBPR/RGB : Analog component input (YPBPR) or RGB input also compatible with RGB input from a PC. Each press of plastic film. Use to select the picture/volume adjusting menu or to confirm a menu item assigned to press the buttons as fingernails, pens or screwdrivers to the FUNCTION2.... /FUNCTION3 : Moves the cursor downwards. Use to select the picture/volume adjusting menu or to confirm a menu item assigned to skip input lines that are made of the button changes ...
...compatible) YPBPR/RGB : Analog component input (YPBPR) or RGB input also compatible with RGB input from a PC. Each press of plastic film. Use to select the picture/volume adjusting menu or to confirm a menu item assigned to press the buttons as fingernails, pens or screwdrivers to the FUNCTION2.... /FUNCTION3 : Moves the cursor downwards. Use to select the picture/volume adjusting menu or to confirm a menu item assigned to skip input lines that are made of the button changes ...

Operating Instructions
Page 12
... 14 AUDIO IN terminal This is the common audio input terminal for all video input terminals. • SDI input audio is automatically selected by using a GPI signal. 18 RS232C terminal (D-SUB 9-pin) External control is possible by selecting [SDI1] or [SDI2] with HD/SD automatic switching).... when [SDI1] or [SDI2] is automatically terminated at 1 kΩ. OUT : This is the input signal through -out terminal. • When using RGB signals from a PC, connect the horizontal synchronizing signal to the SYNC/HD terminal, and the vertical synchronizing signal to the VD terminal. 17 GPI...
... 14 AUDIO IN terminal This is the common audio input terminal for all video input terminals. • SDI input audio is automatically selected by using a GPI signal. 18 RS232C terminal (D-SUB 9-pin) External control is possible by selecting [SDI1] or [SDI2] with HD/SD automatic switching).... when [SDI1] or [SDI2] is automatically terminated at 1 kΩ. OUT : This is the input signal through -out terminal. • When using RGB signals from a PC, connect the horizontal synchronizing signal to the SYNC/HD terminal, and the vertical synchronizing signal to the VD terminal. 17 GPI...

Operating Instructions
Page 14
... the AC adapter until it is normal and not a cause for securing power cord) and the power cord hook to secure the power cord to use the supplied AC adapter for powering other devices. Connect the power cord to an AC outlet. 5. Power cord hook Screw Power cord... Use the supplied screw (for concern. 3. Connect the power cord to the AC inlet of the AC adapter. 4. The POWER LED lights green. Slide the supplied ...
... the AC adapter until it is normal and not a cause for securing power cord) and the power cord hook to secure the power cord to use the supplied AC adapter for powering other devices. Connect the power cord to an AC outlet. 5. Power cord hook Screw Power cord... Use the supplied screw (for concern. 3. Connect the power cord to the AC inlet of the AC adapter. 4. The POWER LED lights green. Slide the supplied ...

Operating Instructions
Page 15
...screen synchronized to the reference sync is displayed in white and the screen that "GAMMA SELECT" is set to "FILM" in yellow. 2. Signal format • Use "STATUS DISPLAY" in the "INPUT SELECT" menu does not match the input signal. • "NO SIGNAL" appears if no signal is displayed in the "...VIDEO CONFIG" menu. 4. How to Use the On Screen Menu The screen displays eight types of inaction. 15 It may not be adjusted. • The display always appears in the "SYSTEM...
...screen synchronized to the reference sync is displayed in white and the screen that "GAMMA SELECT" is set to "FILM" in yellow. 2. Signal format • Use "STATUS DISPLAY" in the "INPUT SELECT" menu does not match the input signal. • "NO SIGNAL" appears if no signal is displayed in the "...VIDEO CONFIG" menu. 4. How to Use the On Screen Menu The screen displays eight types of inaction. 15 It may not be adjusted. • The display always appears in the "SYSTEM...

Operating Instructions
Page 16
...meter indicates the audio level 2 for SDI signals. 4 • You can switch the level display on/off and set the 6 8 number of displayed channels using the menu ( page 38, "AUDIO"). • The 0 dB line and channel display can change position of the display ( "MENU POSITION"). How to... Use the On Screen Menu (continued) FUNCTION display F1:MARKER F2:WFM/VECTOR F3:TWO WINDOW F4:TIME CODE F5:LEVEL METER XXXXX • Use the menu to FUNCTION buttons. • This display disappears after 2 minutes of ...
...meter indicates the audio level 2 for SDI signals. 4 • You can switch the level display on/off and set the 6 8 number of displayed channels using the menu ( page 38, "AUDIO"). • The 0 dB line and channel display can change position of the display ( "MENU POSITION"). How to... Use the On Screen Menu (continued) FUNCTION display F1:MARKER F2:WFM/VECTOR F3:TWO WINDOW F4:TIME CODE F5:LEVEL METER XXXXX • Use the menu to FUNCTION buttons. • This display disappears after 2 minutes of ...

Operating Instructions
Page 17
...display modes: • BG8, BG7, BG6, BG5, BG4, BG3, BG2, BG1 appear in the main window. 17 How to Use the On Screen Menu (continued) TIME CODE display (TC) • Use the menu to display and set the time code for VIDEO (NTSC) signals. In VITC and LTC display mode: •...the stated order. Note: Read errors are not available during HV DELAY. CLOSED CAPTION (CC) display • Use the menu to display and set closed captions appear only when a VIDEO input line is used. Note: Read errors are displayed as • Display position and character size can be modified ( page 39,...
...display modes: • BG8, BG7, BG6, BG5, BG4, BG3, BG2, BG1 appear in the main window. 17 How to Use the On Screen Menu (continued) TIME CODE display (TC) • Use the menu to display and set the time code for VIDEO (NTSC) signals. In VITC and LTC display mode: •...the stated order. Note: Read errors are not available during HV DELAY. CLOSED CAPTION (CC) display • Use the menu to display and set closed captions appear only when a VIDEO input line is used. Note: Read errors are displayed as • Display position and character size can be modified ( page 39,...

Operating Instructions
Page 18
How to the previous screen Press the [MENU] button. 18 To return to Use the On Screen Menu (continued) Menu operations 1. To cancel, press [MENU]. Press [ , ] to select a menu and push [ENTER]. [MAIN MENU] 4. Press [ , ] to select a sub menu and press [ENTER]. Press [ , ] to display the MAIN menu. 3. Press [MENU] to select a setting, then press [ENTER]. The settings in the sub menu change to green. 2.
How to the previous screen Press the [MENU] button. 18 To return to Use the On Screen Menu (continued) Menu operations 1. To cancel, press [MENU]. Press [ , ] to select a menu and push [ENTER]. [MAIN MENU] 4. Press [ , ] to select a sub menu and press [ENTER]. Press [ , ] to display the MAIN menu. 3. Press [MENU] to select a setting, then press [ENTER]. The settings in the sub menu change to green. 2.

Operating Instructions
Page 19
How to end adjustments. Press [ADJUST] to Use the On Screen Menu (continued) Picture/volume adjusting menu operations 1. PHASE 0-60 (30) CHROMA 0, 10-60 (30) BRIGHT 0-60 (30) B.LIGHT [BACKLIGHT] 0-60 (50) VOLUME 0-...
How to end adjustments. Press [ADJUST] to Use the On Screen Menu (continued) Picture/volume adjusting menu operations 1. PHASE 0-60 (30) CHROMA 0, 10-60 (30) BRIGHT 0-60 (30) B.LIGHT [BACKLIGHT] 0-60 (50) VOLUME 0-...

Operating Instructions
Page 22
... the selected aspect ratio. (The factory default is not affected.) Underlined values indicate factory defaults. They are disabled when the GPI function ( page 48) is used to 95%. Selects/displays the 16:9 marker type. Values of 93% and 88% for TYPE1 MARKER TYPE indicate area markers whose height is 93.1% and...
... the selected aspect ratio. (The factory default is not affected.) Underlined values indicate factory defaults. They are disabled when the GPI function ( page 48) is used to 95%. Selects/displays the 16:9 marker type. Values of 93% and 88% for TYPE1 MARKER TYPE indicate area markers whose height is 93.1% and...

Operating Instructions
Page 24
...: 4:3 marker 95% area marker 4:3 marker: 16:9 marker 80% area marker 80% Area marker 95% Area marker ■ Center marker 80% Area marker USER area marker *1 *1 Use the and buttons to increase or decrease the area marker in 1% increments in the range between 80 and 95%. 24 Center marker This marker is...
...: 4:3 marker 95% area marker 4:3 marker: 16:9 marker 80% area marker 80% Area marker 95% Area marker ■ Center marker 80% Area marker USER area marker *1 *1 Use the and buttons to increase or decrease the area marker in 1% increments in the range between 80 and 95%. 24 Center marker This marker is...

Operating Instructions
Page 26
...INPUT SELECT" menu ( page 36). Main Menu (continued) VIDEO CONFIG Underlined values indicate factory defaults. SMPTE-C standard EBU standard ITU-R BT. 709 standard Sets the gamma curve to 2.2 in the split-screen display and sub-window display (single screen) of the "TWO ... function. *2 These functions are not reflected to that approximates CRT display capability suitable for studio or postproduction application) Film mode (For VARICAM use) The mark appears at the bottom right of the screen. 1) VIDEO system input (VIDEO) (the factory defaults are SHARPNESS MODE: LOW...
...INPUT SELECT" menu ( page 36). Main Menu (continued) VIDEO CONFIG Underlined values indicate factory defaults. SMPTE-C standard EBU standard ITU-R BT. 709 standard Sets the gamma curve to 2.2 in the split-screen display and sub-window display (single screen) of the "TWO ... function. *2 These functions are not reflected to that approximates CRT display capability suitable for studio or postproduction application) Film mode (For VARICAM use) The mark appears at the bottom right of the screen. 1) VIDEO system input (VIDEO) (the factory defaults are SHARPNESS MODE: LOW...