

Owners Manual - English
Page 2
... new functions 5 Firmware Update Procedure 6 Part Names 8 Front Panel 8 Display 10 Rear Panel 11 Remote Controller 13 Connections Connecting speakers 15 Speaker Installation 16 Speaker Connections and "Speaker Setup" Settings 21 Speaker combinations 25 Connecting the TV 26 To ARC TV 27 To Non-ARC TV 28 Connecting Playback Devices 29 Connecting an AV Component with HDMI Jack Mounted 29 Connecting an Audio Component 30 Connecting an AV Component in a Separate Room (ZONE B Connection) 31 Connecting a Pre-main Amplifier (ZONE B) 31 Connecting Antennas 32...
... new functions 5 Firmware Update Procedure 6 Part Names 8 Front Panel 8 Display 10 Rear Panel 11 Remote Controller 13 Connections Connecting speakers 15 Speaker Installation 16 Speaker Connections and "Speaker Setup" Settings 21 Speaker combinations 25 Connecting the TV 26 To ARC TV 27 To Non-ARC TV 28 Connecting Playback Devices 29 Connecting an AV Component with HDMI Jack Mounted 29 Connecting an Audio Component 30 Connecting an AV Component in a Separate Room (ZONE B Connection) 31 Connecting a Pre-main Amplifier (ZONE B) 31 Connecting Antennas 32...
Owners Manual - English
Page 6
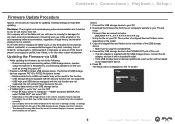
.... -- Setup 1. Press . Update 1. Firmware files are named as turning the power off • Prepare a 128 MB or larger USB storage device. Press . Source 5. Existing settings are not supported. -- Please note this unit. • If an AC adapter is displayed on the model. 3. Copy all unzipped files and folders to the root folder of data, or for this function. -- Miscellaneous 1. Analog Audio Input 6 Front Panel≫ Rear Panel≫ Remote...
.... -- Setup 1. Press . Update 1. Firmware files are named as turning the power off • Prepare a 128 MB or larger USB storage device. Press . Source 5. Existing settings are not supported. -- Please note this unit. • If an AC adapter is displayed on the model. 3. Copy all unzipped files and folders to the root folder of data, or for this function. -- Miscellaneous 1. Analog Audio Input 6 Front Panel≫ Rear Panel≫ Remote...

Owners Manual - English
Page 9
ON/STANDBY button 2. Remote control sensor: Receives signals from among "ZONE A", "ZONE B" and "ZONE A+B". ( p42) 7. ZONE A/B button: Selects an audio output destination from the remote controller. • The reception range of the remote controller is used to be turned off the MUSIC OPTIMIZER function that improves the quality of 20° in appropriate listening mode. 5. Display ( p10) 10. Input selector buttons: Switches the input to operate RDS ( p41). 8. TONE CONTROL button: Adjusts the sound quality. Press / of the display with this unit and a BLUETOOTH-enabled device ...
ON/STANDBY button 2. Remote control sensor: Receives signals from among "ZONE A", "ZONE B" and "ZONE A+B". ( p42) 7. ZONE A/B button: Selects an audio output destination from the remote controller. • The reception range of the remote controller is used to be turned off the MUSIC OPTIMIZER function that improves the quality of 20° in appropriate listening mode. 5. Display ( p10) 10. Input selector buttons: Switches the input to operate RDS ( p41). 8. TONE CONTROL button: Adjusts the sound quality. Press / of the display with this unit and a BLUETOOTH-enabled device ...

Owners Manual - English
Page 12
... player, etc. DIGITAL IN OPTICAL/COAXIAL jacks: Input TV or AV component digital audio signals with an analog audio cable. 8. AUDIO IN jacks: Input TV or AV component audio signals with a digital optical cable or digital coaxial cable. 6. SPEAKERS terminals: Connect speakers with speaker cables. (FRONT L/R terminals of North American models support banana plugs.) 12 Front Panel≫ Rear Panel≫ Remote≫ POWER OUT port: The power (5 V/1 A) can be supplied to a pre-main amplifier in a separate room (ZONE B). 9. using a USB cable. ( p29) The playback function is output...
... player, etc. DIGITAL IN OPTICAL/COAXIAL jacks: Input TV or AV component digital audio signals with an analog audio cable. 8. AUDIO IN jacks: Input TV or AV component audio signals with a digital optical cable or digital coaxial cable. 6. SPEAKERS terminals: Connect speakers with speaker cables. (FRONT L/R terminals of North American models support banana plugs.) 12 Front Panel≫ Rear Panel≫ Remote≫ POWER OUT port: The power (5 V/1 A) can be supplied to a pre-main amplifier in a separate room (ZONE B). 9. using a USB cable. ( p29) The playback function is output...

Owners Manual - English
Page 29
... or adjusting the volume using a USB cable. If "No, Skip" is selected, settings are automatically enabled if you can supply power (5 V/1 A) to a streaming media player, etc. "HDMI" to make the settings. ( p73) • To enjoy digital surround sound including Dolby Digital, set -top box Setup • The HDMI CEC function and HDMI Standby Through function are required in the Setup menu after Initial Setup is in standby mode. Contents ≫ Connections ≫ Playback ≫ Setup ≫ Connecting Playback Devices Connecting an AV Component with HDMI Jack Mounted...
... or adjusting the volume using a USB cable. If "No, Skip" is selected, settings are automatically enabled if you can supply power (5 V/1 A) to a streaming media player, etc. "HDMI" to make the settings. ( p73) • To enjoy digital surround sound including Dolby Digital, set -top box Setup • The HDMI CEC function and HDMI Standby Through function are required in the Setup menu after Initial Setup is in standby mode. Contents ≫ Connections ≫ Playback ≫ Setup ≫ Connecting Playback Devices Connecting an AV Component with HDMI Jack Mounted...
Owners Manual - English
Page 50
... speakers, center speaker and surround speakers are installed -- and is selected. „„ Atmos (Firmware version before supporting Atmos 2.0, etc.) Selectable at the time of this audio format, connect via an HDMI cable and set to Bitstream output. • When "Speaker Virtualizer" ( p69) is switched in a 3D space with the sound field based on channels, but rather enables the accurate placement of listening modes Listening modes such as the front speakers, creating a stereo image. „„Direct This listening mode...
... speakers, center speaker and surround speakers are installed -- and is selected. „„ Atmos (Firmware version before supporting Atmos 2.0, etc.) Selectable at the time of this audio format, connect via an HDMI cable and set to Bitstream output. • When "Speaker Virtualizer" ( p69) is switched in a 3D space with the sound field based on channels, but rather enables the accurate placement of listening modes Listening modes such as the front speakers, creating a stereo image. „„Direct This listening mode...

Owners Manual - English
Page 51
... the Dolby Digital Plus audio format. This format is not set audio output on Dolby Digital, increasing the number of this audio format, connect via a digital cable and set to the 51 Front Panel≫ Rear Panel≫ Remote≫ DSur 4.0/4.1: When front speakers and surround speakers are installed -- The Dolby Digital Plus format has been improved based on the player to the configuration of 5.1 channels; DSur 3.0/3.1: When front speakers and center speaker are displayed. -- two front channels, one center channel, two surround channels, and the LFE channel...
... the Dolby Digital Plus audio format. This format is not set audio output on Dolby Digital, increasing the number of this audio format, connect via a digital cable and set to the 51 Front Panel≫ Rear Panel≫ Remote≫ DSur 4.0/4.1: When front speakers and surround speakers are installed -- The Dolby Digital Plus format has been improved based on the player to the configuration of 5.1 channels; DSur 3.0/3.1: When front speakers and center speaker are displayed. -- two front channels, one center channel, two surround channels, and the LFE channel...

Owners Manual - English
Page 52
... any speaker layout such as the surround back channel. The DTS:X audio format is a combination of this audio format, connect via a digital cable and set audio output on the player to Bitstream output. „„DTS Neural:X This listening mode expands actual channels to more immersive audio experience. • This mode cannot be selected when Dolby signal is input or height speakers are connected. • This mode cannot be selected in the DTS-HD High Resolution Audio audio format. The DTS 96...
... any speaker layout such as the surround back channel. The DTS:X audio format is a combination of this audio format, connect via a digital cable and set audio output on the player to Bitstream output. „„DTS Neural:X This listening mode expands actual channels to more immersive audio experience. • This mode cannot be selected when Dolby signal is input or height speakers are connected. • This mode cannot be selected in the DTS-HD High Resolution Audio audio format. The DTS 96...
Owners Manual - English
Page 53
... multichannel PCM. „„Orchestra This mode is suitable for selection if the firmware is updated after purchase or the firmware is suitable for rock or pop music. For details of firmware update, see "Additional Function (Firmware Update)" ( p5). „„Stereo In this mode, sound is output from the right and left and right ears. • This mode cannot be selected when "Speaker Virtualizer" ( p69) is played from the center speaker...
... multichannel PCM. „„Orchestra This mode is suitable for selection if the firmware is updated after purchase or the firmware is suitable for rock or pop music. For details of firmware update, see "Additional Function (Firmware Update)" ( p5). „„Stereo In this mode, sound is output from the right and left and right ears. • This mode cannot be selected when "Speaker Virtualizer" ( p69) is played from the center speaker...

Owners Manual - English
Page 64
... screen saver. Set the time to "Off". Input/Output Assign „„1. In this Mini Player on the TV screen. Select a value from "Off" and between "1" (weak) and "3" (strong). "Auto Off": The Mini Player turns off automatically in the corner of video signal correction from "3 minutes", "5 minutes", "10 minutes" and "Off". 64 Front Panel≫ Rear Panel≫ Remote≫ "Off": When this function is always displayed. After switching the input...
... screen saver. Set the time to "Off". Input/Output Assign „„1. In this Mini Player on the TV screen. Select a value from "Off" and between "1" (weak) and "3" (strong). "Auto Off": The Mini Player turns off automatically in the corner of video signal correction from "3 minutes", "5 minutes", "10 minutes" and "Off". 64 Front Panel≫ Rear Panel≫ Remote≫ "Off": When this function is always displayed. After switching the input...

Owners Manual - English
Page 67
... "Configuration" - Crossover Change the settings of the speakers. "Subwoofer" is set to "Full Band". • If the item cannot be selected even though connection is correct, check if the setting in "Speaker Channels" matches the number of connected channels. 6 ohms or above ": When the connected speakers all have 6 Ω or more to start outputting frequencies for each channel. "Speaker Channels" matches the number of connected channels. 67 Front Panel≫ Rear Panel≫ Remote≫ Setting Item Speaker Channels Subwoofer Height Speaker Speaker Impedance Default Value...
... "Configuration" - Crossover Change the settings of the speakers. "Subwoofer" is set to "Full Band". • If the item cannot be selected even though connection is correct, check if the setting in "Speaker Channels" matches the number of connected channels. 6 ohms or above ": When the connected speakers all have 6 Ω or more to start outputting frequencies for each channel. "Speaker Channels" matches the number of connected channels. 67 Front Panel≫ Rear Panel≫ Remote≫ Setting Item Speaker Channels Subwoofer Height Speaker Speaker Impedance Default Value...

Owners Manual - English
Page 70
... function which keeps the volume of this unit. LFE Level Set the low-frequency effect (LFE) level for content other than DTS:X. • Depending on the main unit's display. If the low-frequency effect sound is fixed to "-∞ dB". Setting Item DTS Auto Surround Dialog Control Default Value On 0 dB Setting Details When inputting DTS signals that include extended channel information, the optimum listening mode is Off, the Late Night function that you to play 2-ch digital sources such as Dolby Digital, or 2-ch analog/PCM sources...
... function which keeps the volume of this unit. LFE Level Set the low-frequency effect (LFE) level for content other than DTS:X. • Depending on the main unit's display. If the low-frequency effect sound is fixed to "-∞ dB". Setting Item DTS Auto Surround Dialog Control Default Value On 0 dB Setting Details When inputting DTS signals that include extended channel information, the optimum listening mode is Off, the Late Night function that you to play 2-ch digital sources such as Dolby Digital, or 2-ch analog/PCM sources...

Owners Manual - English
Page 71
... a preset radio station, press TUNER on the input screen. Then while nothing is selected. 71 Front Panel≫ Rear Panel≫ Remote≫ Setting Item Name Edit Default Value Input name Setting Details 1. " ": Removes a character on the left of when the power is on the main unit's display. Contents ≫ Connections ≫ Playback ≫ Setup ≫ „„5. Volume Change the Volume settings. Select the input selector to the default value, press CLEAR on the remote controller on...
... a preset radio station, press TUNER on the input screen. Then while nothing is selected. 71 Front Panel≫ Rear Panel≫ Remote≫ Setting Item Name Edit Default Value Input name Setting Details 1. " ": Removes a character on the left of when the power is on the main unit's display. Contents ≫ Connections ≫ Playback ≫ Setup ≫ „„5. Volume Change the Volume settings. Select the input selector to the default value, press CLEAR on the remote controller on...

Owners Manual - English
Page 78
.... DD+, Dolby Audio - Center: Adjust the speaker level of the front speaker while listening to the previous statuses. 78 Front Panel≫ Rear Panel≫ Remote≫ Late Night: Enable small sounds to be set to "Off" -- When the input signal is DTS:X, and "Dialog Control" is not 0 dB • If you made will be set the unit to the standby mode, the adjustments you set if the listening mode is Direct. To enable this function, the following cases. -- Subwoofer: Adjust the speaker level of...
.... DD+, Dolby Audio - Center: Adjust the speaker level of the front speaker while listening to the previous statuses. 78 Front Panel≫ Rear Panel≫ Remote≫ Late Night: Enable small sounds to be set to "Off" -- When the input signal is DTS:X, and "Dialog Control" is not 0 dB • If you made will be set the unit to the standby mode, the adjustments you set if the listening mode is Direct. To enable this function, the following cases. -- Subwoofer: Adjust the speaker level of...

Owners Manual - English
Page 80
..., test tones are displayed. Note that the image on this unit suddenly turns off, the wires in the speaker cables have . Select how many speakers you select "Yes", the HDMI CEC function is output from each speaker to the SETUP MIC jack on , and you can check each speaker, the crossover frequencies, and the distance from each time you connect a subwoofer, check the power and volume of your surroundings. Press ENTER after confirmation. 4. AccuEQ Room Calibration...
..., test tones are displayed. Note that the image on this unit suddenly turns off, the wires in the speaker cables have . Select how many speakers you select "Yes", the HDMI CEC function is output from each speaker to the SETUP MIC jack on , and you can check each speaker, the crossover frequencies, and the distance from each time you connect a subwoofer, check the power and volume of your surroundings. Press ENTER after confirmation. 4. AccuEQ Room Calibration...
Owners Manual - English
Page 83
... "4. "Audio Select" - Contents ≫ Connections ≫ Playback ≫ Setup ≫ Troubleshooting „„Power ❏❏When the power is turned on, "AMP Diag Mode" appears on the display of the main unit. • The protection circuit function may be malfunctioning. After setting the power of the unit decreases. The unit may have been shortcircuited. If the operation has stopped with the speaker cable connection. Change the setting to standby state, connect...
... "4. "Audio Select" - Contents ≫ Connections ≫ Playback ≫ Setup ≫ Troubleshooting „„Power ❏❏When the power is turned on, "AMP Diag Mode" appears on the display of the main unit. • The protection circuit function may be malfunctioning. After setting the power of the unit decreases. The unit may have been shortcircuited. If the operation has stopped with the speaker cable connection. Change the setting to standby state, connect...

Owners Manual - English
Page 84
... TV does not support the ARC function, along with the connection by an HDMI cable, connect the TV with this unit using a digital optical cable. ❏❏No sound from a connected player • Change the input selector on this unit to the position of the terminal to which the player is connected. • Check the digital audio output setting on the input signal and listening mode, not much . To output the sound from the subwoofer, make the setting with the...
... TV does not support the ARC function, along with the connection by an HDMI cable, connect the TV with this unit using a digital optical cable. ❏❏No sound from a connected player • Change the input selector on this unit to the position of the terminal to which the player is connected. • Check the digital audio output setting on the input signal and listening mode, not much . To output the sound from the subwoofer, make the setting with the...

Owners Manual - English
Page 85
After changing the setting, switch the listening mode to that for extended periods with an HDMI cable, digital coaxial cable or digital optical cable. Then, resume playback. This is performed on the remote controller several times to PCM, PCM playback may not start immediately. ❏❏Sound suddenly reduces • When using the unit for each source, and confirm. ❏❏About DTS signals • With media that switches suddenly from DTS to switch the display of...
After changing the setting, switch the listening mode to that for extended periods with an HDMI cable, digital coaxial cable or digital optical cable. Then, resume playback. This is performed on the remote controller several times to PCM, PCM playback may not start immediately. ❏❏Sound suddenly reduces • When using the unit for each source, and confirm. ❏❏About DTS signals • With media that switches suddenly from DTS to switch the display of...

Owners Manual - English
Page 89
... functions to work properly, do not connect CEC-compliant devices exceeding the connectable number to the HDMI jack as switching input selectors interlocking with all CEC devices. Sharp brand players and recorders (when used with a Sharp brand television) ARC (Audio Return Channel): By connecting an ARC-compliant TV with CEC (Consumer Electronics Control) of the HDMI standard using the remote controller of the above audio formats. 89 Front Panel≫ Rear Panel≫ Remote≫ HDMI CEC function: By connecting...
... functions to work properly, do not connect CEC-compliant devices exceeding the connectable number to the HDMI jack as switching input selectors interlocking with all CEC devices. Sharp brand players and recorders (when used with a Sharp brand television) ARC (Audio Return Channel): By connecting an ARC-compliant TV with CEC (Consumer Electronics Control) of the HDMI standard using the remote controller of the above audio formats. 89 Front Panel≫ Rear Panel≫ Remote≫ HDMI CEC function: By connecting...

Owners Manual - English
Page 92
... Audio, DTS 96/24, DTS-ES, DTS Express, DSD (PCM Conversion Input), PCM HDCP version 2.2 Maximum Video Resolution 4K 60 Hz (YCbCr 4:4:4) „„Supported input resolutions HDMI input 4K, 1080p/24, 1080p, 1080i, 720p, 480p/576p • Signals are output from the HDMI OUT jack of this unit to the TV with the same resolution as 4K. „„Audio Inputs Digital OPTICAL (TV) COAXIAL (CD) Analog CD, AUX, PC 92 Front Panel≫ Rear Panel...
... Audio, DTS 96/24, DTS-ES, DTS Express, DSD (PCM Conversion Input), PCM HDCP version 2.2 Maximum Video Resolution 4K 60 Hz (YCbCr 4:4:4) „„Supported input resolutions HDMI input 4K, 1080p/24, 1080p, 1080i, 720p, 480p/576p • Signals are output from the HDMI OUT jack of this unit to the TV with the same resolution as 4K. „„Audio Inputs Digital OPTICAL (TV) COAXIAL (CD) Analog CD, AUX, PC 92 Front Panel≫ Rear Panel...


