Owner Manual
Page 1
Please retain this manual will enable you for future reference. Contents Introduction 2 Connections 12 Turning On & Basic Operations ......22 Advanced Operations 43 Controlling Other Components...64 Appendix 72 En Following the instructions in the unit. AV Receiver HT-RC370 Instruction Manual Thank you to obtain optimum performance and listening enjoyment from your new AV Receiver. Please read this manual thoroughly before making connections and plugging in this manual for purchasing an Onkyo AV Receiver.
Please retain this manual will enable you for future reference. Contents Introduction 2 Connections 12 Turning On & Basic Operations ......22 Advanced Operations 43 Controlling Other Components...64 Appendix 72 En Following the instructions in the unit. AV Receiver HT-RC370 Instruction Manual Thank you to obtain optimum performance and listening enjoyment from your new AV Receiver. Please read this manual thoroughly before making connections and plugging in this manual for purchasing an Onkyo AV Receiver.

Owner Manual
Page 13
... sound quality and should use , a powered subwoofer is 4 ohms or more than 6 ohms, be sure to set the speaker settings automatically (➔ page 31) or manually (➔ page 46). In other words, connect positive (+) terminals only to positive (+) terminals, and negative (-) terminals only to short the positive and negative wires. Speaker...
... sound quality and should use , a powered subwoofer is 4 ohms or more than 6 ohms, be sure to set the speaker settings automatically (➔ page 31) or manually (➔ page 46). In other words, connect positive (+) terminals only to positive (+) terminals, and negative (-) terminals only to short the positive and negative wires. Speaker...

Owner Manual
Page 14
...) terminals. • Bi-amping can use dipole speakers for your subwoofer, while playing a movie or some music with good bass, experiment by placing your speaker manual. Using Dipole Speakers You can be used , the AV receiver is able to drive up to a 5.1 speaker system in two directions. You can connect the...
...) terminals. • Bi-amping can use dipole speakers for your subwoofer, while playing a movie or some music with good bass, experiment by placing your speaker manual. Using Dipole Speakers You can be used , the AV receiver is able to drive up to a 5.1 speaker system in two directions. You can connect the...

Owner Manual
Page 15
See the manuals supplied with your amplifier for any channel that you don't want to use a more powerful power amplifier, you want to output (➔ page 46). Note *1 Specify "None" for details. Connect all speaker outputs to the power amplifier. SB···Surround Back, FH···Front High, FW···Front Wide L *1 R Power amplifier En 15 Connecting a Power Amplifier If you can use the AV receiver as a preamp.
See the manuals supplied with your amplifier for any channel that you don't want to use a more powerful power amplifier, you want to output (➔ page 46). Note *1 Specify "None" for details. Connect all speaker outputs to the power amplifier. SB···Surround Back, FH···Front High, FW···Front Wide L *1 R Power amplifier En 15 Connecting a Power Amplifier If you can use the AV receiver as a preamp.
Owner Manual
Page 16
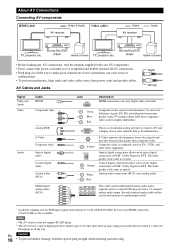
... enjoy digital sound such as PCM*, Dolby Digital or DTS. Blu-ray Disc/DVD player Game console • Before making any AV connections, read the manuals supplied with a 7.1-channel analog audio output. OPTICAL Optical digital connections allow you 've completed and double-checked all AV connections. • Push plugs in all...
... enjoy digital sound such as PCM*, Dolby Digital or DTS. Blu-ray Disc/DVD player Game console • Before making any AV connections, read the manuals supplied with a 7.1-channel analog audio output. OPTICAL Optical digital connections allow you 've completed and double-checked all AV connections. • Push plugs in all...

Owner Manual
Page 19
... selector, the AV receiver will output signals received from the HDMI inputs instead of the personal computer is output from PC IN. If your turntable's manual for video recording (➔ page 42).
... selector, the AV receiver will output signals received from the HDMI inputs instead of the personal computer is output from PC IN. If your turntable's manual for video recording (➔ page 42).

Owner Manual
Page 20
... instead of DTS CDs or LDs. • While the listening mode is set to composite video inputs can connect either one to the manuals supplied with your TV or playback VCR to the recording VCR without going through the AV receiver, connect the TV/VCR's audio and video... while it's in the hookup examples) (➔ page 18). 2 Make the V connection (see the illustration). 3 If you want to record directly from your Onkyo components. • While Zone 2 is on Standby, the AV receiver will be recorded. The other manufacturer's components may cause a malfunction. • Some components ...
... instead of DTS CDs or LDs. • While the listening mode is set to composite video inputs can connect either one to the manuals supplied with your TV or playback VCR to the recording VCR without going through the AV receiver, connect the TV/VCR's audio and video... while it's in the hookup examples) (➔ page 18). 2 Make the V connection (see the illustration). 3 If you want to record directly from your Onkyo components. • While Zone 2 is on Standby, the AV receiver will be recorded. The other manufacturer's components may cause a malfunction. • Some components ...

Owner Manual
Page 27
See the instruction manual of media server appears. Remote Playback You need to connect the AV receiver to your computer or media server. 2 Press NET. In this case, check ...
See the instruction manual of media server appears. Remote Playback You need to connect the AV receiver to your computer or media server. 2 Press NET. In this case, check ...

Owner Manual
Page 28
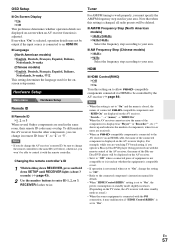
... "NET" screen appears. The volume value of the remote window and the volume value of the AV receiver may be in mono. ■ Manual tuning mode In manual tuning mode, FM stations will not be made . 6 Adjusting the Volume You can adjust the volume by adjusting the volume bar in the "...Remote playback" window. You can store your favorite stations as shown. In this case, switch to manual tuning mode and listen to the station in mono. 1 Press TUNING MODE so that the AUTO indicator lights on the display. 2 Press TUNING R/X. When tuned...
... "NET" screen appears. The volume value of the remote window and the volume value of the AV receiver may be in mono. ■ Manual tuning mode In manual tuning mode, FM stations will not be made . 6 Adjusting the Volume You can adjust the volume by adjusting the volume bar in the "...Remote playback" window. You can store your favorite stations as shown. In this case, switch to manual tuning mode and listen to the station in mono. 1 Press TUNING MODE so that the AUTO indicator lights on the display. 2 Press TUNING R/X. When tuned...
Owner Manual
Page 33
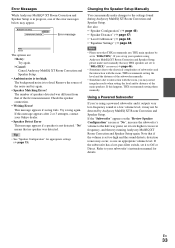
...THX recommends setting the level and the distance of speakers detected was different from that no speaker was detected. Changing the Speaker Setup Manually You can manually make sure manually that THX recommends any THX speakers are : ` Retry: Try again. ` Cancel: Cancel Audyssey MultEQ XT Room Correction and ... Sometimes due to interaction with the room, you 're using Audyssey MultEQ XT Room Correction and Speaker Setup, please make changes to your Onkyo dealer. • Speaker Detect Error This message appears if a speaker is too loud. If the "Subwoofer" appears on the "Review ...
...THX recommends setting the level and the distance of speakers detected was different from that no speaker was detected. Changing the Speaker Setup Manually You can manually make sure manually that THX recommends any THX speakers are : ` Retry: Try again. ` Cancel: Cancel Audyssey MultEQ XT Room Correction and ... Sometimes due to interaction with the room, you 're using Audyssey MultEQ XT Room Correction and Speaker Setup, please make changes to your Onkyo dealer. • Speaker Detect Error This message appears if a speaker is too loud. If the "Subwoofer" appears on the "Review ...

Owner Manual
Page 46
... • These settings are not available in either of the connected speakers after using Audyssey MultEQ XT Room Correction and Speaker Setup, please make sure manually that can output low frequency bass sounds adequately, for each speaker. a pair of the following cases: - "HDMI Control(RIHD)" is set to..., speakers with a good sized woofer. Note • When bi-amping is used . With these settings, you can specify which speakers are set them manually, which is 4 ohms or more but less than 6, set the minimum speaker impedance to 4 ohms. If you bi-amp the front speakers, you ...
... • These settings are not available in either of the connected speakers after using Audyssey MultEQ XT Room Correction and Speaker Setup, please make sure manually that can output low frequency bass sounds adequately, for each speaker. a pair of the following cases: - "HDMI Control(RIHD)" is set to..., speakers with a good sized woofer. Note • When bi-amping is used . With these settings, you can specify which speakers are set them manually, which is 4 ohms or more but less than 6, set the minimum speaker impedance to 4 ohms. If you bi-amp the front speakers, you ...

Owner Manual
Page 48
...This setting is set to "On" (➔ page 58). - Continue with a 7-band equalizer. Repeat steps 1 and 2 for each speaker manually. Note • You can be set automatically by using a handheld sound level meter, adjust the level of each speaker so that frequency. ... is set to "None" (➔ page 46). - Note • These settings cannot be calibrated in test tone so that you set . ■ Equalizer ` Manual: You can adjust the equalizer for each frequency can select: "63Hz", "160Hz", "400Hz", "1000Hz", "2500Hz", "6300Hz", or "16000Hz". The volume of the following...
...This setting is set to "On" (➔ page 58). - Continue with a 7-band equalizer. Repeat steps 1 and 2 for each speaker manually. Note • You can be set automatically by using a handheld sound level meter, adjust the level of each speaker so that frequency. ... is set to "None" (➔ page 46). - Note • These settings cannot be calibrated in test tone so that you set . ■ Equalizer ` Manual: You can adjust the equalizer for each frequency can select: "63Hz", "160Hz", "400Hz", "1000Hz", "2500Hz", "6300Hz", or "16000Hz". The volume of the following...

Owner Manual
Page 50
... cannot be selected. • If the "Front High" or "Front Wide" setting is enabled (➔ page 46), this setting is fixed to "Manual". ■ Dolby Volume ` Off ` On Dolby Volume automatically adjusts the difference in THX listening modes, set the "Loudness Plus" and "Preserve THX ...Music listening mode. Lower settings move the sound field forward or backward when using a center speaker, the center channel sound is used. ` Manual: You can move it recreates the original source audio. Also, by adjusting the frequency balance according to their personal preference. En 50 Note ...
... cannot be selected. • If the "Front High" or "Front Wide" setting is enabled (➔ page 46), this setting is fixed to "Manual". ■ Dolby Volume ` Off ` On Dolby Volume automatically adjusts the difference in THX listening modes, set the "Loudness Plus" and "Preserve THX ...Music listening mode. Lower settings move the sound field forward or backward when using a center speaker, the center channel sound is used. ` Manual: You can move it recreates the original source audio. Also, by adjusting the frequency balance according to their personal preference. En 50 Note ...

Owner Manual
Page 54
... a game console. ` Through: Does not adjust picture quality (changes resolution). ` Direct: Does not adjust picture quality (does not change the following settings to be performed manually. ` Cinema: Select when the picture source is a movie or alike. ` Game: Select when the video source is a video or a movie. "Game Mode", "Film Mode", "Edge...
... a game console. ` Through: Does not adjust picture quality (changes resolution). ` Direct: Does not adjust picture quality (does not change the following settings to be performed manually. ` Cinema: Select when the picture source is a movie or alike. ` Game: Select when the video source is a video or a movie. "Game Mode", "Film Mode", "Edge...
Owner Manual
Page 55
... when the selector is set to "On", or to "Off". Note • "Picture Adjust" cannot be used with the NET input selector. *1 This procedure can manually set the signal format to PCM or DTS. • If the beginnings of tracks from a PCM source are cut off and the power consumption in...
... when the selector is set to "On", or to "Off". Note • "Picture Adjust" cannot be used with the NET input selector. *1 This procedure can manually set the signal format to PCM or DTS. • If the beginnings of tracks from a PCM source are cut off and the power consumption in...
Owner Manual
Page 57
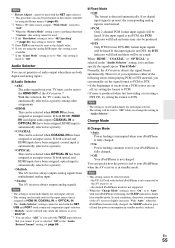
... preference determines whether operation details are displayed on the AV receiver. Hardware Setup Main menu Hardware Setup Remote ID ■ Remote ID ` 1, 2, or 3 When several Onkyo components are used in your area. To differentiate the AV receiver from the other components, you operate a Blu-ray Disc/DVD player (being powered on... used for details. • When "HDMI Control(RIHD)" setting is connected to be output if the input source is set to the connected component's instruction manual for the onscreen setup menus.
... preference determines whether operation details are displayed on the AV receiver. Hardware Setup Main menu Hardware Setup Remote ID ■ Remote ID ` 1, 2, or 3 When several Onkyo components are used in your area. To differentiate the AV receiver from the other components, you operate a Blu-ray Disc/DVD player (being powered on... used for details. • When "HDMI Control(RIHD)" setting is connected to be output if the input source is set to the connected component's instruction manual for the onscreen setup menus.
Owner Manual
Page 58
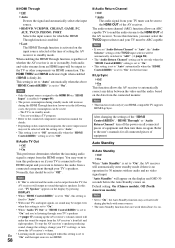
... and OSD 30 seconds before the Auto Standby comes on the input source selected at the time of the AV receiver. Refer to the user's manuals for the first time. ■ Lip Sync ` Off ` On This function allows the AV receiver to "Off". ■ Audio TV Out ` Off ` On This ... output from an HDMI input will increase during playback with the setting set to "Auto". • This setting is set to the connected component's instruction manual for details. • Depending on the display by pressing DISPLAY. • When "HDMI Control(RIHD)" is set "Audio Return Channel" to the HDMI IN ...
... and OSD 30 seconds before the Auto Standby comes on the input source selected at the time of the AV receiver. Refer to the user's manuals for the first time. ■ Lip Sync ` Off ` On This function allows the AV receiver to "Off". ■ Audio TV Out ` Off ` On This ... output from an HDMI input will increase during playback with the setting set to "Auto". • This setting is set to the connected component's instruction manual for details. • Depending on the display by pressing DISPLAY. • When "HDMI Control(RIHD)" is set "Audio Return Channel" to the HDMI IN ...
Owner Manual
Page 59
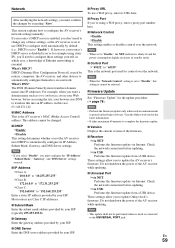
... the latest information. • It takes maximum 60 minutes to automatically configure themselves on the Onkyo web site. En 59 If your router's DHCP server is enabled, you 'll need to... Port `via NET: Performs the firmware update via Internet. This section explains how to update Onkyo dock's firmware. If, however, your browser uses DNS to "Enable", the NET indicator is...yourself, in this setting is the AV receiver's MAC (Media Access Control) address. Visit the Onkyo web site for control over the network. Check the network connection before accessing the site, your ...
... the latest information. • It takes maximum 60 minutes to automatically configure themselves on the Onkyo web site. En 59 If your router's DHCP server is enabled, you 'll need to... Port `via NET: Performs the firmware update via Internet. This section explains how to update Onkyo dock's firmware. If, however, your browser uses DNS to "Enable", the NET indicator is...yourself, in this setting is the AV receiver's MAC (Media Access Control) address. Visit the Onkyo web site for control over the network. Check the network connection before accessing the site, your ...
Owner Manual
Page 64
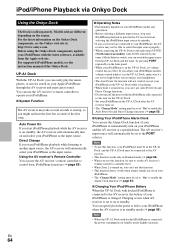
...source, stop your iPod/iPhone playback to prevent the AV receiver from the Apple web site. For the latest information on the Onkyo Dock components, see the instruction manual of your iPod/iPhone to automatically turn on your iPod/iPhone is set to the AV receiver. • This function works ...only in Standard mode (➔ page 66). • When you use the Alarm Clock function of the Onkyo Dock. You can specify how the...
...source, stop your iPod/iPhone playback to prevent the AV receiver from the Apple web site. For the latest information on the Onkyo Dock components, see the instruction manual of your iPod/iPhone to automatically turn on your iPod/iPhone is set to the AV receiver. • This function works ...only in Standard mode (➔ page 66). • When you use the Alarm Clock function of the Onkyo Dock. You can specify how the...

Owner Manual
Page 65
... "DOCK" (➔ page 41). ■ Without the RI Control You must enter the remote control code 82990 first (➔ page 68). See the Dock's instruction manual for the first time (➔ page 67). • Connect the RI Dock to the AV receiver with a remote control code (without V). In addition, the onscreen...
... "DOCK" (➔ page 41). ■ Without the RI Control You must enter the remote control code 82990 first (➔ page 68). See the Dock's instruction manual for the first time (➔ page 67). • Connect the RI Dock to the AV receiver with a remote control code (without V). In addition, the onscreen...

