

E-5 Instruction Manual (English)
Page 4
.... 46 Shooting mode gP. 41-45 Number of storable sequential pictures gP. 59 Image stabilizer gP. 62 ISO sensitivity gP. 50 White balance (Displayed when set to a setting other than auto white balance.) gP. 66 Auto bracket gP. 49, 51, 69, 77 ISO sensitivity value gP. 50 AE lock gP. 48 Flash...
.... 46 Shooting mode gP. 41-45 Number of storable sequential pictures gP. 59 Image stabilizer gP. 62 ISO sensitivity gP. 50 White balance (Displayed when set to a setting other than auto white balance.) gP. 66 Auto bracket gP. 49, 51, 69, 77 ISO sensitivity value gP. 50 AE lock gP. 48 Flash...

E-5 Instruction Manual (English)
Page 6
Super control panel The following screen allows the display and setting of shooting settings at the super control panel" (P. 21) MYSET gP. 100 Shutter speed gP. 41-45 Flash charging gP. 76 Battery check gP. 13 Shooting mode gP. ... z gP. 70 B&W filter x gP. 70 Picture tone y gP. 70 White balance gP. 66 White balance compensation gP. 68 The functions within this area can be set on the LCD monitor. Press the INFO button to display the super control panel on the super control panel. 6 EN...
Super control panel The following screen allows the display and setting of shooting settings at the super control panel" (P. 21) MYSET gP. 100 Shutter speed gP. 41-45 Flash charging gP. 76 Battery check gP. 13 Shooting mode gP. ... z gP. 70 B&W filter x gP. 70 Picture tone y gP. 70 White balance gP. 66 White balance compensation gP. 68 The functions within this area can be set on the LCD monitor. Press the INFO button to display the super control panel on the super control panel. 6 EN...

E-5 Instruction Manual (English)
Page 10
Turn the camera upside-down to set aside a backup battery for prolonged shooting in case the battery in the direction of E Unloading the battery Press the battery lock to unlock the battery. ...
Turn the camera upside-down to set aside a backup battery for prolonged shooting in case the battery in the direction of E Unloading the battery Press the battery lock to unlock the battery. ...

E-5 Instruction Manual (English)
Page 11
... camera's body (1). • Rotate the lens in the direction indicated by the arrow until you hear it click (2). • Make sure the power switch is set to OFF. • Do not press the lens release button. 2 2 Body cap Lens attachment Alignment mark (Red) mark (Red) 2 1 3 Preparations for shooting 3 Remove the lens... from the camera While pressing the lens release button (1), rotate the lens in the direction of the arrow (2). • Make sure the power switch is set to OFF. 2 1 Lens release button 11 EN
... camera's body (1). • Rotate the lens in the direction indicated by the arrow until you hear it click (2). • Make sure the power switch is set to OFF. • Do not press the lens release button. 2 2 Body cap Lens attachment Alignment mark (Red) mark (Red) 2 1 3 Preparations for shooting 3 Remove the lens... from the camera While pressing the lens release button (1), rotate the lens in the direction of the arrow (2). • Make sure the power switch is set to OFF. 2 1 Lens release button 11 EN

E-5 Instruction Manual (English)
Page 13
... clearly, adjustment is turned on the control panel. While looking through the viewfinder, rotate the diopter adjustment dial little by little. Basic guide Power on 1 Set the camera's power switch to ON • To turn off . LIGHT button Turns the control panel light on and off the power..., set the power switch to remove dust and dirt from the image pickup device's filter surface. Lit up (ready for use) Lit up (battery power is ...
... clearly, adjustment is turned on the control panel. While looking through the viewfinder, rotate the diopter adjustment dial little by little. Basic guide Power on 1 Set the camera's power switch to ON • To turn off . LIGHT button Turns the control panel light on and off the power..., set the power switch to remove dust and dirt from the image pickup device's filter surface. Lit up (ready for use) Lit up (battery power is ...

E-5 Instruction Manual (English)
Page 14
... displayed on the card together with the date and time information. s REC VIEW 5SEC cMENU DISPLAY ON FIRM BACK SET 8 Press the MENU button to select [Y], then press d Y M D TIME 2010 Y/M/D CANCEL CANCEL SET 7 Press the i button X '10.09.01 14:01 ENG. The file name is also included with the images.... s REC VIEW 5SEC cMENU DISPLAY ON FIRMWARE BACK SET 3 Use ac to select [X], then press d CANCEL SET • The time is displayed in the 24-hour format. 6 Use ac to select the date format Y M D TIME 2010...
... displayed on the card together with the date and time information. s REC VIEW 5SEC cMENU DISPLAY ON FIRM BACK SET 8 Press the MENU button to select [Y], then press d Y M D TIME 2010 Y/M/D CANCEL CANCEL SET 7 Press the i button X '10.09.01 14:01 ENG. The file name is also included with the images.... s REC VIEW 5SEC cMENU DISPLAY ON FIRMWARE BACK SET 3 Use ac to select [X], then press d CANCEL SET • The time is displayed in the 24-hour format. 6 Use ac to select the date format Y M D TIME 2010...

E-5 Instruction Manual (English)
Page 15
... shutter speed and aperture value that have just taken. 15 EN Doing so could destroy stored pictures and prevent storage of pictures you have been set automatically by the camera are displayed. • The super control panel is not displayed while the shutter button is pressed. 3 Release the shutter Press the...
... shutter speed and aperture value that have just taken. 15 EN Doing so could destroy stored pictures and prevent storage of pictures you have been set automatically by the camera are displayed. • The super control panel is not displayed while the shutter button is pressed. 3 Release the shutter Press the...

E-5 Instruction Manual (English)
Page 18
ERASE D button BACK YES NO SET 18 EN Main dial Erasing images Play back the image you turn the main dial towards U, the image is incrementally enlarged from 2× to erase and press the D button. Each time you want to 14×. Use ac to select [YES] and press the i button to forward the frames. Playback/Erasing Playing back images Close-up playback Pressing the q button displays the last picture taken. q button Displays the previous frame Displays the next frame Arrow pad Use k to erase.
ERASE D button BACK YES NO SET 18 EN Main dial Erasing images Play back the image you turn the main dial towards U, the image is incrementally enlarged from 2× to erase and press the D button. Each time you want to 14×. Use ac to select [YES] and press the i button to forward the frames. Playback/Erasing Playing back images Close-up playback Pressing the q button displays the last picture taken. q button Displays the previous frame Displays the next frame Arrow pad Use k to erase.

E-5 Instruction Manual (English)
Page 19
...super control panel while you can make the function settings with the live view, you are three basic ways to operate this camera. Setting on the control panel. You can use the super control panel to set shooting and playback settings and customize camera functions. Sub dial k Main ...dial j Basic operations 19 EN Setting while looking at the super control panel gP. ...
...super control panel while you can make the function settings with the live view, you are three basic ways to operate this camera. Setting on the control panel. You can use the super control panel to set shooting and playback settings and customize camera functions. Sub dial k Main ...dial j Basic operations 19 EN Setting while looking at the super control panel gP. ...

E-5 Instruction Manual (English)
Page 20
After pressing one or two buttons at the same time, turn the dial and set the function during that time, the setting for approximately 8 seconds. If no operations are two ways to use the direct buttons. 1 While holding down a direct button, turn the main dial or sub ...dial • Release the button to operate the camera There are performed during that function is then set the function. Using the direct buttons to set . You can turn the main dial or sub dial • The function remains selected for that time. Direct buttons Dial Function...
After pressing one or two buttons at the same time, turn the dial and set the function during that time, the setting for approximately 8 seconds. If no operations are two ways to use the direct buttons. 1 While holding down a direct button, turn the main dial or sub ...dial • Release the button to operate the camera There are performed during that function is then set the function. Using the direct buttons to set . You can turn the main dial or sub dial • The function remains selected for that time. Direct buttons Dial Function...

E-5 Instruction Manual (English)
Page 21
... the super control panel, refer to turn off the super control panel. • During live view, the live control to operate the camera" (P. 37) g"KCONTROL SETTINGS" (P. 109) INFO button Sub dial k Main dial j 2010. 09.01 AF arge Normal OFF IS 1 i button p Arrow pad 2 Press the i button ...3 Use p to move the cursor to the function you want to set with the dial RECOMMENDED ISO j /< /Y Cursor lights arge Normal OFF IS 1 Displays the selected function name arge Normal OFF IS 1 Direct menu P SINGLE Press...
... the super control panel, refer to turn off the super control panel. • During live view, the live control to operate the camera" (P. 37) g"KCONTROL SETTINGS" (P. 109) INFO button Sub dial k Main dial j 2010. 09.01 AF arge Normal OFF IS 1 i button p Arrow pad 2 Press the i button ...3 Use p to move the cursor to the function you want to set with the dial RECOMMENDED ISO j /< /Y Cursor lights arge Normal OFF IS 1 Displays the selected function name arge Normal OFF IS 1 Direct menu P SINGLE Press...

E-5 Instruction Manual (English)
Page 22
...; Selecting a function and rotating the main dial automatically changes the tab and allows you to select a function on the functions that can be set with the menu, refer to "Menu directory" (gP. 146). 22 EN Sub dial k Main dial j i button p Arrow pad IMAGE STABILIZER IS.1 ...BRACKETING MULTIPLE EXPOSURE OFF # RC MODE OFF BACK SET 3 Use ac to select a function and d to go back one screen Press the i button to confirm the setting 2 Use ac to select a tab, then press d Tab W Shooting menu 1 X Shooting menu 2 q Playback...
...; Selecting a function and rotating the main dial automatically changes the tab and allows you to select a function on the functions that can be set with the menu, refer to "Menu directory" (gP. 146). 22 EN Sub dial k Main dial j i button p Arrow pad IMAGE STABILIZER IS.1 ...BRACKETING MULTIPLE EXPOSURE OFF # RC MODE OFF BACK SET 3 Use ac to select a function and d to go back one screen Press the i button to confirm the setting 2 Use ac to select a tab, then press d Tab W Shooting menu 1 X Shooting menu 2 q Playback...
E-5 Instruction Manual (English)
Page 23
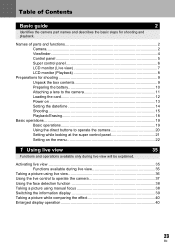
...shooting 9 Unpack the box contents 9 Preparing the battery 10 Attaching a lens to the camera 11 Loading the card 12 Power on ...13 Setting the date/time 14 Shooting ...15 Playback/Erasing 18 Basic operations ...19 Basic operations 19 Using the direct buttons to operate the camera 20... Setting while looking at the super control panel 21 Setting on the menu 22 1 Using live view 35 Functions and operations available only during live view 35 Taking a ...
...shooting 9 Unpack the box contents 9 Preparing the battery 10 Attaching a lens to the camera 11 Loading the card 12 Power on ...13 Setting the date/time 14 Shooting ...15 Playback/Erasing 18 Basic operations ...19 Basic operations 19 Using the direct buttons to operate the camera 20... Setting while looking at the super control panel 21 Setting on the menu 22 1 Using live view 35 Functions and operations available only during live view 35 Taking a ...
E-5 Instruction Manual (English)
Page 24
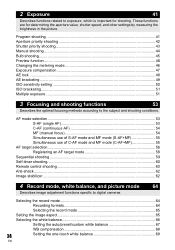
...the record mode 64 Recording formats 64 Selecting the record mode 65 Setting the image aspect 65 Selecting the white balance 66 Setting the auto/preset/custom white balance 67 WB compensation 68 24 Setting the one-touch white balance 69 EN AF mode selection...53 S-AF... shooting...45 Preview function ...46 Changing the metering mode 46 Exposure compensation 47 AE lock ...48 AE bracketing ...49 ISO sensitivity setting 50 ISO bracketing...51 Multiple exposure ...51 3 Focusing and shooting functions 53 Describes the optimal focusing methods according to digital cameras....
...the record mode 64 Recording formats 64 Selecting the record mode 65 Setting the image aspect 65 Selecting the white balance 66 Setting the auto/preset/custom white balance 67 WB compensation 68 24 Setting the one-touch white balance 69 EN AF mode selection...53 S-AF... shooting...45 Preview function ...46 Changing the metering mode 46 Exposure compensation 47 AE lock ...48 AE bracketing ...49 ISO sensitivity setting 50 ISO bracketing...51 Multiple exposure ...51 3 Focusing and shooting functions 53 Describes the optimal focusing methods according to digital cameras....
E-5 Instruction Manual (English)
Page 25
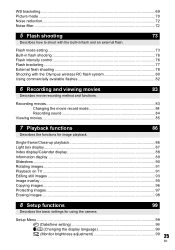
... ...95 Copying images ...96 Protecting images ...97 Erasing images ...98 8 Setup functions 99 Describes the basic settings for image playback. Setup Menu ...99 X (Date/time setting 99 W (Changing the display language 99 s (Monitor brightness adjustment 99 25 EN Recording movies ...83 Changing...5 Flash shooting 73 Describes how to shoot with the Olympus wireless RC flash system 80 Using commercially available flashes 82 6 Recording and viewing movies 83 Describes movie recording method and functions. Flash mode setting ...73 Built-in flash shooting 76 Flash intensity control...
... ...95 Copying images ...96 Protecting images ...97 Erasing images ...98 8 Setup functions 99 Describes the basic settings for image playback. Setup Menu ...99 X (Date/time setting 99 W (Changing the display language 99 s (Monitor brightness adjustment 99 25 EN Recording movies ...83 Changing...5 Flash shooting 73 Describes how to shoot with the Olympus wireless RC flash system 80 Using commercially available flashes 82 6 Recording and viewing movies 83 Describes movie recording method and functions. Flash mode setting ...73 Built-in flash shooting 76 Flash intensity control...

E-5 Instruction Manual (English)
Page 26
REC VIEW 99 cMENU DISPLAY 99 FIRMWARE 100 RESET/MYSET ...100 Setting MYSET 100 Resetting the settings 101 9 Customizing your camera Describes how to customize the camera's settings. 102 R AF/MF ...102 AF AREA 102 P SET UP 102 RESET LENS 102 BULB FOCUSING 102 FOCUS RING 103 MF ASSIST 103 ... C 108 O fps...108 U DISP/8/PC...108 HDMI ...108 VIDEO OUT 108 SLEEP...108 LIVE VIEW BOOST 109 g FACE DETECT 109 G/INFO SETTINGS 109 KCONTROL SETTINGS 109 HISTOGRAM SETTINGS 109 BACKLIT LCD (Backlight timer 109 8 ...109 VOLUME 109 USB MODE 110 26 LEVEL GAUGE 110 EN
REC VIEW 99 cMENU DISPLAY 99 FIRMWARE 100 RESET/MYSET ...100 Setting MYSET 100 Resetting the settings 101 9 Customizing your camera Describes how to customize the camera's settings. 102 R AF/MF ...102 AF AREA 102 P SET UP 102 RESET LENS 102 BULB FOCUSING 102 FOCUS RING 103 MF ASSIST 103 ... C 108 O fps...108 U DISP/8/PC...108 HDMI ...108 VIDEO OUT 108 SLEEP...108 LIVE VIEW BOOST 109 g FACE DETECT 109 G/INFO SETTINGS 109 KCONTROL SETTINGS 109 HISTOGRAM SETTINGS 109 BACKLIT LCD (Backlight timer 109 8 ...109 VOLUME 109 USB MODE 110 26 LEVEL GAUGE 110 EN

E-5 Instruction Manual (English)
Page 27
... X K/ASPECT/COLOR/WB 113 NOISE REDUCT. (Noise Reduction 113 NOISE FILTER 113 WB...113 ALL 113 COLOR SPACE 114 SHADING COMP 114 K SET...114 PIXEL COUNT 114 ASPECT SHOOTING 115 Y RECORD/ERASE 115 QUICK ERASE 115 RAW+JPEG ERASE 115 FILE NAME 116 EDIT FILENAME 116 PRIORITY... SET 116 dpi SETTING 116 r/...116 COPYRIGHT SETTINGS 117 Z MOVIE ...117 MOVIE R 117 K UTILITY ...117 PIXEL MAPPING 117 EXPOSURE SHIFT 117 CLEANING MODE 117 EXT....
... X K/ASPECT/COLOR/WB 113 NOISE REDUCT. (Noise Reduction 113 NOISE FILTER 113 WB...113 ALL 113 COLOR SPACE 114 SHADING COMP 114 K SET...114 PIXEL COUNT 114 ASPECT SHOOTING 115 Y RECORD/ERASE 115 QUICK ERASE 115 RAW+JPEG ERASE 115 FILE NAME 116 EDIT FILENAME 116 PRIORITY... SET 116 dpi SETTING 116 r/...116 COPYRIGHT SETTINGS 117 Z MOVIE ...117 MOVIE R 117 K UTILITY ...117 PIXEL MAPPING 117 EXPOSURE SHIFT 117 CLEANING MODE 117 EXT....

E-5 Instruction Manual (English)
Page 28
... Resetting the print reservation data 123 Direct printing (PictBridge 123 Connecting the camera to a printer 124 Easy printing 124 Custom printing 125 11 Using the OLYMPUS Viewer 2 / [ib] Describes how to this section for information on optional accessories, camera specifications, and other useful shooting information. Card basics...136 Usable cards... DIGITAL lens specifications 139 Program line diagram (P mode 140 Flash synchronization and shutter speed 141 Exposure warning display 141 Flash modes that can be set by shooting mode 142 28 White balance color temperature 143 EN
... Resetting the print reservation data 123 Direct printing (PictBridge 123 Connecting the camera to a printer 124 Easy printing 124 Custom printing 125 11 Using the OLYMPUS Viewer 2 / [ib] Describes how to this section for information on optional accessories, camera specifications, and other useful shooting information. Card basics...136 Usable cards... DIGITAL lens specifications 139 Program line diagram (P mode 140 Flash synchronization and shutter speed 141 Exposure warning display 141 Flash modes that can be set by shooting mode 142 28 White balance color temperature 143 EN

E-5 Instruction Manual (English)
Page 29
Record mode and file size/number of storable still pictures 144 Functions that can be registered with MYSET setting 145 Menu directory ...146 Specifications ...153 SAFETY PRECAUTIONS 156 Index ...163 29 EN
Record mode and file size/number of storable still pictures 144 Functions that can be registered with MYSET setting 145 Menu directory ...146 Specifications ...153 SAFETY PRECAUTIONS 156 Index ...163 29 EN

E-5 Instruction Manual (English)
Page 30
...distance of the P. 138 lens from the subject and take a picture while checking the white balance, exposure compensation, picture mode, and other settings on the LCD monitor. P. 56 Focusing on the lens. P. 56 Correct focus cannot be taken You can use [TEST PICTURE] to.... Limiting these actions will help extend the useful life of Reduce the pixel count and compression rate settings. P. 38, P. 40, P. 54 Set [AF SENSITIVITY] to check the set exposure conditions. Set [SLEEP] so that the backlight turns off faster. P. 35 Taking pictures while checking the results ...
...distance of the P. 138 lens from the subject and take a picture while checking the white balance, exposure compensation, picture mode, and other settings on the LCD monitor. P. 56 Focusing on the lens. P. 56 Correct focus cannot be taken You can use [TEST PICTURE] to.... Limiting these actions will help extend the useful life of Reduce the pixel count and compression rate settings. P. 38, P. 40, P. 54 Set [AF SENSITIVITY] to check the set exposure conditions. Set [SLEEP] so that the backlight turns off faster. P. 35 Taking pictures while checking the results ...
