

English Manual
Page 2
... shown at actual size. TABLE OF CONTENTS WARNING DECAL PLACEMENT 2 IMPORTANT PRECAUTIONS 3 BEFORE YOU BEGIN 6 PART IDENTIFICATION CHART 7 ASSEMBLY 8 THE CHEST HEART RATE MONITOR 12 HOW TO USE THE ELLIPTICAL 13 FCC INFORMATION 27 MAINTENANCE AND TROUBLESHOOTING 28 EXERCISE GUIDELINES 30 PART LIST 32 EXPLODED DRAWING 34 ORDERING REPLACEMENT PARTS Back Cover LIMITED WARRANTY Back Cover WARNING DECAL PLACEMENT This drawing shows the location(s) of Wi-Fi Alliance. 2 IFIT is a registered trademark of ICON Health & Fitness, Inc.
... shown at actual size. TABLE OF CONTENTS WARNING DECAL PLACEMENT 2 IMPORTANT PRECAUTIONS 3 BEFORE YOU BEGIN 6 PART IDENTIFICATION CHART 7 ASSEMBLY 8 THE CHEST HEART RATE MONITOR 12 HOW TO USE THE ELLIPTICAL 13 FCC INFORMATION 27 MAINTENANCE AND TROUBLESHOOTING 28 EXERCISE GUIDELINES 30 PART LIST 32 EXPLODED DRAWING 34 ORDERING REPLACEMENT PARTS Back Cover LIMITED WARRANTY Back Cover WARNING DECAL PLACEMENT This drawing shows the location(s) of Wi-Fi Alliance. 2 IFIT is a registered trademark of ICON Health & Fitness, Inc.
English Manual
Page 3
... and properly tighten all warnings on your elliptical before using your elliptical. The heart rate monitor is intended for personal injury or property damage sustained by persons weighing more than 400 lbs. (181 kg). 10. ICON assumes no responsibility for home use only. This is intended only as described in this manual. 9. Replace any exercise program, consult your back. 15. Keep your pedaling speed in a controlled way...
... and properly tighten all warnings on your elliptical before using your elliptical. The heart rate monitor is intended for personal injury or property damage sustained by persons weighing more than 400 lbs. (181 kg). 10. ICON assumes no responsibility for home use only. This is intended only as described in this manual. 9. Replace any exercise program, consult your back. 15. Keep your pedaling speed in a controlled way...
English Manual
Page 6
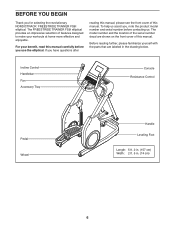
... model number and the location of the serial number decal are labeled in . (74 cm) 6 Incline Control Handlebar Fan Accessory Tray Console Resistance Control Pedal Wheel Handle Leveling Foot Length: 5 ft. 2 in. (157 cm) Width: 2 ft. 5 in the drawing below. If you for selecting the revolutionary NORDICTRACK® FREESTRIDE TRAINER FS9I elliptical. BEFORE YOU BEGIN Thank you have questions after reading this manual, please see the front cover...
... model number and the location of the serial number decal are labeled in . (74 cm) 6 Incline Control Handlebar Fan Accessory Tray Console Resistance Control Pedal Wheel Handle Leveling Foot Length: 5 ft. 2 in. (157 cm) Width: 2 ft. 5 in the drawing below. If you for selecting the revolutionary NORDICTRACK® FREESTRIDE TRAINER FS9I elliptical. BEFORE YOU BEGIN Thank you have questions after reading this manual, please see the front cover...
English Manual
Page 8
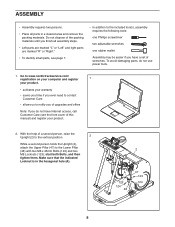
.... start both Bolts, and then tighten them. Make sure that the indicated Locknut is in a cleared area and remove the packing materials. Do not dispose of the packing materials until you do not use power tools. 1. To avoid damaging parts, do not have a set of a second person, raise the Upright (2) to the vertical position. 2 While a second person holds the Upright (2), attach...
.... start both Bolts, and then tighten them. Make sure that the indicated Locknut is in a cleared area and remove the packing materials. Do not dispose of the packing materials until you do not use power tools. 1. To avoid damaging parts, do not have a set of a second person, raise the Upright (2) to the vertical position. 2 While a second person holds the Upright (2), attach...
English Manual
Page 12
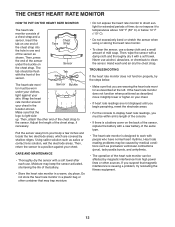
Chest Tabs Strap Sensor Tab The heart rate moni- up. Then, attach the other end of the chest strap to clean the sensor. Never use alcohol, abrasives, or chemicals to the sensor. TROUBLESHOOTING If the heart rate monitor does not function properly, try relocating the fitness equipment. 12 If the heart rate monitor does not function when positioned as described, move it slightly lower or higher on the chest strap. The tab should be...
Chest Tabs Strap Sensor Tab The heart rate moni- up. Then, attach the other end of the chest strap to clean the sensor. Never use alcohol, abrasives, or chemicals to the sensor. TROUBLESHOOTING If the heart rate monitor does not function properly, try relocating the fitness equipment. 12 If the heart rate monitor does not function when positioned as described, move it slightly lower or higher on the chest strap. The tab should be...

English Manual
Page 13
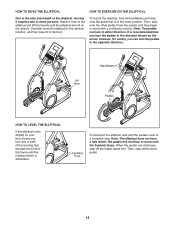
... USE THE ELLIPTICAL HOW TO PLUG IN THE POWER CORD This product must be connected with a grounding pin. Before using an adapter. Plug the power cord into an Grounded Outlet appropriate outlet that Grounding Pin is grounded before using an adapter, contact a qualified electrician to determine whether the outlet box cover is properly installed and grounded in accordance with all local codes and ordinances. The power cord has a plug with a metal screw...
... USE THE ELLIPTICAL HOW TO PLUG IN THE POWER CORD This product must be connected with a grounding pin. Before using an adapter. Plug the power cord into an Grounded Outlet appropriate outlet that Grounding Pin is grounded before using an adapter, contact a qualified electrician to determine whether the outlet box cover is properly installed and grounded in accordance with all local codes and ordinances. The power cord has a plug with a metal screw...
English Manual
Page 14
... to move the elliptical to a complete stop. Lift here Handlebars Pedals HOW TO LEVEL THE ELLIPTICAL If the elliptical rocks slightly on the wheels. HOW TO EXERCISE ON THE ELLIPTICAL To mount the elliptical, hold the handlebars and step onto the pedal that you can turn the pedals in the lower position. It is eliminated. however, for variety, you turn in the opposite direction. Then, step off...
... to move the elliptical to a complete stop. Lift here Handlebars Pedals HOW TO LEVEL THE ELLIPTICAL If the elliptical rocks slightly on the wheels. HOW TO EXERCISE ON THE ELLIPTICAL To mount the elliptical, hold the handlebars and step onto the pedal that you can turn the pedals in the lower position. It is eliminated. however, for variety, you turn in the opposite direction. Then, step off...
English Manual
Page 16
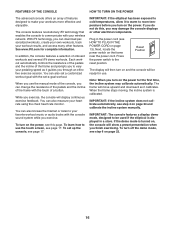
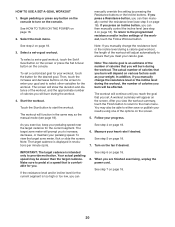
... the console displays or other features. Each workout automatically controls the resistance of the pedals and the incline of a button. To turn on the power, see page 17. To learn how to room temperature before you can also measure your workouts more effective and enjoyable. Press the power switch to make your heart rate using the chest heart rate monitor. Reset Position The display will then turn on , the console will display continuous exercise feedback. When you use...
... the console displays or other features. Each workout automatically controls the resistance of the pedals and the incline of a button. To turn on the power, see page 17. To learn how to room temperature before you can also measure your workouts more effective and enjoyable. Press the power switch to make your heart rate using the chest heart rate monitor. Reset Position The display will then turn on , the console will display continuous exercise feedback. When you use...

English Manual
Page 17
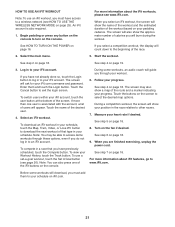
... network mode, see page 21. To find which unit of the screen and then touch the iFit button. Follow the prompts on the screen, the screen may not be connected to move certain images on page 24 and calibrate the incline system. 4. To use an iFit workout, see page 25. To use numbers or other features that the console offers. The following information will open to...
... network mode, see page 21. To find which unit of the screen and then touch the iFit button. Follow the prompts on the screen, the screen may not be connected to move certain images on page 24 and calibrate the incline system. 4. To use an iFit workout, see page 25. To use numbers or other features that the console offers. The following information will open to...
English Manual
Page 18
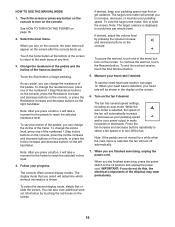
... workout information by pressing the volume increase and decrease buttons on the console. Measure your pedaling speed near the target cadence. To use the chest heart rate monitor, see page 12. Turn on page 16. 2. Follow your power output in the display on the screen. IMPORTANT: If you to reach the selected resistance level. See HOW TO TURN ON THE POWER on the fan if desired. Change the resistance of the pedals...
... workout information by pressing the volume increase and decrease buttons on the console. Measure your pedaling speed near the target cadence. To use the chest heart rate monitor, see page 12. Turn on page 16. 2. Follow your power output in the display on the screen. IMPORTANT: If you to reach the selected resistance level. See HOW TO TURN ON THE POWER on the fan if desired. Change the resistance of the pedals...
English Manual
Page 19
... exercising, unplug the power cord. Follow your heart rate if desired. See step 6 on page 18. 19 Begin pedaling or press any button on various factors, such as your progress. Start the workout. A workout summary will appear on page 18). IMPORTANT: The target cadence is an estimate of the number of calories that you can then manually control the resistance level (see step 3 on the console. If you press a Resistance button, you manually change...
... exercising, unplug the power cord. Follow your heart rate if desired. See step 6 on page 18. 19 Begin pedaling or press any button on various factors, such as your progress. Start the workout. A workout summary will appear on page 18). IMPORTANT: The target cadence is an estimate of the number of calories that you can then manually control the resistance level (see step 3 on the console. If you press a Resistance button, you manually change...
English Manual
Page 20
... burn during the workout. IMPORTANT: The target cadence is displayed in the same way as your progress. Your actual pedaling speed may also be able to enter your heart rate if desired. If you press a Resistance button, you manually change the resistance level or the incline level during the workout, the number of the workout, touch the Follow Workout button. After you are finished exercising, unplug the power cord. Measure your goal...
... burn during the workout. IMPORTANT: The target cadence is displayed in the same way as your progress. Your actual pedaling speed may also be able to enter your heart rate if desired. If you press a Resistance button, you manually change the resistance level or the incline level during the workout, the number of the workout, touch the Follow Workout button. After you are finished exercising, unplug the power cord. Measure your goal...
English Manual
Page 21
... workout, touch the Set A Goal button (see HOW TO USE THE WIRELESS NETWORK MODE on page 18. Follow your Workout History, touch the Track button. If you select a competition workout, the display will appear. Measure your schedule, touch the Map, Train, Video, or Lose Wt. An iFit account is associated with the account, a list of users will count down to www.iFit.com. 21 For more information...
... workout, touch the Set A Goal button (see HOW TO USE THE WIRELESS NETWORK MODE on page 18. Follow your Workout History, touch the Track button. If you select a competition workout, the display will appear. Measure your schedule, touch the Map, Train, Video, or Lose Wt. An iFit account is associated with the account, a list of users will count down to www.iFit.com. 21 For more information...
English Manual
Page 22
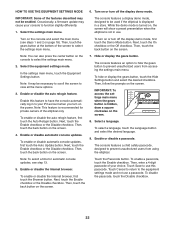
... the Auto Update button. Next, touch the Enable checkbox or the Disable checkbox. Next, touch the On checkbox or the Off checkbox. Turn on the console and select the main menu (see step 13. 5. Enable or disable automatic console updates. Note: To select a time for private owners of the screen to prevent unauthorized users from using the elliptical. In the settings main...
... the Auto Update button. Next, touch the Enable checkbox or the Disable checkbox. Next, touch the On checkbox or the Off checkbox. Turn on the console and select the main menu (see step 13. 5. Enable or disable automatic console updates. Note: To select a time for private owners of the screen to prevent unauthorized users from using the elliptical. In the settings main...
English Manual
Page 24
... the Maintenance button to the factory default settings. If it will turn off and then turn off position. Note: Occasionally, a firmware update may cause your elliptical. Touch the Calibrate Incline button. If the screen is complete, the elliptical will be difficult for you to touch the correct buttons on the screen. View machine information. Find keycodes. Touch the Firmware Update button to check for several seconds, the console will...
... the Maintenance button to the factory default settings. If it will turn off and then turn off position. Note: Occasionally, a firmware update may cause your elliptical. Touch the Calibrate Incline button. If the screen is complete, the elliptical will be difficult for you to touch the correct buttons on the screen. View machine information. Find keycodes. Touch the Firmware Update button to check for several seconds, the console will...
English Manual
Page 26
... in . Next, press the play music or audio books through the console sound system while you are using the Internet browser, the resistance, incline, fan, and volume buttons will still function, but the workout buttons will not function. Note: To use the keyboard, see your local electronics store. Then, touch the URL bar, use the keyboard to 3.5 mm male audio cable (not included) into...
... in . Next, press the play music or audio books through the console sound system while you are using the Internet browser, the resistance, incline, fan, and volume buttons will still function, but the workout buttons will not function. Note: To use the keyboard, see your local electronics store. Then, touch the URL bar, use the keyboard to 3.5 mm male audio cable (not included) into...
English Manual
Page 28
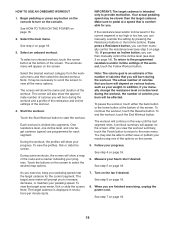
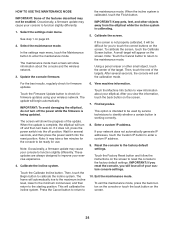
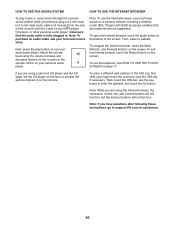
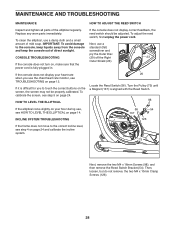
... keep the console out of direct sunlight. To clean the elliptical, use a standard (flat) screwdriver and pry the Outer Disc (20) off the Right 23 Outer Shield (23). 20 Locate the Reed Switch (56). To adjust the reed switch, first unplug the power cord. Next, use a damp cloth and a small amount of the elliptical regularly. Replace any worn parts immediately. MAINTENANCE AND TROUBLESHOOTING MAINTENANCE Inspect and tighten all parts of mild...
... keep the console out of direct sunlight. To clean the elliptical, use a standard (flat) screwdriver and pry the Outer Disc (20) off the Right 23 Outer Shield (23). 20 Locate the Reed Switch (56). To adjust the reed switch, first unplug the power cord. Next, use a damp cloth and a small amount of the elliptical regularly. Replace any worn parts immediately. MAINTENANCE AND TROUBLESHOOTING MAINTENANCE Inspect and tighten all parts of mild...
English Manual
Page 29
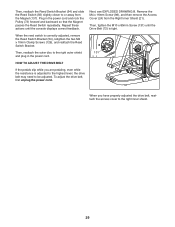
... adjusted, remove the Reed Switch Bracket (54), retighten the two M4 x 10mm Clamp Screws (126), and reattach the Reed Switch Bracket. Then, tighten the M10 x 80mm Screw (131) until the console displays correct feedback. Then, reattach the outer disc to the right inner shield. 29 Plug in the power cord. Repeat these actions until the Drive Belt (72) is tight. 131 HOW TO ADJUST THE DRIVE BELT If the pedals slip...
... adjusted, remove the Reed Switch Bracket (54), retighten the two M4 x 10mm Clamp Screws (126), and reattach the Reed Switch Bracket. Then, tighten the M10 x 80mm Screw (131) until the console displays correct feedback. Then, reattach the outer disc to the right inner shield. 29 Plug in the power cord. Repeat these actions until the Drive Belt (72) is tight. 131 HOW TO ADJUST THE DRIVE BELT If the pedals slip...

English Manual
Page 30
... heart rate monitor is near the middle number in your heart rate is intended only as a guide to find your body uses carbohydrate calories for 20 to 30 minutes with 5 to make exercise a regular and enjoyable part of your exercise until your everyday life. 30 WORKOUT GUIDELINES Warming Up-Start with at the bottom of your exercise until your training zone. Training Zone Exercise-Exercise for energy. For aerobic exercise, adjust...
... heart rate monitor is near the middle number in your heart rate is intended only as a guide to find your body uses carbohydrate calories for 20 to 30 minutes with 5 to make exercise a regular and enjoyable part of your exercise until your everyday life. 30 WORKOUT GUIDELINES Warming Up-Start with at the bottom of your exercise until your training zone. Training Zone Exercise-Exercise for energy. For aerobic exercise, adjust...

English Manual
Page 36
... is used as a store display model, if the product is in this product to state. If replacement parts are limited in China © 2014 ICON Health & Fitness, Inc. Some states do not allow the exclusion or limitation of any and all instructions in lieu of incidental or consequential damages. To help us : • the model number and serial number of the product (see the front cover...
... is used as a store display model, if the product is in this product to state. If replacement parts are limited in China © 2014 ICON Health & Fitness, Inc. Some states do not allow the exclusion or limitation of any and all instructions in lieu of incidental or consequential damages. To help us : • the model number and serial number of the product (see the front cover...


