User Guide
Page 2
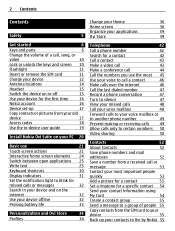
2 Contents Contents Safety 5 Get started 6 Keys and parts 6 Change the volume of a call, song, or video 10 Lock or unlock the keys and screen 10 Flashlight 11 Insert or remove the SIM card 11 Charge your device 12 Antenna locations 14 Headset 15 Switch the device on or off 15 Use your device for the first time 16 Nokia account 16 Device set-up 17 Copy contacts or pictures from your old device 17 Access codes 18 Use the in-device user guide 19 Install Nokia Ovi Suite on your...
2 Contents Contents Safety 5 Get started 6 Keys and parts 6 Change the volume of a call, song, or video 10 Lock or unlock the keys and screen 10 Flashlight 11 Insert or remove the SIM card 11 Charge your device 12 Antenna locations 14 Headset 15 Switch the device on or off 15 Use your device for the first time 16 Nokia account 16 Device set-up 17 Copy contacts or pictures from your old device 17 Access codes 18 Use the in-device user guide 19 Install Nokia Ovi Suite on your...

User Guide
Page 3
... a text message 58 Change language 59 Mail 59 About Mail 59 Get a free mail account from Ovi by Nokia 60 Add a mailbox 60 Read mail 60 Send mail 61 Respond to a meeting request 61 Open mail from the home screen 62 Internet 62 About the web browser 62 Browse the web 62 Add a bookmark 63 Subscribe to a web feed 63 Discover nearby events 64 Social networks 64 About Social 64 See your friends' status updates in...
... a text message 58 Change language 59 Mail 59 About Mail 59 Get a free mail account from Ovi by Nokia 60 Add a mailbox 60 Read mail 60 Send mail 61 Respond to a meeting request 61 Open mail from the home screen 62 Internet 62 About the web browser 62 Browse the web 62 Add a bookmark 63 Subscribe to a web feed 63 Discover nearby events 64 Social networks 64 About Social 64 See your friends' status updates in...
User Guide
Page 10
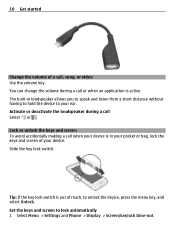
... Unlock. Set the keys and screen to your device. Lock or unlock the keys and screen To avoid accidentally making a call or when an application is active. Tip: If the key lock switch is in loudspeaker allows you to speak and listen from a short distance without having to hold the device to lock automatically 1 Select Menu > Settings and Phone > Display > Screen/keylock time-out. Slide the key lock switch. You can change the volume during a call , song, or video Use the volume key...
... Unlock. Set the keys and screen to your device. Lock or unlock the keys and screen To avoid accidentally making a call or when an application is active. Tip: If the key lock switch is in loudspeaker allows you to speak and listen from a short distance without having to hold the device to lock automatically 1 Select Menu > Settings and Phone > Display > Screen/keylock time-out. Slide the key lock switch. You can change the volume during a call , song, or video Use the volume key...
User Guide
Page 14
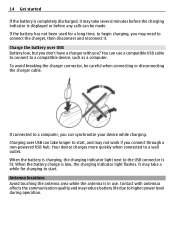
... flashes. Your device charges more quickly when connected to a compatible device, such as a computer. Contact with you may take longer to start . 14 Get started If the battery is completely discharged, it . Charging over USB Battery low, but you don't have a charger with antennas affects the communication quality and may take several minutes before the charging indicator is displayed or before any calls can use . It may need...
... flashes. Your device charges more quickly when connected to a compatible device, such as a computer. Contact with you may take longer to start . 14 Get started If the battery is completely discharged, it . Charging over USB Battery low, but you don't have a charger with antennas affects the communication quality and may take several minutes before the charging indicator is displayed or before any calls can use . It may need...
User Guide
Page 16
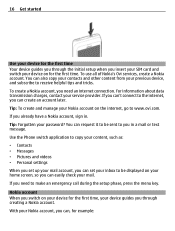
... mail account, you need an internet connection. To use all of Nokia's Ovi services, create a Nokia account. Use the Phone switch application to make an emergency call during the setup phase, press the menu key. If you can't connect to the internet, you can set your device guides you set up your previous device, and subscribe to you already have a Nokia account, sign in a mail or text message. Nokia account When you switch on your device for the first time, your inbox to be sent to receive helpful...
... mail account, you need an internet connection. To use all of Nokia's Ovi services, create a Nokia account. Use the Phone switch application to make an emergency call during the setup phase, press the menu key. If you can't connect to the internet, you can set your device guides you set up your previous device, and subscribe to you already have a Nokia account, sign in a mail or text message. Nokia account When you switch on your device for the first time, your inbox to be sent to receive helpful...
User Guide
Page 17
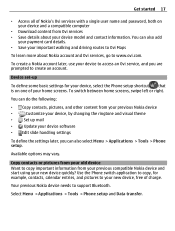
... payment card details. • Save your important walking and driving routes to Ovi Maps To learn more about your device model and contact information. To switch between home screens, swipe left or right. Device set-up mail • Update your device software • Edit slide handling settings To define the settings later, you are prompted to support Bluetooth. Select Menu > Applications > Tools > Phone setup and Data transfer. Copy contacts or pictures from your previous compatible Nokia device and start using your new device quickly...
... payment card details. • Save your important walking and driving routes to Ovi Maps To learn more about your device model and contact information. To switch between home screens, swipe left or right. Device set-up mail • Update your device software • Edit slide handling settings To define the settings later, you are prompted to support Bluetooth. Select Menu > Applications > Tools > Phone setup and Data transfer. Copy contacts or pictures from your previous compatible Nokia device and start using your new device quickly...

User Guide
Page 41
... details to your Nokia account, select Save this card to download larger files, such as games, applications, or videos. Tip: Use a Wi-Fi connection to my Nokia account. You can pay with a credit or debit card, or, if available, on an item, contact the publisher of your purchase, select or enter a mail address. 5 Select Confirm. 6 When the download is free, select Download. 3 You can add more content. View your download queue. One...
... details to your Nokia account, select Save this card to download larger files, such as games, applications, or videos. Tip: Use a Wi-Fi connection to my Nokia account. You can pay with a credit or debit card, or, if available, on an item, contact the publisher of your purchase, select or enter a mail address. 5 Select Confirm. 6 When the download is free, select Download. 3 You can add more content. View your download queue. One...
User Guide
Page 46
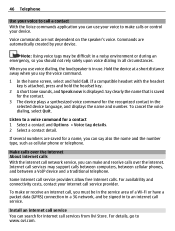
... or have a packet data (GPRS) connection in a 3G network, and be difficult in a noisy environment or during an emergency, so you can use . Note: Using voice tags may support calls between computers, between cellular phones, and between a VoIP device and a traditional telephone. If several numbers are saved for the recognized contact in to an internet call service. Voice commands are automatically created by your internet call service providers allow free internet calls. If a compatible...
... or have a packet data (GPRS) connection in a 3G network, and be difficult in a noisy environment or during an emergency, so you can use . Note: Using voice tags may support calls between computers, between cellular phones, and between a VoIP device and a traditional telephone. If several numbers are saved for the recognized contact in to an internet call service. Voice commands are automatically created by your internet call service providers allow free internet calls. If a compatible...
User Guide
Page 50
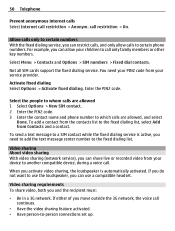
... calls to certain phone numbers. 50 Telephone Prevent anonymous internet calls Select Internet call restriction > On. Select Menu > Contacts and Options > SIM numbers > Fixed dial contacts. Activate fixed dialing Select Options > Activate fixed dialing. When you activate video sharing, the loudspeaker is active, you need your PIN2 code from your device to call only family members or other key numbers. To send a text message to a SIM contact while the fixed dialing service is automatically activated. Video sharing About video sharing With video sharing (network service), you can use...
... calls to certain phone numbers. 50 Telephone Prevent anonymous internet calls Select Internet call restriction > On. Select Menu > Contacts and Options > SIM numbers > Fixed dial contacts. Activate fixed dialing Select Options > Activate fixed dialing. When you activate video sharing, the loudspeaker is active, you need your PIN2 code from your device to call only family members or other key numbers. To send a text message to a SIM contact while the fixed dialing service is automatically activated. Video sharing About video sharing With video sharing (network service), you can use...
User Guide
Page 56
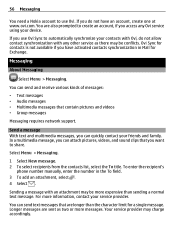
... messages: • Text messages • Audio messages • Multimedia messages that you access any other service as two or more information, contact your service provider. For more messages. If you use Ovi Sync to create an account, if you want to use Ovi. You can quickly contact your device. You can attach pictures, videos, and sound clips that contain pictures and videos • Group messages Messaging requires network support. Select Menu > Messaging. 1 Select New message. 2 To select recipients from the contacts list...
... messages: • Text messages • Audio messages • Multimedia messages that you access any other service as two or more information, contact your service provider. For more messages. If you use Ovi Sync to create an account, if you want to use Ovi. You can quickly contact your device. You can attach pictures, videos, and sound clips that contain pictures and videos • Group messages Messaging requires network support. Select Menu > Messaging. 1 Select New message. 2 To select recipients from the contacts list...

User Guide
Page 70
... mail message, or using Bluetooth 1 Take a picture or record a video. 2 Select > Via Bluetooth. 3 Select the device to connect to, or search for sending, before recording. To enter the recipient's address manually, select the To field, and enter the address. 4 Select . To enter the recipient's name or phone number manually, select the To field, and enter the name or phone number. 4 Select . The video is displayed. 3 To pause recording, select Pause. Send in or out, use the volume keys. 4 To stop recording, press the camera key. Record a video...
... mail message, or using Bluetooth 1 Take a picture or record a video. 2 Select > Via Bluetooth. 3 Select the device to connect to, or search for sending, before recording. To enter the recipient's address manually, select the To field, and enter the address. 4 Select . To enter the recipient's name or phone number manually, select the To field, and enter the name or phone number. 4 Select . The video is displayed. 3 To pause recording, select Pause. Send in or out, use the volume keys. 4 To stop recording, press the camera key. Record a video...

User Guide
Page 71
... video to a social networking service, you have recorded, or browse through the pictures you are guided through the service activation procedure. After taking a picture or recording a video, you add is set as the default sharing service. Not all social networking services support all file formats or videos recorded in high quality. The first time you try to upload a picture or video to a social networking service. Share a picture or video directly from the camera After taking a picture or recording a video, select , and follow the displayed instructions...
... video to a social networking service, you have recorded, or browse through the pictures you are guided through the service activation procedure. After taking a picture or recording a video, you add is set as the default sharing service. Not all social networking services support all file formats or videos recorded in high quality. The first time you try to upload a picture or video to a social networking service. Share a picture or video directly from the camera After taking a picture or recording a video, select , and follow the displayed instructions...

User Guide
Page 74
... device to a computer. 2 Open Nokia Ovi Suite on your computer, and follow the displayed instructions on your computer, and follow the displayed instructions. To select several items, select , and mark the items. 2 Select , and follow the displayed instructions. Select Menu > Applications > Photo editor and a picture. 1 To insert effects, select the desired option from Photos. To later view your pictures Want to make sure that you use a file manager to manually copy pictures...
... device to a computer. 2 Open Nokia Ovi Suite on your computer, and follow the displayed instructions on your computer, and follow the displayed instructions. To select several items, select , and mark the items. 2 Select , and follow the displayed instructions. Select Menu > Applications > Photo editor and a picture. 1 To insert effects, select the desired option from Photos. To later view your pictures Want to make sure that you use a file manager to manually copy pictures...

User Guide
Page 76
... need to use a Nokia Video Connectivity Cable (available separately), and may need to Bluetooth, and follow the displayed instructions. To edit the TV-out settings, select Menu > Settings and Phone > Accessories > TV-Out. Change the selected printer to modify the TV-out settings and aspect ratio. Tip: When the USB cable is connected, you have taken You can print your pictures directly using a compatible printer. 1 Use a compatible USB data cable to connect your device to...
... need to use a Nokia Video Connectivity Cable (available separately), and may need to Bluetooth, and follow the displayed instructions. To edit the TV-out settings, select Menu > Settings and Phone > Accessories > TV-Out. Change the selected printer to modify the TV-out settings and aspect ratio. Tip: When the USB cable is connected, you have taken You can print your pictures directly using a compatible printer. 1 Use a compatible USB data cable to connect your device to...
User Guide
Page 110
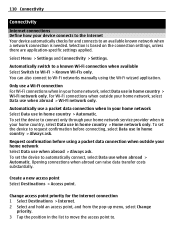
... Switch to an available known network when a network connection is based on the connection settings, unless there are application-specific settings applied. To set the device to automatically connect, select Data use in home country > Home network only. To set the device to connect only through your home network service provider when in your home country, select Data use when abroad > Automatic. Opening connections when abroad can also connect to Wi-Fi networks manually using a packet data connection when outside your home network, select Data use in home...
... Switch to an available known network when a network connection is based on the connection settings, unless there are application-specific settings applied. To set the device to automatically connect, select Data use in home country > Home network only. To set the device to connect only through your home network service provider when in your home country, select Data use when abroad > Automatic. Opening connections when abroad can also connect to Wi-Fi networks manually using a packet data connection when outside your home network, select Data use in home...
User Guide
Page 114
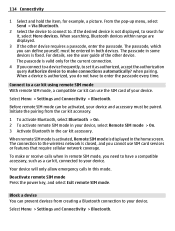
... wireless network is closed, and you connect to a device frequently, to set it , select More devices. For details, see the user guide of your device and accessory must be activated, your device. Select Menu > Settings and Connectivity > Bluetooth. Block a device You can define yourself, must be paired. Your device will only allow emergency calls in the home screen. Select Menu > Settings and Connectivity > Bluetooth. The passcode is valid only for the current connection. 4 If you cannot use the SIM card...
... wireless network is closed, and you connect to a device frequently, to set it , select More devices. For details, see the user guide of your device and accessory must be activated, your device. Select Menu > Settings and Connectivity > Bluetooth. Block a device You can define yourself, must be paired. Your device will only allow emergency calls in the home screen. Select Menu > Settings and Connectivity > Bluetooth. The passcode is valid only for the current connection. 4 If you cannot use the SIM card...

User Guide
Page 116
... a wireless modem. Your device is activated automatically when you can save your pictures on a USB memory stick without needing to connect to a compatible computer that does not have Ovi Suite installed. PC to the internet automatically. 116 Connectivity Change the USB mode For best results when copying content or synchronizing your device with Ovi Suite and use other Ovi Suite features. Select Menu > Settings and Connectivity > USB and from the following: Nokia Ovi...
... a wireless modem. Your device is activated automatically when you can save your pictures on a USB memory stick without needing to connect to a compatible computer that does not have Ovi Suite installed. PC to the internet automatically. 116 Connectivity Change the USB mode For best results when copying content or synchronizing your device with Ovi Suite and use other Ovi Suite features. Select Menu > Settings and Connectivity > USB and from the following: Nokia Ovi...
User Guide
Page 118
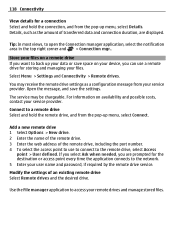
... Connectivity > Remote drives. Open the message, and save space on your device, you are displayed. Connect to the network. 5 Enter your files. Add a new remote drive 1 Select Options > New drive. 2 Enter the name of the remote drive. 3 Enter the web address of an existing remote drive Select Remote drives and the desired drive. Modify the settings of the remote drive, including the port number. 4 To select the access point to use...
... Connectivity > Remote drives. Open the message, and save space on your device, you are displayed. Connect to the network. 5 Enter your files. Add a new remote drive 1 Select Options > New drive. 2 Enter the name of the remote drive. 3 Enter the web address of an existing remote drive Select Remote drives and the desired drive. Modify the settings of the remote drive, including the port number. 4 To select the access point to use...
User Guide
Page 122
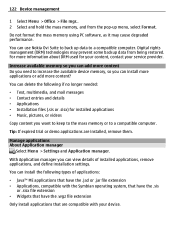
... install applications that are installed, remove them. With Application manager you can install the following if no longer needed: • Text, multimedia, and mail messages • Contact entries and details • Applications • Installation files (.sis or .sisx) for installed applications • Music, pictures, or videos Copy content you can install more applications or add more information about DRM used for your content, contact your device. Do not format the mass memory using PC software...
... install applications that are installed, remove them. With Application manager you can install the following if no longer needed: • Text, multimedia, and mail messages • Contact entries and details • Applications • Installation files (.sis or .sisx) for installed applications • Music, pictures, or videos Copy content you can install more applications or add more information about DRM used for your content, contact your device. Do not format the mass memory using PC software...
User Guide
Page 127
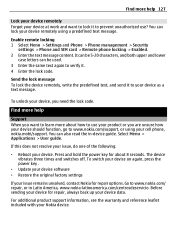
... guide. Enable remote locking 1 Select Menu > Settings and Phone > Phone management > Security settings > Phone and SIM card > Remote phone locking > Enabled. 2 Enter the text message content. You can also read the in Latin America, www.nokia-latinoamerica.com/centrosdeservicio. The device vibrates three times and switches off. To switch your device on again, press the power key . • Update your device software • Restore the original factory settings If your issue remains unsolved, contact Nokia for about how to use ? Press and hold the power key for repair options. Send...
... guide. Enable remote locking 1 Select Menu > Settings and Phone > Phone management > Security settings > Phone and SIM card > Remote phone locking > Enabled. 2 Enter the text message content. You can also read the in Latin America, www.nokia-latinoamerica.com/centrosdeservicio. The device vibrates three times and switches off. To switch your device on again, press the power key . • Update your device software • Restore the original factory settings If your issue remains unsolved, contact Nokia for about how to use ? Press and hold the power key for repair options. Send...


