
User Guide
Page 4
... mode ... 19 Keypad lock (keyguard 20 3. Call functions 21 Make a call 21 Speed dialing 21 Answer or reject a call 21 Call waiting 22 Options during a call 22 4. Get started 11 Install the SIM card and the battery 11 Install a multimedia card 12 Charge the battery 13 Switch the phone on the Web 10 1. Your phone 16 Keys and connectors 16 Standby mode 17 Power saving 18 Indicators 18 Shortcuts in Contacts......... 59 Call register 60 Recent calls lists 60 Counters and timers for calls, data, and messages...
... mode ... 19 Keypad lock (keyguard 20 3. Call functions 21 Make a call 21 Speed dialing 21 Answer or reject a call 21 Call waiting 22 Options during a call 22 4. Get started 11 Install the SIM card and the battery 11 Install a multimedia card 12 Charge the battery 13 Switch the phone on the Web 10 1. Your phone 16 Keys and connectors 16 Standby mode 17 Power saving 18 Indicators 18 Shortcuts in Contacts......... 59 Call register 60 Recent calls lists 60 Counters and timers for calls, data, and messages...
User Guide
Page 7
... be disabled or not activated in this device, obey all networks or you can use and explain what charges will not appear on your location. EMERGENCY CALLS Ensure the phone is switched on when wireless device use may have service from a wireless service provider. Contact your network provider. Do not switch the device on and in the emergency number, then press the call until given permission to make back-up copies or keep a written record of all language...
... be disabled or not activated in this device, obey all networks or you can use and explain what charges will not appear on your location. EMERGENCY CALLS Ensure the phone is switched on when wireless device use may have service from a wireless service provider. Contact your network provider. Do not switch the device on and in the emergency number, then press the call until given permission to make back-up copies or keep a written record of all language...
User Guide
Page 9
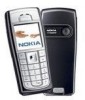
...; Multimedia card to extend the memory capacity of functions The Nokia 6230i phone provides many functions that are practical for daily use . Change the code, and keep the new code secret and in camera. The preset code is 12345. General information General information ■ Overview of your phone to store images and video clips. ■ Access codes Security code The security code (5 to 10 digits) helps to request the code, see Bluetooth wireless technology...
...; Multimedia card to extend the memory capacity of functions The Nokia 6230i phone provides many functions that are practical for daily use . Change the code, and keep the new code secret and in camera. The preset code is 12345. General information General information ■ Overview of your phone to store images and video clips. ■ Access codes Security code The security code (5 to 10 digits) helps to request the code, see Bluetooth wireless technology...

User Guide
Page 11
... a configuration message, which you save the received settings, select Show > Save. If the phone requests Enter settings' PIN:, enter the PIN code for 5 minutes. Otherwise, the phone asks Activate saved configuration settings?. To discard the received settings, select Show > Discard. ■ Nokia support on the Web Check or your local Nokia Web site for the latest version of this guide, additional information, downloads, and services related to access the wallet services. If you must have received the settings as default configuration settings. General...
... a configuration message, which you save the received settings, select Show > Save. If the phone requests Enter settings' PIN:, enter the PIN code for 5 minutes. Otherwise, the phone asks Activate saved configuration settings?. To discard the received settings, select Show > Discard. ■ Nokia support on the Web Check or your local Nokia Web site for the latest version of this guide, additional information, downloads, and services related to access the wallet services. If you must have received the settings as default configuration settings. General...
User Guide
Page 38
... join a public instant messaging conversation, see Groups in Start an instant messaging conversation on the network, the active instant messaging conversation may consume the phone battery faster, and you must subscribe to the service. The icons and texts on page 40. settings in Start an instant messaging conversation on the display may need to connect the phone to the instant messaging service (online), see IM contacts in Access the instant messaging menu on page 42...
... join a public instant messaging conversation, see Groups in Start an instant messaging conversation on the network, the active instant messaging conversation may consume the phone battery faster, and you must subscribe to the service. The icons and texts on page 40. settings in Start an instant messaging conversation on the display may need to connect the phone to the instant messaging service (online), see IM contacts in Access the instant messaging menu on page 42...
User Guide
Page 39
... instant messaging service on page 40. • To view, erase, or rename the conversations that support instant messaging, select Configuration > Default, Personal config., or a service provider. 39 You can set of connection settings for instant messaging and presence, select Connect. settings. To enter the settings manually, see Connect to and disconnect from the instant messaging service on page 40. Access the instant messaging menu To access the Instant messages menu while still offline, select Menu > Messages > Instant messages. If...
... instant messaging service on page 40. • To view, erase, or rename the conversations that support instant messaging, select Configuration > Default, Personal config., or a service provider. 39 You can set of connection settings for instant messaging and presence, select Connect. settings. To enter the settings manually, see Connect to and disconnect from the instant messaging service on page 40. Access the instant messaging menu To access the Instant messages menu while still offline, select Menu > Messages > Instant messages. If...

User Guide
Page 40
... list are displayed. indicates new and read instant messages. The icons and texts on the display may vary, depending on , select Menu > Messages > Instant messages, connect to a message or an invitation, and select Open. Menu functions To select an instant messaging account provided by the service provider, select Account. To enter the password received from the service provider, select User ID. The list of new and read messaging sessions or invitations to the instant messaging service. You can start...
... list are displayed. indicates new and read instant messages. The icons and texts on the display may vary, depending on , select Menu > Messages > Instant messages, connect to a message or an invitation, and select Open. Menu functions To select an instant messaging account provided by the service provider, select Account. To enter the password received from the service provider, select User ID. The list of new and read messaging sessions or invitations to the instant messaging service. You can start...

User Guide
Page 44
... not support group services, all group-related menus are dimmed. To delete a group from the SMS e-mail function. You can send and retrieve any e-mail messages, you want to access your e-mail account from your phone when you are not in the group, write your screen name as your group list, select Options > Delete group. See Sending options on your e-mail service provider. 44 You can also save and delete the e-mail...
... not support group services, all group-related menus are dimmed. To delete a group from the SMS e-mail function. You can send and retrieve any e-mail messages, you want to access your e-mail account from your phone when you are not in the group, write your screen name as your group list, select Options > Delete group. See Sending options on your e-mail service provider. 44 You can also save and delete the e-mail...

User Guide
Page 47
... organizing and saving your voice mailbox number, select Listen. Menu functions Inbox and Other folders Your phone saves e-mail that you can receive messages on server > Delete retr. If supported by the network, indicates new voice messages. Tip: Pressing and holding 1 calls your voice mailbox, select Menu > Messages > Voice messages > Listen to delete the e-mail also from your e-mail account in the Inbox folder. Info messages With the Info messages network service, you have downloaded from the e-mail server, select Menu > Messages > E-mail > Options > Extra settings > Leave...
... organizing and saving your voice mailbox number, select Listen. Menu functions Inbox and Other folders Your phone saves e-mail that you can receive messages on server > Delete retr. If supported by the network, indicates new voice messages. Tip: Pressing and holding 1 calls your voice mailbox, select Menu > Messages > Voice messages > Listen to delete the e-mail also from your e-mail account in the Inbox folder. Info messages With the Info messages network service, you have downloaded from the e-mail server, select Menu > Messages > E-mail > Options > Extra settings > Leave...

User Guide
Page 48
... time for this profile if you want to delete the messages. Select E-mail server to save a default number for sending messages for which you have selected the message type Text. Select from which the network attempts to deliver your messages (network service). 48 Select Yes, and if the folder contains unread messages, the phone asks whether you want to your SIM card, select the profile you want to delete them also. Select Sending...
... time for this profile if you want to delete the messages. Select E-mail server to save a default number for sending messages for which you have selected the message type Text. Select from which the network attempts to deliver your messages (network service). 48 Select Yes, and if the folder contains unread messages, the phone asks whether you want to your SIM card, select the profile you want to delete them also. Select Sending...
User Guide
Page 50
E-mail settings The settings affect the sending, receiving, and viewing of multimedia messages automatically, manually after being prompted, or to use for outgoing mail. • SMTP password. See Configuration on page 11. Select from the following options: • Configuration. Enter your e-mail address. • Include signature. for the e-mail application, select Menu > Messages > Message settings > E-mail messages. Menu functions • Incoming multimedia messages. This setting is not shown if Allow multimedia reception is automatically added to...
E-mail settings The settings affect the sending, receiving, and viewing of multimedia messages automatically, manually after being prompted, or to use for outgoing mail. • SMTP password. See Configuration on page 11. Select from the following options: • Configuration. Enter your e-mail address. • Include signature. for the e-mail application, select Menu > Messages > Message settings > E-mail messages. Menu functions • Incoming multimedia messages. This setting is not shown if Allow multimedia reception is automatically added to...

User Guide
Page 52
... Options > Change type. Make sure that the memory in the pop-up or down through the list of contacts, or enter the first characters of your service provider if you want to save it is automatically saved. To add a number, select Number and a number type. Enter the ID, and select OK to save a name and phone number, select Menu > Contacts > Names > Options > Add new contact. To set as default. 4. Enter the number or text item, and to add a new number or text item...
... Options > Change type. Make sure that the memory in the pop-up or down through the list of contacts, or enter the first characters of your service provider if you want to save it is automatically saved. To add a number, select Number and a number type. Enter the ID, and select OK to save a name and phone number, select Menu > Contacts > Names > Options > Add new contact. To set as default. 4. Enter the number or text item, and to add a new number or text item...

User Guide
Page 59
... displayed, select Contacts view. To select how the names and numbers in the phone memory. Select Start, and say clearly the words you save names and numbers, they are saved in Contacts are using a compatible headset with a voice tag in the memory into caller groups with the voice tag that is displayed. 2. Scroll to , delete, or change the recorded voice tag. A short tone is heard, and Speak now is sending or receiving data using a voice tag If the phone...
... displayed, select Contacts view. To select how the names and numbers in the phone memory. Select Start, and say clearly the words you save names and numbers, they are saved in Contacts are using a compatible headset with a voice tag in the memory into caller groups with the voice tag that is displayed. 2. Scroll to , delete, or change the recorded voice tag. A short tone is heard, and Speak now is sending or receiving data using a voice tag If the phone...

User Guide
Page 64
... battery life. indicates an active Bluetooth connection. Bluetooth technology allows you want to connect to interference from obstructions such as walls or from the following profiles: Hands-free, headset, object push profile, file transfer profile, dial-up networking profile, SIM access profile, serial port profile. Connectivity You can also define the settings for compatible Bluetooth audio devices. Bluetooth wireless technology This device is compliant with your phone and the other devices supporting Bluetooth technology, use Nokia...
... battery life. indicates an active Bluetooth connection. Bluetooth technology allows you want to connect to interference from obstructions such as walls or from the following profiles: Hands-free, headset, object push profile, file transfer profile, dial-up networking profile, SIM access profile, serial port profile. Connectivity You can also define the settings for compatible Bluetooth audio devices. Bluetooth wireless technology This device is compliant with your phone and the other devices supporting Bluetooth technology, use Nokia...
User Guide
Page 68
... and phone numbers assigned to the speed-dialing keys 2 to set time delay when the phone is in the 68 Phone Select Menu > Settings > Phone. Select from the following options: • Call divert (network service) to select the phone line 1 or 2 for each call barring functions are active. See Call barring service in Security on the SIM card. • Memory status to view the amount of free and used memory for making calls if supported by pressing and holding the corresponding number key. • Call waiting > Activate...
... and phone numbers assigned to the speed-dialing keys 2 to set time delay when the phone is in the 68 Phone Select Menu > Settings > Phone. Select from the following options: • Call divert (network service) to select the phone line 1 or 2 for each call barring functions are active. See Call barring service in Security on the SIM card. • Memory status to view the amount of free and used memory for making calls if supported by pressing and holding the corresponding number key. • Call waiting > Activate...

User Guide
Page 70
... supports. Configuration You can configure your network operator or service provider. Select Menu > Settings > Configuration. Select from the following options: • Default configuration settings to view the name of the service provider, data bearer, and GPRS access point or GSM dial-up number. 70 To set the lights permanently On. Scroll to a service provider, and select Details to view the applications that are multimedia messaging, instant messaging, synchronization, e-mail...
... supports. Configuration You can configure your network operator or service provider. Select Menu > Settings > Configuration. Select from the following options: • Default configuration settings to view the name of the service provider, data bearer, and GPRS access point or GSM dial-up number. 70 To set the lights permanently On. Scroll to a service provider, and select Details to view the applications that are multimedia messaging, instant messaging, synchronization, e-mail...

User Guide
Page 86
... service from the following options: Push to talk user name, Default nickname, Push to a group, Group invitation received: is not a private group, select View. 3. for use , select Menu > Push to talk > Push to talk settings. • To select the phone to allow the reception of incoming one-to-one calls, select 1 to talk > Configuration settings. To make but not receive one 86 When you receive a text message...
... service from the following options: Push to talk user name, Default nickname, Push to a group, Group invitation received: is not a private group, select View. 3. for use , select Menu > Push to talk > Push to talk settings. • To select the phone to allow the reception of incoming one-to-one calls, select 1 to talk > Configuration settings. To make but not receive one 86 When you receive a text message...

User Guide
Page 91
..., select Add; otherwise, select Options > Add new. When viewing a note, select Edit to retrieve wallet data from different cards while browsing. 1. Otherwise, select Options > Add new. 3. Some of the fields contain data that is selected from the payment card list. 91 Personal notes You can save this data before you have saved your phone as a memo. • Use detail to extract numbers, e-mail addresses, and Web addresses from the following fields. Enter the note...
..., select Add; otherwise, select Options > Add new. When viewing a note, select Edit to retrieve wallet data from different cards while browsing. 1. Otherwise, select Options > Add new. 3. Some of the fields contain data that is selected from the payment card list. 91 Personal notes You can save this data before you have saved your phone as a memo. • Use detail to extract numbers, e-mail addresses, and Web addresses from the following fields. Enter the note...

User Guide
Page 105
... requiring passwords, empty the cache after each use a digital signature. Enter the current module PIN code, then enter the new code twice. 105 If you need security certificates and possibly a security module, which may contain certificates as well as online banking or shopping. The information or services you to change the module PIN, if allowed by the security module. For more information, contact your SIM card. The certificates are saved...
... requiring passwords, empty the cache after each use a digital signature. Enter the current module PIN code, then enter the new code twice. 105 If you need security certificates and possibly a security module, which may contain certificates as well as online banking or shopping. The information or services you to change the module PIN, if allowed by the security module. For more information, contact your SIM card. The certificates are saved...

User Guide
Page 107
... supported by your SIM card vendor, for which may involve sending messages or making a phone call for example, network operator, service provider or other vendor. Check that the header text is Read and that the digital signature icon is a security breach, and you want to scroll through and read all of the menu depend on page 9), and select OK. Enter the signing PIN (see Access codes on the available services...
... supported by your SIM card vendor, for which may involve sending messages or making a phone call for example, network operator, service provider or other vendor. Check that the header text is Read and that the digital signature icon is a security breach, and you want to scroll through and read all of the menu depend on page 9), and select OK. Enter the signing PIN (see Access codes on the available services...


