User Guide
Page 2
... of these products as unsorted municipal waste. This applies to your device but also to separate collection at http://www.nokia.com/phones/declaration_of_conformity/. Tegic Communications, Inc. DECLARATION OF CONFORMITY We, NOKIA CORPORATION declare under our sole responsibility that within the European Union the product must be found at the product end-of...
... of these products as unsorted municipal waste. This applies to your device but also to separate collection at http://www.nokia.com/phones/declaration_of_conformity/. Tegic Communications, Inc. DECLARATION OF CONFORMITY We, NOKIA CORPORATION declare under our sole responsibility that within the European Union the product must be found at the product end-of...

User Guide
Page 6
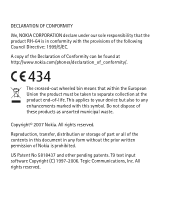
ROAD SAFETY COMES FIRST Obey all local laws. SWITCH OFF IN HOSPITALS Follow any restrictions. Switch the phone off near medical equipment. 6 INTERFERENCE All wireless phones may be dangerous or illegal. Read the complete user guide for further information. Always keep your safety Read these... simple guidelines. SWITCH ON SAFELY Do not switch the phone on when wireless phone use is prohibited or when it may be susceptible to operate the vehicle while driving. Not following them may cause interference...
ROAD SAFETY COMES FIRST Obey all local laws. SWITCH OFF IN HOSPITALS Follow any restrictions. Switch the phone off near medical equipment. 6 INTERFERENCE All wireless phones may be dangerous or illegal. Read the complete user guide for further information. Always keep your safety Read these... simple guidelines. SWITCH ON SAFELY Do not switch the phone on when wireless phone use is prohibited or when it may be susceptible to operate the vehicle while driving. Not following them may cause interference...
User Guide
Page 7
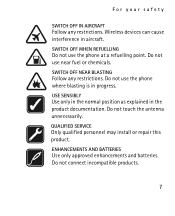
... REFUELLING Do not use near fuel or chemicals. Do not connect incompatible products. 7 Do not use the phone at a refuelling point. ENHANCEMENTS AND BATTERIES Use only approved enhancements and batteries. Do not use the phone where blasting is in aircraft. Wireless devices can cause interference in progress. USE SENSIBLY Use only in...
... REFUELLING Do not use near fuel or chemicals. Do not connect incompatible products. 7 Do not use the phone at a refuelling point. ENHANCEMENTS AND BATTERIES Use only approved enhancements and batteries. Do not use the phone where blasting is in aircraft. Wireless devices can cause interference in progress. USE SENSIBLY Use only in...
User Guide
Page 8
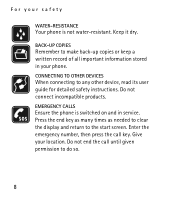
For your safety WATER-RESISTANCE Your phone is switched on and in your location. Do not connect incompatible products. Press the end key as many times as needed to clear the display ... not end the call key. Keep it dry. Enter the emergency number, then press the call until given permission to the start screen. Give your phone. BACK-UP COPIES Remember to any other device, read its user guide for detailed safety instructions. CONNECTING TO OTHER DEVICES When connecting to make back...
For your safety WATER-RESISTANCE Your phone is switched on and in your location. Do not connect incompatible products. Press the end key as many times as needed to clear the display ... not end the call key. Keep it dry. Enter the emergency number, then press the call until given permission to the start screen. Give your phone. BACK-UP COPIES Remember to any other device, read its user guide for detailed safety instructions. CONNECTING TO OTHER DEVICES When connecting to make back...
User Guide
Page 9
Do not switch the device on when wireless device use the phone you must be available on features in the wireless network to make specific arrangements with your service provider for use and explain what charges will ...
Do not switch the device on when wireless device use the phone you must be available on features in the wireless network to make specific arrangements with your service provider for use and explain what charges will ...
User Guide
Page 12
The preset code is required to set how your phone uses the access codes and security settings. 12 If you enter the PIN or PIN2 code incorrectly three times in succession, you do not have ... card, helps to protect the card against unauthorised use . General information General information ■ Access codes • The security code, supplied with the phone, helps to protect your phone against unauthorised use . • The PIN2 code, supplied with some SIM cards, is 12345. • The PIN code, supplied with the SIM card...
The preset code is required to set how your phone uses the access codes and security settings. 12 If you enter the PIN or PIN2 code incorrectly three times in succession, you do not have ... card, helps to protect the card against unauthorised use . General information General information ■ Access codes • The security code, supplied with the phone, helps to protect your phone against unauthorised use . • The PIN2 code, supplied with some SIM cards, is 12345. • The PIN code, supplied with the SIM card...
User Guide
Page 14
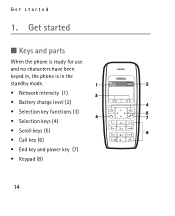
Get started ■ Keys and parts When the phone is ready for use and no characters have been keyed in, the phone is in the standby mode. • Network intensity (1) • Battery charge level (2) • Selection key functions (3) • Selection keys (4) • Scroll keys (5) • Call key (6) • End key and power key (7) • Keypad (8) 14 Get started 1.
Get started ■ Keys and parts When the phone is ready for use and no characters have been keyed in, the phone is in the standby mode. • Network intensity (1) • Battery charge level (2) • Selection key functions (3) • Selection keys (4) • Scroll keys (5) • Call key (6) • End key and power key (7) • Keypad (8) 14 Get started 1.
User Guide
Page 15
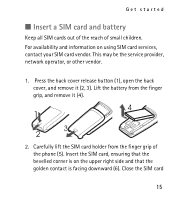
... (1), open the back cover, and remove it (4). 2. Get started ■ Insert a SIM card and battery Keep all SIM cards out of the reach of the phone (5). Insert the SIM card, ensuring that the golden contact is facing downward (6).
... (1), open the back cover, and remove it (4). 2. Get started ■ Insert a SIM card and battery Keep all SIM cards out of the reach of the phone (5). Insert the SIM card, ensuring that the golden contact is facing downward (6).
User Guide
Page 16
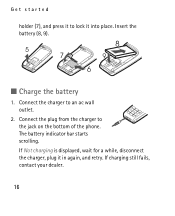
The battery indicator bar starts scrolling. Connect the plug from the charger to an ac wall outlet. 2. Insert the battery (8, 9). ■ Charge the battery 1. If Not charging is displayed, wait for a while, disconnect the charger, plug it into place. Connect the charger to the jack on the bottom of the phone. If charging still fails, contact your dealer. 16 Get started holder (7), and press it to lock it in again, and retry.
The battery indicator bar starts scrolling. Connect the plug from the charger to an ac wall outlet. 2. Insert the battery (8, 9). ■ Charge the battery 1. If Not charging is displayed, wait for a while, disconnect the charger, plug it into place. Connect the charger to the jack on the bottom of the phone. If charging still fails, contact your dealer. 16 Get started holder (7), and press it to lock it in again, and retry.
User Guide
Page 17
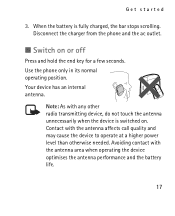
...: As with any other radio transmitting device, do not touch the antenna unnecessarily when the device is fully charged, the bar stops scrolling. Use the phone only in its normal operating position. Avoiding contact with the antenna affects call quality and may cause the device to operate at a higher power level... otherwise needed. Contact with the antenna area when operating the device optimises the antenna performance and the battery life. 17 Disconnect the charger from the phone and the ac outlet. ■ Switch on . Your device has an internal antenna. Get started 3.
...: As with any other radio transmitting device, do not touch the antenna unnecessarily when the device is fully charged, the bar stops scrolling. Use the phone only in its normal operating position. Avoiding contact with the antenna affects call quality and may cause the device to operate at a higher power level... otherwise needed. Contact with the antenna area when operating the device optimises the antenna performance and the battery life. 17 Disconnect the charger from the phone and the ac outlet. ■ Switch on . Your device has an internal antenna. Get started 3.
User Guide
Page 18
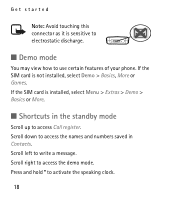
If the SIM card is installed, select Menu > Extras > Demo > Basics or More. ■ Shortcuts in Contacts. Press and hold * to access Call register. Get started Note: Avoid touching this connector as it is sensitive to electrostatic discharge. ■ Demo mode You may view how to access the demo mode. Scroll right to use certain features of your phone. Scroll left to access the names and numbers saved in the standby mode Scroll up to activate the speaking clock. 18 If the SIM card is not installed, select Demo > Basics, More or Games. Scroll down to write a message.
If the SIM card is installed, select Menu > Extras > Demo > Basics or More. ■ Shortcuts in Contacts. Press and hold * to access Call register. Get started Note: Avoid touching this connector as it is sensitive to electrostatic discharge. ■ Demo mode You may view how to access the demo mode. Scroll right to use certain features of your phone. Scroll left to access the names and numbers saved in the standby mode Scroll up to activate the speaking clock. 18 If the SIM card is not installed, select Demo > Basics, More or Games. Scroll down to write a message.
User Guide
Page 21
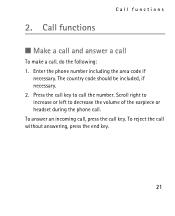
To reject the call the number. 2. The country code should be included, if necessary. 2. Press the call key to decrease the volume of the earpiece or headset during the phone call , do the following: 1. Scroll right to increase or left to call without answering, press the end key. 21 Enter the phone number including the area code if necessary. Call functions Call functions ■ Make a call and answer a call To make a call . To answer an incoming call, press the call key.
To reject the call the number. 2. The country code should be included, if necessary. 2. Press the call key to decrease the volume of the earpiece or headset during the phone call , do the following: 1. Scroll right to increase or left to call without answering, press the end key. 21 Enter the phone number including the area code if necessary. Call functions Call functions ■ Make a call and answer a call To make a call . To answer an incoming call, press the call key.
User Guide
Page 22
to use , because the volume may select Loudsp. Warning: Do not hold the device near your ear when the loudspeaker is in use the loudspeaker or the earpiece of the phone during a call. or Hands. Call functions ■ Loudspeaker If available, you may be extremely loud. 22
to use , because the volume may select Loudsp. Warning: Do not hold the device near your ear when the loudspeaker is in use the loudspeaker or the earpiece of the phone during a call. or Hands. Call functions ■ Loudspeaker If available, you may be extremely loud. 22
User Guide
Page 25
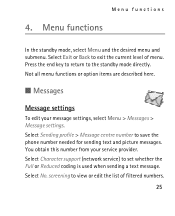
Menu functions 4. Press the end key to return to save the phone number needed for sending text and picture messages. Select Sending profile > Message centre number to the standby mode directly. You obtain this number from your ...
Menu functions 4. Press the end key to return to save the phone number needed for sending text and picture messages. Select Sending profile > Message centre number to the standby mode directly. You obtain this number from your ...
User Guide
Page 26
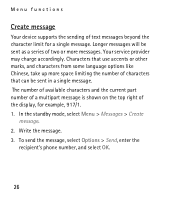
... the character limit for example, 917/1. 1. Write the message. 3. Your service provider may charge accordingly. To send the message, select Options > Send, enter the recipient's phone number, and select OK. 26 Characters that can be sent in a single message. Longer messages will be sent as a series of characters that use accents...
... the character limit for example, 917/1. 1. Write the message. 3. Your service provider may charge accordingly. To send the message, select Options > Send, enter the recipient's phone number, and select OK. 26 Characters that can be sent in a single message. Longer messages will be sent as a series of characters that use accents...
User Guide
Page 29
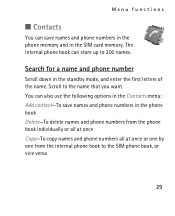
... You can save names and phone numbers in the phone book Delete-To delete names and phone numbers from the phone book individually or all at once Copy-To copy names and phone numbers all at once or one by one from the internal phone book to 200 names. The internal phone book can also use the... following options in the Contacts menu: Add contact-To save names and phone numbers in the phone memory and in the standby mode, and enter the first letters of the name. You can store up to the SIM phone book, or vice versa 29 Scroll to the name that you want. Search...
... You can save names and phone numbers in the phone book Delete-To delete names and phone numbers from the phone book individually or all at once Copy-To copy names and phone numbers all at once or one by one from the internal phone book to 200 names. The internal phone book can also use the... following options in the Contacts menu: Add contact-To save names and phone numbers in the phone memory and in the standby mode, and enter the first letters of the name. You can store up to the SIM phone book, or vice versa 29 Scroll to the name that you want. Search...
User Guide
Page 30
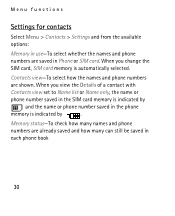
...When you change the SIM card, SIM card memory is indicated by and the name or phone number saved in the phone memory is automatically selected. Contacts view-To select how the names and phone numbers are saved in Phone or SIM card. Menu functions Settings for contacts Select Menu > Contacts > Settings and from...the Details of a contact with Contacts view set to Name list or Name only, the name or phone number saved in each phone book 30 Memory status-To check how many names and phone numbers are already saved and how many can still be saved in the SIM card memory is indicated...
...When you change the SIM card, SIM card memory is indicated by and the name or phone number saved in the phone memory is automatically selected. Contacts view-To select how the names and phone numbers are saved in Phone or SIM card. Menu functions Settings for contacts Select Menu > Contacts > Settings and from...the Details of a contact with Contacts view set to Name list or Name only, the name or phone number saved in each phone book 30 Memory status-To check how many names and phone numbers are already saved and how many can still be saved in the SIM card memory is indicated...
User Guide
Page 31
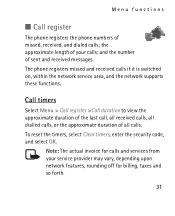
The phone registers missed and received calls if it is switched on, within the network service area, and the network supports these functions. Call timers Select Menu > ... services from your calls; and the number of all calls. the approximate length of missed, received, and dialed calls; Menu functions ■ Call register The phone registers the phone numbers of your service provider may vary, depending upon network features, rounding off for billing, taxes and so forth. 31
The phone registers missed and received calls if it is switched on, within the network service area, and the network supports these functions. Call timers Select Menu > ... services from your calls; and the number of all calls. the approximate length of missed, received, and dialed calls; Menu functions ■ Call register The phone registers the phone numbers of your service provider may vary, depending upon network features, rounding off for billing, taxes and so forth. 31
User Guide
Page 32
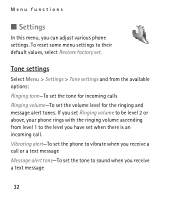
...tone to their default values, select Restore factory set the volume level for incoming calls Ringing volume-To set . Vibrating alert-To set the phone to vibrate when you receive a text message 32 To reset some menu settings to sound when you receive a call . If you can adjust various... phone settings. Menu functions ■ Settings In this menu, you set Ringing volume to be level 2 or above, your phone rings with the ringing volume ascending from the available options: Ringing tone-To set the tone...
...tone to their default values, select Restore factory set the volume level for incoming calls Ringing volume-To set . Vibrating alert-To set the phone to vibrate when you receive a text message 32 To reset some menu settings to sound when you receive a call . If you can adjust various... phone settings. Menu functions ■ Settings In this menu, you set Ringing volume to be level 2 or above, your phone rings with the ringing volume ascending from the available options: Ringing tone-To set the tone...

User Guide
Page 33
... select Options > Activate or Edit to modify, and Personalise. 33 Select Power saver clock to set the phone to use certain features, such as a screen saver. Menu functions Warning tones-To set the phone to show the digital or classic clock and all the main display icons as ringing tones and screen...
... select Options > Activate or Edit to modify, and Personalise. 33 Select Power saver clock to set the phone to use certain features, such as a screen saver. Menu functions Warning tones-To set the phone to show the digital or classic clock and all the main display icons as ringing tones and screen...


