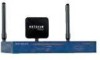
WNDAP330 User Manual
Page 9
... lit on the wireless access point 5-1 The Wireless LAN activity light does not light up 5-2 The LAN light is not lit...5-2 I cannot access the Internet or the LAN with a wireless capable computer 5-2 I cannot connect to the WNDAP330 to configure it 5-3 When I enter a URL or IP address I get a timeout error 5-3 Using the Reset Button to Restore Factory Default Settings 5-4 Appendix...
... lit on the wireless access point 5-1 The Wireless LAN activity light does not light up 5-2 The LAN light is not lit...5-2 I cannot access the Internet or the LAN with a wireless capable computer 5-2 I cannot connect to the WNDAP330 to configure it 5-3 When I enter a URL or IP address I get a timeout error 5-3 Using the Reset Button to Restore Factory Default Settings 5-4 Appendix...

WNDAP330 User Manual
Page 79
... the WNDAP330 to the Factory Default Settings It is sometimes desirable to restore the wireless access point to upload the file. The Restore Defaults screen will reboot automatically. Under the Maintenance tab, select Reset from the main menu, and then select Restore Defaults from a saved configuration file: 1. Figure 3-7 Management 3-9 v1.0, May 2008 ProSafe Dual Band Wireless Access Point WNDAP330 Reference Manual...
... the WNDAP330 to the Factory Default Settings It is sometimes desirable to restore the wireless access point to upload the file. The Restore Defaults screen will reboot automatically. Under the Maintenance tab, select Reset from the main menu, and then select Restore Defaults from a saved configuration file: 1. Figure 3-7 Management 3-9 v1.0, May 2008 ProSafe Dual Band Wireless Access Point WNDAP330 Reference Manual...
WNDAP330 User Manual
Page 80
... configuration has now been restored and the WNDAP330 is password. After a restore, the wireless access point password will be password, the WNDAP330 DHCP client will be enabled, the default LAN IP address will reboot (restart). • Reset to the factory default values. Power off the WNDAP330. 2. ProSafe Dual Band Wireless Access Point WNDAP330 Reference Manual 2. Release the Reset Button. On the Restore Defaults screen...
... configuration has now been restored and the WNDAP330 is password. After a restore, the wireless access point password will be password, the WNDAP330 DHCP client will be enabled, the default LAN IP address will reboot (restart). • Reset to the factory default values. Power off the WNDAP330. 2. ProSafe Dual Band Wireless Access Point WNDAP330 Reference Manual 2. Release the Reset Button. On the Restore Defaults screen...

WNDAP330 User Manual
Page 116
... data and restore ALL settings to Restore Factory Default Settings The Reset button (see "Rear Panel" on . 2. ProSafe Dual Band Wireless Access Point WNDAP330 Reference Manual Using the Reset Button to the factory default values. To clear all data and restore the factory default values: 1. The factory default configuration has now been restored, and the WNDAP330 is ready for at least 5 seconds...
... data and restore ALL settings to Restore Factory Default Settings The Reset button (see "Rear Panel" on . 2. ProSafe Dual Band Wireless Access Point WNDAP330 Reference Manual Using the Reset Button to the factory default values. To clear all data and restore the factory default values: 1. The factory default configuration has now been restored, and the WNDAP330 is ready for at least 5 seconds...

WNDAP330 User Manual
Page 117
...reset. • To perform a hard reset, push and hold the reset button for the ProSafe 802.11n Dual Band Wireless Access Point WNDAP330. Your device will return to the factory configuration settings shown in Table A-1 below. • Pressing the reset button for a shorter period of your device to their factory defaults. Table A-1. Access Point... Settings and Technical Specifications A-1 v1.0, May 2008 Factory Default Settings You can use the reset button located on the front of time will simply cause your device to reset all settings to reboot. Appendix A Default Settings and...
...reset. • To perform a hard reset, push and hold the reset button for the ProSafe 802.11n Dual Band Wireless Access Point WNDAP330. Your device will return to the factory configuration settings shown in Table A-1 below. • Pressing the reset button for a shorter period of your device to their factory defaults. Table A-1. Access Point... Settings and Technical Specifications A-1 v1.0, May 2008 Factory Default Settings You can use the reset button located on the front of time will simply cause your device to reset all settings to reboot. Appendix A Default Settings and...
WNDAP330 User Manual
Page 138
ProSafe Dual Band Wireless Access Point WNDAP330 Reference Manual D Data Encryption AES 2-38, 2-40 TKIP 2-37 TKIP+AES 2-39, 2-41 Data Rate 2-16, 2-19 default login 2-4 default password 2-5, 2-12 Default Settings A-1 default settings 2-22 default subnet mask 255.255.255.0 2-4 default user name 2-5, 2-12 DHCP Client 1-2, 2-14 enabling 2-14, 4-2 DHCP Server 4-2 enabling access point 4-1 use as 4-1 Documentation 2-5 DTIM...
ProSafe Dual Band Wireless Access Point WNDAP330 Reference Manual D Data Encryption AES 2-38, 2-40 TKIP 2-37 TKIP+AES 2-39, 2-41 Data Rate 2-16, 2-19 default login 2-4 default password 2-5, 2-12 Default Settings A-1 default settings 2-22 default subnet mask 255.255.255.0 2-4 default user name 2-5, 2-12 DHCP Client 1-2, 2-14 enabling 2-14, 4-2 DHCP Server 4-2 enabling access point 4-1 use as 4-1 Documentation 2-5 DTIM...
WNDAP330 User Manual
Page 140
ProSafe Dual Band Wireless Access Point WNDAP330 Reference Manual Receive Traps 3-2 reception range equipment placement 2-1 registering 1-ii Remote Console 3-1 remote management via Telenet 3-1 Remote Management screen 3-1 Repeater 4-12 repeater mode enabling 4-1 Repeater, wireless configuring 4-18 Reset to Factory Defaults 3-10 restore configuration 3-7 restore default settings 3-9 Restore Defaults screen 3-10 restricting access MAC address, using 2-42 RIFS Transmission default settings 4-7, 4-9 Rogue...
ProSafe Dual Band Wireless Access Point WNDAP330 Reference Manual Receive Traps 3-2 reception range equipment placement 2-1 registering 1-ii Remote Console 3-1 remote management via Telenet 3-1 Remote Management screen 3-1 Repeater 4-12 repeater mode enabling 4-1 Repeater, wireless configuring 4-18 Reset to Factory Defaults 3-10 restore configuration 3-7 restore default settings 3-9 Restore Defaults screen 3-10 restricting access MAC address, using 2-42 RIFS Transmission default settings 4-7, 4-9 Rogue...


