
User Manual
Page 3
... to a Network With a DHCP Server 14 Connect the Access Point With a Static IP Address to Your Network 16 Log In to the Access Point After Setup to View or Change Settings 19 Change the Language 20 Change the admin Password 21 Set Up Password Recovery 21 Set the Time Zone and... Connect to the Access Point Through an Ethernet Cable 23 Join the WiFi Network of the Access Point 23 Manual Method 23 Wi-Fi Protected Setup Method 24 Chapter 3 Manage the Basic WiFi Network Settings Manage the Basic WiFi Settings and WiFi Security of the WiFi Network 27 View or Change...
... to a Network With a DHCP Server 14 Connect the Access Point With a Static IP Address to Your Network 16 Log In to the Access Point After Setup to View or Change Settings 19 Change the Language 20 Change the admin Password 21 Set Up Password Recovery 21 Set the Time Zone and... Connect to the Access Point Through an Ethernet Cable 23 Join the WiFi Network of the Access Point 23 Manual Method 23 Wi-Fi Protected Setup Method 24 Chapter 3 Manage the Basic WiFi Network Settings Manage the Basic WiFi Settings and WiFi Security of the WiFi Network 27 View or Change...

User Manual
Page 7
Power is not supplied to factory default settings and is restarting. For more information, see Wi-Fi Protected Setup Method on Ethernet device is connected to the LAN port. • Blinking green. The access point is off . By default, the WPS LED is starting ... powered-on page 44. • Blinking green. The access point is starting or was reset to the access point. • Solid green. (Wi-Fi Protected Setup) is blinking green at any other time, see Return the Access Point to Its Factory Default Settings on Ethernet device is connected to the LAN...
Power is not supplied to factory default settings and is restarting. For more information, see Wi-Fi Protected Setup Method on Ethernet device is connected to the LAN port. • Blinking green. The access point is off . By default, the WPS LED is starting ... powered-on page 44. • Blinking green. The access point is starting or was reset to the access point. • Solid green. (Wi-Fi Protected Setup) is blinking green at any other time, see Return the Access Point to Its Factory Default Settings on Ethernet device is connected to the LAN...

User Manual
Page 8
... connector. Figure 3. For more information, see Use the Reset Button on page 24. • WiFi On/Off button. For more information, see Wi-Fi Protected Setup Method on page 45. • Power On/Off button. 802.11ac Wireless Access Figure 2. Press the Power On/Off button to provide power to factory...
... connector. Figure 3. For more information, see Use the Reset Button on page 24. • WiFi On/Off button. For more information, see Wi-Fi Protected Setup Method on page 45. • Power On/Off button. 802.11ac Wireless Access Figure 2. Press the Power On/Off button to provide power to factory...

User Manual
Page 10
... Point on page 11 • Connect the Access Point to Your Router or Network on page 12 • Log In to the Access Point After Setup to View or Change Settings on page 19 • Change the Language on page 20 • Change the admin Password on page 21 • Set...
... Point on page 11 • Connect the Access Point to Your Router or Network on page 12 • Log In to the Access Point After Setup to View or Change Settings on page 19 • Change the Language on page 20 • Change the admin Password on page 21 • Set...

User Manual
Page 12
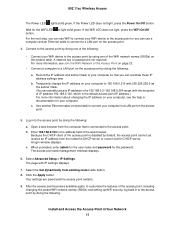
... page 16 To set up your access point, follow the procedure in your router and the access point's LAN and WiFi clients, these sections. After setup, if you can use the default access point IP address 192.168.0.100. The following sections describe how you want the access point to receive...
... page 16 To set up your access point, follow the procedure in your router and the access point's LAN and WiFi clients, these sections. After setup, if you can use the default access point IP address 192.168.0.100. The following sections describe how you want the access point to receive...

User Manual
Page 14
... can no longer use any of the cable to an Ethernet port on a switch or hub, which must enable the access point's DHCP client. After setup, to access the access point web management interface (also referred to as user interface), you must use your router's built-in DHCP server, connect the...
... can no longer use any of the cable to an Ethernet port on a switch or hub, which must enable the access point's DHCP client. After setup, to access the access point web management interface (also referred to as user interface), you must use your router's built-in DHCP server, connect the...
User Manual
Page 15
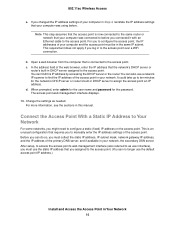
... and an Ethernet cable to connect to the access point by doing the following : a. Your settings are saved and the access point restarts. 9. b. c. c. Select Advanced Setup > IP Settings. Wait for the password. A network key or password is disabled by using one of your computer so that is the default access point...
... and an Ethernet cable to connect to the access point by doing the following : a. Your settings are saved and the access point restarts. 9. b. c. c. Select Advanced Setup > IP Settings. Wait for the password. A network key or password is disabled by using one of your computer so that is the default access point...
User Manual
Page 16
... with an Ethernet cable to the access point. b. In the address field of the access point. The access point web management interface displays. 10. After setup, to access the access point's web management interface (also referred to as needed. It could take up to ten minutes for the password. d. When prompted...
... with an Ethernet cable to the access point. b. In the address field of the access point. The access point web management interface displays. 10. After setup, to access the access point's web management interface (also referred to as needed. It could take up to ten minutes for the password. d. When prompted...
User Manual
Page 18
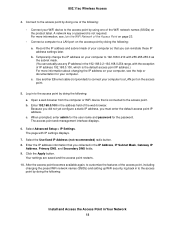
... following : Install and Access the Access Point in the IP Address, IP Subnet Mask, Gateway IP Address, Primary DNS, and Secondary DNS fields. 9. Select Advanced Setup > IP Settings. Enter the IP address information that is not required. Use another Ethernet cable (not provided) to the access point by doing the following...
... following : Install and Access the Access Point in the IP Address, IP Subnet Mask, Gateway IP Address, Primary DNS, and Secondary DNS fields. 9. Select Advanced Setup > IP Settings. Enter the IP address information that is not required. Use another Ethernet cable (not provided) to the access point by doing the following...

User Manual
Page 19
... for the password. In this manual. b. d. Change the settings as the access point or to the access point. Log In to the Access Point After Setup to View or Change Settings After you set up the access point, you did not enable the DHCP client on the access point or did...
... for the password. In this manual. b. d. Change the settings as the access point or to the access point. Log In to the Access Point After Setup to View or Change Settings After you set up the access point, you did not enable the DHCP client on the access point or did...
User Manual
Page 23
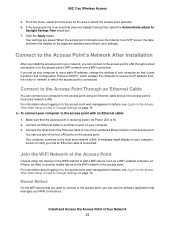
... Network After Installation After you install the access point in to the access point web management interface, see Log In to the Access Point After Setup to the access point using an Ethernet cable and join the access point's local area network (LAN). Make sure that manages your computer so that...cable is lit). 2. Install and Access the Access Point in to the access point web management interface, see Log In to the Access Point After Setup to the local area network (LAN). Connect to the Access Point Through an Ethernet Cable You can use any of the access point. Your settings...
... Network After Installation After you install the access point in to the access point web management interface, see Log In to the Access Point After Setup to the access point using an Ethernet cable and join the access point's local area network (LAN). Make sure that manages your computer so that...cable is lit). 2. Install and Access the Access Point in to the access point web management interface, see Log In to the Access Point After Setup to the local area network (LAN). Connect to the Access Point Through an Ethernet Cable You can use any of the access point. Your settings...
User Manual
Page 24
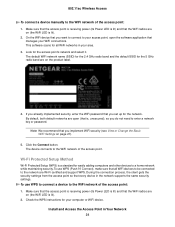
... application that is lit). 2. On the WiFi device that you do not need to the network are on page 27). 5. Wi-Fi Protected Setup Method Wi-Fi Protected Setup (WPS) is lit). 2. Install and Access the Access Point in your area. 3. By default, both default networks are on (the WiFi LED is...
... application that is lit). 2. On the WiFi device that you do not need to the network are on page 27). 5. Wi-Fi Protected Setup Method Wi-Fi Protected Setup (WPS) is lit). 2. Install and Access the Access Point in your area. 3. By default, both default networks are on (the WiFi LED is...

User Manual
Page 28
The following table describes the fields on page 9). If your country or region is WAC104. If you did not change the SSID, enter a 32-character (maximum), case-sensitive name in this field. Manage the Basic WiFi Network Settings 28 By ... for the 2.4 GHz band displays. For some countries. View or change the region because it is the WiFi network name. 802.11ac Wireless Access 4. Select Setup > Wireless Setup. 5.
The following table describes the fields on page 9). If your country or region is WAC104. If you did not change the SSID, enter a 32-character (maximum), case-sensitive name in this field. Manage the Basic WiFi Network Settings 28 By ... for the 2.4 GHz band displays. For some countries. View or change the region because it is the WiFi network name. 802.11ac Wireless Access 4. Select Setup > Wireless Setup. 5.
User Manual
Page 33
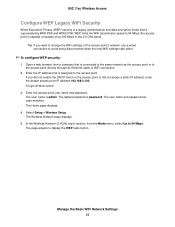
... directly through an Ethernet cable or WiFi connection. 2. If you want to change the WiFi settings of up 300 Mbps in the 2.4 GHz band). Select Setup > Wireless Setup. To configure WEP security: 1. The user name and password are case-sensitive. The user name is password. The default password is admin. Open a web...
... directly through an Ethernet cable or WiFi connection. 2. If you want to change the WiFi settings of up 300 Mbps in the 2.4 GHz band). Select Setup > Wireless Setup. To configure WEP security: 1. The user name and password are case-sensitive. The user name is password. The default password is admin. Open a web...

User Manual
Page 35
... Set Up a WiFi Distribution System on the access point or did not enable the DHCP client on page 63). The Home page displays. 4. Select Setup > Wireless Setup. 802.11ac Wireless Access • If your WiFi-enabled computer or mobile device is already connected to another type of the access point's network, use...
... Set Up a WiFi Distribution System on the access point or did not enable the DHCP client on page 63). The Home page displays. 4. Select Setup > Wireless Setup. 802.11ac Wireless Access • If your WiFi-enabled computer or mobile device is already connected to another type of the access point's network, use...

User Manual
Page 38
Do one of the following in the Wireless Network (2.4GHz b/g/n) section, Wireless Network (5GHz a/n/ac) section, or both sections: • Turn off . • Turn on the radio. The WiFi LED turns off the radio. Select Advanced Setup > Advanced Wireless Settings. 5. Manage the Basic WiFi Network Settings 38 The WiFi LED lights solid green. 6. 802.11ac Wireless Access 4. Clear the Enable Radio check box. Click the Apply button. Select the Enable Radio check box. Your settings are saved.
Do one of the following in the Wireless Network (2.4GHz b/g/n) section, Wireless Network (5GHz a/n/ac) section, or both sections: • Turn off . • Turn on the radio. The WiFi LED turns off the radio. Select Advanced Setup > Advanced Wireless Settings. 5. Manage the Basic WiFi Network Settings 38 The WiFi LED lights solid green. 6. 802.11ac Wireless Access 4. Clear the Enable Radio check box. Click the Apply button. Select the Enable Radio check box. Your settings are saved.

User Manual
Page 47
Select Advanced Setup > IP Settings. Your settings are saved and the access point restarts. Note If you want to disable the DHCP client but do not want to ...
Select Advanced Setup > IP Settings. Your settings are saved and the access point restarts. Note If you want to disable the DHCP client but do not want to ...
User Manual
Page 52
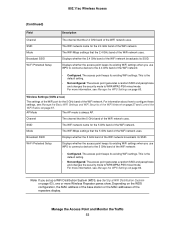
802.11ac Wireless Access (Continued) Field Description Channel SSID Mode Broadcast SSID Wi-Fi Protected Setup The channel that the 2.4 GHz band of the WiFi network uses. The WiFi Mbps settings that the 2.4 GHz band of the WiFi network uses. This ... the WiFi network. Displays whether the 2.4 GHz band of the WiFi network: • Configured. The access point keeps its existing WiFi settings. Wi-Fi Protected Setup Displays whether the access point keeps its existing WiFi settings when you use WPS to connect a device to the 2.4 GHz band of the WiFi network...
802.11ac Wireless Access (Continued) Field Description Channel SSID Mode Broadcast SSID Wi-Fi Protected Setup The channel that the 2.4 GHz band of the WiFi network uses. The WiFi Mbps settings that the 2.4 GHz band of the WiFi network uses. This ... the WiFi network. Displays whether the 2.4 GHz band of the WiFi network: • Configured. The access point keeps its existing WiFi settings. Wi-Fi Protected Setup Displays whether the access point keeps its existing WiFi settings when you use WPS to connect a device to the 2.4 GHz band of the WiFi network...

User Manual
Page 57
... do not need a WiFi connection. For more information about whether the access point synchronizes its internal clock with a time server on the Internet. Select Advanced Setup > Advanced Wireless Settings. 5. Manage the Advanced WiFi Features 57 Note You can add a WiFi schedule only if the access point is connected to the access...
... do not need a WiFi connection. For more information about whether the access point synchronizes its internal clock with a time server on the Internet. Select Advanced Setup > Advanced Wireless Settings. 5. Manage the Advanced WiFi Features 57 Note You can add a WiFi schedule only if the access point is connected to the access...

User Manual
Page 59
... to the access control list and enable access control: 1. The Advanced Wireless Settings page displays. 4. Click the Add button. The Home page displays. 3. Select Advanced Setup > Advanced Wireless Settings. A login window opens. 2. Enter the access point user name and password. 802.11ac Wireless Access To add WiFi devices to the allowed...
... to the access control list and enable access control: 1. The Advanced Wireless Settings page displays. 4. Click the Add button. The Home page displays. 3. Select Advanced Setup > Advanced Wireless Settings. A login window opens. 2. Enter the access point user name and password. 802.11ac Wireless Access To add WiFi devices to the allowed...


