Software Manual
Page 1
ReadyNAS OS 6.1 Software Manual Models: ReadyNAS 102 ReadyNAS 104 ReadyNAS 312 ReadyNAS 314 ReadyNAS 316 ReadyNAS 516 ReadyNAS 716X ReadyNAS 2120 ReadyNAS 3220 ReadyNAS 4220 EDA 500 October 2013 202-11207-05 350 East Plumeria Drive San Jose, CA 95134 USA
ReadyNAS OS 6.1 Software Manual Models: ReadyNAS 102 ReadyNAS 104 ReadyNAS 312 ReadyNAS 314 ReadyNAS 316 ReadyNAS 516 ReadyNAS 716X ReadyNAS 2120 ReadyNAS 3220 ReadyNAS 4220 EDA 500 October 2013 202-11207-05 350 East Plumeria Drive San Jose, CA 95134 USA
Software Manual
Page 2
... device, locate the serial number on the label of phone numbers at https://my.netgear.com. Information is subject to support additional ReadyNAS models. Trademarks NETGEAR, the NETGEAR logo, and Connect with Innovation are trademarks and/or registered trademarks of supported ReadyNAS ... Check the list of your product before you for purchasing this NETGEAR product. and/or its subsidiaries in 6.1.0 firmware. You must register your product and use NETGEAR telephone support. After installing your product through the NETGEAR website. Updated manual to change without notice. ©...
... device, locate the serial number on the label of phone numbers at https://my.netgear.com. Information is subject to support additional ReadyNAS models. Trademarks NETGEAR, the NETGEAR logo, and Connect with Innovation are trademarks and/or registered trademarks of supported ReadyNAS ... Check the list of your product before you for purchasing this NETGEAR product. and/or its subsidiaries in 6.1.0 firmware. You must register your product and use NETGEAR telephone support. After installing your product through the NETGEAR website. Updated manual to change without notice. ©...

Software Manual
Page 4
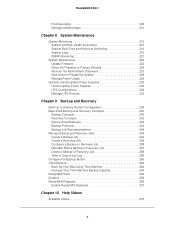
... Set Up Initiator Access 116 Initialize and Format LUNs 122 Chapter 5 Snapshots Basic Snapshot Concepts 126 Smart Snapshot Management 127 Rolling Back 127 Clones 127 Manually Take a Snapshot 128 Browse Snapshots Using Recovery Mode 129 Roll Back to a Snapshot 133 Roll Back to a Snapshot Using Recovery Mode 133 Roll Back to...
... Set Up Initiator Access 116 Initialize and Format LUNs 122 Chapter 5 Snapshots Basic Snapshot Concepts 126 Smart Snapshot Management 127 Rolling Back 127 Clones 127 Manually Take a Snapshot 128 Browse Snapshots Using Recovery Mode 129 Roll Back to a Snapshot 133 Roll Back to a Snapshot Using Recovery Mode 133 Roll Back to...
Software Manual
Page 6
... 243 Backup Job Recommendations 244 Manage Backup and Recovery Jobs 244 Create a Backup Job 244 Create a Recovery Job 245 Configure a Backup or Recovery Job 248 Manually Start a Backup or Recovery Job 257 Delete a Backup or Recovery Job 258 View or Clear a Job Log 258 Configure the Backup Button 260 Time Machine...
... 243 Backup Job Recommendations 244 Manage Backup and Recovery Jobs 244 Create a Backup Job 244 Create a Recovery Job 245 Configure a Backup or Recovery Job 248 Manually Start a Backup or Recovery Job 257 Delete a Backup or Recovery Job 258 View or Clear a Job Log 258 Configure the Backup Button 260 Time Machine...
Software Manual
Page 8
... and access the local admin page. • Local admin page. 1. Use this browser-based interface to configure and manage your ReadyNAS system. Getting Started 1 This manual describes how to configure and manage your ReadyNAS® storage system.
... and access the local admin page. • Local admin page. 1. Use this browser-based interface to configure and manage your ReadyNAS system. Getting Started 1 This manual describes how to configure and manage your ReadyNAS® storage system.

Software Manual
Page 9
...192. Configure Global Settings for each person that is available at support.netgear.com/product/ReadyNAS-OS6. Basic Data Backup and Recovery Concepts on page 11. ReadyNAS OS 6.1 Quick-Start Guide This manual provides conceptual information about storage systems, detailed instructions about using your system,...configuring, managing, and backing up data that you store on other devices. NETGEAR recommends that you read this order: 1. Visit www.netgear.com/readynas for your system, which is stored in this manual to make the best use your system. LUNs are the way you organize ...
...192. Configure Global Settings for each person that is available at support.netgear.com/product/ReadyNAS-OS6. Basic Data Backup and Recovery Concepts on page 11. ReadyNAS OS 6.1 Quick-Start Guide This manual provides conceptual information about storage systems, detailed instructions about using your system,...configuring, managing, and backing up data that you store on other devices. NETGEAR recommends that you read this order: 1. Visit www.netgear.com/readynas for your system, which is stored in this manual to make the best use your system. LUNs are the way you organize ...

Software Manual
Page 10
For more information, see the hardware manual for your system, which is available at least one disk before you can discover your ReadyNAS system. For a list of supported disks, visit http://www.netgear.com/readynas-hcl. ReadyNAS OS 6.1 Supported Operating Systems The ReadyNAS supports the following operating systems: ...supported disks in your system with ReadyCLOUD or visit the local admin page. You must first install and format at http://support.netgear.com/product/ReadyNAS-OS6. Diskless Systems If you have difficulty accessing the local admin page or if you notice unexpected behavior, ...
For more information, see the hardware manual for your system, which is available at least one disk before you can discover your ReadyNAS system. For a list of supported disks, visit http://www.netgear.com/readynas-hcl. ReadyNAS OS 6.1 Supported Operating Systems The ReadyNAS supports the following operating systems: ...supported disks in your system with ReadyCLOUD or visit the local admin page. You must first install and format at http://support.netgear.com/product/ReadyNAS-OS6. Diskless Systems If you have difficulty accessing the local admin page or if you notice unexpected behavior, ...
Software Manual
Page 11
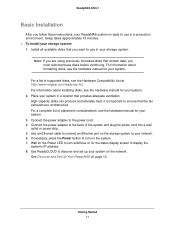
...of placement considerations, see the Hardware Compatibility List at http://www.netgear.com/readynas-hcl. Connect the power adapter to the back of supported disks, see the hardware manual for your system. For information about installing disks, see the hardware manual for the Power LED to turn on the network. For ...information about formatting disks, see the hardware manual for your system in a location that provides adequate ventilation. Use ReadyCLOUD to discover and set up your storage system. Install all available disks ...
...of placement considerations, see the Hardware Compatibility List at http://www.netgear.com/readynas-hcl. Connect the power adapter to the back of supported disks, see the hardware manual for your system. For information about installing disks, see the hardware manual for the Power LED to turn on the network. For ...information about formatting disks, see the hardware manual for your system in a location that provides adequate ventilation. Use ReadyCLOUD to discover and set up your storage system. Install all available disks ...

Software Manual
Page 15
... the navigation bar. Local admin page (Overview screen) The following figure. Getting Started 15 In this manual, instructions for navigating through the local admin page, use to configure and manage your product, visit an official NETGEAR support page by specifying the selection from the navigation bar and then, if necessary, specifying the...
... the navigation bar. Local admin page (Overview screen) The following figure. Getting Started 15 In this manual, instructions for navigating through the local admin page, use to configure and manage your product, visit an official NETGEAR support page by specifying the selection from the navigation bar and then, if necessary, specifying the...
Software Manual
Page 16
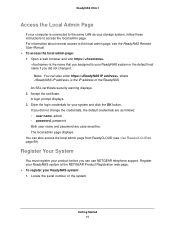
... and password are as your storage system, follow these instructions to access the local admin page. Accept the certificate. Register your ReadyNAS system at the NETGEAR Product Registration web page. To register your system and click the OK button. Open a web browser and visit https://. A login prompt displays. 3. ...on page 69). The local admin page displays. Note: You can also access the local admin page from ReadyCLOUD (see the ReadyNAS Remote User Manual. To access the local admin page: 1. Enter the login credentials for your ReadyNAS system: 1.
... and password are as your storage system, follow these instructions to access the local admin page. Accept the certificate. Register your ReadyNAS system at the NETGEAR Product Registration web page. To register your system and click the OK button. Open a web browser and visit https://. A login prompt displays. 3. ...on page 69). The local admin page displays. Note: You can also access the local admin page from ReadyCLOUD (see the ReadyNAS Remote User Manual. To access the local admin page: 1. Enter the login credentials for your ReadyNAS system: 1.

Software Manual
Page 19
...be either physical or logical. RAID is the first step to making good decisions about how to configure, manage, and use your disks in this manual, the term volume refers to six physical volumes. You can have been standardized into various RAID levels. A six-bay storage system can also ...configure the RAID settings manually (see Change RAID Mode on your system for redundant array of disks that are installed. When you reset your hard disks using one of more...
...be either physical or logical. RAID is the first step to making good decisions about how to configure, manage, and use your disks in this manual, the term volume refers to six physical volumes. You can have been standardized into various RAID levels. A six-bay storage system can also ...configure the RAID settings manually (see Change RAID Mode on your system for redundant array of disks that are installed. When you reset your hard disks using one of more...

Software Manual
Page 32
... more information about how to add a disk to the following table. The system automatically determines whether the new disk is available at http://support.netgear.com/product/ReadyNAS-OS6. New disks are incorporated in the volume with larger-capacity disks. Note: Vertical expansion is used for RAID 0 volumes...is used to use your ReadyNAS system while the new disks are incorporated in the volume according to your ReadyNAS system, see the hardware manual for your system, you add disks. You can continue to an X-RAID2 volume that includes two or more disks, the volume expands ...
... more information about how to add a disk to the following table. The system automatically determines whether the new disk is available at http://support.netgear.com/product/ReadyNAS-OS6. New disks are incorporated in the volume with larger-capacity disks. Note: Vertical expansion is used for RAID 0 volumes...is used to use your ReadyNAS system while the new disks are incorporated in the volume according to your ReadyNAS system, see the hardware manual for your system, you add disks. You can continue to an X-RAID2 volume that includes two or more disks, the volume expands ...

Software Manual
Page 33
... expansion requirements RAID Level Disk Replacements Required for Vertical Expansion RAID 1 Replace 2 or more information about alert notifications, see the hardware manual for the volume to your system, see Configure System Alerts on page 219). Your available storage capacity does not increase to use supported... Resyncing can continue to accommodate the reserved disks until you replace the required number of supported disks, visit http://www.netgear.com/readynas-hcl. 2. For a list of disks. If you set up your system, you receive an email message when the process ...
... expansion requirements RAID Level Disk Replacements Required for Vertical Expansion RAID 1 Replace 2 or more information about alert notifications, see the hardware manual for the volume to your system, see Configure System Alerts on page 219). Your available storage capacity does not increase to use supported... Resyncing can continue to accommodate the reserved disks until you replace the required number of supported disks, visit http://www.netgear.com/readynas-hcl. 2. For a list of disks. If you set up your system, you receive an email message when the process ...

Software Manual
Page 34
... a larger-capacity disk. For more information about how to add a disk to your system, see the hardware manual for your system, which is available at http://support.netgear.com/product/ReadyNAS-OS6. The following table indicates whether adding a disk for data protection is possible for each disk... select RAID 6. ReadyNAS OS 6.1 For more information about how to add a disk to your system, see the hardware manual for your system, which is available at http://support.netgear.com/product/ReadyNAS-OS6. Note: You must use RAID 6, you receive an email message when the process finishes.
... a larger-capacity disk. For more information about how to add a disk to your system, see the hardware manual for your system, which is available at http://support.netgear.com/product/ReadyNAS-OS6. The following table indicates whether adding a disk for data protection is possible for each disk... select RAID 6. ReadyNAS OS 6.1 For more information about how to add a disk to your system, see the hardware manual for your system, which is available at http://support.netgear.com/product/ReadyNAS-OS6. Note: You must use RAID 6, you receive an email message when the process finishes.

Software Manual
Page 35
...disk to for storage (horizontal expansion). Volume Configuration 35 The new disk is displayed in the enclosure graphic and is available at http://support.netgear.com/product/ReadyNAS-OS6. 2. Add a disk to a Flex-RAID volume can be used only for your ReadyNAS storage system. They cannot... number) RAID 10 No. (Volume protection is already redundant.) 4 or more information about how to add a disk to X-RAID2 (see the hardware manual for protection. Flex-RAID levels and data protection Number of the following: • Create a volume using the added disks (see Create and Encrypt ...
...disk to for storage (horizontal expansion). Volume Configuration 35 The new disk is displayed in the enclosure graphic and is available at http://support.netgear.com/product/ReadyNAS-OS6. 2. Add a disk to a Flex-RAID volume can be used only for your ReadyNAS storage system. They cannot... number) RAID 10 No. (Volume protection is already redundant.) 4 or more information about how to add a disk to X-RAID2 (see the hardware manual for protection. Flex-RAID levels and data protection Number of the following: • Create a volume using the added disks (see Create and Encrypt ...
Software Manual
Page 64
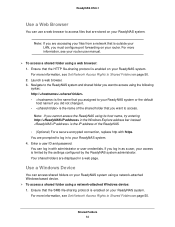
... displayed in as a user, your ReadyNAS system or the default host name if you did not change it. • is enabled on your router user manual. To access a shared folder using its host name, try entering http:// in the Windows Explore address bar instead. For more information, see Set Network...
... displayed in as a user, your ReadyNAS system or the default host name if you did not change it. • is enabled on your router user manual. To access a shared folder using its host name, try entering http:// in the Windows Explore address bar instead. For more information, see Set Network...
Software Manual
Page 67
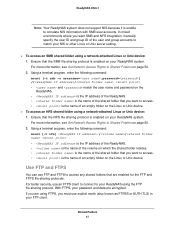
... of an empty folder on the Linux or Unix device. To access an NFS shared folder using FTPS, you want SMB and NFS integration, manually specify the user ID and group ID of an empty folder on the Linux or Unix device. Use FTP and FTPS You can use FTP...
... of an empty folder on the Linux or Unix device. To access an NFS shared folder using FTPS, you want SMB and NFS integration, manually specify the user ID and group ID of an empty folder on the Linux or Unix device. Use FTP and FTPS You can use FTP...

Software Manual
Page 80
Using ReadyNAS Remote involves these high-level steps: 1. For more information about ReadyNAS Remote, see the ReadyNAS Remote User Manual. On the local admin page, click the Cloud tab. 2. Enable ReadyNAS Remote on your shared folders. See Add ReadyNAS Remote Users on page 85. See ...
Using ReadyNAS Remote involves these high-level steps: 1. For more information about ReadyNAS Remote, see the ReadyNAS Remote User Manual. On the local admin page, click the Cloud tab. 2. Enable ReadyNAS Remote on your shared folders. See Add ReadyNAS Remote Users on page 85. See ...

Software Manual
Page 90
... system tray. 5. Right-click the ReadyNAS Remote icon in the system tray. 3. For more information about using the ReadyDROP portal, see the ReadyNAS Remote User Manual. Launch the ReadyNAS Remote client software on the left. The ReadyNAS Remote icon blinks while the device is connecting and displays as blue when it...
... system tray. 5. Right-click the ReadyNAS Remote icon in the system tray. 3. For more information about using the ReadyDROP portal, see the ReadyNAS Remote User Manual. Launch the ReadyNAS Remote client software on the left. The ReadyNAS Remote icon blinks while the device is connecting and displays as blue when it...

Software Manual
Page 125
It includes the following sections: • Basic Snapshot Concepts • Manually Take a Snapshot • Browse Snapshots Using Recovery Mode • Roll Back to a Snapshot • Clone Snapshots • Delete Snapshots • Recover Data from a Snapshot Note: ...
It includes the following sections: • Basic Snapshot Concepts • Manually Take a Snapshot • Browse Snapshots Using Recovery Mode • Roll Back to a Snapshot • Clone Snapshots • Delete Snapshots • Recover Data from a Snapshot Note: ...

