Hardware Installation Guide
Page 28
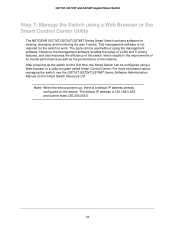
...GS716T, GS724T and GS748T Gigabit Smart Switch Step 7: Manage the Switch using a Web Browser or the Smart Control Center Utility The NETGEAR GS716T,GS724T,GS748T Series Smart Switch contains software for the switch to work. This management software is 192.168.0.239 and subnet mask ...see the GS716T,GS724T,GS748T Series Software Administration Manual on the device. After powering up , there is a default IP address already configured on the Smart Switch Resource CD. The default IP address is not required for viewing, changing, and monitoring the way it works. Note: When the device ...
...GS716T, GS724T and GS748T Gigabit Smart Switch Step 7: Manage the Switch using a Web Browser or the Smart Control Center Utility The NETGEAR GS716T,GS724T,GS748T Series Smart Switch contains software for the switch to work. This management software is 192.168.0.239 and subnet mask ...see the GS716T,GS724T,GS748T Series Software Administration Manual on the device. After powering up , there is a default IP address already configured on the Smart Switch Resource CD. The default IP address is not required for viewing, changing, and monitoring the way it works. Note: When the device ...
Hardware Installation Guide
Page 39
...-pressure 5 Brackets 19 C Category 5 Unshielded Twisted-Pair 4 Checking the Installation 20 Class of Service 4 compliance 33 Connecting Devices to the Switch 21 Copper 4 Crossover 13 D Default IP Address 24 Default Reset Button 8, 10 Device Hardware Interfaces 8 Duplex Mode 13 E Example of Desktop Switching 15 35
...-pressure 5 Brackets 19 C Category 5 Unshielded Twisted-Pair 4 Checking the Installation 20 Class of Service 4 compliance 33 Connecting Devices to the Switch 21 Copper 4 Crossover 13 D Default IP Address 24 Default Reset Button 8, 10 Device Hardware Interfaces 8 Duplex Mode 13 E Example of Desktop Switching 15 35
Installation Guide
Page 1
...Switch If you have a DHCP server in you network, configure the switch IP address before connecting the switch to your desktop or click the icon in the 192.168.0.x subnet. 2. The default IP address of the switch to match your CD drive. 2. Connect the ... the switch. If you are using static IP addresses in your network. 3. Click the Discover button. Installation Guide NETGEAR ProSAFE Smart Switch™ GS716Tv3 NETGEAR ProSAFE Smart Switch™ GS724Tv4 NETGEAR ProSAFE Smart Switch™ GS748Tv5 Package Contents • NETGEAR ProSAFE Smart Switch • Rubber footpads for...
...Switch If you have a DHCP server in you network, configure the switch IP address before connecting the switch to your desktop or click the icon in the 192.168.0.x subnet. 2. The default IP address of the switch to match your CD drive. 2. Connect the ... the switch. If you are using static IP addresses in your network. 3. Click the Discover button. Installation Guide NETGEAR ProSAFE Smart Switch™ GS716Tv3 NETGEAR ProSAFE Smart Switch™ GS724Tv4 NETGEAR ProSAFE Smart Switch™ GS748Tv5 Package Contents • NETGEAR ProSAFE Smart Switch • Rubber footpads for...

Installation Guide
Page 2
... to change without notice. © NETGEAR, Inc. For more information, see the software administration manual. Troubleshooting Tips Here are plugged in the United States and/or other countries. Enter the default password of password in the following sequence: 1. All rights reserved. If your network uses static IP addresses, be configured to configure. After...
... to change without notice. © NETGEAR, Inc. For more information, see the software administration manual. Troubleshooting Tips Here are plugged in the United States and/or other countries. Enter the default password of password in the following sequence: 1. All rights reserved. If your network uses static IP addresses, be configured to configure. After...
Software Administration Manual
Page 7
...GS748Tv5 Smart Switches Chapter 7 Monitoring the System Ports 227 Switch Statistics 228 Port Statistics 230 Port Detailed Statistics 231 EAP Statistics 237 Cable Test 238 Logs 239 Memory Logs 240 Server Log 242 Trap Logs 244 Event Logs 245 Mirroring 245 Chapter 8 Maintenance Reset 247 Device Reboot 247 Factory Default... B Configuration Examples Virtual Local Area Network Configuration Example 263 Access Control Lists (ACLs 266 MAC ACL Configuration Example 266 Standard IP ACL Configuration Example 268 Differentiated Services 269 Class 269 DiffServ Traffic Classes 270 7
...GS748Tv5 Smart Switches Chapter 7 Monitoring the System Ports 227 Switch Statistics 228 Port Statistics 230 Port Detailed Statistics 231 EAP Statistics 237 Cable Test 238 Logs 239 Memory Logs 240 Server Log 242 Trap Logs 244 Event Logs 245 Mirroring 245 Chapter 8 Maintenance Reset 247 Device Reboot 247 Factory Default... B Configuration Examples Virtual Local Area Network Configuration Example 263 Access Control Lists (ACLs 266 MAC ACL Configuration Example 266 Standard IP ACL Configuration Example 268 Differentiated Services 269 Class 269 DiffServ Traffic Classes 270 7
Software Administration Manual
Page 12
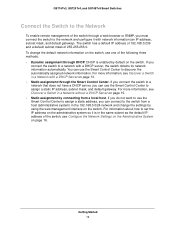
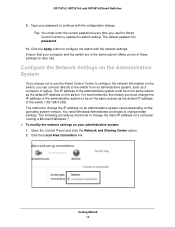
...GS748Tv5 Smart Switches Connect the Switch to the Network To enable remote management of 255.255.255.0. For more information, see Discover a Switch in a Network without a DHCP Server on page 15. • Static assignment by connecting from a host (administrative system) in the 192.168.0.0/24 network and change the default... that does not have a DHCP server, you can use one of the switch, see Discover a Switch in the same subnet as the default IP address of the following three methods: • Dynamic assignment through the Smart Control Center. If you do not want to use the Smart...
...GS748Tv5 Smart Switches Connect the Switch to the Network To enable remote management of 255.255.255.0. For more information, see Discover a Switch in a Network without a DHCP Server on page 15. • Static assignment by connecting from a host (administrative system) in the 192.168.0.0/24 network and change the default... that does not have a DHCP server, you can use one of the switch, see Discover a Switch in the same subnet as the default IP address of the following three methods: • Dynamic assignment through the Smart Control Center. If you do not want to use the Smart...
Software Administration Manual
Page 13
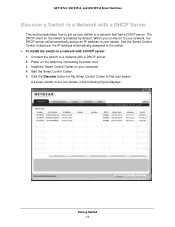
.... 3. When you connect it to your network, the DHCP server will automatically assign an IP address to set up your switch in a network that has a DHCP server. GS716Tv3, GS724Tv4, and GS748Tv5 Smart Switches Discover a Switch in a Network with a DHCP Server This section describes how to...Control Center to discover the IP address automatically assigned to find your computer. 4. A screen similar to a network with a DHCP server: 1. Connect the switch to the one shown in a network with a DHCP server. 2. Install the Smart Control Center on the switch by default. Power on your switch....
.... 3. When you connect it to your network, the DHCP server will automatically assign an IP address to set up your switch in a network that has a DHCP server. GS716Tv3, GS724Tv4, and GS748Tv5 Smart Switches Discover a Switch in a Network with a DHCP Server This section describes how to...Control Center to discover the IP address automatically assigned to find your computer. 4. A screen similar to a network with a DHCP server: 1. Connect the switch to the one shown in a network with a DHCP server. 2. Install the Smart Control Center on the switch by default. Power on your switch....
Software Administration Manual
Page 14
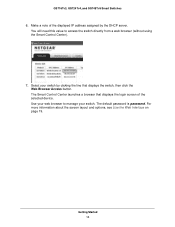
... switch. Getting Started 14 For more information about the screen layout and options, see Use the Web Interface on page 19. The default password is password. GS716Tv3, GS724Tv4, and GS748Tv5 Smart Switches 6. Make a note of the displayed IP address assigned by clicking the line that displays the login screen of the selected device.
... switch. Getting Started 14 For more information about the screen layout and options, see Use the Web Interface on page 19. The default password is password. GS716Tv3, GS724Tv4, and GS748Tv5 Smart Switches 6. Make a note of the displayed IP address assigned by clicking the line that displays the login screen of the selected device.
Software Administration Manual
Page 16
...running a Microsoft Windows 7. To modify the network settings on your computer and the switch are in the same subnet as the default IP address of the switch (192.168.0.239). Type your password to the switch from an administrative system, such as a computer or laptop. ..., you must be on the same subnet as the default IP address on the operating system version. Getting Started 16 The IP address of these settings. The following procedures show how to update the switch setting. GS716Tv3, GS724Tv4, and GS748Tv5 Smart Switches 9. Make a note of the administrative system...
...running a Microsoft Windows 7. To modify the network settings on your computer and the switch are in the same subnet as the default IP address of the switch (192.168.0.239). Type your password to the switch from an administrative system, such as a computer or laptop. ..., you must be on the same subnet as the default IP address on the operating system version. Getting Started 16 The IP address of these settings. The following procedures show how to update the switch setting. GS716Tv3, GS724Tv4, and GS748Tv5 Smart Switches 9. Make a note of the administrative system...
Software Administration Manual
Page 19
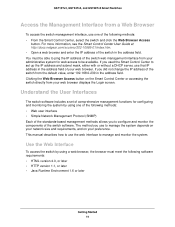
..., the browser must be available. GS716Tv3, GS724Tv4, and GS748Tv5 Smart Switches Access the Management Interface from a Web Browser To access the switch management interface, use that IP address in the address field of your web browser. You... see the Smart Control Center User Guide at http://docs.netgear.com/scc/enu/202-10685-01/index.htm. • Open a web browser and enter the IP address of the switch from your preference. Understand the User... Center or accessing the switch directly from the default value, enter 192.168.0.239 in the address field. The method you did not change the...
..., the browser must be available. GS716Tv3, GS724Tv4, and GS748Tv5 Smart Switches Access the Management Interface from a Web Browser To access the switch management interface, use that IP address in the address field of your web browser. You... see the Smart Control Center User Guide at http://docs.netgear.com/scc/enu/202-10685-01/index.htm. • Open a web browser and enter the IP address of the switch from your preference. Understand the User... Center or accessing the switch directly from the default value, enter 192.168.0.239 in the address field. The method you did not change the...
Software Administration Manual
Page 20
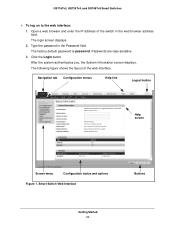
... authenticates you, the System Information screen displays. Type the password in the web browser address field. Passwords are case-sensitive. 3. The factory default password is password. The following figure shows the layout of the switch in the Password field. The login screen displays. 2. Navigation tab Configuration... menus Help link Logout button Help screen Screen menu Configuration status and options Figure 1. Click the Login button. GS716Tv3, GS724Tv4, and GS748Tv5 Smart Switches To log on to the web interface: 1. Open a web browser and enter the...
... authenticates you, the System Information screen displays. Type the password in the web browser address field. Passwords are case-sensitive. 3. The factory default password is password. The following figure shows the layout of the switch in the Password field. The login screen displays. 2. Navigation tab Configuration... menus Help link Logout button Help screen Screen menu Configuration status and options Figure 1. Click the Login button. GS716Tv3, GS724Tv4, and GS748Tv5 Smart Switches To log on to the web interface: 1. Open a web browser and enter the...
Software Administration Manual
Page 36
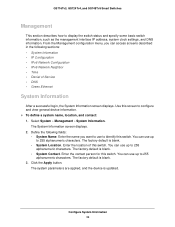
... you can use up to display the switch status and specify some basic switch information, such as the management interface IP address, system clock settings, and DNS information. You can use to identify this screen to 255 alphanumeric characters. The.... The System Information screen displays. 2. The factory default is updated. The factory default is blank. • System Contact. GS716Tv3, GS724Tv4, and GS748Tv5 Smart Switches Management This section describes how to 255 alphanumeric characters. The factory default is blank. 3. Click the Apply button. Configure ...
... you can use up to display the switch status and specify some basic switch information, such as the management interface IP address, system clock settings, and DNS information. You can use to identify this screen to 255 alphanumeric characters. The.... The System Information screen displays. 2. The factory default is updated. The factory default is blank. • System Contact. GS716Tv3, GS724Tv4, and GS748Tv5 Smart Switches Management This section describes how to 255 alphanumeric characters. The factory default is blank. 3. Click the Apply button. Configure ...

Software Administration Manual
Page 37
...Up Time Base MAC Address Fan Status Model Name Boot Version Software Version Description The product name that the IP address, subnet mask, and default gateway must be manually configured. The boot code version of the fans. Specifies that the switch must obtain the... IP address through a BootP server. • Static IP Address. Configure System Information 37 The current date and time. GS716Tv3, GS724Tv4, and GS748Tv5 Smart Switches The...
...Up Time Base MAC Address Fan Status Model Name Boot Version Software Version Description The product name that the IP address, subnet mask, and default gateway must be manually configured. The boot code version of the fans. Specifies that the switch must obtain the... IP address through a BootP server. • Static IP Address. Configure System Information 37 The current date and time. GS716Tv3, GS724Tv4, and GS748Tv5 Smart Switches The...
Software Administration Manual
Page 38
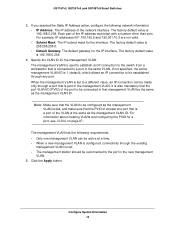
...001.10.3 are not valid. • Subnet Mask. The default gateway for the management VLAN. The factory default value is 255.255.255.0. • Default Gateway. If not specified, the active management VLAN ID is 1 (default), which allows an IP connection to a port in that management VLAN be configured as...Make sure that is the same as the management VLAN ID. The IP address of the IP address must start with a number other than zero. Specify the VLAN ID for the IP interface. GS716Tv3, GS724Tv4, and GS748Tv5 Smart Switches 3. The IP subnet mask for a port, see VLANs on page 87. It ...
...001.10.3 are not valid. • Subnet Mask. The default gateway for the management VLAN. The factory default value is 255.255.255.0. • Default Gateway. If not specified, the active management VLAN ID is 1 (default), which allows an IP connection to a port in that management VLAN be configured as...Make sure that is the same as the management VLAN ID. The IP address of the IP address must start with a number other than zero. Specify the VLAN ID for the IP interface. GS716Tv3, GS724Tv4, and GS748Tv5 Smart Switches 3. The IP subnet mask for a port, see VLANs on page 87. It ...

Software Administration Manual
Page 47
...> Denial of Service > Denial of Service Max ICMPv4 Packet Size. The factory default is disabled. • Denial of Service Configuration. 2. If ICMPv4 DoS prevention... the minimum TCP header size allowed. Specify the maximum ICMPv4 packet size allowed. GS716Tv3, GS724Tv4, and GS748Tv5 Smart Switches Configure Denial of Service The Denial of Service Configuration screen allows you to monitor and block ...a source MAC address equal to drop packets that have a TCP payload where the IP payload length minus the IP header size is enabled, the switch will drop packets that have TCP Flags FIN,...
...> Denial of Service > Denial of Service Max ICMPv4 Packet Size. The factory default is disabled. • Denial of Service Configuration. 2. If ICMPv4 DoS prevention... the minimum TCP header size allowed. Specify the maximum ICMPv4 packet size allowed. GS716Tv3, GS724Tv4, and GS748Tv5 Smart Switches Configure Denial of Service The Denial of Service Configuration screen allows you to monitor and block ...a source MAC address equal to drop packets that have a TCP payload where the IP payload length minus the IP header size is enabled, the switch will drop packets that have TCP Flags FIN,...
Software Administration Manual
Page 56
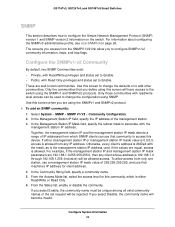
.... 3. From the Status list, enable or disable the community. In the Management Station IP Mask field, specify the subnet mask to add other communities. GS716Tv3, GS724Tv4, and GS748Tv5 Smart Switches SNMP This section describes how to the switch using the SNMPv1 and SNMPv2c protocols.... Only the communities that machine's IP address for this screen will be rejected. The screens you are well-known communities. Configure the SNMPv1/v2 Community By default, two ...
.... 3. From the Status list, enable or disable the community. In the Management Station IP Mask field, specify the subnet mask to add other communities. GS716Tv3, GS724Tv4, and GS748Tv5 Smart Switches SNMP This section describes how to the switch using the SNMPv1 and SNMPv2c protocols.... Only the communities that machine's IP address for this screen will be rejected. The screens you are well-known communities. Configure the SNMPv1/v2 Community By default, two ...
Software Administration Manual
Page 61
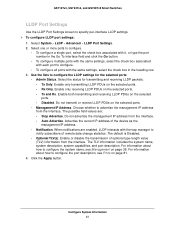
...interface LLDP settings. To configure LLDP port settings: 1. GS716Tv3, GS724Tv4, and GS748Tv5 Smart Switches LLDP Port Settings Use the LLDP Port Settings screen to advertise the management IP address from the interface. Enable only receiving LLDP PDUs on the selected ports. - Configure... see Management on page 81. 4. The TLV information includes the system name, system description, system capabilities, and port description. The default is Disabled. • Optional TLV(s). For information about how to configure. • To configure all ports with each port to ...
...interface LLDP settings. To configure LLDP port settings: 1. GS716Tv3, GS724Tv4, and GS748Tv5 Smart Switches LLDP Port Settings Use the LLDP Port Settings screen to advertise the management IP address from the interface. Enable only receiving LLDP PDUs on the selected ports. - Configure... see Management on page 81. 4. The TLV information includes the system name, system description, system capabilities, and port description. The default is Disabled. • Optional TLV(s). For information about how to configure. • To configure all ports with each port to ...
Software Administration Manual
Page 90
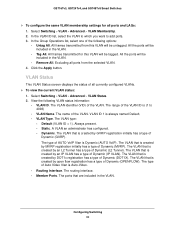
...The ports that is created by MVRP registration initially has a type of Auto Video Vlan is always named Default. • VLAN Type. Select Switching > VLAN > Advanced > VLAN Status. 2. Static. The VLAN...The VLAN that is Dynamic (AUTO VoIP). The routing interface. • Member Ports. GS716Tv3, GS724Tv4, and GS748Tv5 Smart Switches To configure the same VLAN membership settings for this VLAN will be untagged. Select Switching >... type of Dynamic (IP VLAN). The VLAN that is created by an IP VLAN has a type of Dynamic (DOT1X). Configuring Switching 90
...The ports that is created by MVRP registration initially has a type of Auto Video Vlan is always named Default. • VLAN Type. Select Switching > VLAN > Advanced > VLAN Status. 2. Static. The VLAN...The VLAN that is Dynamic (AUTO VoIP). The routing interface. • Member Ports. GS716Tv3, GS724Tv4, and GS748Tv5 Smart Switches To configure the same VLAN membership settings for this VLAN will be untagged. Select Switching >... type of Dynamic (IP VLAN). The VLAN that is created by an IP VLAN has a type of Dynamic (DOT1X). Configuring Switching 90
Software Administration Manual
Page 93
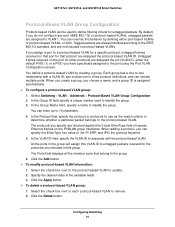
... the group. 3. When adding a protocol, you assign a port to a protocol-based VLAN for IP, ARP, and IPX) the protocol keyword. 5. All the ports in this behavior by creating a group... VLAN ID, can include one to remove. 2. Click the Delete button. GS716Tv3, GS724Tv4, and GS748Tv5 Smart Switches Protocol-Based VLAN Group Configuration Protocol-based VLAN can enter up to 16 characters. 4. ...You can include multiple ports. You define a protocol-based VLAN by defining either the default PVID (1) or a PVID you do not configure any port (IEEE 802.1Q) or protocol...
... the group. 3. When adding a protocol, you assign a port to a protocol-based VLAN for IP, ARP, and IPX) the protocol keyword. 5. All the ports in this behavior by creating a group... VLAN ID, can include one to remove. 2. Click the Delete button. GS716Tv3, GS724Tv4, and GS748Tv5 Smart Switches Protocol-Based VLAN Group Configuration Protocol-based VLAN can enter up to 16 characters. 4. ...You can include multiple ports. You define a protocol-based VLAN by defining either the default PVID (1) or a PVID you do not configure any port (IEEE 802.1Q) or protocol...
Software Administration Manual
Page 115
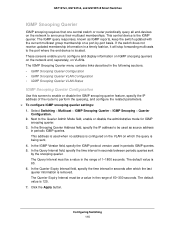
...3. Select Switching > Multicast > IGMP Snooping Querier > IGMP Snooping > Querier Configuration. 2. In the Snooping Querier Address field, specify the IP address to be a value in the following sections. • IGMP Snooping Querier Configuration • IGMP Snooping Querier VLAN Configuration •...stop forwarding multicasts to announce their multicast memberships. The default value is 125. 7. The Query Interval must be used in seconds after which the query is being sent. 4. GS716Tv3, GS724Tv4, and GS748Tv5 Smart Switches IGMP Snooping Querier IGMP snooping requires that ...
...3. Select Switching > Multicast > IGMP Snooping Querier > IGMP Snooping > Querier Configuration. 2. In the Snooping Querier Address field, specify the IP address to be a value in the following sections. • IGMP Snooping Querier Configuration • IGMP Snooping Querier VLAN Configuration •...stop forwarding multicasts to announce their multicast memberships. The default value is 125. 7. The Query Interval must be used in seconds after which the query is being sent. 4. GS716Tv3, GS724Tv4, and GS748Tv5 Smart Switches IGMP Snooping Querier IGMP snooping requires that ...

