User Guide
Page 3
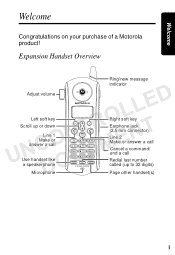
Welcome Welcome Congratulations on your purchase of a Motorola product! Expansion Handset Overview Ring/new message Adjust volume indicator LLED Left soft key NTRO Scroll up or down UNCO ENT Line1 Make or answer a call CUM Use handset like a speakerphone DO Microphone 1 2 abc 3 def 4 ghi 5 jkl 6 mno 7 pqrs 8 tuv 9 wxyz tone 0 oper # pause handsfree redial in ter com 5.8 GHz DIGITAL Right soft key Earphone jack (2.5 mm connector) Line 2 Make or answer a call Cancel a command/ end a call Redial last number called (up to 32 digits) Page other handset(s) i
Welcome Welcome Congratulations on your purchase of a Motorola product! Expansion Handset Overview Ring/new message Adjust volume indicator LLED Left soft key NTRO Scroll up or down UNCO ENT Line1 Make or answer a call CUM Use handset like a speakerphone DO Microphone 1 2 abc 3 def 4 ghi 5 jkl 6 mno 7 pqrs 8 tuv 9 wxyz tone 0 oper # pause handsfree redial in ter com 5.8 GHz DIGITAL Right soft key Earphone jack (2.5 mm connector) Line 2 Make or answer a call Cancel a command/ end a call Redial last number called (up to 32 digits) Page other handset(s) i
User Guide
Page 7
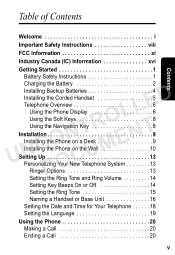
...Battery Safety Instructions 1 Charging the Battery 2 Installing Backup Batteries 4 Installing the Corded Handset 5 LLED Telephone Overview 6 Using the Phone Display 6 Using the Soft Keys 8 NTRO Using the Navigation Key 8 UNCO ENT Installation 9 Installing the Phone on a Desk 9 CUM Installing the Phone on the Wall 10 Setting Up 13 Personalizing Your New Telephone System 13 DO Ringer Options 13 Setting the Ring Tone and Ring Volume 14 Setting Key Beeps On or Off 14 Setting the Ring Tone 15 Naming a Handset or Base Unit 16 Setting the Date and Time for Your Telephone 18 Setting...
...Battery Safety Instructions 1 Charging the Battery 2 Installing Backup Batteries 4 Installing the Corded Handset 5 LLED Telephone Overview 6 Using the Phone Display 6 Using the Soft Keys 8 NTRO Using the Navigation Key 8 UNCO ENT Installation 9 Installing the Phone on a Desk 9 CUM Installing the Phone on the Wall 10 Setting Up 13 Personalizing Your New Telephone System 13 DO Ringer Options 13 Setting the Ring Tone and Ring Volume 14 Setting Key Beeps On or Off 14 Setting the Ring Tone 15 Naming a Handset or Base Unit 16 Setting the Date and Time for Your Telephone 18 Setting...

User Guide
Page 8
... Phonebook 29 Calling a Number from the Phonebook 30 UNCO ENT Using Caller ID 30 Reviewing the List of Caller ID Calls 30 CUM Deleting Caller ID Calls 31 Multihandset Functions 32 Registering an Expansion Handset 33 DO Deregistering an Expansion Handset 33 Using the Intercom 34 Enabling Auto-Answer 35 Transferring Calls to Other Handsets 35 Conference Calling 36 Creating a Conference Call with Lines 1 and 2 . . . 36 Monitoring a Room 37 Using the Answering Machine 38 Setting Up the Answering Machine 39 Turning the Answering Machine On...
... Phonebook 29 Calling a Number from the Phonebook 30 UNCO ENT Using Caller ID 30 Reviewing the List of Caller ID Calls 30 CUM Deleting Caller ID Calls 31 Multihandset Functions 32 Registering an Expansion Handset 33 DO Deregistering an Expansion Handset 33 Using the Intercom 34 Enabling Auto-Answer 35 Transferring Calls to Other Handsets 35 Conference Calling 36 Creating a Conference Call with Lines 1 and 2 . . . 36 Monitoring a Room 37 Using the Answering Machine 38 Setting Up the Answering Machine 39 Turning the Answering Machine On...
User Guide
Page 9
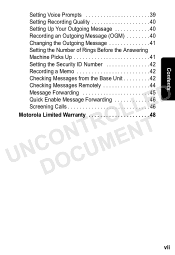
Contents Setting Voice Prompts 39 Setting Recording Quality 40 Setting Up Your Outgoing Message 40 Recording an Outgoing Message (OGM 40 Changing the Outgoing Message 41 Setting the Number of Rings Before the Answering Machine Picks Up 41 Setting the Security ID Number 42 Recording a Memo 42 Checking Messages from the Base Unit 42 Checking Messages Remotely 44 Message Forwarding 45 LLED Quick Enable Message Forwarding 46 Screening Calls 46 UNCDOONCTURMOENT Motorola Limited Warranty 48 vii
Contents Setting Voice Prompts 39 Setting Recording Quality 40 Setting Up Your Outgoing Message 40 Recording an Outgoing Message (OGM 40 Changing the Outgoing Message 41 Setting the Number of Rings Before the Answering Machine Picks Up 41 Setting the Security ID Number 42 Recording a Memo 42 Checking Messages from the Base Unit 42 Checking Messages Remotely 44 Message Forwarding 45 LLED Quick Enable Message Forwarding 46 Screening Calls 46 UNCDOONCTURMOENT Motorola Limited Warranty 48 vii
User Guide
Page 10
... the gas line. Do not use this cordless phone to persons or property: To reduce the risk of fire and shock: 1. Do not disassemble this user guide. 8. Do not overload wall outlets and extension cords. 9. Caution: To reduce the risk of fire, use while wet or while standing in water. Do not set the phone on the power cord. NTRO Place the power cord so that...
... the gas line. Do not use this cordless phone to persons or property: To reduce the risk of fire and shock: 1. Do not disassemble this user guide. 8. Do not overload wall outlets and extension cords. 9. Caution: To reduce the risk of fire, use while wet or while standing in water. Do not set the phone on the power cord. NTRO Place the power cord so that...
User Guide
Page 11
... all instructions and save NTRO them for future reference. Do not install this cordless phone immediately from the wall. Safety Info Unplug this product near a bath tub, sink, CUM or shower. 4. Operate this phone using only the power source that are DO unsure of other controls may fall, causing serious damage to your home, consult your dealer or local power company...
... all instructions and save NTRO them for future reference. Do not install this cordless phone immediately from the wall. Safety Info Unplug this product near a bath tub, sink, CUM or shower. 4. Operate this phone using only the power source that are DO unsure of other controls may fall, causing serious damage to your home, consult your dealer or local power company...
User Guide
Page 15
... you to make changes in accordance with Part 15 of the equipment. LLED Operation is no guarantee that interference will provide advance notice in order for a Class B digital device, pursuant to CUM Part 15 of Part 68, FCC Rules and Regulations. DO This equipment generates, uses, and can radiate radio frequency energy and, if not installed and used in its facilities...
... you to make changes in accordance with Part 15 of the equipment. LLED Operation is no guarantee that interference will provide advance notice in order for a Class B digital device, pursuant to CUM Part 15 of Part 68, FCC Rules and Regulations. DO This equipment generates, uses, and can radiate radio frequency energy and, if not installed and used in its facilities...
User Guide
Page 18
.... The term "IC:" before the certification/registration number only signifies that it is called. The REN is designed to be connected to the premises wiring and telephone network must be connected to one line may not prevent degradation of a certified connector assembly (telephone extension cord). You should make sure CUM that registration was performed based on the telephone base unit. In some DO cases, the telecommunications...
.... The term "IC:" before the certification/registration number only signifies that it is called. The REN is designed to be connected to the premises wiring and telephone network must be connected to one line may not prevent degradation of a certified connector assembly (telephone extension cord). You should make sure CUM that registration was performed based on the telephone base unit. In some DO cases, the telecommunications...

User Guide
Page 26
Getting Started 6 Using the Phone Display The main display: Time LLED Line 1/Line 2 indicators Number of your phone. When the speakerphone is displayed. For step-by-step instructions on , V displays. DO Note: Caller ID information is supplied only if you can set up your local phone company. This section describes how to select the various features and functions of calls NTRO Answering machine status UNCO ENT Function Date Battery meter Device name Line 1/Line 2 messages Ringer off...
Getting Started 6 Using the Phone Display The main display: Time LLED Line 1/Line 2 indicators Number of your phone. When the speakerphone is displayed. For step-by-step instructions on , V displays. DO Note: Caller ID information is supplied only if you can set up your local phone company. This section describes how to select the various features and functions of calls NTRO Answering machine status UNCO ENT Function Date Battery meter Device name Line 1/Line 2 messages Ringer off...
User Guide
Page 33
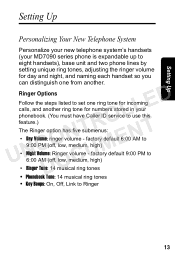
... New Telephone System Personalize your new telephone system's handsets (your MD7090 series phone is expandable up to eight handsets), base unit and two phone lines by setting unique ring tones, adjusting the ringer volume for day and night, and naming each handset so you can distinguish one ring tone for incoming calls, and another . Ringer Options LLED Follow the steps listed to set one from another ring tone for numbers stored in your phonebook. (You must have Caller ID service...
... New Telephone System Personalize your new telephone system's handsets (your MD7090 series phone is expandable up to eight handsets), base unit and two phone lines by setting unique ring tones, adjusting the ringer volume for day and night, and naming each handset so you can distinguish one ring tone for incoming calls, and another . Ringer Options LLED Follow the steps listed to set one from another ring tone for numbers stored in your phonebook. (You must have Caller ID service...
User Guide
Page 34
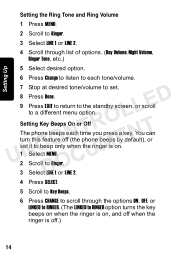
.... 6 Press Change to listen to each time you press a key. LLED 9 Press EXIT to return to the standby screen, or scroll to Ringer. You can turn this feature off (the phone beeps by default), or set . 8 Press Done. Setting Up Setting the Ring Tone and Ring Volume 1 Press MENU. 2 Scroll to Ringer. 3 Select LINE 1 or LINE 2. 4 Scroll through the options ON, OFF, or LINKED to RINGER. (The LINKED to RINGER option turns the key beeps on...
.... 6 Press Change to listen to each time you press a key. LLED 9 Press EXIT to return to the standby screen, or scroll to Ringer. You can turn this feature off (the phone beeps by default), or set . 8 Press Done. Setting Up Setting the Ring Tone and Ring Volume 1 Press MENU. 2 Scroll to Ringer. 3 Select LINE 1 or LINE 2. 4 Scroll through the options ON, OFF, or LINKED to RINGER. (The LINKED to RINGER option turns the key beeps on...
User Guide
Page 35
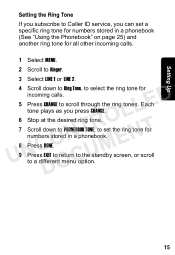
... ring tones. Each tone plays as you can set a specific ring tone for numbers stored in a phonebook (See "Using the Phonebook" on page 25) and another ring tone for all other incoming calls. 1 Select MENU. 2 Scroll to Ringer. 3 Select LINE 1 or LINE 2. 4 Scroll down to PHONEBOOK TONE, to set the ring tone for incoming calls. LLED 5 Press CHANGE to a different menu option. 15 Setting Up Setting the Ring Tone If you subscribe to Caller ID service, you press CHANGE. NTRO 6 Stop...
... ring tones. Each tone plays as you can set a specific ring tone for numbers stored in a phonebook (See "Using the Phonebook" on page 25) and another ring tone for all other incoming calls. 1 Select MENU. 2 Scroll to Ringer. 3 Select LINE 1 or LINE 2. 4 Scroll down to PHONEBOOK TONE, to set the ring tone for incoming calls. LLED 5 Press CHANGE to a different menu option. 15 Setting Up Setting the Ring Tone If you subscribe to Caller ID service, you press CHANGE. NTRO 6 Stop...
User Guide
Page 40
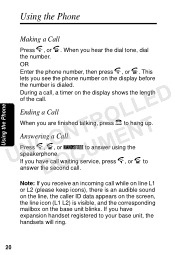
... the call , a timer on the base unit blinks. A B OR Enter the phone number, then press , or . UNCO ENT Answering a Call CUM A B Press , , or HANDSFREE to your base unit, the handsets will ring. 20 When you have expansion handset registered to answer using the A B speakerphone. If you are finished talking, press to DO answer the second call waiting service, press , or to hang up. Ending a Call NTROB When you have call . Using the Phone PRLIMINARY Using the Phone Making a Call A B Press...
... the call , a timer on the base unit blinks. A B OR Enter the phone number, then press , or . UNCO ENT Answering a Call CUM A B Press , , or HANDSFREE to your base unit, the handsets will ring. 20 When you have expansion handset registered to answer using the A B speakerphone. If you are finished talking, press to DO answer the second call waiting service, press , or to hang up. Ending a Call NTROB When you have call . Using the Phone PRLIMINARY Using the Phone Making a Call A B Press...
User Guide
Page 46
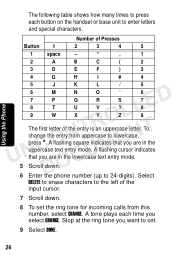
A flashing cursor indicates that you are in the CUM uppercase text entry mode. To UNCO ENT change the entry from this number, select CHANGE. Stop at the ring tone you want to set the ring tone for incoming calls from uppercase to enter letters and special characters. Select DELETE to erase characters to the left of the entry is an uppercase letter. Number of Presses Button 1 2 3 4 5 1 space - * , 1 2 A B C ( 2 3 D E F ) 3 4 G H I # 4 5 J K L / 5 6 M N O ' 6 LLED 7 P Q R S 7 8 T U V ? 8 9 W X Y Z 9 NTRO...
A flashing cursor indicates that you are in the CUM uppercase text entry mode. To UNCO ENT change the entry from this number, select CHANGE. Stop at the ring tone you want to set the ring tone for incoming calls from uppercase to enter letters and special characters. Select DELETE to erase characters to the left of the entry is an uppercase letter. Number of Presses Button 1 2 3 4 5 1 space - * , 1 2 A B C ( 2 3 D E F ) 3 4 G H I # 4 5 J K L / 5 6 M N O ' 6 LLED 7 P Q R S 7 8 T U V ? 8 9 W X Y Z 9 NTRO...

User Guide
Page 52
... answer intercom calls NTRO • Transfer calls from one handset to another UNCO ENT • Monitor a room To order expansion handsets, visit us online: CUM www.motorola.com/cordless DO (In Canada, check website for local retailers) Or contact us at least two (up to eight compatible Motorola MD7090 series expansion handsets. You can place the handset and its charging base anywhere a standard electrical outlet is available. You can expand your phone...
... answer intercom calls NTRO • Transfer calls from one handset to another UNCO ENT • Monitor a room To order expansion handsets, visit us online: CUM www.motorola.com/cordless DO (In Canada, check website for local retailers) Or contact us at least two (up to eight compatible Motorola MD7090 series expansion handsets. You can place the handset and its charging base anywhere a standard electrical outlet is available. You can expand your phone...
User Guide
Page 55
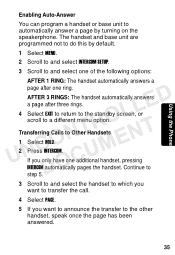
... program a handset or base unit to and select one of the following options: AFTER 1 RING: The handset automatically answers a page after three rings. 4 Select EXIT to return to the standby screen, or NTRO scroll to a different menu option. The handset and base unit are programmed not to do this by default. 1 Select MENU. 2 Scroll to and select INTERCOM SETUP. 3 Scroll to automatically answer a page by turning on the speakerphone...
... program a handset or base unit to and select one of the following options: AFTER 1 RING: The handset automatically answers a page after three rings. 4 Select EXIT to return to the standby screen, or NTRO scroll to a different menu option. The handset and base unit are programmed not to do this by default. 1 Select MENU. 2 Scroll to and select INTERCOM SETUP. 3 Scroll to automatically answer a page by turning on the speakerphone...
User Guide
Page 58
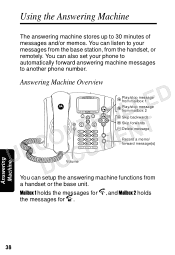
... answering machine messages to 30 minutes of messages and/or memos. Using the Answering Machine The answering machine stores up to another phone number. Mailbox 1 holds the messages for the messages for . , and Mailbox 2 holds Answering Machine 38 You can setup the answering machine functions from the handset, or remotely. Answering Machine Overview UNCDOONCTURMOELNLTED Volume Play/stop message from mailbox 1 Play/stop message from mailbox 2 Skip backwards Skip forwards Delete message Record a memo/ forward message(s) You can also set your messages from the base station...
... answering machine messages to 30 minutes of messages and/or memos. Using the Answering Machine The answering machine stores up to another phone number. Mailbox 1 holds the messages for the messages for . , and Mailbox 2 holds Answering Machine 38 You can setup the answering machine functions from the handset, or remotely. Answering Machine Overview UNCDOONCTURMOELNLTED Volume Play/stop message from mailbox 1 Play/stop message from mailbox 2 Skip backwards Skip forwards Delete message Record a memo/ forward message(s) You can also set your messages from the base station...
User Guide
Page 59
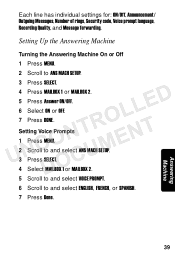
... to and select ANS MACH SETUP. 3 Press SELECT. LLED 5 Press Answer ON/OFF. 6 Select ON or OFF. CUM 2 Scroll to ANS MACH SETUP. 3 Press SELECT. 4 Press MAILBOX 1 or MAILBOX 2. NTRO 7 Press DONE. UNCO ENT Setting Voice Prompts 1 Press MENU. Each line has individual settings for: ON/Off, Announcement/ Outgoing Messages, Number of rings, Security code, Voice prompt language, Recording Quality, and Message forwarding. DO 4 Select MAILBOX 1 or...
... to and select ANS MACH SETUP. 3 Press SELECT. LLED 5 Press Answer ON/OFF. 6 Select ON or OFF. CUM 2 Scroll to ANS MACH SETUP. 3 Press SELECT. 4 Press MAILBOX 1 or MAILBOX 2. NTRO 7 Press DONE. UNCO ENT Setting Voice Prompts 1 Press MENU. Each line has individual settings for: ON/Off, Announcement/ Outgoing Messages, Number of rings, Security code, Voice prompt language, Recording Quality, and Message forwarding. DO 4 Select MAILBOX 1 or...
User Guide
Page 61
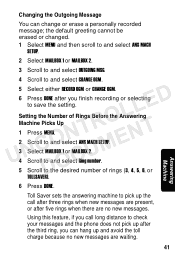
... and avoid the toll charge because no new messages are no new messages. CUM 3 Select MAILBOX 1 or MAILBOX 2. 4 Scroll to and select ANS MACH SETUP. DO 5 Scroll to check your messages and the phone does not pick up after you can change or erase a personally recorded message; Using this feature, if you call after three rings when new messages are present, or after five rings when there are waiting. 41 Answering Machine
... and avoid the toll charge because no new messages are no new messages. CUM 3 Select MAILBOX 1 or MAILBOX 2. 4 Scroll to and select ANS MACH SETUP. DO 5 Scroll to check your messages and the phone does not pick up after you can change or erase a personally recorded message; Using this feature, if you call after three rings when new messages are present, or after five rings when there are waiting. 41 Answering Machine

User Guide
Page 65
To set to automatically forward answering machine messages to another phone number. If a pause is required, press the pound key (#) twice. NTRO 7 Press DONE. Message Forwarding Your Motorola phone can be forwarded. UNCO ENT 8 Scroll to and select FORWARD ON/OFF. 9 Select ENABLE. LLED 6 Enter the phone number where your messages will be set up the phone number: 1 Press MENU. 2 Scroll to and select ANS MACH SETUP. 3 Select MAILBOX 1 or MAILBOX 2. 4 Scroll to and select FORWARD MSGS. 5 Scroll to and select SET FWD NUMBER. DOCUM 10 Press DONE. 45 Answering Machine
To set to automatically forward answering machine messages to another phone number. If a pause is required, press the pound key (#) twice. NTRO 7 Press DONE. Message Forwarding Your Motorola phone can be forwarded. UNCO ENT 8 Scroll to and select FORWARD ON/OFF. 9 Select ENABLE. LLED 6 Enter the phone number where your messages will be set up the phone number: 1 Press MENU. 2 Scroll to and select ANS MACH SETUP. 3 Select MAILBOX 1 or MAILBOX 2. 4 Scroll to and select FORWARD MSGS. 5 Scroll to and select SET FWD NUMBER. DOCUM 10 Press DONE. 45 Answering Machine


