User Guide
Page 10
... be recycled. Caution: To maintain compliance with your local recycling center for battery type. Use only the battery that came with an incorrect battery type. ITC03-201 8 Battery Safety Instructions • Do not burn, disassemble, mutilate, or puncture the battery. Important Safety Instructions 8. Because cordless phones operate on or near a TV, microwave oven, or VCR. Contact your...
... be recycled. Caution: To maintain compliance with your local recycling center for battery type. Use only the battery that came with an incorrect battery type. ITC03-201 8 Battery Safety Instructions • Do not burn, disassemble, mutilate, or puncture the battery. Important Safety Instructions 8. Because cordless phones operate on or near a TV, microwave oven, or VCR. Contact your...
User Guide
Page 11
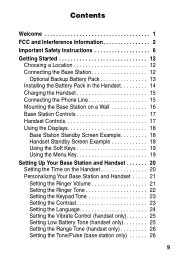
... Important Safety Instructions 6 Getting Started 12 Choosing a Location 12 Connecting the Base Station 12 Optional Backup Battery Pack 13 Installing the Battery Pack in the Handset 14 Charging the Handset 15 Connecting the Phone Line 15 Mounting the Base Station on a Wall 16 Base Station Controls 17 Handset Controls 17 Using the...22 Setting the Keypad Tone 23 Setting the Contrast 23 Setting the Language 24 Setting the Vibrate Control (handset only 25 Setting Low Battery Tone (handset only 25 Setting the Range Tone (handset only 26 Setting the Tone/Pulse (base station only 26 9
... Important Safety Instructions 6 Getting Started 12 Choosing a Location 12 Connecting the Base Station 12 Optional Backup Battery Pack 13 Installing the Battery Pack in the Handset 14 Charging the Handset 15 Connecting the Phone Line 15 Mounting the Base Station on a Wall 16 Base Station Controls 17 Handset Controls 17 Using the...22 Setting the Keypad Tone 23 Setting the Contrast 23 Setting the Language 24 Setting the Vibrate Control (handset only 25 Setting Low Battery Tone (handset only 25 Setting the Range Tone (handset only 26 Setting the Tone/Pulse (base station only 26 9
User Guide
Page 14
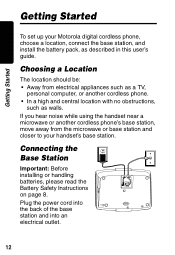
... be: • Away from electrical appliances such as a TV, personal computer, or another cordless phone's base station, move away from the microwave or base station and closer to your Motorola digital cordless phone, choose a location, connect the base station, and install the battery pack, as walls. Getting Started Getting Started To set up your handset's base station.
... be: • Away from electrical appliances such as a TV, personal computer, or another cordless phone's base station, move away from the microwave or base station and closer to your Motorola digital cordless phone, choose a location, connect the base station, and install the battery pack, as walls. Getting Started Getting Started To set up your handset's base station.
User Guide
Page 17
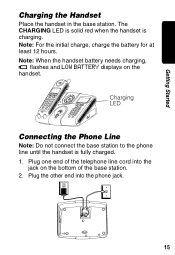
Note: For the initial charge, charge the battery for at least 12 hours. Plug one end of the base station. 2. Charging LED Connecting the Phone Line Note: Do not connect the base station to the phone line until the handset is charging. Plug the other end into the jack on the handset. Note: When the handset battery needs charging, l flashes and LOW BATTERY displays on the bottom of the telephone line cord into the phone jack. 15 The CHARGING LED is solid red when the handset is fully charged. 1. Getting Started Charging the Handset Place the handset in the base station.
Note: For the initial charge, charge the battery for at least 12 hours. Plug one end of the base station. 2. Charging LED Connecting the Phone Line Note: Do not connect the base station to the phone line until the handset is charging. Plug the other end into the jack on the handset. Note: When the handset battery needs charging, l flashes and LOW BATTERY displays on the bottom of the telephone line cord into the phone jack. 15 The CHARGING LED is solid red when the handset is fully charged. 1. Getting Started Charging the Handset Place the handset in the base station.
User Guide
Page 43
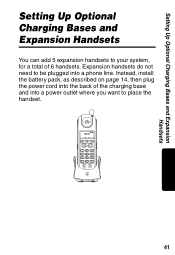
Instead, install the battery pack, as described on page 14, then plug the power cord into the back of 6 handsets. Expansion handsets do not need to place the handset. charge 41 Setting Up Optional Charging Bases and Expansion Handsets Setting Up Optional Charging Bases and Expansion Handsets You can add 5 expansion handsets to your system, for a total of the charging base and into a power outlet where you want to be plugged into a phone line.
Instead, install the battery pack, as described on page 14, then plug the power cord into the back of 6 handsets. Expansion handsets do not need to place the handset. charge 41 Setting Up Optional Charging Bases and Expansion Handsets Setting Up Optional Charging Bases and Expansion Handsets You can add 5 expansion handsets to your system, for a total of the charging base and into a power outlet where you want to be plugged into a phone line.
User Guide
Page 44
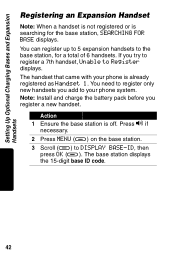
... Note: When a handset is not registered or is off. If you register a new handset. Note: Install and charge the battery pack before you try to register a 7th handset, Unable to your phone is already registered as Handset 1. You need to register only new handsets you add to Register displays. Action 1 Ensure the... searching for a total of 6 handsets. You can register up to 5 expansion handsets to DISPLAY BASE-ID, then press OK (a). The handset that came with your phone system. The base station displays the 15-digit base ID code. 42
... Note: When a handset is not registered or is off. If you register a new handset. Note: Install and charge the battery pack before you try to register a 7th handset, Unable to your phone is already registered as Handset 1. You need to register only new handsets you add to Register displays. Action 1 Ensure the... searching for a total of 6 handsets. You can register up to 5 expansion handsets to DISPLAY BASE-ID, then press OK (a). The handset that came with your phone system. The base station displays the 15-digit base ID code. 42


