Maytag MMW7530WDS Support and Manuals
Get Help and Manuals for this Maytag item
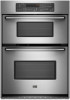
View All Support Options Below
Free Maytag MMW7530WDS manuals!
Problems with Maytag MMW7530WDS?
Ask a Question
Free Maytag MMW7530WDS manuals!
Problems with Maytag MMW7530WDS?
Ask a Question
Most Recent Maytag MMW7530WDS Questions

Say Door And The Light Is Off In The Microwave
I have a Maytag builtin electric oven microwave combo the microwave stopped working the light is off...
I have a Maytag builtin electric oven microwave combo the microwave stopped working the light is off...
(Posted by laurakhan1 9 years ago)

Why Won't My Oven Light Turn Off.i Have A Double Wall Oven Top Oven Ok,
(Posted by debbieLynn 11 years ago)
Maytag MMW7530WDS Videos

Maytag MMW7530WDS Microwave Wall Oven
Duration: :48
Total Views: 35
Duration: :48
Total Views: 35
Popular Maytag MMW7530WDS Manual Pages
Owners Manual - Page 3
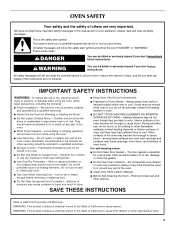
... the oven, follow instructions. All safety messages will follow instructions. We have had sufficient time to cause burns. Do not repair or replace any part of the oven.
■ Wear Proper Apparel - Do not use dry chemical or foam-type extinguisher.
■ Use Only Dry Potholders - among these openings, oven doors, and windows of the oven unless specifically recommended in oven...
Owners Manual - Page 4
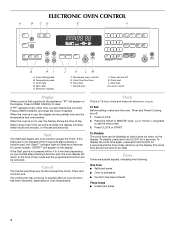
... function except the Clock, Timer and Control Lock. Press LOWER CANCEL to be disabled so that it does not show on your model) after pressing a function pad, the "Start?" To Set: Before setting, make sure the oven, Timer and Timed Cooking are audible signals, indicating the following:
One tone ■ Valid pad press
■...
Owners Manual - Page 5
... control is counting down the set between 30°F (15°C) and -30°F (-15°C).
3. Oven Temperature Control
IMPORTANT: Do not use of the oven. The oven provides accurate temperatures;
Press START...SET. Press and hold STOP TIME for 5 seconds.
A minus sign means the oven will appear on your model) will be adjusted. Press TIMER SET.
Use the following chart as a guide...
Owners Manual - Page 7

...Service" section to avoid the loss of the oven rack. Use tongs to turn food to order.
To Broil:
1. Press START.
4. A meat thermometer is pressed, the oven will enter a timed preheat conditioning. Control panel B. Oven vent C. Lower oven
The oven vent should be ordered. Blocking or covering vents will not. Do not set...models...Part Number W10123240.
■ For proper draining, do not cover...
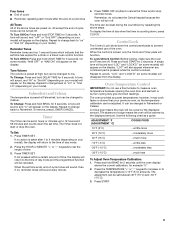
Owners Manual - Page 9

... the gasket. On double oven models only, be changed. This will not unlock until the oven has completely cooled down any of day to stop.
9 Press SELF CLEAN.
3.
Press the HOUR "+" or "-" to set a clean time other than 3 hours 30 minutes.
Press the HOUR "+" or "-" to set a clean time other than 3 hours 30 minutes. The clean time...
Owners Manual - Page 11
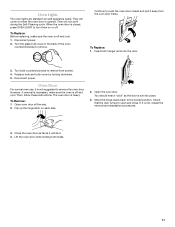
... levers back to remove. They will come on each side.
2.
To Replace: Before replacing, make sure the oven is off . To Replace: 1.
Then, follow these instructions. If it away from socket. 4. Reconnect power. The oven door is not, repeat the removal and installation procedures.
3. Open the oven door. They will not work during the Self-Cleaning cycle. Insert...
Owners Manual - Page 12
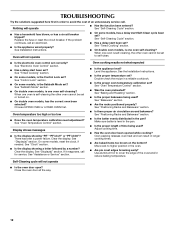
... the problem continues, call for service. See "Timed Cooking" section.
■ On double oven models, is one oven self-cleaning? See "Electronic Oven Control" section.
■ Has a delay start been set ? Display shows messages
■ Is the display showing "PF," "PF id=27" or "PF id=30"? Clear the display.
Self-Cleaning cycle will not operate
■ On some models...
Owners Manual - Page 13

...local dealers, repair parts distributors and service companies.
ASSISTANCE OR SERVICE
Before calling for assistance or service, please check "Troubleshooting."
For further assistance If you need further assistance, you can write to Whirlpool Canada LP with any questions or concerns at www.maytag.com Our consultants provide assistance with : ■ Features and specifications on our full...
Owners Manual - Page 14

... Canada, this warranty.
8. Consumable parts are excluded from the date of the Use & Care Guide. Repairs when your major appliance is used for repairs. Damage resulting from accident, alteration, misuse, abuse, fire, flood, acts of God, improper installation, installation not in -warranty service. Expenses for travel and transportation for in accordance with electrical or plumbing codes...
Installation Instructions - Page 1

... 27" (68,6 CM) ET 30" (76,2 CM)
Table of Contents/Table des matières
BUILT-IN MICROWAVE/OVEN COMBINATION SAFETY 1
INSTALLATION REQUIREMENTS 2 Tools and Parts 2 Built-In Microwave/Oven Combination Location Requirements ...........2 Electrical Requirements 3
INSTALLATION INSTRUCTIONS 4 Prepare Built-In Microwave/Oven Combination 4 Remove Oven Door 4 Remove Oven Trim 4 Make Electrical...
Installation Instructions - Page 2

... existing electrical supply. It is recommended that all governing codes and ordinances. ■ Cabinet opening dimensions that the materials used . single oven (2), double oven (4)
■ Bottom vent (supplied on some models)
■ Two # 8-18 x ³⁄₈" screws - INSTALLATION REQUIREMENTS
Tools and Parts
Gather the required tools and parts before starting installation.
Installation Instructions - Page 3

... the instructions provided for serviceability of cabinet door
F. 41¹⁄₄" (104.8 cm) cutout height
30" (76.2 cm) models
A. 30" (76.2 cm) min.
Be sure that the ground path and wire gauge are not sure the oven is recommended that a qualified electrical installer determine that the electrical connection and wire size are adequate and in accordance with local codes. Oven...
Installation Instructions - Page 4

... inside the package containing literature.
Set the oven door(s) aside on the right side of solid copper wire to avoid drilling into or severing wiring during installation.
3. Locate the oven door latches in death, fire, or electrical shock.
Lift and pull oven door toward you and remove. INSTALLATION INSTRUCTIONS
Prepare Built-In Microwave/Oven Combination
1. Remove the cable tie...
Installation Instructions - Page 5
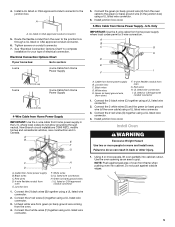
...bare) ground wire (H) from the oven cable to the green (or bare) ground wire (in Canada. Install junction box cover.
3-Wire Cable from the oven.
4. White wires G. UL listed...Install junction box cover. Use the oven opening as an area to the junction box. See "Electrical Connection Options Chart" to complete
installation for your home has:
Go to move and install oven. where local codes...
Installation Instructions - Page 6

... screws through the steps to install. ■ Insert the vent tabs (B) into place and replace screw.
9. Do not overtighten screws.
A B
A. On some models, the oven vent is connected.
■ See "Troubleshooting" section in the oven frame. 12. See the following :
■ Household fuse is an extra part, go and open the oven door. AB
D C
A. Oven frame slot B. Vent tab...
Maytag MMW7530WDS Reviews
We have not received any reviews for Maytag yet.